Table of Contents
Advertisement
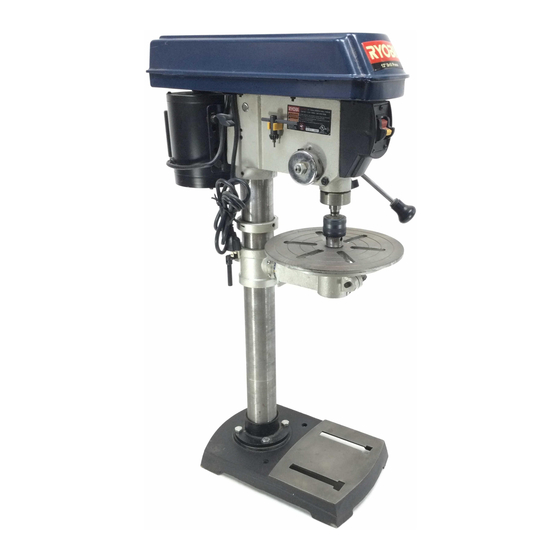
THANK YOU FOR BUYING A RYOBI BENCHTOP DRILL PRESS.
Your new Drill Press has been engineered and manufactured to Ryobi's high standards for dependability, ease of operation,
and operator safety. Properly cared for, it will give you years of rugged, trouble-free performance.
CAUTION
: Carefully read through this entire operator's manual before using your new machine.
Pay close attention to the Rules for Safe Operation, Warnings, and Cautions. If you use your machine properly and only for
what it is intended, you will enjoy years of safe, reliable service.
Please fill out and return the Warranty Registration Card so we can be of future service to you.
Thank you again for buying Ryobi tools.
SAVE THIS MANUAL FOR FUTURE REFERENCE
OPERATOR'S MANUAL
12 in. (305 mm) DRILL PRESS
MODEL DP120
1
Advertisement
Table of Contents

Related Manuals for Ryobi DP120


Summary of Contents for Ryobi DP120
- Page 1 THANK YOU FOR BUYING A RYOBI BENCHTOP DRILL PRESS. Your new Drill Press has been engineered and manufactured to Ryobi's high standards for dependability, ease of operation, and operator safety. Properly cared for, it will give you years of rugged, trouble-free performance.
-
Page 2: Table Of Contents
■ Product Specifications ...2 ■ Rules for Safe Operation ... 3-5 ■ Electrical ... 6 ■ Glossary of Terms and Unpacking ... 7 ■ Loose Parts ...8 ■ Features ... 9 ■ Assembly ... 10-11 ■ Adjustments ... 11-12 ■ Operation ... 13-14 ■... -
Page 3: Rules For Safe Operation
RULES FOR SAFE OPERATION Safe operation of this power tool requires that you read and understand this operator's manual and all labels affixed to the tool. Safety is a combination of common sense, staying alert, and knowing how your tool works. READ ALL INSTRUCTIONS ■... -
Page 4: Specific Safety Rules For Drill Presses
■ ALWAYS TURN SWITCH OFF before disconnecting it to avoid accidental starting. ■ ALL REPAIRS, WHETHER ELECTRICAL OR MECHANICAL, should be made at a Ryobi Authorized Service Center. Use only Ryobi identical replacement parts. ■ SAVE THESE INSTRUCTIONS. Refer to them frequently and use to instruct other users. -
Page 5: Rules For Safe Operation
Servicing requires extreme care and knowledge and should be performed only by a qualified service technician. For service we suggest you return the tool to your nearest RYOBI AUTHORIZED SERVICE CENTER for repair. When servic- ing, use only identical Ryobi replacement parts. -
Page 6: Electrical
COVER OF GROUNDED ELECTRICAL ELECTRICAL CONNECTION Your Ryobi Drill Press is powered by a precision built electric motor. It should be connected to a power supply that is 120 volts, 60Hz. If the machine does not operate when plugged into an outlet, double check the power supply. -
Page 7: Glossary Of Terms And Unpacking
The assembly at the top of the column which houses the motor, quill, and spindle. Feed The speed and force with which the drill bit is lowered into the workpiece. ■ Carefully remove all parts from the shipping carton. ■ Do not discard the packing material until you have carefully inspected the drill press, identified all parts, and satisfactorily operated your new tool. -
Page 8: Loose Parts
Check all loose parts with the list below. Assemble according to the instructions on the following pages. ■ Head Assembly ■ Column Assembly ■ Column Support ■ Table ■ Belts (2) ■ Table Lock Handle (2) ■ Base ■ Idler Pulley ■... -
Page 9: Features
SWITCH AND SWITCH KEY Your drill press has an easy access power switch. To lock in the OFF position, remove the switch key. Place the key in a location inaccessible to children and others not qualified to use the tool. -
Page 10: Assembly
WARNING: Do not connect to power supply until assembly is complete. Failure to comply could result in accidental starting and possible serious injury. ATTACHING THE COLUMN ASSEMBLY See Figure 4. ■ Place base on a flat surface. Align screw holes in the column support with screw holes in the base. -
Page 11: Adjustments
CLAMPING DRILL PRESS TO WORKBENCH See Figure 10. If your drill press is to be used as a portable tool, fasten it permanently to a mounting board that can easily be clamped to a workbench or other stable surface. The mounting board should be of sufficient size to avoid tipping while drill press is in use. -
Page 12: Adjustments
BEVEL ADJUSTMENT See Figure 12 . Your drill press is equipped with a tilting table that allows you to drill angled holes. The table can be tilted left or right, from 0°-45°. To tilt the table: ■ Loosen the large hex bolt located beneath the table. -
Page 13: Operation
LOCKING THE SWITCH See Figure 15. ■ Place the switch in the OFF position. ■ Wait until the drill press has come to a full and complete stop. ■ Remove the switch key from the switch assembly. Store key in safe place. -
Page 14: Operation
DRILLING TIPS If the hole is large, it’s a good idea to drill a smaller pilot hole before drilling the final one. Your hole will be more accurately positioned, rounder, and the bits will last longer. -
Page 15: Maintenance
WARNING: When servicing use only identical Ryobi replacement parts. Use of any other parts may create a hazard or cause product damage. WARNING: To avoid serious personal injury make sure the drill press is turned OFF and the cord is unplugged from the power source before performing any maintenance or adjustment. -
Page 16: Troubleshooting
Sharpen or replace bit. Feed fast enough, allow drill to cut. Lubricate bit for metal work. Replace bit. Install bit properly. Install chuck properly. Contact Ryobi Authorized Service Center. Reduce feed pressure. Adjust belt tension. Check support and/or reclamp workpiece. - Page 17 NOTES NOTES...
-
Page 18: Parts Ordering/Service
Ryobi Authorized Service Center. Be sure to provide all pertinent facts when you call or visit. Please call 1-800-525-2579 for your nearest Ryobi Authorized Service Center. You can also check our web site at www.ryobitools.com for a complete list of Authorized Service Centers.