Table of Contents
Advertisement
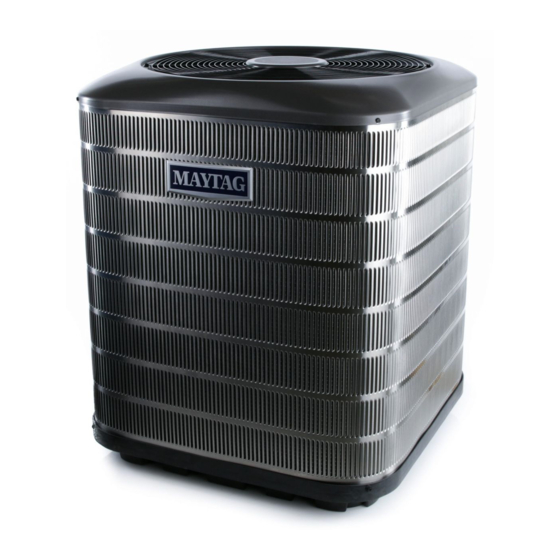
FS4BG & PSA4BG Series
INSTALLATION INSTRUCTIONS
Split System Air Conditioner
The 20 SEER, iQ Drive
air flow, and humidity control for a residence or other similarly sized building. This system includes this outdoor unit and a
compatible indoor unit, typically a gas furnace or an air handler with electric strip heat. Accessory equipment which may be
used with the system includes humidifiers, electric or electronic air cleaners, and U/V (ultraviolet) sterilizing lamps.
Refer to the System Operation section within this document for a description of how the air conditioner operates. In addition,
information for troubleshooting and diagnosing problems is included.
IMPORTANT SAFETY INFORMATION .......................2
PREPARATION ............................................................3
Slab Mounting ................................................................... 3
Roof Mounting .................................................................. 3
ELECTRICAL CONNECTIONS ...................................4
Electrical Power Wiring ..................................................... 4
Control Circuit Wiring ........................................................ 4
REFRIGERANT LINE CONNECTIONS .......................4
Line Design and Routing .................................................. 4
Brazing .............................................................................. 5
System Evacuation ........................................................... 5
Refrigerant Charging ........................................................ 5
Charging Operation .......................................................... 6
in Cooling Mode ................................................................ 6
SYSTEM OPERATION .................................................6
Thermostat ........................................................................ 6
Blower Flow Rates ............................................................ 6
Start-Up Sequence ........................................................... 6
Run Sequence .................................................................. 6
Diagnostic Display ............................................................ 7
Short Cycle Timer Override .............................................. 7
Low Temperature Lockouts .............................................. 7
Other Speed Overrides ..................................................... 7
Instrumentation ................................................................. 7
TROUBLESHOOTING .................................................8
Inverter Circuit Board LEDs .............................................. 8
No Control Board Display ................................................. 9
MAINTENANCE ...........................................................10
FIGURES & CHARTS ..................................................11
Figure 2. Air Conditioner Control Panel (Cover Removed) 11
Figure 3. Power Wiring Terminals ...................................... 12
Figure 4. Low Voltage Compartment for Control Wiring ..... 12
Figure 5. Service Valves .................................................... 12
Figure 6. Charging Chart ................................................... 13
Figure 7. Interface Board in Control Panel ......................... 13
Figure 8. Wiring Diagram (2, 3 & 4 Ton Models) ................ 14
Figure 9. Wiring Diagram (5 Ton Models) .......................... 15
Figure 10. Temperature Sensor Resistance Charts ........... 16
split system air conditioner operates as part of a larger system which can provide temperature,
®
IMPORTANT
ATTENTION INSTALLERS:
It is your responsibility to know this product better
than your customer. This includes being able
to install the product according to strict safety
guidelines and instructing the customer on how
to operate and maintain the equipment for the
life of the product. Safety should always be the
deciding factor when installing this product and
using common sense plays an important role as
well. Pay attention to all safety warnings and any
other special notes highlighted in the manual.
Improper installation of the unit or failure to follow
safety warnings could result in serious injury,
death, or property damage.
These instructions are primarily intended to assist
qualified individuals experienced in the proper
installation of this appliance. Some local codes
require licensed installation/service personnel for
this type of equipment. Please read all instructions
carefully before starting the installation. Return
these instructions to the customer's package for
future reference.
DO NOT DESTROY. PLEASE READ CAREFULLY AND
KEEP IN A SAFE PLACE FOR FUTURE REFERENCE.
OTHER REFERENCE DOCUMENTS
• Installation instruction documents for indoor equipment
(furnace or air handler, optional humidifier, etc.)
• local wiring and building codes
• Application Guideline for Refrigerant Lines Over 75 Feet,
document 044B-0600
• Operation/configuration manual for two-stage thermostat
(existing or newly installed)
20 SEER
Advertisement
Table of Contents
Troubleshooting

Related Manuals for Maytag FS4BG024K


Summary of Contents for Maytag FS4BG024K
-
Page 1: Table Of Contents
FS4BG & PSA4BG Series 20 SEER INSTALLATION INSTRUCTIONS Split System Air Conditioner The 20 SEER, iQ Drive split system air conditioner operates as part of a larger system which can provide temperature, ® air flow, and humidity control for a residence or other similarly sized building. This system includes this outdoor unit and a compatible indoor unit, typically a gas furnace or an air handler with electric strip heat. -
Page 2: Important Safety Information
IMPORTANT SAFETY INFORMATION WARNING: INSTALLER: Please read all instructions before servicing this equipment. Pay attention to all safety warnings and any other Unless noted otherwise in these instructions, only special notes highlighted in the manual. Safety markings are factory authorized parts or accessory kits may be used frequently throughout this manual to designate a degree used with this product. -
Page 3: Preparation
PREPARATION Slab Mounting • The preferred unit mounting is on an outdoor slab (concrete Before proceeding with installation of iQ air conditioning or plastic), on the ground, in an area with good drainage equipment, consult with the distributor and homeowner to unlikely to be affected by heavy runoff, ground settling, or confirm that the equipment listed on the order is what was deep snowdrift accumulation. -
Page 4: Electrical Connections
ELECTRICAL CONNECTIONS Four control wires must be run to the air conditioner’s control panel: R and C will originate from the indoor unit (furnace or air handler). Y1 and Y2 will originate at the thermostat. WARNING: Pass each field-run control wire into the hole in the lower left side of the base of the air conditioner’s control panel compartment. -
Page 5: Brazing
The maximum vertical elevation between the air conditioner of vacuum. Loss of vacuum indicates that there is a leak in and indoor coil is 50 ft. Systems that require more elevation the system. Repeat the leak test if required. will need to have an oil trap installed in the vapor line. Refer to 3. -
Page 6: Charging Operation
Charging Operation SYSTEM OPERATION For charging in the field, the unit should be run with a call for Thermostat second stage cooling, with both Y1 and Y2 outputs energized. The primary control for the overall cooling system is provided This may be accomplished by setting the thermostat to cool by the indoor thermostat. -
Page 7: Diagnostic Display
Short Cycle Timer Override The actual current operating compressor speed can be determined by checking the 2-character display on the interface When performing startup tests or while troubleshooting, the board. Refer to Figure 7 (page 13) Table 5 minute startup delay can be skipped by shorting the two J4 Test pins indicated in Figure 7 for about 1 second while the... -
Page 8: Troubleshooting
TROUBLESHOOTING DISPLAY CAPACITY STAGE The 2-character LED display on the inverter control board is 1 Inverter Power Module Overcurrent intended to be helpful in diagnosing problems. Under normal General Inverter Drive Fault operation, the display will always show both a status indicator ... -
Page 9: No Control Board Display
present, the inverter needs to be replaced, or internal wiring CODES DESCRIPTION is incorrect. If line voltage is absent, check for 24 vac across 1 the main contactor coil, and verify line voltage between the These codes indicate abnormal high current or high ... -
Page 10: Maintenance
MAINTENANCE Outdoor Fan Fault – Check that 208/230 vac line power is being provided through the main contactor to the fan. WARNING: In 5-ton models this is through a terminal block located to the right of the contactor. If ok, check that the 2-wire fan power harness (brown and black wires) is connected ELECTRICAL SHOCK HAZARD as indicated on the wiring diagram. -
Page 11: Figures & Charts
FIGURES & CHARTS Inverter (black plastic case) Interface Board Contactor low Voltage Compartment Figure 2. Air Conditioner Control Panel (Cover Removed) -
Page 12: Figure 3. Power Wiring Terminals
Contactor Ground Lug Wire Entry Figure 3. Power Wiring Terminals Figure 4. low Voltage Compartment for Control Wiring Vapor line Service Valve Liquid Line Service Valve Figure 5. Service Valves... -
Page 13: Figure 6. Charging Chart
Cooling Charging Chart (Outdoor Temperature above 60° F) Remove refrigerant if above curve 2 TON MODELS 3 & 4 TON MODELS 5 TON MODELS Add refrigerant if below curve Liquid Line Temperature (° F) Figure 6. Charging Chart 2-Character Display Test Pins Figure 7. -
Page 14: Figure 8. Wiring Diagram (2, 3 & 4 Ton Models)
Figure 8. Wiring Diagram (2, 3 & 4 ton Models) -
Page 15: Figure 9. Wiring Diagram (5 Ton Models)
Figure 9. Wiring Diagram (5 ton Models) -
Page 16: Figure 10. Temperature Sensor Resistance Charts
Temperature vs. Resistance for All Thermistors (Part 1) k Ω Temperature vs. Resistance for All Thermistors (Part 2) k Ω Figure 10. Temperature Sensor Resistance Charts... -
Page 20: Installation / Performance Check List
INSTALLATION / PERFORMANCE CHECK LIST ELECTRICAL SYSTEM ATTENTION INSTALLERS: It is your responsibility to know this product better than your customer. Electrical connections tight? This includes being able to install the product according to strict safety Line voltage polarity correct? guidelines and instructing the customer on how to operate and maintain the equipment for the life of the product.