
Related Manuals for JUKI LZ-2290A-SS-7


Summary of Contents for JUKI LZ-2290A-SS-7
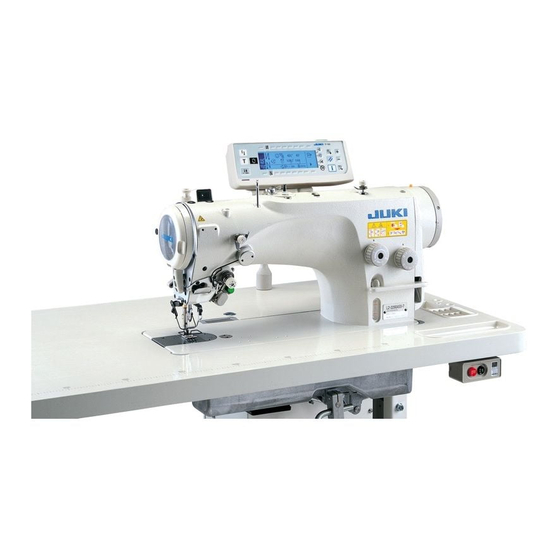
- Page 1 Computer-controlled, Direct-drive, High-speed, 1-needle, Lockstitch, Zigzag Stitching Machine LZ-2290A Series IP-100A / SC-915 IP-100D / SC-916 ENGINEER’S MANUAL 40011067 No.E355-01...
- Page 2 Additional function 1. AK-121 (Auto-lifter : Part No. : GAKA21000B0) Major optional 2. Exclusive grease tube for maintenance 10g (JUKI grease A Part No. : 40006323) devices 3. Exclusive grease can for maintenance 500g (Part No. : 23640204) 4. Touch-back kit asm. (Part No. ; 40010795) ... Other than WB, CB, OB, A-SR) 5.
- Page 3 (2) Stitch pattern table Stitch Number of stitches Max.zigzag Name of pattern Remarks pattern for pattern width ―― Straight stitch Standard zigzag stitch 2-step zigzag stitch 3-step zigzag stitch Standard scallop Crescent scallop Scallop (right) Equal-width scallop Equal-width scallop Standard scallop Crescent scallop...
- Page 4 2) Adjusting the feed timing (for A-SR only) Standard Adjustment Mark on feed adjustor Engraved marker dot on bed Feed Feed rocker rocker rod Timing mark on face plate F Engraved marker line on thread take-up Timing mark on face plate G Alignment of timing marks Top suface of...
- Page 5 Adjustment Procedures Results of Improper Adjustment A. Procedure by removing the gear box large lid (Standard adjustment) (A-SR) 1) Remove the gear box large lid. (Refer to 4-(1).) 2) Adjust the engraved marker line on the thread take-up to timing mark G on the face plate.
- Page 6 2) Adjusting the feed amount (A-SR only) Standard Adjustment Normal feed amount : 0 Straight stitching Extreme left end of speed variable resistor To smoothly rotate Less than 700g by spring balancer is the srandard. Feed stepping motor unit − −...
- Page 7 * For the information operation, refer to Instruction Manual. * Normal/reverse feed amount has been factory-set to the standard adjustment value of JUKI standard delivery gauge (Part No. 40018430 ... max. feed amount of normal/reverse stitching is 5 mm). There are cases where the feed amount varies from the actual input value in accordance with the material used or kind of gauge.
- Page 8 (3) Replacing the timing belt Procedures of disassembling/assembling The timing belt !1 (22505705) of the highest quality is used, and it is not necessary to replace it unless a special trouble occurs. 1) Perform removing/installing of the motor in accordance with the steps of 4. - (2) Replacing the motor.
- Page 9 Caution in disassembling Caution in assembling ™ When removing/installing the motor, unless the motor is ™ When the motor is separated defective, loosen coupling setscrew 8 without loosening from the coupling, set the coupling setscrews 6 and remove the motor with the coupling clearance between the end face installed.
- Page 10 (6) Adjusting/assembling the reverse feed control lever (A-SR only) Procedures of disassembling/assembling 1) Loosen setscrews in the handwheel in the order of screw No. 2 2 and screw No. 1 1, and remove the handwheel. 2) Remove four setscrews 4 in the pulley cover 3, and remove pulley cover 3.
- Page 11 Caution in disassembling Caution in assembling ™ Be very careful of handling the magnet assembled to the ™ Set the handwheel to the position handwheel. where the clearance between p u l l e y c o v e r 3 a n d t h e (Be careful of the damage or collection of dust or the like.) ™...
- Page 12 Procedures of disassembling/assembling 6) Press switch 6 to display the sewing common data screen. Information screen (Operator level) 7) Press switch 7 from the first screen of sewing common data setting to display the second screen. The first screen of sewing common data setting 8) Press switch 8 for approximately three seconds from the second screen of sewing common data setting to change to the third screen.
- Page 13 Caution in disassembling Caution in assembling − −...
- Page 14 Procedures of disassembling/assembling 10) When reverse feed control lever !0 is turned on in the reverse feed control lever adjustment screen, the numeric value on the panel changes. When the numeric value is not within the range of 22 to 32 (standard assembling value) with reverse feed control lever !0 lifted (off), re-adjust as described in 11) and after.
- Page 15 Caution in disassembling Caution in assembling ™ When the numeric value does not change or E734 occurs, replace the feed lever sensor. Refer to 12) Replacing the reverse feed control lever sensor. * E734 : Feed lever sensor error ... Feed lever sensor detection trouble Feed lever sensor : Part No.
- Page 16 (9) Protruding amount of the hook shaft 1. Protruding amount of hook shaft 1 from the end plane of hook shaft front metal 2 is 9 mm. (Caution) When the protruding amount is excessively large or small, lubrication failure will occur. So, be careful.
- Page 17 6. OPERATION PANEL (1) Names of the respective sections !5 Power display lamp 1 Re-sewing switch 8 Information switch 2 Needle up/down compensating switch 9 Edge sensor switch !6 Smart media cover 3 Screen changeover switch !0 One-shot stitching switch !7 Smart media slot 4 With/without reverse feed stitch at sewing start switch !1 With/without automatic thread trimmer switch...
- Page 18 7 Teaching switch This is the switch to set the setting of the number of stitches with the value of number of stitches which has been actually sewn. 8 Information switch This is the switch to perform various function settings. 9 Feed amount display switch * LZ-2290A-SR only Normal feed amount and reverse feed amount of the pattern...
- Page 19 (2) Information Setting and checking of various data can be performed with the information. For the information, there are the operator level and the maintenance personnel level. [Operator level] 1. Turn ON the power. When the needle bar is not in the UP position, turn the handwheel to bring the needle bar to its UP position.
- Page 20 1) Ver display Software version of each CPU is displayed. Press switch 2 in the information screen (maintenance personnel level). Ver display screen Excluding LZ-2290A-SR Explanation of display Others Level Panel software Version Main software Revision Servo motor software Kind of CPU LZ-2290A-SR only Explanation of display Others...
- Page 21 2) Sewing common data 1. Press switch 3 in the information screen. The first screen of sewing common data setting 2. Set the items below in the first screen. 2 : Limiting procedure of max. zigzag width limitation 1) Center For the limiting procedure of max.
- Page 22 4. Press switch !6 for approximately three seconds in the second screen of sewing common data setting. The second screen of sewing common data setting The third screen of sewing common data setting 2 : Change of zigzag timing Zigzag timing can be changed. Needle sway can be prevented by delaying timing when sewing heavy-weight materials or the like.
- Page 23 5. Press switch 8 in the third screen of sewing common data setting. Reverse feed control lever adjustment screen (LZ-2290A-SR only) Existing value of the lever is displayed. 1. Set the reverse feed control lever to the free state and adjust so that the numeric value is among 22 to 33.
- Page 24 5) Vector form data (Custom pattern data) 1. The custom pattern created with the panel can be stored as the vector form data. 2. The same custom pattern can be used with other sewing machines by downloading the vector form data which has been stored.
- Page 25 6) Parameter form data (Condensation custom pattern) 1. The condensation custom pattern created with the panel can be stored as the parameter form data. 2. The same condensation custom pattern can be used with other sewing machines by downloading the parameter form data which has been stored.
- Page 26 7) All sewing machine data 1. Data such as sewing setting data, adjustment data, etc. which are memorized in the sewing machine can be stored in one package. 2. It is possible to download the all sewing machine data to the other sewing machines to make the same setting.
- Page 27 8) Program data 1. When the change of software occurs in the future due to Ver-up or the like, rewriting of the program can be performed. Rewriting of the program is performed with each CPU. Communication screen (Download of IP-100 program data) Folder structure of program (* .PRG) file in the smart media Smart media PROG...
- Page 28 (2) Error code list (Error display in panel) There are the following error codes in this device. These error codes interlock (or limit function) and inform the problem so that the problem is not enlarged when any problem is discovered. When you request our service, please confirm the error codes.
- Page 29 − −...
- Page 30 − −...
- Page 31 − −...
- Page 32 − −...
- Page 33 (2) Block diagram B (for SC-916) 4 0 0 1 1 8 3 1 4 0 0 1 7 0 9 8 EARTH CORD M90345800A0 FEED 5-P CN76 BTPM PCB STEPPING CN72 MOTOR OPTIONAL FLT PCB 4 0 0 1 3 8 8 1 ORIGIN SENSOR CN106...