Table of Contents
Advertisement
Quick Links
Advertisement
Table of Contents

Related Manuals for Rosewill RNX-N1/N1MAC


Summary of Contents for Rosewill RNX-N1/N1MAC
- Page 1 Wireless Adater RNX-N1/N1MAC User Manual...
-
Page 2: Table Of Contents
Wireless Adapter RNX-N1/N1MAC 1. INTRODUCTION... 4 1.1 F & B ... 4 EATURES ENEFITS 1.2 P ... 5 ACKAGE ONTENTS 1.3 USB A DAPTER ESCRIPTION 1.4 S ... 5 YSTEM EQUIREMENTS 2. USB ADAPTER FOR WINDOWS 2000/XP/VISTA ... 5 2.1 B ... - Page 3 Wireless Adapter RNX-N1/N1MAC 4.2.1 Infrastructure Mode ... 49 4.2.2 Ad-hoc Mode... 50 4.3 A UTHENTICATION AND ECURITY 4.3.1 WEP Encryption... 51 4.3.2 WPA-PSK Authentication & TKIP, AES Encryption ... 52 4.4 L ... 53 TATUS 4.5 S ... 54 URVEY 4.6 S...
-
Page 4: Introduction
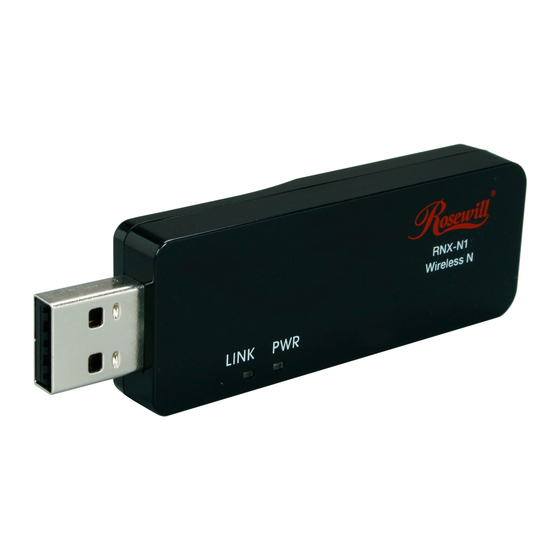
The Rosewill 802.11n USB Adapter (RNX-N1/N1MAC) implements the latest 11n 2.0 technology which extremely improves wireless signal for your computer than existing wireless 802.11g technology. It supports the 2T2R MIMO architecture with fully forward compatibility with IEEE802.11n. -
Page 5: Package Contents
• One Wireless LAN USB Adapter-RNX-N1/N1MAC • One CD-ROM with Drivers and User’s Manual Included • One Flexible Stainless Steel USB 2.0 Extended Connector 1.3 USB ADAPTER DESCRIPTION... - Page 6 Wireless Adapter RNX-N1/N1MAC setup.exe file from the CD-ROM drive. • Once the setup begins you will see the InstallShield Wizard. Select Rosewill Configuration Tool and then click on the Next> button. • Click on the Install button to begin the installation.
-
Page 7: Profiles
Wireless Adapter RNX-N1/N1MAC • Carefully insert the USB adapter into the USB port. Windows will then detect and install the new hardware. • An R icon will then appear in the system tray. Right click on the R icon and then click on Launch Config Utilities. -
Page 8: Infrastructure Mode
Wireless Adapter RNX-N1/N1MAC encryption/authentication settings. A profile can be configured as Infrastructure or Ad-hoc mode. The configuration settings for each mode are described below. 2.3.1 Infrastructure Mode The infrastructure mode requires the use of an Access Point (AP). In this mode, all wireless communication between two computers has to be via the AP. -
Page 9: Ad-Hoc Mode
Wireless Adapter RNX-N1/N1MAC • Profile: Enter a name for the profile; this does not need to be the same as the SSID. • SSID: Enter the SSID of the network or select one from the drop-down list. The SSID is a unique name shared among all points in your wireless network. -
Page 10: Authentication And Security
Wireless Adapter RNX-N1/N1MAC • Profile: Enter a name for the profile; this does not need to be the same as the SSID. • SSID: Enter the SSID of the network or select one from the drop-down list. The SSID is a unique name shared among all points in your wireless network. -
Page 11: Wpa, Wpa2 Authentication & Tkip, Aes Encryption
Wireless Adapter RNX-N1/N1MAC other wireless clients, all the wireless devices in this network must have the same encryption key or pass phrase. The following information is included in this tab, as the image depicts below. • Authentication Type: Select Open or Shared from the drop-down list. -
Page 12: Wpa-Psk Authentication & Tkip, Aes Encryption
Wireless Adapter RNX-N1/N1MAC • Authentication Type: Select WPA or WPA2 from the drop-down list. • Encryption: Select TKIP or AES from the drop-down list. • Click on the Apply button to save the changes. • Show Password check box. If you want to make sure the accuracy of password you type, click the Show Password box to check it. -
Page 13: Network
Wireless Adapter RNX-N1/N1MAC • Authentication Type: Select WPA or WPA2 from the drop-down list. • Encryption: Select TKIP or AES from the drop-down list. • WPA Preshared key: Enter a pass phrase which is between 8 and 32 characters long. -
Page 14: Site Survey
Wireless Adapter RNX-N1/N1MAC • Status: This indicates the state of the client. There are three options: 1. Associated: Indicates that the wireless client is connected to an Access Point (AP). The BSSID is shown in the form of 12 HEX digits, which is the MAC address of the AP. -
Page 15: Statistics
Wireless Adapter RNX-N1/N1MAC • SSID: Displays the SSID of the Access Point. The SSID is a unique name shared among all points in your wireless network. The SSID must be identical for all points in the network, and is case-sensitive. -
Page 16: Wps
Wireless Adapter RNX-N1/N1MAC 2.8 WPS Click on the WPS Configuration tab. WPS (Wireless Push Button) is used for WiFi Protected Setup. By pressing this button, the security settings of the device will automatically synchronize with other wireless devices on your network that support Wi-Fi Protected Setup. -
Page 17: About
USB adapter and its utility and repeat the installation procedure again. Follow the steps below in order to uninstall the client utility: Click on Start > Rosewill Wireless > Uninstall Rosewill RNX-N1 The un-installation process will then begin. - Page 18 Wireless Adapter RNX-N1/N1MAC User Manual Select the Remove all button and then click on the Next button. Click on the Yes button to confirm the un-installation process. The un-installation process is complete. Select Yes, I want to restart my computer now radio...
- Page 19 Wireless Adapter RNX-N1/N1MAC User Manual...
-
Page 20: Usb Adapter For Windows 2000/Xp
If the setup does not run automatically, then you must manually select the setup.exe file from the CD-ROM drive. • Once the setup begins you will see the InstallShield Wizard. Select Rosewill Configuration Tool and then click on the Next> button. - Page 21 Wireless Adapter RNX-N1/N1MAC User Manual • Wait for a few seconds until the driver and client utility is installed.
- Page 22 Wireless Adapter RNX-N1/N1MAC User Manual • The installation is complete. Click on the Finish button.
- Page 23 Wireless Adapter RNX-N1/N1MAC • Carefully insert the USB adapter into the USB port. Windows will then detect and install the new hardware. • An R icon will then appear in the system tray. Right click on the R icon and then click on Launch Config Utilities.
-
Page 24: Profiles
Wireless Adapter RNX-N1/N1MAC 3.3 PROFILES The Profile tab is used to store the settings of multiple Access Points such as home, office, café, etc. When adding a profile you are required to enter a profile name and SSID as well as configure the power-saving mode, network type, RTS/fragmentation threshold and encryption/authentication settings. - Page 25 Wireless Adapter RNX-N1/N1MAC • Profile: Enter a name for the profile; this does not need to be the same as the SSID. • SSID: Enter the SSID of the network or select one from the drop-down list. The SSID is a unique name shared among all points in your wireless network.
-
Page 26: Ad-Hoc Mode
Wireless Adapter RNX-N1/N1MAC 3.3.2 Ad-hoc Mode This is the simplest network configuration with several computers equipped with the PC Cards that form a wireless network whenever they are within range of one another. In ad- hoc mode, each client is peer-to-peer, would only have access to the resources of the other client and does not require an access point. -
Page 27: Wep Encryption
Wireless Adapter RNX-N1/N1MAC User Manual 3.4.1 WEP Encryption The WEP tab displays the WEP settings. Encryption is designed to make the data transmission more secure. You may select 64 or 128-bit WEP (Wired Equivalent Privacy) key to encrypt data (Default setting is Disable). WEP encrypts each frame transmitted from the radio using one of the Keys from a panel. -
Page 28: Wpa, Wpa2 Authentication & Tkip, Aes Encryption
Wireless Adapter RNX-N1/N1MAC • Authentication Type: Select Open or Shared from the drop-down list. • Encryption: Select WEP from the drop-down list. • WEP Key: Type a character string into the field. For 64-bit enter 5 alphanumeric or 10 hexadecimal characters. -
Page 29: Wpa-Psk Authentication & Tkip, Aes Encryption
Wireless Adapter RNX-N1/N1MAC • Authentication Type: Select WPA or WPA2 from the drop-down list. • Encryption: Select TKIP or AES from the drop-down list. • Click on the Apply button to save the changes. • Show Password check box. If you want to make sure the accuracy of password you type, click the Show Password box to check it. -
Page 30: Leap Authentication
Wireless Adapter RNX-N1/N1MAC • Authentication Type: Select WPA or WPA2 from the drop-down list. • Encryption: Select TKIP or AES from the drop-down list. • WPA Preshared key: Enter a pass phrase which is between 8 and 32 characters long. -
Page 31: 802.1X With Peap
Wireless Adapter RNX-N1/N1MAC • Authentication Type: Select LEAP from the drop-down list. • Identity: Enter the user name. • Password: Enter the password. • Domain: Enter a domain name. • Encryption: Select WEP, WPA-TKIP or WPA2-AES encryption. • Click on the OK button to save the changes. -
Page 32: 802.1X With Ttls With Eap-Md5, Ms-Chap, Ms-Chapv2
Wireless Adapter RNX-N1/N1MAC • Authentication Type: Select PEAP from the drop-down list. • Protocol: If your network uses TLS or Smart Card to authenticate its users, select TLS/Smartcard from the drop down list. TLS (Transport Layer Security) is an IETF standardized authentication protocol that uses PKI (Public Key Infrastructure) certificate-based authentication of both the client and authentication server. -
Page 33: 802.1X Ca Server
Wireless Adapter RNX-N1/N1MAC • Authentication Type: Select TTLS from the drop-down list. • Protocol: Select EAP-MSCHAP v2, MS-CHAP, or CHAP from the drop-down list. • Identity: Enter the user name. • Password: Enter the password. • Click on the OK button to save the changes. - Page 34 Wireless Adapter RNX-N1/N1MAC User Manual...
-
Page 35: Network
Wireless Adapter RNX-N1/N1MAC • Use certificate chain: Place a check in this to enable the certificate use. • Certificate issuer: Select the Certification Authority from the drop-down list. • Allow intermediate certificates: During tunnel creation the client must verify the server’s certificate. - Page 36 Wireless Adapter RNX-N1/N1MAC • Status: This indicates the state of the client. There are three options: 1. Associated: Indicates that the wireless client is connected to an Access Point (AP). The BSSID is shown in the form of 12 HEX digits, which is the MAC address of the AP.
-
Page 37: Site Survey
Wireless Adapter RNX-N1/N1MAC • Noise Level: Displays the background noise level; a lower level indicates less interference. • Click on the OK button to close this window. 3.5.1 Site Survey The Network tab also displays a list of Access Points and Stations in the area, and allows you to connect to a specific one. -
Page 38: Advanced Configuration
Wireless Adapter RNX-N1/N1MAC 3.6 ADVANCED CONFIGURATION The Advanced tab is used to configure the wireless mode (802.11g, 802.11b/g-mixed, or 802.11b/g/n-mixed), Tx burst, and CCX. • Wireless mode: Select 802.11 b/g/n mix if the wireless network uses both 11b, 11g, and 11n stations and APs. - Page 39 Wireless Adapter RNX-N1/N1MAC User Manual retry, received with CRC error, duplicate frames received, etc.
-
Page 40: Wmm (Wireless Multimedia)
Wireless Adapter RNX-N1/N1MAC 3.8 WMM (WIRELESS MULTIMEDIA) Click on the WMM tab. Wireless Multimedia Extensions (WME), also known as Wi-Fi Multimedia (WMM) is a Wi-Fi Alliance interpretability certification, based on the IEEE 802.11e draft standard. It provides basic Quality of service (QoS) features to IEEE 802.11 networks. WMM prioritizes traffic according to 4 AC (Access Categories), however it does not provide guaranteed throughput. - Page 41 Wireless Adapter RNX-N1/N1MAC • Rescan: Click on this button to view a list of Access Points in the area. • WPS Information: Display the information about WPS on the selected network. List information include Authentication Type, Encryption Type, Config Methods, Device Password ID, Selected Registrar, State, Version, AP Setup Locked, UUID-E and RF Bands •...
-
Page 42: About
Wireless Adapter RNX-N1/N1MAC User Manual 3.10 ABOUT The About tab displays information about the device, such as: the network driver version and date, configuration utility version and date, and the NIC (Network Interface Card) firmware version and date. 3.11 RADIO... -
Page 43: U Ninstall The D Rivers & C Lient U Tility
Follow the steps below in order to uninstall the client utility: • Click on Start > Rosewill Wireless > Uninstall Rosewill Wireless USB Adapter • The un-installation process will then begin. • Select the Remove all button and then click on the Next button. - Page 44 Wireless Adapter RNX-N1/N1MAC User Manual • Click on the Yes button to confirm the un-installation process. • The un-installation process is complete. Select Yes, I want to restart my computer now radio button and then click on the Finish button. Then remove the USB adapter.
- Page 45 Wireless Adapter RNX-N1/N1MAC User Manual...
-
Page 46: Uninstall The Drivers & Client Utility 4. Usb Adapter For Mac Os 10.3/10.4/10.5
Wireless Adapter RNX-N1/N1MAC 4. USB ADAPTER FOR MAC OS 10.3/10.4/10.5 4.1 INSTALLING THE DRIVERS Follow the steps below in order to install the USB adapter drivers: • Insert the CD-ROM that was provided to you in this package. The setup should run automatically. - Page 47 Wireless Adapter RNX-N1/N1MAC User Manual • Select the Macintosh HD and then click on the Continue button. • Click on the Continue button to configure the next step.
- Page 48 Wireless Adapter RNX-N1/N1MAC User Manual • The installation is complete. Click on the Restart button. • Carefully insert the USB adapter into the USB port. MAC OS X will then detect and install the new hardware.
-
Page 49: Profiles
Wireless Adapter RNX-N1/N1MAC • The Client Utility is installed in the Applications folder. 4.2 PROFILES The Profile tab is used to store the settings of multiple Access Points such as home, office, café, etc. When adding a profile you are required to enter a profile name and SSID as well as configure the power-saving mode, network type, RTS/fragmentation threshold and encryption/authentication settings. -
Page 50: Ad-Hoc Mode
Wireless Adapter RNX-N1/N1MAC power. This option minimizes the battery usage while the network is idle. • Network Type: Select Infrastructure from the drop-down list. • TX Power: Select a transmit power from the drop-down list. If your notebook is connected to external power then select 100% or auto, if not, select one of the lower values for power saving. -
Page 51: Authentication And Security
Wireless Adapter RNX-N1/N1MAC values for power saving. • Preamble: Select Auto from the drop-down list, unless you are aware of the preamble type (long or short) used in each station. • Ad-hoc wireless mode: Select a wireless mode from the drop-down list depending on the type of stations used in the ad-hoc network. -
Page 52: Wpa-Psk Authentication & Tkip, Aes Encryption
Wireless Adapter RNX-N1/N1MAC • Authentication Type: Select Open or Shared from the drop-down list. • Encryption: Select WEP from the drop-down list. • WEP Key: Type a character string into the field. For 64-bit enter 5 alphanumeric or 10 hexadecimal characters. -
Page 53: Link Status
Wireless Adapter RNX-N1/N1MAC • Authentication Type: Select WPA or WPA2 from the drop-down list. • Encryption: Select TKIP or AES from the drop-down list. • WPA Preshared key: Enter a pass phrase which is between 8 and 32 characters long. -
Page 54: Site Survey
Wireless Adapter RNX-N1/N1MAC • Status: This indicates the state of the client. There are three options: 1. Associated: Indicates that the wireless client is connected to an Access Point (AP). The BSSID is shown in the form of 12 HEX digits, which is the MAC address of the AP. -
Page 55: Statistics
Wireless Adapter RNX-N1/N1MAC connect to a specific one. The following information is included in this tab, as the image depicts below. • SSID: Displays the SSID of the Access Point. The SSID is a unique name shared among all points in your wireless network. The SSID must be identical for all points in the network, and is case-sensitive. -
Page 56: Advanced Configuration
Wireless Adapter RNX-N1/N1MAC User Manual retry, received with CRC error, duplicate frames received, etc. 4.7 ADVANCED CONFIGURATION The Advanced tab is used to configure the wireless mode (802.11b-only, 802.11g-only, or 802.11b/g-mixed), B/G protection and country/channel setting. - Page 57 Wireless Adapter RNX-N1/N1MAC • Wireless mode: Select 802.11 B/G/N mixed if the wireless network uses both 11b, 11g and 11n stations and APs. • Tx Rate: The transmit rate should be set to auto, however you may manually select a transmit rate from the drop-down list.
-
Page 58: About
Wireless Adapter RNX-N1/N1MAC User Manual 4.8 ABOUT The About tab displays information about the device, such as: the network driver version and date, configuration utility version and date, and the NIC (Network Interface Card) firmware version and date. -
Page 59: Appendix A - Glossary
Wireless Adapter RNX-N1/N1MAC 5. APPENDIX A – GLOSSARY 802.11 A family of specifications for wireless local area networks (WLANs) developed by a working group of the Institute of Electrical and Electronics Engineers (IEEE). Access Control List ACL. This is a database of network devices that are allowed to access resources on the network. - Page 60 Wireless Adapter RNX-N1/N1MAC Backward Compatible The ability for new devices to communicate and interact with older legacy devices to guarantee interoperability Bandwidth The maximum amount of bytes or bits per second that can be transmitted to and from a network device Basic Input/Output System BIOS.
- Page 61 Wireless Adapter RNX-N1/N1MAC another device Data Encryption Standard Uses a randomly selected 56-bit key that must be known by both the sender and the receiver when information is exchanged Database Organizes information so that it can be managed updated, as well as easily accessed by users or applications.
- Page 62 Wireless Adapter RNX-N1/N1MAC obtain a Domain Name that will always by linked to their changing IP address. The IP address is updated by either client software running on a computer or by a router that supports Dynamic DNS, whenever the IP address changes Dynamic IP address IP address that is assigned by a DHCP server and that may change.
- Page 63 Wireless Adapter RNX-N1/N1MAC for videoconferencing devices Half-duplex Data cannot be transmitted and received at the same time Hashing Transforming a string of characters into a shorter string with a predefined length Hexadecimal Characters 0-9 and A-F The action of data packets being transmitted from one router to another...
- Page 64 Wireless Adapter RNX-N1/N1MAC A 32-bit number, when talking about Internet Protocol Version 4, that identifies each computer that transmits data on the Internet or on an Intranet IPsec Internet Protocol Security Internetwork Packet Exchange is a networking protocol developed by Novel to enable their...
- Page 65 Wireless Adapter RNX-N1/N1MAC transmit the signal over phone lines. It also Demodulates the analog signals coming from the phone lines to digital signals for your computer MPPE Microsoft Point-to-Point Encryption is used to secure data transmissions over PPTP connections Maximum Transmission Unit is the largest packet that can be transmitted on a packet-...
- Page 66 Wireless Adapter RNX-N1/N1MAC Physical layer The first layer of the OSI model. Provides the hardware means of transmitting electrical signals on a data carrier Ping A utility program that verifies that a given Internet address exists and can receive messages. The utility sends a control packet to the given address and waits for a response.
- Page 67 Wireless Adapter RNX-N1/N1MAC Algorithm used for encryption and authentication Server A computer on a network that provides services and resources to other computers on the network Session key An encryption and decryption key that is generated for every communication session...
- Page 68 Wireless Adapter RNX-N1/N1MAC Throughput The amount of data that can be transferred in a given time period Traceroute A utility displays the routes between you computer and specific destination User Datagram Protocol Unicast Communication between a single sender and receiver...
- Page 69 Wireless Adapter RNX-N1/N1MAC Wired Equivalent Privacy is security for wireless networks that is supposed to be comparable to that of a wired network Wide Area Network The larger network that your LAN is connected to, which may be the Internet itself, or a...
-
Page 70: Appendix B - Specifications
Wireless Adapter RNX-N1/N1MAC 6. APPENDIX B – SPECIFICATIONS Data Rates 1, 2, 5.5, 6, 9, 11, 12, 18, 24, 36, 48, 54, 72, 84, 150 and 300Mbps (300 Rx PHY rate; 150Mbps Tx PHY support) Standards / Compliance IEEE802.3, IEEE802.3u, IEEE802.11b, IEEE802.11g, 802.11n (2.0) -
Page 71: Appendix C - Fcc Interference Statement
This transmitter must not be co-located or operating in conjunction with any other antenna or transmitter. Thank you for purchasing a quality Rosewill Product. Please register your product at : www.rosewill.com for complete warranty information and future support for your product. User Manual...