Table of Contents
Advertisement
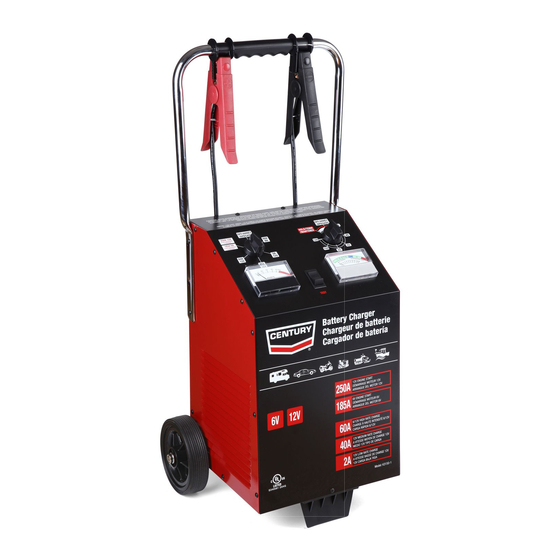
Manual Wheel Charger
For use with machines having Code Numbers:
Safety Depends on You
Century charging equipment
is designed and built with
safety in mind. However,
your overall safety can be
increased by proper installation
... and thoughtful operation on
your part. DO NOT INSTALL,
OPERATE OR REPAIR THIS
EQUIPMENT WITHOUT READ-
ING THIS MANUAL AND THE
SAFETY PRECAUTIONS CON-
TAINED THROUGHOUT. And,
most importantly, think before
you act and be careful.
(See Below)
K3149-1 (11860)
40/20/2/200, 6/12V
W/ TEST
OPERATOR'S MANUAL
Century Equipment
2345 Murphy Blvd. Gainesville, GA 30504
K3151-1 (11862)
60/40/30/225, 6/12 /24V
K3150-1 (11861)
60/40/2/250, 6/12V
W/ TEST
IM10130
September, 2012
Advertisement
Table of Contents

Related Manuals for Century K3151-1


Summary of Contents for Century K3151-1
- Page 1 Manual Wheel Charger September, 2012 For use with machines having Code Numbers: (See Below) Safety Depends on You Century charging equipment is designed and built with safety in mind. However, your overall safety can be increased by proper installation ... and thoughtful operation on your part.
-
Page 2: Table Of Contents
TABLE OF CONTENTS ENGINE STARTING ......14 ENGLISH MAINTENANCE..........15 SAFETY SUMMARY ........3 TROUBLESHOOTING ......15 SAFETY INFORMATION ......3 WIRE DIAGRAM.S.........16, 17 SHOCK HAZARDS ......3 PARTS PAGES ......P-712 SERIES EXPLOSIVE GAS HAZARDS ....3 BATTERY EXPLOSION HAZARDS ..4 FIRE HAZARDS ........4 BATTERY ACID HAZARDS....4 MOVING PARTS HAZARDS ....4 BURN HAZARDS ......4 INTRODUCTION ..........5... -
Page 3: Safety Summary
SAFETY SUMMARY Congratulations on the purchase of your new battery charg- 11. ALWAYS plug in and unplug the ac power cord by er. We wish to acknowledge Underwriters Laboratories grasping the power cord plug, NOT THE POWER CORD, (U/L) for contributing the following important safety precau- to reduce risk of damaging power cord. -
Page 4: Battery Explosion Hazards
FIRE HAZARDS BATTERY EXPLOSION HAZARDS 1. To reduce the risk of battery explosion, read, understand, 1. NEVER use an attachment not recommended or sold by and follow these instructions, those published by the bat- the battery charger manufacturer for use with your specif- tery manufacturer, and those of the manufacturer of any ic model charger. -
Page 5: Introduction
INTRODUCTION DESCRIPTION NOTE: A slow bubbling sound may be heard coming from the battery during the charging process. This battery charger is designed to handle the majority of This is a normal condition and just another your charging and starting needs. indicator the battery is being charged. -
Page 6: Assembly
ASSEMBLY ASSEMBLY OF HANDLE AND CLAMP FIGURE 3 HOLDER REPLACE TOP Assemble the charger handle and clamp holder accord- 2 SCREWS THEN ing to the following instructions and illustrations. TIGHTEN ALL 4 SCREWS 1. Carefully remove the charger unit and all associated hardware from carton, note the charger is shipped with the handle partially secured, and resting in a down position on the front of the unit. -
Page 7: Preparation
PREPARATION CHARGER PREPARATION WARNING CHARGER PLACEMENT Place the charger in a clean, dry, stable, well-ventilated spot as far away from the battery as the dc output cables permit. FIRE CAN KILL, INJURE, AND CAUSE PROPERTY NEVER place the charger directly above the battery being DAMAGE! charged;... -
Page 8: Controls And Indicators
CONTROLS AND INDICATORS CONTROL SETTING INSTRUCTIONS CHARGE RATE SELECTOR switch is a multi position CHARGE VOLTAGE AND RATE SELECTION rotary switch. The available settings, for each charger are ( See Figure 6 and 7) shown in Figure 5. FIGURE 5. Set the RATE SELECTOR to the same voltage and charge Charge Rate Selector Switch Settings rate that is appropriate for the size and type of battery... -
Page 9: Battery Percent Of Charge Test (12 Volt Only)
PRE-CHARGE BATTERY ACTIVATION If the voltmeter reads outside these voltages, refer to the chart below for possible battery conditions: Some modern batteries can cause charging problems if they VOLTS LOW, AMPS HIGH Probable shorted have been deeply discharged. The plates in these batteries can begin sulfating quickly, forming a barrier to accepting a Battery —... -
Page 10: Operation
OPERATION OPERATING INSTRUCTIONS 1) Connect the POSITIVE (red) clamp from the bat- tery charger to the POSITIVE, ungrounded termi- ATTENTION! nal of the battery. 2) Connect the NEGATIVE (black) clamp from the DO NOT ATTEMPT TO OPERATE THIS BATTERY battery charger to a heavy gauge metal part of the CHARGER until you have read and understood the entire vehicle chassis or engine block away from the bat- SAFETY SUMMARY provided in this manual. -
Page 11: Charging Instructions
3. Attach a battery or booster cable, AT LEAST 24 inches fully charged). At full charge, the ammeter will still register long that is the same (or larger) wire gauge as the charg- some current draw (approximately 50% of the charger’s out- er cable, to the NEGATIVE terminal of the battery. - Page 12 40 Amp 2 Amp 20 Amp 40 Amp 130 Amp 6V 250 Amp 12V 60 Amp K3150-1 60 Amp 2 Amp 40 Amp 185 Amp 6V 225 Amp 12V 60 Amp K3151-1 60 Amp 40 Amp 30 Amp 160 Amp 6V...
- Page 13 Table 3. Length of Charge Time Chart 60 Amps BATTERY RATINGS MINUTES TO CHARGE @ 60 AMPS Approx. Approx. for the percent-of-charge now in the battery Reserve Marine Cold Capacity Cranking Cranking Ampere 100% (Minutes) Amps Amps Hours Table 4. Length of Charge Time Chart 40 Amps BATTERY RATINGS MINUTES TO CHARGE @ 40 AMPS Approx.
-
Page 14: English Engine Starting
Table 6. Length of Charge Time Chart 2 Amps BATTERY RATINGS HOURS TO CHARGE @ 2 AMPS Approx. Approx. for the percent-of-charge now in the battery Reserve Marine Cold Capacity Cranking Cranking Ampere 100% (Minutes) Amps Amps Hours 41.3 30.9 20.6 10.3 38.1... -
Page 15: Maintenance
MAINTENANCE CAUTION a. Check to see that the battery is capable of being charged. It may be damaged or sulfated. Make sure charger is unplugged from ac outlet before b. Make sure you are allowing enough time for charging performing any cleaning or maintenance. the battery. - Page 18 Century Equipment 2345 Murphy Blvd. Gainesville, GA 30504...