
Related Manuals for Kärcher K2000


Summary of Contents for Kärcher K2000
- Page 1 Electric Pressure Washer English ..4 Español . . . 18 Français. . . 34 K2000 1.106-112.0 K2010 1.106-118.0 8.641-730.0-A 10/16...
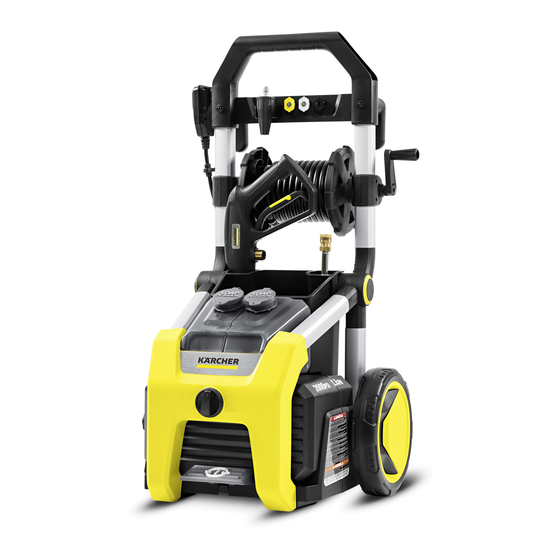
- Page 2 Machine Parts List 1. Water Inlet 2. High Pressure Hose Reel 3. Hose Connector 4. ON/Off Pedal 5. Power Cord Cleat 6. Nozzles 7. Turbo Nozzle 8. High Pressure Hose 9. Spray Wand 10. Spray Gun 11. Handle 12. Plug Storage 13.
-
Page 4: Table Of Contents
K2000 Pressure Washer Please read and comply with these Hazard Levels original instructions prior to the initial operation of your appliance and store them for later use Indicates “an imminently hazardous or subsequent owners. situation which, if not avoided, will result in death or serious injury.”... - Page 5 ● Do not operate the product when ● Keep all connections dry and off the fatigued or under the influence of ground. ● Do not touch plug with wet hands. alcohol or drugs. ● Keep operating area clear of all ●...
- Page 6 ● High-pressure. Keep clear of nozzle. ● Garden hose must be at least ● Injection hazard: Equipment can 5/8 inch (16 mm) in diameter. ● Flow rate of water supply must not cause serious injury if the spray penetrates the skin. Do not point the fall below 2 GPM/gallons per minute gun at anyone or any part of the (7.6 L/min).
-
Page 7: Assembly Instructions
4. Attach nozzles to handle. Assembly Instructions 1. Insert wheels into the body of the machine. Secure with axle pin. Operating Instructions 1. Thread the other end of the high 2. Push the handle into place. pressure hose onto the spray gun inlet. - Page 8 3. Thread the garden hose onto the this test, visit Karcher-help.com/ and water inlet connector and hand search for GFCI. tighten. 4. Connect the garden hose to the cold water source and turn the water Do not use if GFCI fails test.
-
Page 9: Using The Accessories
8. Turn on the machine by stepping pattern can cover an area of 4 to 8 down on the foot pedal. inches (10 to 20 cm), depending on the distance between the tip and the surface being cleaned. The 40° Nozzle is efficient for general purpose cleaning. - Page 10 This machine is equipped with a dual soap tank system, For Kärcher detergents, check your allowing you to use two different retailer or visit our website: detergent solutions. www.Karcher.com/us Never Use: ● Bleach, chlorine products and other corrosive chemicals ●...
-
Page 11: Taking A Break
6. Cleaning Up: Always run fresh water 2. Turn off the water source. through the detergent tank when done to flush any remaining deter- 3. Press trigger to release water gents from the injection system. pressure. Taking a Break five minutes or more 1. -
Page 12: Winterizing & Long Term Storage
Winterizing & Long Term Maintenance Instructions Storage Cleaning the Water Inlet 1. Disconnect all water connections. Filter 2. Turn on the machine for a few 1. Disconnect the connector from the seconds, until the water which had water inlet. remained in the pump exits, turn off immediately. - Page 13 For additional cleaning tips, visit our stubborn dirt. Rinse at high-pressure website: from top to bottom in an even sweeping motion keeping the spray www.Karcher.com/us/ nozzle approximately 6 ft. (1.8 m) from the cleaning surface. Deck Cleaning Cement Patios, Brick and (With or without detergent).
-
Page 14: Optional Accessories
surface. If needed, use special wash (not included) to remove stubborn dirt. brush attachment (not included) to Rinse at high-pressure in a sweeping motion keeping the spray nozzle remove stubborn dirt. Rinse at high- pressure in a sweeping motion keep- approximately 3-6 in. -
Page 15: Troubleshooting
Troubleshooting Disconnect the unit from the power source before making any repairs. Symptom Cause Solution Power Cord not Plug in Power Cord. plugged in. Electrical Outlet does Try a different outlet. not supply adequate power. Tripped GFCI plug. Press “Reset” button on GFCI plug. Motor will not start Tripped Circuit Breaker. - Page 16 Symptom Cause Solution Pump is sucking in air. Check that hoses and fittings are air tight. Turn off machine and purge pump by squeezing trigger gun until a steady flow of water emerges through the nozzle. Output pressure Water inlet filter is Remove garden hose adapter and varies high clogged.
- Page 17 Spray wand locked position. leaks Broken o-ring or plastic Visit www.karcher-help.com or locate insert. a service center. Pump is sucking in air. Check that hoses and fittings are air tight. Turn off machine and purge...