Roland GW-8 Owner's Manual
Workstation
Hide thumbs
Also See for GW-8:
- Supplementary manual (48 pages) ,
- Quick manualbook (39 pages) ,
- Release note (32 pages)
Table of Contents
Advertisement
Quick Links
Owner's Manual
201a
Before using this unit, carefully read the sections entitled: "USING THE UNIT SAFELY" (p. 3–4) and
"IMPORTANT NOTES" (p. 5–6). These sections provide important information concerning the
proper operation of the unit. Additionally, in order to feel assured that you have gained a good
grasp of every feature provided by your new unit, Owner's manual should be read in its entirety.
The manual should be saved and kept on hand as a convenient reference.
Conventions Used in This Manual
Operating buttons are enclosed by square brackets [ ]; e.g., [ENTER].
Reference pages are indicated by (p. **).
The following symbols are used.
This indicates an important note; be sure to read it.
This indicates a memo regarding the setting or function; read it as desired.
This indicates a useful hint for operation; read it as necessary.
This indicates information for your reference; read it as necessary.
This indicates an explanation of a term; read it as necessary.
* The explanations in this manual include illustrations that depict what should typically be shown by
the display. Note, however, that your unit may incorporate a newer, enhanced version of the
system (e.g., includes newer sounds), so what you actually see in the display may not always
match what appears in the manual.
202
Copyright © 2008 ROLAND CORPORATION
All rights reserved. No part of this publication may be reproduced in any form without the
written permission of ROLAND CORPORATION.
Advertisement
Chapters
Table of Contents

Related Manuals for Roland GW-8


Summary of Contents for Roland GW-8
-
Page 1: Conventions Used In This Manual
(e.g., includes newer sounds), so what you actually see in the display may not always match what appears in the manual. Copyright © 2008 ROLAND CORPORATION All rights reserved. No part of this publication may be reproduced in any form without the... - Page 2 IMPORTANT: THE WIRES IN THIS MAINS LEAD ARE COLOURED IN ACCORDANCE WITH THE FOLLOWING CODE. BLUE: NEUTRAL BROWN: LIVE As the colours of the wires in the mains lead of this apparatus may not correspond with the coloured markings identifying the terminals in your plug, proceed as follows: The wire which is coloured BLUE must be connected to the terminal which is marked with the letter N or coloured BLACK.
-
Page 3: Using The Unit Safely
Roland. • When using the unit with a rack or stand recom- mended by Roland, the rack or stand must be carefully placed so it is level and sure to remain stable. If not using a rack or stand, you still need to... - Page 4 • The unit and the AC adaptor should be located so their location or position does not interfere with their proper ventilation. 101c • This (GW-8) for use only with Roland stand KS-12. Use with other stands is capable of resulting in instability causing possible injury. 102c •...
-
Page 5: Important Notes
However, in certain cases (such as when circuitry related to memory itself is out of order), we regret that it may not be possible to restore the data, and Roland assumes no liability concerning such loss of data. Additional Precautions •... - Page 6 * MPEG Layer-3 audio compression technology is licensed from Fraunhofer IIS Corporation and THOMSON Multi- media Corporation. * MatrixQuest™ 2008 TEPCO UQUEST, LTD. All rights reserved. The GW-8’s USB functionality uses Matrix- Quest middleware technology from TEPCO UQUEST, LTD.
-
Page 7: Main Features
❍ Four variations each for Intro, Main, and Ending. ❍ Included “StyleConverter” software lets you create Styles on your computer. Styles you’ve created can be installed in the GW-8 as User Styles via USB memory. ● USB Memory Player function lets you play MP3/WAV/AIFF/SMF data ❍... -
Page 8: Table Of Contents
Adjusting the Display Contrast ([LCD CONTRAST] knob) ... 16 Listening to the Demo Song ... 16 Restoring the GW-8 to Its Factory Settings ... 16 Preserving Certain Settings Even When You Switch Performances ([LOCK]) ... 16 Input settings for the EXT INPUT jack... 17 Basic Operation... - Page 9 MIDI Channels... 43 MIDI Parameters ... 43 Local Switch ... 43 Using the GW-8 as a MIDI Sound Module .. 44 Connecting to a Computer via the USB MIDI Connector ... 45 If connection to your computer is unsuccessful... 45 Making the Settings for the USB Driver...
-
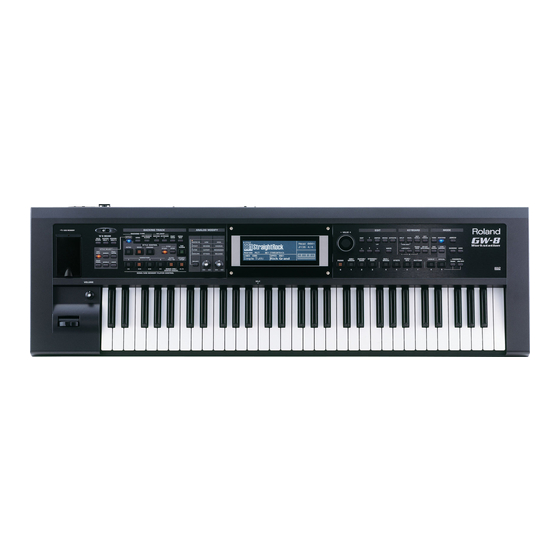
Page 10: Panel Descriptions
Panel Descriptions Front Panel USB MEMORY connector Connect a USB memory here and use the GW-8 to play back files (songs) that have been stored on USB memory. You can also back up data to USB memory. VOLUME knob This knob controls the volume of the entire GW-8. - Page 11 Use these buttons to raise or lower the pitch of the keyboard in one-octave steps (p. 22). TRANSPOSE button These button allow you to transpose the GW-8 up or down in semitone steps (p. 22). MELODY INTELLIGENCE button Press this button to add an automatic counter-melody (second and third voice) to your solos or melodies (p.
-
Page 12: Rear Panel
Sound will be output from the OUTPUT jacks even if you connect headphones. USB MIDI connector Use a USB cable to connect the GW-8 to your computer via this connector (p. 49). Cord hook Use this to secure the AC adaptor cord (p. 14). -
Page 13: Introduction
Style, the keyboard mode, and various other parameters. What is a Tone? (p. 20) On the GW-8, each of the sounds you normally play is called a “Tone.” If we use the analogy of an orchestra, a Tone corresponds to an instrument played by one of the musicians. -
Page 14: Making Connections
If so, omit step 3 and proceed. 4. Connect the AC adaptor to the DC IN jack on the GW-8’s rear panel, and then plug the AC adaptor into an electrical outlet. -
Page 15: Connecting External Equipment
If the GW-8 is connected to a keyboard amp or audio amp, turn on the power of the GW-8 first, and then switch on your amp. 3. Turn the [VOLUME] knob to adjust the volume of the GW-8. -
Page 16: Adjusting The Display Contrast ([Lcd Contrast] Knob)
OUT. Restoring the GW-8 to Its Factory Settings You can return all of GW-8’s settings to the factory-set state. This is called “Factory Reset.” If GW-8’s internal memory already contains important data that you’ve created, all of this data will be lost when you execute a Factory Reset. -
Page 17: Input Settings For The Ext Input Jack
Input settings for the EXT INPUT jack Here you can specify whether the sound from the EXT INPUT jack (p. 15) will be used. You can also specify whether the Center Cancel function will be applied to the sound from the EXT INPUT jack. Center Cancel function minimizes the playback volume of the sound that’s heard from the center (e.g., vocal or melody instrument). -
Page 18: Main Screen
The following screen, which appears after you turn on the power, is called the “Main screen.” This screen will be shown most of the time you’re performing with the GW-8. fig.disp-main.eps 1. The number and name of the currently selected Style, or the number and name of the currently selected Song 2. -
Page 19: Keyboard Mode Functions
If the [SPLIT] and [DUAL] are off, the keyboard will be in Single mode, meaning that the entire keyboard will play a single Tone. When you turn on the power, the GW-8 will be in this mode. Using Piano setting Regardless of the keyboard mode that is currently selected, you can use the following operation to call up the “Piano... -
Page 20: Selecting A Tone ([Tone])
Keyboard Mode Functions Selecting a Tone ([TONE]) The GW-8 contains more than 1000 different Tones. You can use these Tones in the three keyboard modes (Single, Split, Dual). In Split mode or Dual mode, you can use the cursor buttons to move the cursor to the Tone number of the Upper Tone or Lower Tone, and select a different Tone for each. -
Page 21: Viewing Or Editing The Favorite List
G#, Bb and C#, and Eb and F# have a natural third the interval between a major third and a minor third. On the GW-8, you can use Arabian temperament in the three keys of G, C and F. Use the Key Scale for the Lower... -
Page 22: Changing The Key Touch ([Key Touch])
Keyboard Mode Functions Changing the Key Touch ([KEY TOUCH]) This setting determines how the volume changes in response to the force used to play the keyboard (Velocity Sensitivity). The velocity—the force with which you play the keyboard— can affect the volume or timbre of a sound. 1. -
Page 23: Adding Harmony To The Upper Tone ([Melody Intelligence])
Adding Harmony to the Upper Tone ([MELODY INTELLIGENCE]) While a Music Style is playing (p. 25), the matching harmony is automatically added to the notes you are playing in the Upper Part. This function is called “Melody Intelligence.” Those automatic harmonies are based on the chords you play in the lower section. -
Page 24: Backing Track Functions
Backing Track Functions Selecting the Backing Types (Style/Song/USB Memory Player) The GW-8 allows you to use the following three types of musical backing. To switch the backing type, use BACKING TYPE [STYLE], [SONG] and [USB MEMORY PLAYER]. [STYLE] (p. 25) This backing uses the Music Styles. -
Page 25: Style (Playing With An Accompaniment)
Variation pattern depends on where you come from. What’s a “Fill-In”?–A short improvisational phrase inserted at the bar line is called a “Fill In.” The GW-8 automatically plays the appropriate phrase for the selected Style. Stopping a Style 1. -
Page 26: Sync Start/Stop (Sync Buttons)
Style being changed. Adding User Styles (Importing from USB memory) Style data saved on USB memory can be imported into the GW-8. Before you continue, the Style data you created on your computer using the included “StyleConverter” software must be saved to USB memory. -
Page 27: Back Up User Style (Exporting To Usb Memory)
Backing Track Functions Song Recording a New Song ([SONG REC]) You can use the 16-track recorder of the GW-8 to record your own performances. You can record your keyboard performance while listening to an accompaniment, and then listen to the playback of your recorded performance. -
Page 28: Recording A Specified Part (Song Track)
Backing Track Functions 5. Press [ ] to stop recording. When you stop recording, the SONG TRACK screen will appear. If you want to continue recording, refer to step 7 and following of “Recording a specified Part (SONG TRACK)” below, or step 3 and following of “Re-recording Your Performance”... -
Page 29: Saving A Song ([Write])
When you record a Song using a Style, the Style data is recorded in the first measure of the Song. When you play back this Song, playback will begin from measure indication “2.” When you re-record the Song, the ANALOG MODIFY settings other than the MASTER EQ settings (p. -
Page 30: Loading Song Data From Usb Memory
5. When you’re finished making settings, press [EXIT]. This setting is system parameter. Back Up Song Files Song data you created on the GW-8 can be saved on USB memory. For details, refer to “Saving User Data to USB Memory (Backup)”... -
Page 31: Usb Memory Player (Smf/Audio File Player)
USB memory. • Only audio files whose sampling frequency is 44.1 kHz can be played. • The GW-8 can handle up to a maximum of 999 songs and playlists. (The Playlist Editor can handle up to 999 playlists.) Playing Back SMF/Audio Files You can play back SMF files or audio files saved in USB memory. -
Page 32: Song Playback ([Usb Memory Player])
Song Playback ([USB MEMORY PLAYER]) Connect the USB memory containing the playlist and songs to the GW-8, and turn [USB MEMORY PLAYER] on. Play the songs as described below. Use the SONG/USB MEMORY PLAYER CONTROL buttons to specify the song playback location. -
Page 33: Editing Playlist
VIEW] repeatedly to switch from the Main screen to SONG INFO (LEVEL) → PERFORM MIXER (p. 25) → Main screen. Saving playlist settings to USB memory ([WRITE]) Here’s how Playlist settings you’ve edited on the GW-8 can be saved to USB memory. 1. Press [WRITE]. 2. Use [ ] to select “Playlist,”... -
Page 34: Performance Functions And Effects
The D Beam controller can be used simply by waving your hand over it. It can be used to apply various effects, depending on the function that is assigned to it. On the GW-8, the D Beam controller can be used not only to modify the sounds, but also to control the pitch of a monophonic (solo) synthesizer sound. -
Page 35: Assigning A Function To The D Beam Controller
Parameter Value Osc2 & Sync Osc 2 Waveform Osc 2 Pulse Width (same as Osc 1) Osc 2 Coarse Tune Osc 2 Fine Tune Osc 2 Level 0–127 Adjust the level. Turning this switch on produces a complex sound with many harmonics. Osc Sync OFF, ON Switch... - Page 36 If you turn off the power while the D BEAM screen is displayed, the D Beam setting you chose will not be remembered by the GW-8. You must press [EXIT] before you turn off the power.
-
Page 37: Pitch Bend And Modulation Lever
Adjusting the MASTER EQ If you press ANALOG MODIFY [SELECT] to select MASTER EQ, the two knobs will operate as [LOW] and [HIGH] knobs. Master EQ is applied to the overall output of the GW-8 that is sent from OUTPUT and PHONES. Modulation... -
Page 38: Adjusting The Currently Selected Tone
Assignable Pedal You can connect a separately available foot switch (Boss FS- 5U) or a separately available expression pedal (Roland EV-5) to the CONTROL PEDAL jack on the rear panel. You can assign a variety of functions to this pedal. For details, refer to “System Parameters”... -
Page 39: Choosing From The Performance List
Choosing from the Performance list 1. In the Main screen, use the cursor buttons to move the cursor to the Performance number. 2. Press [ENTER]. 3. Use [ ] to select “Preset” or “User.” You’ll be able to select preset Performances if you choose “Preset,”... -
Page 40: Editing A Tone
Performance Functions and Effects Editing a Tone You can turn the ANALOG MODIFY knobs to edit the currently selected Tone (including rhythm set Tones). For details on using ANALOG MODIFY, refer to “Modifying the Sound (ANALOG MODIFY)” (p. 37). The Tone settings you edit are stored in the Performance (p. 41). -
Page 41: Saving A Performance ([Write])
Oscillator) to cyclically vary the pitch. Explanation Saving a Performance ([WRITE]) Here’s how the settings of the current Performance (including the Tone settings you’ve edited) can be saved in the GW-8 as a new Performance. 1. Press [WRITE]. 2. Use [ [ENTER]. -
Page 42: Using Effects ([Effects])
Performance Functions and Effects Using Effects ([EFFECTS]) The GW-8 contains built-in reverb, chorus, and multi-effect (MFX) processors. You can choose an effect type for each processor. MFX will apply only to the realtime performance of the part you play by hand (the Upper Part or Lower Part). Be aware that MFX will not apply to recorded song data. -
Page 43: Using Midi
The GW-8’s MIDI connectors allow it to transmit performance data to, and receive such data from other devices. You can use the GW-8 in a wide range of ways by connecting external devices to these connectors. Connection example... -
Page 44: Using The Gw-8 As A Midi Sound Module
Using the GW-8 as a MIDI Sound Module OFF, ON If you want to use the GW-8 with an external MIDI sequencer, for example to create Styles, proceed as follows. 1. Press [SONG] to put the GW-8 in Song mode. -
Page 45: Connecting To A Computer Via The Usb Midi Connector
Administrator • A user name whose account type is a computer administrator Do not connect two or more GW-8 units to one computer via USB. The system will not operate correctly with such connections. The file name for a Style or Song that can be used by the GW- 8 must be no longer than sixteen characters (not including the filename extension). -
Page 46: System Settings
System Settings Settings that affect the entire operating environment of the GW-8, such as tuning and MIDI message reception, are referred to as “system settings.” How to Make System Settings ([MENU]) 1. Press [MENU]. 2. Use [ ] to select “System” then press [ENTER]. - Page 47 If you’re Polarity REVERSE using this type of pedal, set this parameter to “REVERSE.” If you’re using a Roland pedal (without a polarity switch), use “STANDARD.” Switches the polarity of the pedal STANDARD , Hold connected to the HOLD PEDAL...
-
Page 48: Viewing Information About
• External input Center Cancel (p. 17) • MINUS ONE/CENTER CANCEL button on/off (p. 30, p. 32) Viewing Information about GW-8 (System Version Info Screens) Here’s how to view information about the GW-8 such as its software version. 1. Press [MENU]. 2. Use [ 3. -
Page 49: Using Usb Memory
Using USB Memory You can save GW-8 user data to USB memory (i.e., back up data), or load data from USB memory into the GW-8. Data you’ve downloaded to your computer can also be saved to USB memory and then loaded into the GW-8. -
Page 50: Deleting User Data That You Loaded
Before you continue, save the downloaded data from your computer to the USB memory you’re using. Connect the USB memory to the GW-8, and import the data you saved. If you add Tones, the imported Tones will be added to [WORLD] and [SPECIAL]. -
Page 51: About V-Link
About V-LINK Connecting the GW-8 to a V-LINK compatible image device allows you to control the images with the GW-8. To prevent malfunction and/or damage to speakers or other devices, always turn down the volume, and turn off the power on all devices before making any connections. - Page 52 About V-LINK Parameter Value Explanation CC64 (Hold) Sync SW Clip CC65 Loop SW (Portamento) Assign CC72 (Release) Knob Fade CC73 (Attack) Time SW Visual CC74 (Cutoff) Knob AB SW CC81 (General–6) Tap SW CC83 (General–8) Total CC85 Select FX Select CC86 Play Pos CC91 (Reverb)
-
Page 53: Appendices
Troubleshooting This section provides points to check and actions to take when the GW-8 does not function as you expect. Refer to the appropriate section for the problem you are experiencing. Problem Is the included AC adaptor/power cord correctly connected to an AC outlet and... - Page 54 USB memory that has been formatted as FAT. If your USB memory was formatted using any other method, please re-format it using FAT. • The file name for a Style or Song that can be used by the GW-8 must be no longer than sixteen characters (not including the filename extension).
-
Page 55: Error Messages
The file or the USB memory itself is write pro- tected. This is a file that the GW-8 is unable to play. This song has not been transferred from Playl- Incorrect File! ist Editor to USB memory. -
Page 56: Effects List
Effects List Multi-Effects Parameters The multi-effects feature 78 different kinds of effects. Some of the effects consist of two or more different effects connected in series. FILTER (10 types) 01 EQUALIZER 02 SPECTRUM 03 ISOLATOR 04 LOW BOOST 05 SUPER FILTER 06 STEP FILTER 07 ENHANCER 08 AUTO WAH... - Page 57 When Using 3D Effects The following 3D effects utilize RSS (Roland Sound Space) technology to create a spaciousness that cannot be produced by delay, reverb, chorus, etc. 52: 3D DELAY...
-
Page 58: Equalizer
Effects List EQUALIZER This is a four-band stereo equalizer (low, mid x 2, high). fig.MFX-01 L in 4-Band EQ R in 4-Band EQ Parameter Value Description Low Freq 200, 400 Hz Frequency of the low range Low Gain -15– +15 dB Gain of the low range Mid1 Freq 200–8000 Hz... -
Page 59: Super Filter
SUPER FILTER This is a filter with an extremely sharp slope. The cutoff frequency can be varied cyclically. fig.MFX-05 L in Super Filter R in Super Filter Parameter Value Description Filter type Frequency range that will pass through each filter LPF, BPF, HPF, LPF: frequencies below the cutoff Filter Type... -
Page 60: Auto Wah
Effects List AUTO WAH Cyclically controls a filter to create cyclic change in timbre. fig.MFX-08 L in Auto Wah 2-Band EQ R in Auto Wah 2-Band EQ Parameter Value Description Type of filter LPF: The wah effect will be applied over Filter Type LPF, BPF a wide frequency range. -
Page 61: Phaser
PHASER A phase-shifted sound is added to the original sound and modulated. fig.MFX-11 L in Phaser Phaser R in Parameter Value Description 4-STAGE, 8-STAGE, 12- Mode Number of stages in the phaser STAGE Adjusts the basic frequency from Manual 0–127 which the sound will be modulat- Rate 0.05–10.00 Hz, note... -
Page 62: Infinite Phaser
Effects List INFINITE PHASER A phaser that continues raising/lowering the frequency at which the sound is modulated. fig.MFX-14 L in Infinite Phaser 2-Band EQ R in Parameter Range Explanation Higher values will produce a Mode 1, 2, 3, 4 deeper phaser effect. Speed at which to raise or lower the frequency at which the sound Speed... -
Page 63: Auto Pan
AUTO PAN Cyclically modulates the stereo location of the sound. fig.MFX-18a L in Auto Pan 2-Band EQ R in Auto Pan 2-Band EQ Parameter Value Description Modulation Wave TRI: triangle wave TRI, SQR, SIN, SAW1, SQR: square wave SAW2 SIN: sine wave SAW1/2: sawtooth wave SAW1 Mod Wave... -
Page 64: Rotary
Effects List ROTARY The Rotary effect simulates the sound of the rotary speakers often used with the electric organs of the past. Since the movement of the high range and low range rotors can be set independently, the unique type of modulation characteristic of these speakers can be simulated quite closely. -
Page 65: Flanger
FLANGER This is a stereo flanger. (The LFO has the same phase for left and right.) It produces a metallic resonance that rises and falls like a jet airplane taking off or landing. A filter is provided so that you can adjust the timbre of the flanged sound. -
Page 66: Tremolo Chorus
Effects List TREMOLO CHORUS This is a chorus effect with added Tremolo (cyclic modulation of volume). fig.MFX-27 L in Balance D Balance W Tremolo Chorus Balance W R in Balance D Parameter Value Description Adjusts the delay time from the di- Pre Delay 0.0–100.0 ms rect sound until the chorus sound... -
Page 67: 3D Flanger
3D FLANGER This applies a 3D effect to the flanger sound. The flanger sound will be positioned 90 degrees left and 90 degrees right. fig.MFX-30 3D Flanger Parameter Value Description Type of filter Filter Type OFF, LPF, HPF Cutoff Freq 200–8000 Hz Basic frequency of the filter Adjusts the delay time from when... -
Page 68: 2Band Flanger
Effects List 2BAND FLANGER A flanger that lets you apply an effect independently to the low- frequency and high-frequency ranges. fig.MFX-33 L in High Band Flanger Split High Band Feedback Low Band Flanger Low Band Feedback High Band Feedback High Band Flanger Low Band Feedback Split Low Band Flanger... -
Page 69: Overdrive
OVERDRIVE Creates a soft distortion similar to that produced by vacuum tube amplifiers. fig.MFX-35 L in Over 2-Band drive Simulator R in Parameter Value Description Degree of distortion Drive 0–127 Type of guitar amp SMALL, BUILT-IN, Amp Type 2-STACK, 3-STACK Low Gain -15–... -
Page 70: Compressor
Effects List Specifications for each Speaker Type The speaker column indicates the diameter of each speaker unit (in inches) and the number of units. Type Cabinet SMALL 1 small open-back enclosure SMALL 2 small open-back enclosure MIDDLE open back enclosure JC-120 open back enclosure BUILT-IN 1... -
Page 71: Delay (13 Types)
DELAY This is a stereo delay. When Feedback Mode is NORMAL: fig.MFX-43a Balance D L in Delay Balance W Feedback Feedback Balance W Delay R in Balance D When Feedback Mode is CROSS: fig.MFX-43b Balance D L in Delay Balance W Feedback Feedback Delay... -
Page 72: Modulation Delay
Effects List MODULATION DELAY Adds modulation to the delayed sound. When Feedback Mode is NORMAL: fig.MFX-46a Balance D L in Delay Modulation Balance W Feedback Feedback Delay Balance W Modulation R in Balance D When Feedback Mode is CROSS: fig.MFX-46b Balance D L in Delay... -
Page 73: Multi Tap Delay
MULTI TAP DELAY This effect provides four delays. Each of the Delay Time parameters can be set to a note length based on the selected tempo. You can also set the panning and level of each delay sound. fig.MFX-49 Balance D L in Delay 1 Feed... -
Page 74: 3D Delay
Effects List 3D DELAY This applies a 3D effect to the delay sound. The delay sound will be positioned 90 degrees left and 90 degrees right. fig.MFX-52 Level 3D Delay L 3D Delay C Feedback 3D Delay R Parameter Value Description Delay Left Adjusts the delay time from the... -
Page 75: Tape Echo
TAPE ECHO A virtual tape echo that produces a realistic tape delay sound. This simulates the tape echo section of a Roland RE-201 Space Echo. fig.MFX-55 L in Direct Level Echo Level Tape Echo Echo Level R in Direct Level... -
Page 76: Lofi Radio
Effects List LOFI RADIO In addition to a Lo-Fi effect, this effect also generates radio noise. fig.MFX-58 2-Band L in Lo-Fi Radio Lo-Fi 2-Band R in Parameter Value Description Degrades the sound quality. The sound qual- LoFi Type 1–9 ity grows poorer as this value is increased. Type of filter OFF: no filter is used OFF, LPF,... -
Page 77: 2Voi Pitch Shifter
2VOI PITCH SHIFTER (2VOICE PITCH SHIFTER) Shifts the pitch of the original sound. This 2-voice pitch shifter has two pitch shifters, and can add two pitch shifted sounds to the original sound. fig.MFX-62 L in Level 1 Pan 1 L Pan 1 R 2Voice Pitch Shifter Pan 2 L... -
Page 78: Overdrive → Chorus
Effects List GATED REVERB This is a special type of reverb in which the reverberant sound is cut off before its natural length. fig.MFX-65 L in Balance D Balance W Gated Reverb Balance W R in Balance D Parameter Value Description Type of reverb NORMAL, REVERSE,... -
Page 79: Distortion → Chorus
DISTORTION → CHORUS The parameters are essentially the same as in “66: OVERDRIVE CHORUS,” with the exception of the following two. Overdrive Drive → Distortion Drive, Overdrive Pan fig.MFX-69 L in Balance D Distortion Chorus R in Balance D DISTORTION → FLANGER The parameters are essentially the same as in “67: OVERDRIVE FLANGER,”... -
Page 80: Enhancer → Delay
Effects List ENHANCER → DELAY fig.MFX-74 L in Enhancer Balance D Feedback R in Enhancer Balance D Parameter Value Description Enhancer Sens 0–127 Sensitivity of the enhancer Level of the overtones generated Enhancer Mix 0–127 by the enhancer Adjusts the delay time from the Delay Time 0–2600 ms, note direct sound until the delay... -
Page 81: Chorus → Flanger
CHORUS → FLANGER fig.MFX-77 Balance D Balance D L in Feedback Balance W Chorus Flanger Balance W R in Balance D Balance D Parameter Value Description Chorus Pre Adjusts the delay time from the direct 0.0–100.0 ms Delay sound until the chorus sound is heard. Modulation frequency of the chorus Chorus Rate 0.05–10.00 Hz, note... -
Page 82: Chorus Parameters
Effects List Chorus Parameters The GW-8’s Chorus effect unit can also be used as a stereo delay unit. These settings allow you to select chorus or delay, and the characteristics of the selected effect type. Parameter Value Description Selects either Chorus or Delay. -
Page 83: Reverb Parameters
Reverb Parameters These settings allow you to select the desired type of reverb, and its characteristics. Parameter Value Description Type of reverb 0 (OFF): Reverb is not used. 1 (REVERB): Normal reverb 0 (OFF), 2 (SRV ROOM): This simulates typical room 1 (REVERB), acoustic reflections. -
Page 84: Tone List
Tone List Name Category MSB LSB Rich Grand AC.PIANO 88ConcertPno AC.PIANO UltimatGrand AC.PIANO X Pure Grand AC.PIANO So true... AC.PIANO ConcertPiano AC.PIANO Warm Piano AC.PIANO ConcertGrand AC.PIANO Hall Concert AC.PIANO Bright Tune AC.PIANO Mellow Tune AC.PIANO Studio Grand AC.PIANO DryStudio88 AC.PIANO First Choice AC.PIANO... - Page 85 Name Category MSB LSB Mid Pipe Org ORGAN Vodkakordion ACCRDION Squeeze Me! ACCRDION Guinguette ACCRDION HarWonderca HARMONICA BluesHrp V/S HARMONICA Green Bullet HARMONICA SC Brt Nylon AC.GUITAR SoftNyln Gtr AC.GUITAR SC Nylon Gt AC.GUITAR Wet Nyln Gtr AC.GUITAR Pre Mass Hum AC.GUITAR Thick Steel AC.GUITAR...
- Page 86 Tone List Name Category Movie Scene STRINGS Hybrid Str 1 STRINGS Gang Strangs STRINGS Clustered!?! STRINGS Full Strings STRINGS X StrSection STRINGS Oct Strings STRINGS Sahara Str STRINGS Random Mood STRINGS X Hall Str STRINGS SC Slow Str STRINGS Hybrid Str 2 STRINGS Biggie Bows STRINGS...
- Page 87 Name Category MSB LSB Wire Sync HARD LEAD Epic Lead HARD LEAD Bag Lead HARD LEAD Wezcoast HARD LEAD HyperJupiter HARD LEAD Vintagolizer HARD LEAD C64 Lead HARD LEAD 303 NRG HARD LEAD Cell SquLead SOFT LEAD SC Sqr Lead SOFT LEAD SH Sqr Lead SOFT LEAD...
- Page 88 Tone List Name Category Pulsator PULSATING Motion Bass PULSATING Sine Magic PULSATING Juno-D Slice PULSATING Pulsatron PULSATING Mega Sync PULSATING Passing by SYNTH FX Lazer Points SYNTH FX Retro Sci-Fi SYNTH FX Magic Chime SYNTH FX SC Try This! SYNTH FX New Planetz SYNTH FX Jet Noise...
- Page 89 Name Category MSB LSB SC Hollow SOFT PAD SC Sqr Pad SOFT PAD Silk Pad SOFT PAD WarmReso Pad SOFT PAD SC Soft Pad SOFT PAD Air Pad SOFT PAD Soft Breeze SOFT PAD JP Strings 1 SOFT PAD JP Strings 2 SOFT PAD DelayStrings SOFT PAD...
- Page 90 Tone List Name Category Vibraphone w MALLET Marimba MALLET Marimba w MALLET Xylophone MALLET Tubular-bell BELL Church Bell BELL Carillon BELL Santur PLUCKED Organ 1 ORGAN Trem. Organ ORGAN 60's Organ 1 ORGAN 70's E.Organ ORGAN Organ 2 ORGAN Chorus Or.2 ORGAN Perc.
- Page 91 Name Category MSB LSB 1079 Soundtrack SOFT PAD 1080 Crystal BELL 1081 Syn Mallet BELL 1082 Atmosphere AC.GUITAR 1083 Brightness OTHER SYNTH 1084 Goblin PULSATING 1085 Echo Drops BRIGHT PAD 1086 Echo Bell BRIGHT PAD 1087 Echo Pan BRIGHT PAD 1088 Star Theme BRIGHT PAD...
-
Page 92: Rhythm Set List
Rhythm Set List Preset Group Tone Name 1153 GW Std Kit 1154 WD Std Kit 1155 LD Std Kit 1156 TY Std Kit 1157 StandardKit1 1158 StandardKit2 1159 StandardKit3 1160 Rock Kit 1 1161 Rock Kit 2 1162 Brush Jz Kit 1163 Orch Kit 1164... - Page 93 Preset Group 1153 1154 Preset: GW Std Kit WD Std Kit Note No. Dance Kick Dance Kick Dry Kick 1 Dry Kick 1 Snr Roll Snr Roll Power Kick Power Kick Amb.Snr 2 Amb.Snr 2 Power Kick Reg.Kick 2 Reg.PHH Reg.PHH Reg.Kick Reg.Kick 1...
- Page 94 Rhythm Set List 1159 1160 Preset: StandardKit3 Rock Kit 1 Note No. HipHop Kick2 R&B Kick Syn Swt Atk1 Rk CmpKick Lo-Bit Stk 1 Sft Snr Gst TR707 Kick Dry Kick 4 TR808 Snr 5 Snr Roll Vint Kick 1 SH32 Kick Reg.PHH Reg.PHH...
- Page 95 1165 1166 Preset: Limiter Kit HipHop Kit 1 Note No. Dance Kick 1 PlasticKick2 HipHop Kick1 Group Snap WD CStk Snr Roll R&B Kick 1 AnalogKick 3 Wild Stick GoodOld Snr5 Dance Kick 2 Dist Kick Hip PHH Noise CHH LD Kick TR707 Kick R&B Kick 2...
- Page 96 Rhythm Set List 1171 1172 Preset: House Kit Nu Technica Note No. TR909 Kick 3 SH32 Kick 1 SH32 Kick JD EML 5th 1 Urbn Sn Roll AnalogKick 6 TR909 Kick 2 TR909 Kick 5 TR909 Snr 6 Plastic Kc3a TR909 Kick 5 R&B Kick TR909 PHH 2...
- Page 97 1177 1178 Preset: Snare Menu Snr/Rim Menu Note No. ----- ----- ----- ----- ----- ----- ----- ----- ----- ----- ----- ----- ----- ----- Reg.Snr1 p GoodOld Snr1 Reg.Snr1mf GoodOld Snr2 Reg.Snr1 f GoodOld Snr3 Reg.Snr1ff GoodOld Snr4 Reg.Snr2 p GoodOld Snr5 Reg.Snr2 f GoodOld Snr6 Reg.Snr2ff...
- Page 98 Rhythm Set List 1183 1184 Preset: Percussion Scrh&Voi&Wld Note No. Cowbell ----- Cowbell Mute ----- Cowbell2 Lng ----- Cowbell2 Edg ----- Cowbell3 mf ----- Cowbell3 f ----- Wood Block ----- Wood Block2H Scratch 1 Wood Block2L Scratch 2 Claves Scratch 3 TR808 Claves Scratch 4 Claves 2...
- Page 99 GM Group 1185 (PC: 1) 1186 (PC: 9) GM2 STANDARD GM2 ROOM Note No. High Q High Q Slap Slap Scratch Push Scratch Push Scratch Pull Scratch Pull Sticks Sticks Square Click Square Click Metron Click Metron Click Metron Bell Metron Bell Kick Drum 2 Kick Drum 2...
- Page 100 Rhythm Set List 1191 (PC: 41) 1192 (PC: 49) GM2 BRUSH GM2 ORCHSTRA Note No. High Q ClosedHi-hat Slap Pedal Hi-hat Scratch Push Open Hi-hat Scratch Pull Ride Cymbal1 Sticks Sticks Square Click Square Click Metron Click Metron Click Metron Bell Metron Bell Jazz Kick 2 Concert BD 2...
- Page 101 MEMO...
-
Page 102: Chord Intelligence
Chord Intelligence ● = Constituent notes of this chord ★ = Keys you need to press to hear this chord when “Chord Mode” in “Performance Parameters” is set to INTEL (p. 39) C#M7 C#m7 CmM7 C#mM7 Cdim C#dim Cm7 ( 5 ) C#m7 ( 5 ) Caug C#aug... - Page 103 ● = Constituent notes of this chord ★ = Keys you need to press to hear this chord when “Chord Mode” in “Performance Parameters” is set to INTEL (p. 39) F#M7 F#m7 F#mM7 GmM7 F#dim Gdim F#m7 ( 5 ) Gm7 ( 5 ) F#aug Gaug...
-
Page 104: Midi Implementation Chart
MIDI Implementation Chart Model: GW-8 Function... Basic Default Channel Changed Default Messages Mode Altered Note True Voice Number : Note ON Velocity Note OFF Key's Aftertouch Channel's Pitch Bend 0, 32 6, 38 Control Change 96, 97 98, 99 100, 101 102–119... -
Page 105: Specifications
CD-ROM Drive * While under most conditions, a computer similar to the above will permit normal operation of the GW-8 applications, Roland cannot guarantee compatibility solely on these factors. This is due to numerous variables that may influence the processing environment, such as differences in motherboard design and the particular combination of other devices involved. -
Page 106: Index
Index AC Adaptor ... 14 Accompaniment ... 25 ANALOG MODIFY ... 10, 37, 40 ANALOG MODIFY knobs ... 37 ANALOG MODIFY [SELECT] ... 37 Arabic ... 21 [ASSIGNABLE 1] ... 34–35 ASSIGNABLE 1/2 buttons ... 10 [ASSIGNABLE 2] ... 34–35 Assignable pedal ... - Page 107 [INTRO] ... 25 KBD Trans ... 22 [KEY SCALE] ... 11, 21 [KEY TOUCH] ... 11, 22 Keyboard Mode ... 19 [LCD CONTRAST] knob ... 12, 16 Legato Switch ... 40 Level Adjust ... 33 Loading User Data ... 49 Local Switch ...
- Page 108 Index Saving Performance ... 41 Playlist settings ... 33 Song ... 29 User Data to USB Memory ... 49 Screen Saver Time ... 46 [SELECT] ... 10, 37 Single mode ... 19 SMF ... 31 SMF/Audio files that can be played ... 31 SOLO ...
- Page 109 Information When you need repair service, call your nearest Roland Service Center or authorized Roland distributor in your country as shown below. PHILIPPINES AFRICA G.A. Yupangco & Co. Inc. 339 Gil J. Puyat Avenue EGYPT Makati, Metro Manila 1200, Al Fanny Trading Office...
- Page 110 For EU Countries For China...
- Page 111 DECLARATION OF CONFORMITY Compliance Information Statement Model Name : GW-8 Type of Equipment : Workstation Responsible Party : Roland Corporation U.S. Address : 5100 S. Eastern Avenue, Los Angeles, CA 90040-2938 (323) 890-3700 Telephone : NOTICE AVIS For EU Countries...
- Page 112 5120056...