Table of Contents

Related Manuals for Rinnai Infinity 24e


Summary of Contents for Rinnai Infinity 24e
- Page 1 Installation and User Manual Infinity 24e Infinity 24e Continuous Flow Water Heater Important. Read these instructions carefully before attempting installation or use of this appliance. All work must be carried out by competent persons.
-
Page 2: Rinnai Uk Warranty
Rinnai water heaters are installed in domestic and light commercial situations at operating temperatures below 65 storage cylinders or building flow and return systems. The warranty shall apply to any Rinnai water heater from the Infinity range used in this way. Definition of Commercial Use. -
Page 3: Table Of Contents
Technical Details..………………………… Features and Benefits……………………. Important Information…………………….. Operation without Remotes……………… Temperature Controls…………………….. Testing……………………………………… Gas Pressure Setting…………………….. Dip Switch Setting………………………… Error Messages…………………………… Restarting the Rinnai Water Heater…….. Wiring Diagram……………………………. Diagnostic Points………………………….. Specification……………………………….. Service Contact…………………………… Commissioning Check List……………….. CONTENTS …………………………………………………2 …………………………………….…………..4 …………………………………………………5 …………………………………………………8... -
Page 4: Unpacking Rinnai Water Heater
UNPACKING RINNAI WATER HEATER • After unpacking the appliance check for damage, if the heater is damaged contact your supplier immediately. Do not install a damaged appliance before checking with your supplier. • One remote control and heater accessories pack are inside the carton. -
Page 5: Installation Instructions
DO NOT INSTALL, contact your supplier. 3. This appliance is for normal hot water supply only and should not be used as pool or spa water heater. 4. The heater must be installed in the vertical position with the gas and water connections on the underside pointing vertically downward. - Page 6 Multiple heater installations can be installed with the heaters manifolded together. The heater draws combustion air through the casing for the external model. Heater guards and pipe cover boxes for security and safety are available from Rinnai.
- Page 7 1 mg/litre Levels Gas Connection Check pipe sizing required for the heater input. The heat input for the Infinity 24e is 52 kW. Refer to BS6891 (Natural Gas) and BS5482 (Propane) for guidance on correct pipe sizing calculation. Check that the size of the gas meter and pipework will be sufficient for all appliances on the main.
-
Page 8: Flue Requirements
FLUE REQUIREMENTS - POSITIONING Dimension Terminal Position Directly below an opening, air brick, opening windows, etc. Above an opening, air brick , opening window, etc. Horizontally to an opening, air brick , opening window, etc. Below gutters, soil pipes or drain pipes. Below eaves. -
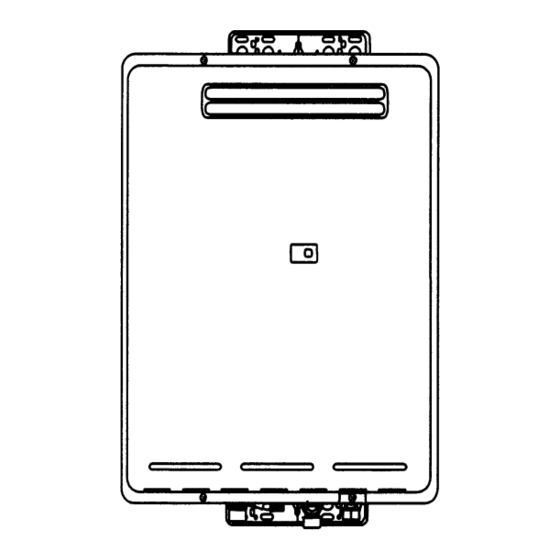
Page 9: Dimensions
DIMENSIONS... -
Page 10: Technical Details
Power Supply Elec. Consumption Standby (with 1 remote connected) Elec. Consumption Run Elec. Consumption Anti-frost Heaters On * Factory Setting **Minimum operation flow based on temperature setpoint and inlet conditions. Infinity 24e Units External mbar mbar mbar 22.6 mbar Forced Exhaust... -
Page 11: Features And Benefits
Congratulations on purchasing the Technologically Advanced, Temperature Controlled, Rinnai Hot Water System. • The Rinnai Infinity 24e NEVER RUNS OUT of hot water. As long as electricity, water, and gas supplies are connected, hot water is available when hot water taps are open. -
Page 12: Important Information
IMPORTANT INFORMATION Excessively hot water is dangerous, especially for young children and the infirm. The water heater allows you to control the temperature of your hot water to safe levels. Do stay with children whenever they are in the bathroom. - Page 13 Always check water temperature before use. Refer to warning about hot water on page 12 for important safety information. The Infinity 24e controls the water temperature automatically. For high temperatures it may reduce the flow. The water from the hot tap may be reduced after the temperature shown on the remote control is raised.
-
Page 14: Operation Without Remotes
Turn On by opening the hot water tap Rinnai Infinity water heaters without controllers are factory pre-set to a temperature limit of 55°C. Other limits, lower or higher, are available on request for the Infinity range. -
Page 15: Temperature Controls
Cables are simply ‘piggy-backed’ at the water heater or at the primary temperature controller. Polarity is not important when connecting the cables, either colour wire can be connected to either terminal at both the heater or primary temperature controller. - Page 16 TEMPERATURE CONTROLS - INSTALLATION Universal Temperature Controller 1. Determine the most suitable position for the temperature controller. 2. Drill 3 holes in the wall as shown in fig. 1, one for the cable and two for the securing screws. Ensure holes are drilled deep enough. Fit wall plugs if needed.
- Page 17 TEMPERATURE CONTROLS - INSTALLATION Connecting One or Two Controllers 1. Isolate the power supply. 2. Remove the front cover from the Appliance (4 screws) fig. 1. 3. Thread the cable through the cable access hole at the base of the appliance. 4.
-
Page 18: Temperature Controls
To obtain water temperatures lower than 37°C simply add cold water. Up to four controllers can be used for one Infinity 24e. When multiple temperature controllers are used they allow the temperature to be set from various locations by pushing the transfer button which gives that controller priority over the system. -
Page 19: Temperature Controls - Operating
TEMPERATURE CONTROLS - OPERATING Remote temperature controllers are a feature that provides control over the water temperature. Rinnai Infinity water heaters can be operated with 1, 2, 3, 4 or no temperature controllers. The Universal controller MC-91-1A comes as standard with all Infinity water heaters. - Page 20 TEMPERATURE CONTROLS - OPERATING Using 1 Universal Temperature Controller. Press the On/Off button on the temperature controller. The ON indicator will glow on the Temperature Controller. This indicates that the heater is ready to supply hot water when a tap is opened. Adjusting Temperature Simply press the Hot Water Temperature Up or Down arrow button until the desired temperature is displayed on the...
- Page 21 TEMPERATURE CONTROLS - OPERATING Using 2 or more Universal Temperature Controllers. Switching the system ON. The hot water system and all controllers can be switched ON and OFF from any controller by pressing the On/Off button as shown. When the system is turned ON the water temperature display will be lit.
- Page 22 TEMPERATURE CONTROLS - OPERATING Using 4 Universal Temperature Controllers. You will need to activate the fourth controller. STEP 1: On the Master controller press and hold the Transfer and On/Off buttons simultaneously (see fig 2.) until a “beep” is heard (approx. 5 seconds) Check that the display on all Four controllers is lit STEP 2: and displaying a temperature when switched on.
- Page 23 TEMPERATURE CONTROLS - OPERATING Using High Temperature Display Controllers. You will need to program the Master controller if you want to display and use temperatures over 50 C. Programming only needs to be done on Master universal controllers; other universal controllers will not allow this, and Deluxe Kitchen Controllers are supplied already programmed to allow high temperatures.
- Page 24 The on indicator will go out. If hot water taps are opened when the Rinnai Infinity is off, cold water will flow from the taps. If the system is to be left off over the winter be sure to drain it down if there is a possibility of freezing temperatures.
- Page 25 Temperature priority can not be switched to another controller when the water is flowing through the water heater. Controller 1 in use Do not clean the remote control with solvents or detergents.
-
Page 26: Testing
1. Purge gas, hot water and cold water supply lines before making the final connection of the water heater. Swarf in either the gas or water supplies may cause damage. 2. Turn on gas and cold water supplies. 3. Test for water leaks and gas escapes near the unit. -
Page 27: Gas Pressure Setting
GAS PRESSURE SETTING The working gas pressure on the water heater is electronically controlled and factory set. Under normal circumstances it does not require adjustment during installation. Perform this procedure only if the unit is not operating correctly and all other possible causes for incorrect operation have been eliminated. - Page 28 GAS PRESSURE SETTING 11.Remove rubber access plug and adjust the regulator screw on the modulating valve (fig. 4 and 4a) as required to the pressure below. 0.8 mbar Propane 1.7 mbar 12.Lock the regulating screw on the modulating valve. 13.Set the appliance to 'Forced High' combustion by setting both no.
-
Page 29: Dip Switch Setting
COMBUSTION NORMAL FORCED LOW OFF ON SW2 COMPUTER PROGRAMMING OFF ON SW2 Switch is always in the OFF position for the Infinity 24e OFF ON SW1 OFF ON SW2 2 on 3 off LEGEND: Black Section indicates position of dip switch. - Page 30 DIP SWITCH SETTING Temperatures - Remotes Connected on SWI on SWI 40 deg C 43 deg C on SWI on SWI 60 deg C 65 deg C Temperatures - Remotes Not Connected on SWI on SWI 40 deg C 43 deg C on SWI on SWI 60 deg C...
-
Page 31: Error Messages
* In all cases, you may be able to clear the Error code by turning the hot water tap OFF, then ON again. If this does not clear the error, try pushing the On/Off button OFF then ON again. If the Error Code still remains contact Rinnai or your nearest service agent for advice. - Page 32 Troubleshooting without controllers If you have not installed temperature controllers and experience the following symptoms, please carry out the suggestions below. If symptoms continue, please contact Rinnai for advice. Fault Heater does not attempt Check the power is on at the heater.
-
Page 33: Restarting The Rinnai Water Heater
If following the above procedure does not reset the heater switch it on and off at its main supply, and then go through these steps again. If heater is still not working call your local service agent or Rinnai for assistance. -
Page 34: Wiring Diagram
WIRING DIAGRAM 230 V... -
Page 35: Diagnostic Points
DIAGNOSTIC POINTS Diagnostic Points- To be read in conjunction with the wiring diagram. -
Page 36: Specification
Electrical Supply…………………………….…………..……………….230V AC 50Hz 1ph * Separate models available for Natural gas or LPG fuel. ** Minimum flow rate based on temperature setpoint and inlet conditions. Rinnai are continually updating and improving products and reserve the right to alter model specifications without prior notice. - Page 37 NOTES...
-
Page 38: Service Contact
SERVICE CONTACT Rinnai Rinnai UK LTD. 9 Christleton Court Manor Park Runcorn Cheshire WA7 1ST Tel. 01928 531870 Fax. 01928 531880 E-mail. info@rinnaiuk.com Web. www.rinnaiuk.com... -
Page 39: Commissioning Check List
COMMISSIONING CHECK LIST...