Table of Contents
Advertisement
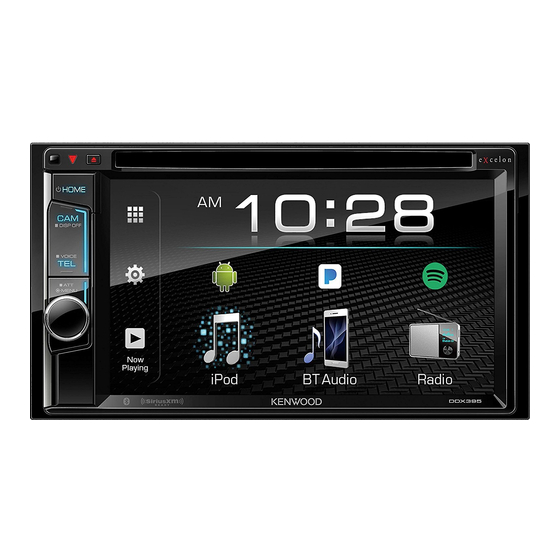
MONITOR WITH DVD RECEIVER
INSTRUCTION MANUAL
DDX395
(Region 1 – DVD Region Code 1 Area)
DDX375BT
(Region 1 – DVD Region Code 1 Area)
DDX350BT
(Region 1 – DVD Region Code 1 Area)
This instruction manual is used to describe the models listed above. Model availability and features (functions) may differ depending on the country and
sales area.
Take the time to read through this instruction manual.
Familiarity with installation and operation procedures will help you obtain the best performance from your new DVD-receiver.
For your records
Record the serial number, found on the back of the unit, in the spaces designated on the warranty card, and in the space provided below. Refer to the model and
serial numbers whenever you call upon your Kenwood dealer for information or service on the product.
Model DDX395/DDX375BT/DDX350BT/DDX25BT/DDX418BT Serial number
US Residents Only
© 2017 JVC KENWOOD Corporation
Register Online
Register your Kenwood product at www.kenwood.com/usa/
DDX25BT
(Region 1 – DVD Region Code 1 Area)
DDX418BT
(Region 4 – DVD Region Code 4 Area)
ENGLISH
B5A-2142-00 (KN/RN)
Advertisement
Table of Contents

Related Manuals for Kenwood DDX395


Summary of Contents for Kenwood DDX395
- Page 1 Record the serial number, found on the back of the unit, in the spaces designated on the warranty card, and in the space provided below. Refer to the model and serial numbers whenever you call upon your Kenwood dealer for information or service on the product.
- Page 2 • Do not expose the monitor to direct sunlight. – it may obstruct the steering wheel and gearshift • Do not operate the touch panel using a ball-point For DDX395/DDX375BT/DDX350BT/DDX25BT: lever operations. pen or similar tool with a sharp tip.
- Page 3 Important Notice Important Notice For DDX395/DDX375BT/DDX350BT/DDX25BT: FCC NOTE For DDX395/DDX375BT/DDX350BT/DDX25BT: This equipment has been tested and found to comply IC (Industry Canada) Notice CAUTION with the limits for a Class B digital device, pursuant This device complies with Industry Canada’s licence- This equipment complies with FCC/IC radiation to Part 15 of the FCC Rules.
-
Page 4: Table Of Contents
Information ..................34 Turning on the power ..............4 Preparation ..................34 Turning off the power ..............4 Illustrations of DDX395 are mainly used for Connection..................34 Putting the unit in standby ............4 explanation. Bluetooth mobile phone ............36 Turning off the screen ..............4... -
Page 5: Component Names And Operations
Component Names and Operations Component Names and Operations 7 CAM/DISP OFF button DDX395/DDX375BT DDX350BT/DDX25BT/DDX418BT • CAM (Press): Displays the picture from the connected rear view camera. • DISP OFF (Hold): Turns off the screen. 8 TEL/VOICE button • TEL (Press): Displays the phone control screen. -
Page 6: Basic Operations
Display OFF Turning off the power To turn on the screen: Touch the screen. On the monitor panel (Only for DDX395/DDX375BT) (Hold) (Hold) To turn on the screen: Press and hold DISP OFF on the monitor panel or touch the screen. -
Page 7: Adjusting The Volume
English. • GUI Language (Local (the language selected above)/English (Initial)): Selects the language used E.g. Initial settings screen for DDX395 for displaying operation keys and menu items. Once completed, Home screen appears. “Please Power Off” appears when the setting is changed. -
Page 8: Setting The Security Function
On the <Setup> setting screen, touch as follows: [System] <SI>: [ON] The security function is activated. E.g. Clock settings screen for DDX395 The security indicator on the monitor panel flashes when the vehicle ignition is off. • To delete the last entry, touch [Clear]. -
Page 9: Various Screens And Operations
Pandora source/option selection screen. Playing • To display the Home screen from other screens, press HOME. E.g. Source/option selection screen for DDX395 *1 Only for DDX418BT. Touching the operation keys performs the following *2 Only for DDX395/DDX375BT/DDX25BT. actions: *3 Only for DDX395/DDX375BT. -
Page 10: Source Control Screen
– To cancel the playback mode, touch repeatedly until the indicator disappears. E.g. Common audio playback source screen for Touching the operation keys performs the following DDX395 actions: 1 Displays/hides short-cut source selection keys. 2 Playback source or media type... -
Page 11: List/Setting Screen
• The appearance of the operation keys may differ, Display the pop-up short-cut menu. however the similar operation keys have the same operations. DDX395/DDX375BT DDX350BT/DDX25BT/ • Available operation keys differ depends on the DDX418BT setting screens. Not all these operation keys are shown on every screen. -
Page 12: Disc
8. Settings for disc playback • Available items shown on the <DISC Mode> screen E.g. Inserting a disc for DDX395 differ depending on the type of disc/file being played back. The source changes to “DISC” and playback starts. -
Page 13: Video
4:3 PS Select the initial subtitle language or turn subtitles off (Off). (Initial: English) E.g. Video playback source control screen for <Audio language>*1 DDX395 Select the initial audio language. (Initial: English) 1 Media type <File Type>*2 <Dynamic Range Control> 2 Playback status... - Page 14 • <Tint>: Adjusts the tint (−10 to +10). Touch [ Aspect] to select the aspect • <Sharpness>: Adjusts the sharpness ratio. E.g. Video menu control screen for DDX395 (−2 to +2). <Full>*2: For 16:9 original pictures [Audio] Selects the audio type.
-
Page 15: Usb
3 Touch [Enter] to confirm. To delete the last entry, touch [DIR/ CLR]. E.g. Video menu control screen for DDX395 [Return] Displays the previous screen or menu. * You need to stop playback to deactivate the PBC function when The source changes to “USB”... - Page 16 Select an item in each layer until you reach and Select the monitor type to watch a wide screen select the desired file. picture on the external monitor. E.g. USB source control screen for DDX395 16:9 (Initial) 4:3 LB 4:3 PS...
-
Page 17: Android
Rear panel APP” is shown on the Android device. Follow the instructions to install the application. • You can also install the latest version of KENWOOD Select a category ( ), then select a Music Play on your Android device before desired item ( connecting. -
Page 18: Ipod/Iphone
Rear panel • BROWSE MODE (Initial): Controls from the unit Setup> screen. (Page 46) (using the KENWOOD Music Play application). • HAND MODE: Controls other media player Selecting an audio file from the menu applications from the Android device (without using the KENWOOD Music Play application). -
Page 19: Radio
Radio Radio iPod/iPhone iPod/iPhone Operation keys on source control screen Select a category ( ), then select a Listening to the radio • The appearance of the operation keys may differ, desired item ( however the similar operation keys have the same Playback information on the source control iPod operations. - Page 20 To hide the window: Touch [ ]. Select a preset number to store into. Radio (Hold) E.g. Radio source control screen for DDX395 The station selected in step 1 is stored into the preset number [P1] to [P5] you have selected. ENGLISH...
-
Page 21: Siriusxm® Satellite Radio
SiriusXM® Satellite Radio SiriusXM® Satellite Radio (Only for DDX395/DDX375BT/DDX25BT) 1 Displays/hides other available operation keys* Only SiriusXM® brings you more of what you love Activating subscription 2 Selects the band (SXM1/SXM2/SXM3/SXM4) to listen to, all in one place. Get over 140 channels,... - Page 22 SiriusXM® Satellite Radio SiriusXM® Satellite Radio Operation keys on source control screen • To list all the channels, touch [All Channels]. • See also “Common operation keys on source control • Touch the info change key above the list Displays the <Channel List> screen. screen”...
- Page 23 SiriusXM® Satellite Radio SiriusXM® Satellite Radio Selecting a preset channel Replaying content Starts/pauses playback. Skips the current track/segment. You can pause, rewind and replay the contents from Select the band, then display the preset • Touching [ ] within 2 seconds the currently tuned channel.
- Page 24 SiriusXM® Satellite Radio SiriusXM® Satellite Radio For teams Content Alert TuneStart™ Display the <Alert Team Select> screen. When you select a SmartFavorites channel, you can The unit informs you when receiving the content you On the source control screen, touch as follows: listen to the current song from the beginning.
- Page 25 SiriusXM® Satellite Radio SiriusXM® Satellite Radio To delete the registered items: Touch and hold the Selecting items for Content Alert Activating Content Alert item you want to delete in step 2. You can select items (artists/songs/teams) from the For artists/songs/teams The [ ] icon and a check mark appear beside the registered items on the list to inform you once the unit selected item.
- Page 26 SiriusXM® Satellite Radio SiriusXM® Satellite Radio Enter a new four-digit code, then touch Setting reception restrictions Switching to registered content [Enter] to confirm. When an artist/song/team registered for Content Alert You can limit access to SiriusXM channels, such as is being broadcasted, an alert appears on the screen. Repeat step 3 above to confirm the new those with mature content.
- Page 27 SiriusXM® Satellite Radio SiriusXM® Satellite Radio To deactivate parental lock for all locked channels: Resetting the SiriusXM Satellite Radio Parental Lock channel selection Select [All Clear] for <Parental Lock Channel settings This option allows you to manually select the channels Selection>...
-
Page 28: Pandora
Pandora® Pandora® (Only for DDX395/DDX375BT/DDX350BT/DDX25BT) You can stream Pandora from iPhone/iPod touch or Install the latest version of the Pandora application on Playback operations Android devices. your smartphone. • Pandora is only available in certain countries. For • For Android devices: Search for “Pandora” in Google Playback information and key operation more information, visit <www.pandora.com/legal>. - Page 29 Pandora® Pandora® Operation keys on source control screen Select a station from the list. Selecting a station from the list • The appearance of the operation keys may differ, On the station list however the similar operation keys have the same Display the list selection screen.
-
Page 30: Iheartradio
(Only for DDX395/DDX375BT/DDX350BT/DDX25BT) iHeartRadio is a free, all-in-one digital radio service that Install the latest version of the iHeartRadio application Playback operations lets you listen to your favorite live stations or create on your smartphone. commercial-free, all-music custom stations featuring •... - Page 31 iHeartRadio iHeartRadio Operation keys on source control screen *1 Appears only for the custom station screen. Searching for a station • The appearance of the operation keys may differ, *2 Appears only for the live station screen. however the similar operation keys have the same Display the <Station Search>...
-
Page 32: Spotify
Spotify Spotify iHeartRadio iHeartRadio With Spotify, your music is everywhere. Working out, Install the latest version of the Spotify application on Editing the <Favorites> list partying or relaxing, the right music is always at your your smartphone. fingertips. There are millions of songs on Spotify—from •... - Page 33 Spotify Spotify Operation keys on source control screen *1 For DDX395/DDX375BT/DDX350BT/DDX25BT: Purchase optional Playback operations • The appearance of the operation keys may differ, remote controller, KNA-RCDV331. however the similar operation keys have the same *2 See “Operation keys on source control screen” above.
-
Page 34: Other External Components
Other External Components Other External Components Spotify Spotify AV-IN Rear view camera Selecting a track (Only for DDX418BT) Install the rear view camera (separately purchased) in Display the Spotify menu screen. the appropriate position according to the instructions Connecting an external component On the source control screen, touch as follows: supplied with the rear view camera. -
Page 35: Using An External Component Via Ads Adapter-Oem Features
Radio] satellite radio source provided for the adapter—OEM Features displayed vehicle. (Only for DDX395/DDX375BT) To adjust the picture [Media Displays the control screen of the Touch the area shown below. By connecting this unit to the bus system of the... -
Page 36: Bluetooth
Bluetooth® Bluetooth® Auto pairing Information Connection When <Auto Pairing> is set to [ON], Android or iOS Bluetooth is a short-range wireless radio When you connect a Bluetooth device to the unit for (such as iPhone) devices are automatically paired communication technology for mobile devices such as the first time: when connected via USB. - Page 37 Bluetooth® Bluetooth® Pairing a Bluetooth device using a PIN code (for • If a PIN code is required, enter “0000” (initial) or Select the device ( ) to connect, then Bluetooth 2.0) new PIN code you have entered in step 2. return to the <Paired Device List>...
-
Page 38: Bluetooth Mobile Phone
Bluetooth® Bluetooth® To delete the registered device: Perform step 1, During a call... Making a call select the device you want to delete in step 2, then touch [Remove]. Display the phone control screen. Device Name 1 Device Name 2 •... - Page 39 Bluetooth® Bluetooth® When item 4 is selected in step 2: Select a contact ( ), then make a call ( Switching between two connected devices When item 1, 2 or 3 is selected in step 2: Enter the phone number ( ), then make a You can change the device to use when 2 devices are call (...
-
Page 40: Bluetooth Audio Player
Presetting phone numbers title) You can preset up to five phone numbers. • Pressing [<] scrolls the text if not all of the text is KENWOOD Music Mix shown. Display the phone control screen. 2 Signal strength and battery level When “BT Audio”... -
Page 41: Bluetooth Settings
Bluetooth® Bluetooth® Bluetooth settings <Auto Connect> Selecting an audio file from the menu • ON (Initial): Automatically establishes a You can change various settings for using Bluetooth Display the audio menu. connection with the last connected Bluetooth devices on the <Bluetooth Setup> screen. On the source control screen, touch as follows: device when the unit is turned on. -
Page 42: Settings
Select a preset sound mode on the <Equalizer> Time Alignment Enter screen. • Natural (Initial)/Rock/Pops/Easy/Top40/Jazz/ Adjust the sound as follows: E.g. Audio settings screen for DDX395 Powerful/User <Q factor> You cannot change the <Audio> screen in the Equalizer SRC Name Adjusts the width of the frequency. - Page 43 Settings Settings *1 You cannot change the setting when “Radio” is selected as the <Sound Effect> <Speaker/X’over> source. Adjust the sound effect. Setting the speakers and crossover *2 This function works only when “DISC”/ “USB”/ “iPod”/ <Loudness> frequency “Android™” is selected as the source. Adjusts loudness.
- Page 44 Settings Settings <Time Alignment> Adjust the crossover frequency of the Determining the value for <Position DTA> adjustment selected speaker. Make fine adjustments to the delay time of the speaker If you specify the distance from the center of the • Adjustable items vary depending on the selected output to create a more suitable environment for your currently set listening position to every speaker, the speaker type/speaker size/crossover settings.
-
Page 45: Display Settings
Dimmer Auto On the <Display> screen, touch as follows: Display User Customize Enter <User Customize>: [Enter] Input OSD Clock System Demonstration Display the background design selection Scroll Once screen, then touch [ Capture]. E.g. Display settings screen for DDX395 ENGLISH... - Page 46 Cancel • OFF: Cancels. <Black> Adjusts blackness. Touching [<] scrolls the text regardless of this setting. E.g. Image adjustment screen for DDX395 • –10 to +10 (Initial: 0) ] Moves the zooming frame. <Home Customize> <Video Output> Magnifies the scene.
-
Page 47: Input Settings
Input Then, on the <Setup> screen, touch [System]. System Initialize Setup Language Audio English E.g. Input settings screen for DDX395 Clock Display Enter Make sure that A and B are horizontally parallel, and Smartphone Setup Input Enter that C and D are the same length. - Page 48 Select this when the device is [Change] ( connected via Bluetooth. (Go to <OEM Setup> Smartphone Setup step 3.) (Only for DDX395/DDX375BT) Initial Information If [Android/Other] is selected in step 1: Device Type iPod / iPhone Get information, and change the settings for using the...
- Page 49 <Serial Number> (Only for DDX418BT) [Done] on the <Steering Remote Control Setting> (Only for DDX395/DDX375BT/DDX25BT) Assign functions to the keys of the remote controller screen. However, new functions cannot be learned on the steering wheel.
-
Page 50: Remote Controller
CAUTION remote controller (RC-DV340) supplied with this unit. Update the system by connecting a USB device • For DDX395/DDX375BT/DDX350BT/DDX25BT: • Put the Remote Controller in a place where it will containing an update file. not move during braking or other operations. A Optional remote controller KNA-RCDV331 is •... -
Page 51: Preparation
Remote Controller Remote Controller Preparation Basic operations for RC-DV340 (supplied) Remote Controller mode switch The functions operated from the remote controller Battery installation Common operations (AUD mode) differ depending on the position of the mode switch. Use two “AAA”/“R03”-size • Selects the source. batteries. - Page 52 Confirm the selection. AUDIO Changes the voice language. • For station frequency: Press *1 Only for DDX395/DDX375BT/DDX25BT. • The voice language changes each • For others: Press ENTER. *2 The search method differs according to the selected seek mode. time you press this key.
-
Page 53: Basic Operations For Kna-Rcdv331 (Optionally Purchased)
Remote Controller Remote Controller Basic operations for KNA-RCDV331 MAP DIR/OPEN Not used for this unit. * +/CLEAR Deletes a character while in direct search mode. (optionally purchased) NAV/DISP Not used for this unit. # BS/DIRECT Enters direct search mode. ZOOM OUT/IN Not used for this unit. - Page 54 Specifies the frequency of the To exit the search mode: Press # BS/DIRECT. station to receive to search for in direct search. # BS/DIRECT Enters direct search mode. *1 Only for DDX395/DDX375BT/DDX25BT. *2 The search method differs according to the selected seek mode. ENGLISH...
-
Page 55: Kenwood Remote App
Remote Controller Before installation KENWOOD Remote APP WARNINGS KENWOOD Remote is an application that connects • DO NOT connect the ignition wire (red) and the Precautions on installation and connection and controls compatible KENWOOD car receivers via battery wire (yellow) to the car chassis (ground), you •... - Page 56 Connect the speaker wires of the wiring “ Microphone, 3 m (× 1) fuse with one with the same rating. harness. Only for DDX395/DDX418BT • Insulate unconnected wires with vinyl tape or other ] Trim plate (× 1) Connect the wires of the wiring harness similar material.
-
Page 57: Installing The Unit
Remove from the upper two catches of Installing the unit Installing the trim plate the trim plate ( (Only for DDX395/DDX418BT) Installing the unit using the mounting bracket removed from the car π / [ The frame can be removed from the top side in the π... -
Page 58: Wiring Connection
Installation and Connection Installation and Connection Wiring connection 10 A fuse *1 Only for DDX395/DDX375BT/DDX25BT. *2 Only for DDX395/DDX375BT. “ *3 Only for DDX418BT. Connect the antenna cord to the antenna terminal USB input terminal (1 m) Purple with white stripe To the car’s reverse lamp harness when using the optional rear view camera... -
Page 59: Connecting External Components
FRONT: Front speaker preouts damage the monitor or the unit. SW: Subwoofer preouts • Gently wipe the panel with a soft, dry cloth. *1 Only for DDX395/DDX375BT/DDX25BT. Handling discs *2 Only for DDX395/DDX375BT. • Do not touch the recording surface of the disc. - Page 60 References References – AAC files copy-protected with FairPlay (except • This unit can play back files that meet the conditions Picture files those stored on an iPod/iPhone). below: • This unit can play back the following files with – Bit rate: –...
- Page 61 • Some recordable/rewritable discs or files may not be Finnish Kirghiz played back due to their characteristics or recording Sangho WO Wolof Fiji Latin conditions. Serbo-Croatian Xhosa Faroese Lingala Singhalese Yoruba * Only for DDX395/DDX375BT/DDX350BT/DDX25BT. Frisian Laothian Slovak Zulu Irish Lithuanian Slovenian ENGLISH...
- Page 62 References References • Electrostatic shock at connecting a USB device may iPod/iPhone that can be connected About USB playback cause abnormal playback of the device. In this case, • Via the USB terminal: Important disconnect the USB device then reset this unit and Made for Make sure all important data has been backed up to –...
-
Page 63: Troubleshooting
No playback picture is shown when the parking may not be performed correctly or as intended. In center. brake is not engaged. this case, visit the following KENWOOD web site: • For operations with external components, refer also “Learning Process Failed” appears. <www.kenwood.com/cs/ce/>... - Page 64 A lot of noise is generated. The tracks are not properly copied into the USB Make sure KENWOOD Music Play APP is installed on Turn off (uncheck) “VoiceOver” on the iPod/ iPhone. device. Copy the tracks again, and try again.
- Page 65 “Login Error” appears. Your subscription has been updated. Press the You have not been signed into Pandora. * Only for DDX395/DDX375BT/DDX350BT/DDX25BT. appropriate button to continue. “No skips remaining” appears. “SXM Channel Locked” appears. No more songs can be skipped.
-
Page 66: Specifications
Specifications Specifications Troubleshooting Troubleshooting The unit does not respond when you try to copy Bluetooth Monitor section the phone book to the unit. Phone sound quality is poor. Picture Size (W × H) 6.2 inches (diagonal) wide You may have tried to copy the same entries (as Reduce the distance between the unit and the 137.5 mm ×... - Page 67 Specifications Specifications 2 Way X'Over DVD player section Bluetooth section Tweeter: Frequency (Hz): D/A Converter 24 bit Technology Bluetooth 3.0 1k/1.6k/2.5k/4k/5k/6.3k/8k/ Audio Decoder Linear PCM/Dolby Audio/ Frequency 2.402 GHz to 2.480 GHz 10k/12.5k MP3/WMA/WAV/AAC (.m4a) Output Power +4 dBm (MAX), 0 dBm (AVE), Gain (dB): Video Decoder DivX*/MPEG1/MPEG2/JPEG...
- Page 68 Full Bandwidth 22 W × 4 (at less than 1% AM tuner section Temperature Range Power (Front & Rear) THD) DDX395: 2.0 kg (4.4 lbs) Weight (Main Unit) Frequency Range 530 kHz to 1 700 kHz (10 kHz) DDX395: Preout Level...
-
Page 69: Trademarks And Licenses
Bluetooth SIG, Inc. and any – Redistributions in binary form must reproduce the use of such marks by JVC KENWOOD Corporation is premium content. – DivX®, DivX Certified® and associated logos are under license. Other trademarks and trade names are above copyright notice, this list of conditions and those of their respective owners. - Page 70 For updated information (the latest Instruction Manual, system updates, new functions, etc.), please visit the following website: <www.kenwood.com/cs/ce/>...