Table of Contents
Advertisement
© 2011 JVC KENWOOD Corporation
DDX6031BT
DDX6031BTM
DDX6031
DDX6031M
DDX4031BT
DDX4031BTM
DDX4031
DDX4031M
MONITOR WITH DVD RECEIVER
INSTRUCTION MANUAL
This instruction manual is used to describe models listed
below. Model availability and features (functions) may differ
depending on the country and sales area.
• Region 2 (DVD Region Code 2 area)
• Region 3 (DVD Region Code 3 area)
• Region 4 (DVD Region Code 4 area)
• Region 6 (DVD Region Code 6 area)
LVT2271-001A (MN/M2N/XN)
Advertisement
Table of Contents

Related Manuals for Kenwood DDX6031BT


Summary of Contents for Kenwood DDX6031BT
- Page 1 • Region 2 (DVD Region Code 2 area) • Region 3 (DVD Region Code 3 area) • Region 4 (DVD Region Code 4 area) • Region 6 (DVD Region Code 6 area) © 2011 JVC KENWOOD Corporation LVT2271-001A (MN/M2N/XN)
-
Page 2: Table Of Contents
Locking the settings ..........45 functions ........8 Adjusting the touch position ......45 Setting the clock ......10 BLUETOOTH OPERATIONS Common operations ....11 (Only for DDX6031BT/DDX6031BTM/ Turning on the power ..........11 DDX4031BT/DDX4031BTM) Turning off the power ..........11 Adjusting the volume ...........11 Information for using Bluetooth®... -
Page 3: Before Use
• Do not operate the touch panel using a ball-point pen or similar tool with the sharp How to read this manual: • Illustrations of DDX6031BT are mainly tip. used for explanation. Press the buttons on the touch panel with •... - Page 4 DDX6031BTM/DDX6031M/DDX4031BTM/ DDX4031M : Declaration of Conformity with regard to the EMC Directive 2004/108/EC Manufacturer: JVC KENWOOD Corporation 3-12 Moriya-cho, Kanagawa-ku, Yokohama- shi, Kanagawa, 221-0022, Japan EU Representative’s: Kenwood Electronics Europe BV Amsterdamseweg 37, 1422 AC UITHOORN, The Netherlands DDX6031BT/DDX6031BTM/DDX6031/DDX6031M/DDX4031BT/DDX4031BTM/DDX4031/DDX4031M...
-
Page 5: Introductions
INTRODUCTIONS Initial Settings Initial setup Adjusting the panel angle When you power on the unit for the first time (Only for DDX6031BT/DDX6031BTM/ or reset the unit, the initial setting screen DDX6031/DDX6031M ) appears. You can change the panel angle. • You can also change the settings on the <Setup>... -
Page 6: Updating The System
* If the update has failed, turn the power off and then on, and retry the update. * Even if you have turned off the power during update, you can restart the update after the power is turned on. The update will be performed from the beginning. DDX6031BT/DDX6031BTM/DDX6031/DDX6031M/DDX4031BT/DDX4031BTM/DDX4031/DDX4031M... -
Page 7: Setting The Security Function
Setting the security function Enter a four-digit number (1), then confirm the entry (2). You can set a security code to protect your receiver system against theft. Deletes the last entry Registering the security code Display the security code setting screen. On <Top Menu>: Cancels the setting Repeat step... -
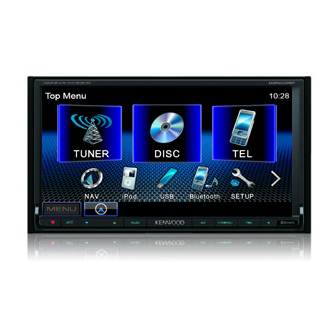
Page 8: Component Names And Functions
• Attenuates the sound. • Displays the <Top Menu> screen. V.OFF button (Hold) (Press) (☞ page 12) • Turns off/on the screen. (☞ page 11) 8 For DDX6031BT/DDX6031BTM: 3 Volume (down) button (☞ page 11) TEL button (Press) • Decreases the volume. - Page 9 DDX4031BT/DDX4031BTM/DDX4031/DDX4031M 6 AV/AV OUT button • Displays the current source screen. (Press) • Selects the AV source for external monitor or amplifier. (Hold) 7 For DDX4031BT/DDX4031BTM: TEL/V.OFF button • Displays the <Handsfree> screen. (Press) (☞ page 47) • Turns off/on the screen. (Hold) (☞ page 11) For DDX4031/DDX4031M: AUD/V.OFF button...
-
Page 10: Setting The Clock
3:30 – 3:59 = 4:00 Finish the procedure. • The time format of the clock display differs as follows: 24 hours: Region 2/3/6 models 12 hours: Region 4 models Appears only when the navigation unit is connected. Not selectable for Region 4/6 models. DDX6031BT/DDX6031BTM/DDX6031/DDX6031M/DDX4031BT/DDX4031BTM/DDX4031/DDX4031M... -
Page 11: Common Operations
(Hold) DDX6031/DDX6031M DDX4031/DDX4031M The screen is turned off. To turn on the screen, press MENU/ . The ATT indicator lights up. To cancel the attenuation, press the ATT button ( DDX6031BT/DDX6031BTM/ DDX6031/DDX6031M) or VOL/ATT knob ( DDX4031BT/DDX4031BTM/DDX4031/ DDX4031M) again. English... -
Page 12: Switching Screens
Displays the source control screen while playing a video. • The operation buttons disappear by touching the screen or when no operation is done for about 5 seconds. Not available for video from an external component and rear view camera. DDX6031BT/DDX6031BTM/DDX6031/DDX6031M/DDX4031BT/DDX4031BTM/DDX4031/DDX4031M... -
Page 13: Av Source Operations Selecting The Playback Source
DDX6031BT/DDX6031BTM/ DDX4031/DDX4031M DDX6031/DDX6031M (Hold) • For DDX6031BT/DDX6031BTM/DDX6031/DDX6031M, pressing and holding TEL hides the operation buttons. For DDX4031BT/DDX4031BTM/DDX4031/DDX4031M, pressing FNC/R- CAM hides the operation buttons. • The operation buttons disappear by touching the screen or when no operation is done for about 5 seconds. -
Page 14: Disc Operations
When removing a disc, pull it horizontally. Label side Closing the monitor panel (For DDX6031BT/DDX6031BTM/ DDX6031/DDX6031M) After removing the disc, press the eject button again. The monitor panel closes. The source changes to “DISC” and playback starts. -
Page 15: Playable Disc Types
Playable disc types Disc type Recording format, file type, etc Playable DVD-Video * Region Code: • For DDX6031BT/DDX6031/DDX4031BT/ DDX4031 : 3/4/6 (depending on the country and sales area) • For DDX6031BTM/DDX6031M/DDX4031BTM/ DDX4031M : 2 DVD-Audio/DVD-ROM DVD Recordable/ DVD-Video Rewritable DVD-VR *... -
Page 16: Playback Operations
] Selects folder. Displays folder/track list. (☞ page 17) ☞ To display the Original Program/Playlist screen, page 18. Does not appear for DVD/DVD-VR/JPEG. Appears only for DVD/DVD-VR/VCD. Search speed varies depending on the type of disc or file. Does not appear for VCD. DDX6031BT/DDX6031BTM/DDX6031/DDX6031M/DDX4031BT/DDX4031BTM/DDX4031/DDX4031M... - Page 17 To display the source control screen, ☞ page 13. For CD/MP3/WMA/WAV/AAC Track/file information • Pressing [<] scrolls the text if not all of the text is shown. Media type Playing time Playback status (3: play / 8: pause ) • MP3/WMA/WAV/AAC: Folder no./Track no.
- Page 18 [Picture Displays picture adjustment • The screen for MPEG1/MPEG2 differs from Adjust] screen. (☞ page 37) the above. [Aspect] Selects aspect ratio. (☞ page 38) [ZOOM] Displays the picture size selecting screen. (☞ page 38) DDX6031BT/DDX6031BTM/DDX6031/DDX6031M/DDX4031BT/DDX4031BTM/DDX4031/DDX4031M...
- Page 19 Only for VCD • To deactivate the PBC function, press [7] then the direct selecting buttons to select a track number. Selecting playback mode For DVD/DVD-VR Selects Repeat playback mode For VCD (without PBC)/CD/DivX/MPEG1/ MPEG2/MP3/WMA/WAV/AAC ☞ Direct selecting buttons ( below) Selects Random Selects Repeat...
-
Page 20: Settings For Disc Playback
: Plays back audio files and DivX/MPEG1/MPEG2 ♦ Audio&Video files. • For playable file types, ☞ page 15. • If the disc contains no files of the selected type, the existing files are played in the following order: audio, video, then still image. DDX6031BT/DDX6031BTM/DDX6031/DDX6031M/DDX4031BT/DDX4031BTM/DDX4031/DDX4031M... -
Page 21: Usb Operations
USB operations Playing a USB device • This unit can play JPEG/DivX/MPEG1/ Cautions: MPEG2/MP3/WMA/WAV/AAC files stored in • This unit may not play back files in a a USB mass storage class device. USB device properly when using a USB •... - Page 22 (PanScan) in the following order: audio, video, then still image. Setting <Drive Select> Press [Next] to switch to another USB device when multiple USB devices are connected via a USB hub or the like. DDX6031BT/DDX6031BTM/DDX6031/DDX6031M/DDX4031BT/DDX4031BTM/DDX4031/DDX4031M...
-
Page 23: Listening To The Ipod/Iphone Device
Listening to the iPod/iPhone device Preparation • Connect iPod/iPhone. (☞ page 71 ) • Use the following cables: – To watch the video and to listen to the music (analog): USB Audio and Audiobooks Selects the speed of Video cable for iPod/iPhone— KCA-iP202 audio books. -
Page 24: Ipod/Iphone Playback Operations
• For some iPod/iPhone models, the performance may be abnormal or unstable during operation. In this case, disconnect the iPod/iPhone device, then check its condition. If the performance is not improved or is slow, reset your iPod/iPhone. • For the latest compatible list and software version of iPod/iPhone, see: www.kenwood.com/cs/ce/ipod DDX6031BT/DDX6031BTM/DDX6031/DDX6031M/DDX4031BT/DDX4031BTM/DDX4031/DDX4031M... -
Page 25: Selecting A Track/Video From Menu On The Ipod/Iphone
Selecting a track/video from Operating in iPod/iPhone menu on the iPod/iPhone control mode You can play back the audio/video using iPod/iPhone itself instead of the unit. Audio: Select the menu (Music or Video) (1), a category (2), then a desired item (3). •... -
Page 26: Listening To The Radio
(☞ above) [Text]* Displays/hides the [MENU] Displays <Top Menu> information of the current ☞ station ( page 27). screen. Appears only for Region 2/3 models. Appears only when FM is selected as the source. DDX6031BT/DDX6031BTM/DDX6031/DDX6031M/DDX4031BT/DDX4031BTM/DDX4031/DDX4031M... - Page 27 • This feature is available only for Region 4/6 models. Press the Reset button while holding the following buttons. • Release them after the message appears. DDX6031BT/DDX6031 DDX4031BT/DDX4031 Select this to tune in only to stations with sufficient signal • Each time you perform the procedure, the strength.
-
Page 28: Storing Stations In Memory
The station selected in step is stored. Selecting a preset station • Only English/Spanish/French/German/ Dutch/Portuguese are available for the text language here. If another language has been selected in <Language> (☞ page 43), the text language is set to English. DDX6031BT/DDX6031BTM/DDX6031/DDX6031M/DDX4031BT/DDX4031BTM/DDX4031/DDX4031M... - Page 29 Activating/deactivating TI/News Standby Reception • This feature is available only for Region 2/3 models. TI Standby Reception News Standby Reception TI indicator NEWS indicator TI indicator TI Standby Reception Lights in The unit will temporarily white switch to Traffic Information (TI) if available.
-
Page 30: Auto Tp Seek
(the AF indicator lights up). AF Reg Switches to another station broadcasting the same program (the AF indicator lights up). Cancels. • The RDS indicator lights up when the Network-Tracking Reception is activated and an FM Radio Data System station is found. DDX6031BT/DDX6031BTM/DDX6031/DDX6031M/DDX4031BT/DDX4031BTM/DDX4031/DDX4031M... -
Page 31: Using Other External Components
Using other external components To display the source control screen, ☞ page 13. ☞ AV-IN name ( below) ☞ page 32 [Mode] Changes the AV-IN name. • Press [2] or [3] to select an AV-IN name. • This setting does not affect the source name “AV-IN 1”/ “AV-IN 2” displayed on <Top Menu>. -
Page 32: Using The External Navigation Unit
Adjust the volume of the <Aspect> setting (☞ page 38). navigation guidance. (0 to 35) To cancel the navigation screen NAV Mute Select <ON> to attenuate the sound DDX6031BT/ DDX4031BT/ coming through DDX6031BTM/ DDX4031BTM/ speakers other than the DDX6031/DDX6031M DDX4031/DDX4031M front speakers during navigation guidance. -
Page 33: Sound Adjustment
Sound adjustment Using the sound equalization • The adjustment is memorized for each source until you adjust the sound again. If the source is a disc, the adjustment is stored for each of the following categories. – DVD/DVD-VR – VCD/CD –... -
Page 34: Adjusting The Cross Over Frequency
Selects the phase for the subwoofer. * Adjusts the subwoofer level. Adjustable only when the subwoofer is activated. ☞ page 41) Adjustable only when the subwoofer is ☞ activated. ( page 41) Not selectable when <Freq> is set to <Through>. DDX6031BT/DDX6031BTM/DDX6031/DDX6031M/DDX4031BT/DDX4031BTM/DDX4031/DDX4031M... -
Page 35: Changing The Display Design
Changing the display design You can change the background and panel color. To select a panel color On <Top Menu>: Variable color illumination • Illumination color changes gradually. For making your own color ☞ adjustment, below Making your own color adjustment •... - Page 36 AV-IN input terminal. Capture the image displayed on the screen. A confirmation message appears. Press [Yes] to store the newly captured image. (The existing image is replaced with the new one.) • Press [No] to return to the previous screen. DDX6031BT/DDX6031BTM/DDX6031/DDX6031M/DDX4031BT/DDX4031BTM/DDX4031/DDX4031M...
-
Page 37: Setting For Video Playback
Setting for video playback You can change the setting for video playback. Picture adjustment Adjust the picture (–15 to +15). You can adjust the picture quality. Display the adjustment menu. Adjusts the brightness Adjusts the contrast Adjusts the black Adjusts the color Adjusts the tint* Adjusts the sharpness Adjustable only when the incoming signal is... -
Page 38: Changing The Aspect Ratio
For 16:9 original pictures JUST: For 4:3LB [5] [∞] [2] [3] : Moves the zooming original frame. pictures Normal*: For 4:3 original pictures Auto: • For “DISC”/”USB” only: Aspect ratio is automatically selected to match to the incoming signals. DDX6031BT/DDX6031BTM/DDX6031/DDX6031M/DDX4031BT/DDX4031BTM/DDX4031/DDX4031M... -
Page 39: Using A Rear View Camera
On <Top Menu>: shift the gear to the reverse (R) position. • To erase the caution message, touch the screen. To display the picture from the rear view camera manually DDX6031BT/ DDX4031BT/ DDX6031BTM/ DDX4031BTM/ DDX6031/DDX6031M DDX4031/DDX4031M To deactivate, select <OFF>. -
Page 40: Using The Steering Remote Controller
• Confirm the contents of the settable function on the function list. You cannot edit the function list. Initializing the settings In step 2 in the left column: Press a steering remote controller button to register/ change. Select a function to assign. DDX6031BT/DDX6031BTM/DDX6031/DDX6031M/DDX4031BT/DDX4031BTM/DDX4031/DDX4031M... -
Page 41: Setting Menu Items
Setting menu items • You cannot change <Audio> settings when the unit is in standby. Menu item Selectable setting/item Initial: Underlined Fader/Balance Fader : Adjust the front and rear speaker output balance. ♦ F6 to R6; Initial 0 • When using a two-speaker system, set the fader to the center (0). - Page 42 Select the color system of the external monitor. ♦ NTSC/PAL Angle Adjust the panel angle. (☞ page 5) Only for DDX6031BT/ DDX6031BTM/ DDX6031/DDX6031M “Please power off” appears when the setting is changed. Turn off the power, then turn on to enable the change.
- Page 43 Menu item Selectable setting/item Initial: Underlined AV Input You can determine the use of AV-IN input terminal. ♦ AV-IN2 : Select to play an AV component connected to the AV-IN input terminal. ♦ iPod : Select when connecting the iPod/iPhone using the USB Audio and Video cable for iPod/iPhone.
- Page 44 (☞ page 40) System Information Displays the version information on the software. You can update the software. (☞ page 6) “Please power off” appears when the setting is changed. Turn off the power, then turn on to enable the change. DDX6031BT/DDX6031BTM/DDX6031/DDX6031M/DDX4031BT/DDX4031BTM/DDX4031/DDX4031M...
-
Page 45: Memorizing/Recalling The Settings
Memorizing/recalling the Locking the settings settings You can lock the settings to prevent them from being changed. You can memorize the settings changed • is shown beside the settings that can in the <Setup> menu and recall the be locked. memorized settings anytime. -
Page 46: Bluetooth Operations
BLUETOOTH OPERATIONS (Only for DDX6031BT/DDX6031BTM/DDX4031BT/DDX4031BTM ) Information for using Bluetooth® devices • While driving, do not perform complicated operations such as dialing the numbers, using phonebook, etc. When you perform these operations, stop your car in a safe place. • Some Bluetooth devices may not be connected to this unit depending on the Bluetooth version of the device. -
Page 47: Connecting Bluetooth Devices
Connecting Bluetooth devices Connecting a new Bluetooth For connecting a Bluetooth mobile phone device for the first time When you connect a Bluetooth device to the unit for the first time, make pairing between the unit and the device. Pairing allows <Handsfree Mode>... -
Page 48: Deleting A Registered Bluetooth Device
(☞ page 47) Select a device to delete the • For Bluetooth mobile phone: registration. <Handsfree Mode> • For Bluetooth audio player: <Bluetooth Mode> To connect Confirmation message appears. Press [Yes]. Select the device you want to connect. DDX6031BT/DDX6031BTM/DDX6031/DDX6031M/DDX4031BT/DDX4031BTM/DDX4031/DDX4031M... -
Page 49: Using The Bluetooth Mobile Phone
Using the Bluetooth mobile phone Adjusting the volume of Receiving a call microphone When a call comes in... Call information While talking... (if acquired) Rejects the call • This adjustment does not affect the volume Status of the device/Battery reminder (only level of the other sources. -
Page 50: Making A Call
the right column) • Available only when the connected mobile phone has the voice recognition system. Speak the name you want to call. Preset list (For presetting, ☞ page 52) To cancel, press [Cancel]. ☞ Voice dialing ( the right column) DDX6031BT/DDX6031BTM/DDX6031/DDX6031M/DDX4031BT/DDX4031BTM/DDX4031/DDX4031M... - Page 51 Using the phonebook/call lists Select the initial. If the initial is not a letter or number, press [Others]. Outgoing From dialled call list. Select a phone number from Incoming From received call list. the list. Missed From missed call list. Phonebook From phonebook.
- Page 52 • Refer to the instruction manual initialize the settings from <Initialize> in supplied with your mobile phone. <Handsfree Mode>. (☞ page 55) • To cancel the transfer, press [Finish]. Finish the procedure. The phonebook memory is copied from the mobile phone. DDX6031BT/DDX6031BTM/DDX6031/DDX6031M/DDX4031BT/DDX4031BTM/DDX4031/DDX4031M...
- Page 53 Deleting the phone number About mobile phones entries in the unit compatible with Phone Book Access Profile (PBAP) Display the phonebook/call If your mobile phone supports PBAP, the list you want to delete. (☞ page phonebook and call lists are automatically copied to the unit when the mobile phone is connected.
-
Page 54: Using The Bluetooth Audio Player
Displays <Top Menu> [4][¢] • Selects track. (Press) screen. • Reverse/forward search* (Hold) Available only for the devices compatible with AVRCP 1.3. Bluetooth device settings For Bluetooth mobile phone: For Bluetooth audio player: On <Top Menu>: On <Top Menu>: DDX6031BT/DDX6031BTM/DDX6031/DDX6031M/DDX4031BT/DDX4031BTM/DDX4031/DDX4031M... - Page 55 PIN Code Changes the PIN code of the unit. • Enter a new PIN code, then press [Enter]. Device Name Shows the device name to be shown on the Bluetooth device — “KENWOOD BT MM-6U2. ” Device Shows the device address of the unit.
-
Page 56: Using The Remote Controller Overview
DDX4031BTM/DDX4031 (Region 3)/DDX4031M : This unit can be operated using the Remote Controller (RC-DV340) supplied with this unit. DDX6031BT (Region 4/6)/DDX6031 (Region 4/6)/DDX4031BT (Region 4/6)/DDX4031 (Region 4/6) : Optional Remote Controller KNA-RCDV331 is designed for controlling this unit. Refer to the instruction manual that comes with the remote controller. -
Page 57: Operations From The Remote Controller
Screen mode changes each time you press NAV/V.SEL this key. Switches to the navigation screen. OPEN Cursor key (Only for DDX6031BT/DDX6031BTM/DDX6031/ Moves the cursor when displaying menu. DDX6031M) Adjusts the panel angle. The panel angle changes each time you press this key. - Page 58 DVD Top Menu Returns to the DVD top menu. Pressing this key switches the features that can be searched directly. DVD-VIDEO DVD Menu Chapter number Displays the DVD menu. Title number Cancel DVD-VR Chapter number Program/Playlist Cancel DDX6031BT/DDX6031BTM/DDX6031/DDX6031M/DDX4031BT/DDX4031BTM/DDX4031/DDX4031M...
- Page 59 SUBTITLE Track search and file search Switches the subtitle language. Selects the track or file to be played. Play/Pause ZOOM Pauses the track. Switches the zoom ratio each time you press Press again to resume playing. this key. Direct search Picture Angle Switches the picture angle each time you press this key.
- Page 60 Selects the folder to be played. receive. Example: 92.1MHz (FM) File search WXYZ Selects the file to be played. Example: 810kHz (AM) Play/Pause Pauses the file. Press again to resume playing. Numeric keypad DDX6031BT/DDX6031BTM/DDX6031/DDX6031M/DDX4031BT/DDX4031BTM/DDX4031/DDX4031M...
-
Page 61: Reference Maintenance
REFERENCE Maintenance Caution on cleaning the unit To keep discs clean Do not use A dirty disc may not play correctly. any solvent If a disc does become dirty, wipe (for example, it with a soft cloth in a straight line thinner, from center to edge. -
Page 62: More About This Unit
USB mass – AAC files copy-protected with FairPlay storage class device while using this (except those stored on an iPod). unit. – Files which have the data such as AIFF, ATRAC3, etc. DDX6031BT/DDX6031BTM/DDX6031/DDX6031M/DDX4031BT/DDX4031BTM/DDX4031/DDX4031M... - Page 63 Sound signals emitted through the rear terminals Through the analog terminals (Speaker out/Front Preout/Rear Preout) 2-channel signal is emitted. When playing multi-channel encoded disc, multi-channel signals are downmixed. Language codes (for DVD/DivX language selection) Code Language Code Language Code Language Code Language Afar...
-
Page 64: Troubleshooting
The unit has failed to receive a call. “Pairing Mode Error” Pairing between the unit and Bluetooth device has failed. Register the device again. (☞ page 47) “Panel Mecha Error” The panel does not work properly. Reset the unit. “No Navigation” No navigation unit is connected. DDX6031BT/DDX6031BTM/DDX6031/DDX6031M/DDX4031BT/DDX4031BTM/DDX4031/DDX4031M... - Page 65 If there seems to be a problem Symptom Remedy/Cause No sound comes out of the • Adjust the volume to the optimum level. speakers. • Check the cords and connections. No picture is displayed on the Turn on the screen. (☞ page 11) screen.
- Page 66 • Select <iPod> for <AV Input>. (☞ page 43) “Reading... ” keeps flashing on the Turn off the power and on again. screen. While playing a track, sound is The tracks are not properly copied into the USB sometimes interrupted. device. Copy tracks again, and try again. DDX6031BT/DDX6031BTM/DDX6031/DDX6031M/DDX4031BT/DDX4031BTM/DDX4031/DDX4031M...
- Page 67 Symptom Remedy/Cause Phone sound quality is poor. • Reduce the distance between the unit and the Bluetooth mobile phone. • Move the car to place where you can get a better signal reception. The sound is interrupted or • Reduce the distance between the unit and the skipped while using a Bluetooth Bluetooth audio player.
-
Page 68: Accessories/Installation Procedure
..1 ..1 WARNING • If you connect the ignition wire (red) and the DDX6031BT/DDX6031/ battery wire (yellow) to the car chassis (ground), DDX4031BT/DDX4031 you may cause a short circuit, that in turn may start of sale in Australia only. a fire. Always connect those wires to the power DDX6031BT/DDX6031/ source running through the fuse box. -
Page 69: Cooling Fan
Bluetooth adaptor (KS-UBT1) output terminals (do not mix front and rear). For DDX6031BT/DDX6031BTM/DDX6031/ example, if you connect the + connector of the left DDX6031M only speaker to a front output terminal, do not connect the - connector to a rear output terminal. -
Page 70: Connecting Wires To Terminals
Power control wire) rown o the terminal that is grounded when either the telephone rings or during conversation. (To connect the Kenwood Mute control wire) navigation system, consult your navigation manual.) ot used range/White... -
Page 71: Connecting A Usb Device/Ipod/Iphone
Connecting a USB device/iPod/iPhone For DDX6031BT/DDX6031BTM/DDX6031/DDX6031M iPod (commercially available) USB device (commercially available) CA-U1EX (Optional Accessory) USB terminal (0.8 m) KCA-iP202 (Optional Accessory) Audio Visual input 2 (iPod/AV Input 2 switchable) (1.8 m) For DDX4031BT/DDX4031BTM/DDX4031/DDX4031M USB device USB terminal (commercially available) -
Page 72: Connecting Other Products
As of December, 2011): • KNA-G630 • KNA-G630CN or latest information, access the www.kenwood.com/cs/ce/. Rear View Camera Input • Visual input (Yellow) Audio/Visual Output • Visual output (Yellow) • Audio output (3.5φ mini plug) -
Page 73: Installing The Unit
Installing the Unit For Toyota/Scion For Volkswagen Cut out accessory 4 as illustrated. Attach accessory 3 to the unit. utting line ccessory 4 Fold double-sided adhesive (accessory 5) ccessory 3 along the slit and attach it to accessory 4 ⁄ cut-out against the center rib as illustrated. -
Page 74: Installing The Microphone Unit
Installation on Toyota, Installing the Microphone Unit Nissan or Mitsubishi Car (DDX6031BT/DDX6031BTM/ using Brackets DDX4031BT/DDX4031BTM only) Check the installation position of the ccessory 6 (M5x6mm) microphone (accessory 8). r Accessory 7 (M5x7mm) Remove oil and other dirt from the ar Bracket installation surface. -
Page 75: Specifications
Sampling frequency : 6.95 inches (diagonal) wide : 44.1/48/96 kHz 156.6 mm (W) × 81.6 mm (H) Quantifying Bit Number (DDX6031BT/DDX6031BTM/DDX6031/ : 16/20/24 bit DDX6031M ) : 6.1 inches (diagonal) wide USB interface section 136.2 mm (W) × 72 mm (H) -
Page 76: Fm Tuner Section
Dimensions (W × H × D) LW (9 kHz) : 153 kHz – 279 kHz : 182 × 111 × 160 mm MW (9 kHz) : 531 kHz – 1611 kHz ( DDX6031BT/DDX6031BTM/DDX6031/ Usable Sensitivity DDX6031M) AM : 28 dBμ... - Page 77 • “DVD Logo” is a trademark of DVD Format/Logo Licensing Corporation registered in the US, Japan and other countries. • The “AAC” logo is a trademark of Dolby Laboratories. • Microsoft and Windows Media are either registered trademarks or trademarks of Microsoft Corporation in the United States and/or other countries.
-
Page 78: Ks-Ubt1 (Usb Bluetooth Adapter)
Power Consumption: 54.3 mA/5 V (max.) • This adapter has been designed exclusively Dimensions (L × W × H): for use with Kenwood car receivers. Do not 15 mm × 19 mm × 5.6 mm use this adapter with any other car receiver. - Page 79 Declaration of Conformity with regard to the R&TTE Directive 1999/5/EC Manufacturer: JVC KENWOOD Corporation 3-12 Moriya-cho, Kanagawa-ku, Yokohama-shi, Kanagawa, 221-0022, Japan EU Representative’s: Kenwood Electronics Europe BV Amsterdamseweg 37, 1422 AC UITHOORN, The Netherlands English Svenska Français Suomi Slovensko Deutsch...