Table of Contents
Advertisement
Quick Links
Camera User Guide
Basic Operations
If you are using the camera for the first time, read this section.
This section provides a basic overview of how to turn on the camera, take
pictures and play back pictures.
Advanced Operations
Read this section when you want to learn more about the different
camera functions.
This section provides more detailed information about the functions used to take
pictures and play back pictures, as well as information on how to customize the
camera settings, print pictures, and use the camera with a computer.
The rechargeable battery needs to be charged before use. The battery is not
charged at the time of purchase.
The serial number of this product
is given on the bottom face of the
camera.
Advertisement
Table of Contents
Troubleshooting

Related Manuals for Ricoh G600


Summary of Contents for Ricoh G600
-
Page 1: Advanced Operations
Camera User Guide Basic Operations If you are using the camera for the first time, read this section. This section provides a basic overview of how to turn on the camera, take pictures and play back pictures. Advanced Operations Read this section when you want to learn more about the different camera functions. - Page 2 Warranty Radio Interference This publication may not be reproduced in whole or in part without the express written permission of Ricoh. © 2008 RICOH CO., LTD. All rights reserved. The contents of this document may be changed in the future, without prior notice.
-
Page 3: Safety Precautions
Safety Precautions Warning Symbols Various symbols are used throughout this instruction manual and on the product to prevent physical harm to you or other people and damage to property. The symbols and their meanings are explained below. This symbol indicates matters that may lead to imminent risk of death or serious Danger injury if ignored or incorrectly handled. - Page 4 Turn off the power immediately in the event of abnormalities such as smoke or unusual odors being emitted. Remove the battery as soon as possible, being careful to avoid electric shocks or burns. If you are drawing power from a household electrical outlet, be sure to unplug the power cord from the outlet to avoid fire or electrical hazards.
- Page 5 Do not touch the internal components of the equipment if they become exposed as a result of being dropped or damaged. The high-voltage circuitry in the equipment could lead to an electric shock. Remove the battery as soon as possible, being careful to avoid electric shocks or burns.
-
Page 6: Using The Manuals
The following two manuals are included with your G600. “Camera User Guide” (This booklet) This guide explains the usage and functions of the camera. It also explains how to install the provided software on your computer. * The “Camera User Guide” (English edition) is available from the provided CD-ROM as a PDF file. -
Page 7: Key Features
Key Features Rugged camera body stands up to water, dust and shocks The camera provides water resistance and dust resistance equivalent to JIS/IEC waterproof grade 7 and JIS/IEC dustproof grade 6 (IP67). In addition, the camera is shock resistant when dropped from a height of up to 1.5 meters. - Page 8 CALS Mode supports the digitization of public works pictures (P.42) Simply turning the mode dial to CALS allows you to capture images suitable for submitting as official public works pictures. ADJ. (Adjust) button enables easier camera operations (P.62) The ADJ. button simplifies the camera setting procedures.
- Page 9 CANCEL CANCEL High Sensitivity Mode for shooting in dimly lit places (P.44) The High Sensitivity Mode enables shooting in dark places. The picture display becomes brighter, making it easier to compose the shot. Direct printing without the use of a computer (P.113) A Direct Print-compatible printer can be connected to the camera with the USB...
-
Page 10: Table Of Contents
Safety Precautions ... 1 Using the Manuals... 4 Key Features ... 5 Contents ... 8 Basic Operations If you are using the camera for the first time, read this section. Packing List ... 14 Names of Parts... 16 How to Use the Mode Dial... 18 Picture Display ... - Page 11 Changing the Display with the DISP. Button ... 57 Maximizing the Picture Display Brightness ...58 Histogram...59 Advanced Operations Read this section when you want to learn more about the different camera functions. 1 Various Shooting Functions Using the ADJ. Button ... 62 Functions that can be set in Scene Mode...63 Changing the Text Density (Scene Mode) ...64 Shifting the AF Target (Macro)...65...
- Page 12 2 Shooting/Playing Back Movies 3 Shooting Movies ...94 Playing Back Movies...96 3 Other Playback Functions Playback Setting Menu... 97 Using the Menu...98 Rotating Images (ROTATION) ... 99 Changing the Image Size (RESIZE)... 100 Correcting the Image Brightness and Contrast (CORRECT CONTRAST)... 101 Straightening Skewed Images (SKEW CORRECTION)...
- Page 13 When [Browse User’s Manual (Software Version)] is Clicked...155 When [Browse CD-ROM Content] is Clicked...156 Uninstalling the Software ...157 Downloading Images Using the RICOH Gate La...159 Downloading Images Without Using RICOH Gate La...160 Disconnecting the Camera from Your Computer ...162 For Macintosh... 163 Downloading Images to Your Computer ...163...
- Page 14 7 Appendices Troubleshooting... 165 Error Messages...165 Camera Troubleshooting ...166 Software and Computer Troubleshooting ...171 Specifications ... 173 Number of Images That Can be Stored in Internal Memory/ SD Memory Card ...176 Optional Accessories... 177 Using a Wide Conversion Lens...177 Using the External Flash ... 178 Functions Whose Defaults are Restored When Camera is Turned Off ...
-
Page 15: Basic Operations
Basic Operations If you are using the camera for the first time, read this section. Packing List ... 14 Names of Parts ... 16 How to Use the Mode Dial... 18 Picture Display ... 19 Getting Ready... 22 Basic Shooting ... 32 Playing Back Images ... -
Page 16: Packing List
Open the package and make sure all the items are included. G600 The serial number of the camera is provided on the bottom face of the camera. USB Cable Used to connect the camera to a computer or Direct Print- compatible printer. -
Page 17: Optional Accessories
Macintosh, it is possible to display the Software User Guide. (Only on computers with Acrobat installed.) Note --------------------------------------------------------------------------------------------------- For the latest information about accessories, visit the Ricoh website at http://www.ricohpmmc.com. Optional Accessories AC Adapter (AC-4c) Used for power supply from a household outlet to the camera. -
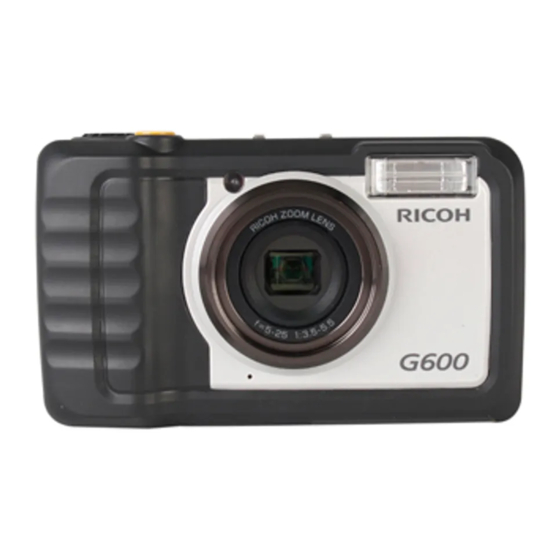
Page 18: Names Of Parts
Camera Front View Shutter Release Button Mode Dial Power Button AF Auxiliary Light Accessory Shoe Strap Eyelet Flash Speaker Terminal Cover Lens Microphone USB Terminal Names of Parts Item Name Refer to P.34 P.18 P.29 P.138 P.178 P.14 P.40 P.96 P.114, 163 P.94 P.114, 159, 163... -
Page 19: Rear View
Rear View Picture Display Auto Focus/Flash Lamp Strap Eyelet z (Telephoto)/8 (Enlarged View) Button Z (Wide-angle)/9 (Thumbnail Display) Button !/MODE Button MENU/OK Button DISP. Button "/N (Macro) Button D (Delete)/t (Self-timer) Button #/F (Flash) Button ADJ./MEMO Button 6 (Playback) Button Tripod Screw Hole Battery/Card Cover Item Name... -
Page 20: How To Use The Mode Dial
How to Use the Mode Dial Set the mode dial to the desired mode before shooting still images or movies. Turn the mode dial to the symbol of the function you want to use. Mode Dial Symbols and Descriptions Symbol Function CALS Mode CALS... -
Page 21: Picture Display
Picture Display Example of Picture Display when Shooting Pictures 6 7 8 14 15 16 17 Still Image Mode Item Name Flash Mode Macro Shooting Self-timer Scene Mode/Multi-shot Shooting Mode Types Recording Destination Remaining Number of Still Images Picture Quality Image Size Zoom Bar Edit Detection... -
Page 22: Movie Mode
Note --------------------------------------------------------------------------------------------------- • The number of remaining shots available may differ from the actual number of shots, depending on the subject. • Movie recording time and the maximum number of still images may vary depending on the capacity of the recording destination (internal memory or SD memory card), shooting conditions, and the type and manufacturer of the SD memory card. -
Page 23: Battery Level Indication
Battery Level Indication A battery symbol appears at the lower right of the picture display to indicate the battery level. Recharge the battery before it is depleted or exchange with new batteries. Battery Symbol The battery is sufficiently charged. Green The battery level begins to drop. -
Page 24: Getting Ready
• AAA Oxyride Batteries (available in stores) These are not rechargeable batteries, but they can be used longer in a digital camera than AAA alkaline batteries. • AAA Nickel-Hydrogen Batteries (available in stores) These batteries are economical because you can recharge and use them over and over again. -
Page 25: Number Of Shots You Can Take
Number of shots you can take --------------------------------------------------------------- • Approximate number of shots you can take on a single charge Battery Type Rechargeable Battery (DB-60) AAA Alkaline Batteries (available in stores) • Based on CIPA standard (Temperature: 23 degrees Celsius, picture display on, 30 seconds between shots, changing the zoom setting from telephoto to wide-angle or wide-angle to telephoto for each shot, 50% flash usage, turning the power off after each 10 shots). -
Page 26: Sd Memory Card (Available In Stores)
[CARD ERROR] is displayed when an SD memory card is loaded in the camera or the card has been used with a computer or different digital camera, you must format the card with this camera prior to use. (GP.125) - Page 27 Write-protecting your images --------------------------------------------------------------- Move the write-protection switch on the SD memory card to LOCK to prevent your still images from being accidentally erased or the card from being formatted. If you unlock the card (by returning the switch to its original position), it is once again possible to erase images and format the card.
-
Page 28: Charging The Rechargeable Battery
Charging the Rechargeable Battery The rechargeable battery needs to be charged before use. Insert the battery into the battery charger, making sure that the match those on the battery charger. • The battery label should face up. Caution----------------------------------------------------------------------------------------------- Be careful not to reverse the Plug the power cable into an outlet. -
Page 29: Loading The Battery And Sd Memory Card
Loading the Battery and SD Memory Card The rechargeable battery (DB-60) can be used to power this camera. This battery is convenient because the battery power lasts long and it can be used over and over again by recharging. Make sure that the camera is off before loading or removing the battery or card. -
Page 30: Removing The Sd Memory Card
Close the battery/card cover and turn the knob toward the L mark. Removing the SD Memory Card Turn the battery/card cover knob toward the M mark to open the cover. Push in the SD memory card and gently release to eject it. Pull the card out of the camera. -
Page 31: Turning The Power On/Off
Turning the Power On/Off To turn the power on: Press the power button. • After the start sound, the auto focus/ flash lamp blinks for several seconds. Using the Camera in playback mode • Pressing the 6 (Playback) button for more than one second turns on the camera in playback mode, allowing you to start playback at once. -
Page 32: Setting The Language
Setting the Language When the power is turned on for the first time, the language setting screen appears (for the picture display language). After setting the language, go on to the date/time setting (for printing the date and time on your photos). You can shoot without these settings. -
Page 33: Setting The Date And Time
Setting the Date and Time When the power is turned on for the first time, the date/time setting screen appears. Press the !"#$ buttons to set the year, month, date and time. • Change the value with !" and move the frame with #$. In [FORMAT], choose the date and time format. -
Page 34: Basic Shooting
Basic Shooting Now you are ready. Holding the Camera Hold the camera as shown below for best results. Hold the camera with both hands and lightly press both elbows against your body. Put your finger on the shutter release button. Note --------------------------------------------------------------------------------------------------- When you are shooting, be careful not to obstruct the lens or flash with your fingers, hair, or the strap. - Page 35 Preventing Camera Shake --------------------------------------------------------------------- If you move the camera when pressing the shutter release button, the still image might not come out clearly due to camera shake. Camera shake tends to occur in the following cases: • When shooting in a dark place without using the flash •...
-
Page 36: Shooting
Shooting The shutter release button works in two steps. When you press the shutter release button halfway (Half-press), the auto-focus function is triggered to determine the focal distance. Next, press it all the way down (Full-press) to shoot. When your subject is not in the center of your composition, compose your photo after focusing. - Page 37 To take a picture with the subject in the foreground in focus against a background, half-press the shutter release button to focus on the subject, and then compose your shot. Subject to be focused on Shooting range Gently press the shutter release button all the way.
- Page 38 Note --------------------------------------------------------------------------------------------------- • Press the shutter release button gently to prevent camera shake. • The J symbol indicates that camera shake may occur. Hold the camera still and focus the camera again. You can also turn on the camera shake correction function to minimize blurring.
-
Page 39: Using The Zoom Function
Using the Zoom Function Pressing the z (Telephoto) button allows you to take a close-up picture of the subject. Pressing the Z (Wide-angle) button allows you to take a wide-angle picture. With the camera ready to shoot, press the Z button or the z button. -
Page 40: Shooting Close-Ups (Macro Shooting)
Shooting Close-Ups (Macro Shooting) Using the N (Macro) button allows you to take a tight close-up of the subject. (Macro shooting) This is good for shooting small subjects because you can shoot up to approximately 1 cm (0.4 in.) (from the front of the camera) away. - Page 41 • To take a further close-up picture during macro shooting, use [ZOOM MACRO] in scene mode. (GP.44) • The macro shooting functions for scene mode are shown below. Scene Mode HIGH SENS FIREFIGHTING SKEW COR MODE TEXT MODE ZOOM MACRO MOVIE Macro Shooting Enabled...
-
Page 42: Using The Flash
Using the Flash Press the F (Flash) button to change the flash mode. At the time of purchase, the camera is set to [FLASH OFF]. Flash Modes FLASH OFF AUTO RED-EYE FLASH FLASH ON FLASH ON (10M) FLASH SYNCHRO. Flash Range for When the Flash Mode is Set to [AUTO] (for when the ISO Setting is set to [AUTO] GP.90) Wide-angle Telephoto... - Page 43 Note --------------------------------------------------------------------------------------------------- • The flash mode setting is retained until you press the F button again. • The flash does not fire for movie, multi-shot, auto bracket, or white balance settings. • The flash fires twice to increase the AE (Auto Exposure) accuracy. •...
-
Page 44: Shooting In Cals Mode
Shooting in CALS Mode In CALS mode, you can shoot photos in a quality and size suitable to be submitted as official public works pictures. Picture quality and size are set beforehand in [CALS PIC QUALITY] on the SETUP menu (GP.144). At the time of purchase, [CALS PIC QUALITY] is set to [N1280(1M)] (No. -
Page 45: Shooting With My Settings Mode
Shooting with My Settings Mode Setting the mode dial to MY1 or MY2 allows you to shoot with preset settings. Use [REG. MY SETTINGS] on the SETUP menu to make the MY1 and MY2 settings. (GP.128) Turn the mode dial to MY1 or MY2. -
Page 46: Shooting With Optimal Settings According To Shooting Conditions
Shooting with Optimal Settings According to Shooting Conditions You can use scene mode to select from among five still image modes and movie, and shoot with settings automatically optimized for shooting conditions. Scene Modes Use when taking pictures in dimly lit places. The picture display also becomes brighter. - Page 47 Note --------------------------------------------------------------------------------------------------- For information on shooting setting menu items in scene mode, see “Available Settings When Mode Dial is Set to SCENE”. (GP.67) Turn the mode dial to SCENE. • The camera is ready to shoot and the selected scene mode is displayed at the top of the picture display.
-
Page 48: Using The Skew Correction Mode
Using the Skew Correction Mode Turn the mode dial to SCENE. Press the MODE button. • The scene mode selection screen appears. Press the !" buttons to select [SKEW COR MODE]. Press the MENU/OK button. Press the shutter release button to shoot the subject. -
Page 49: Shooting In Zoom Macro Mode
Note --------------------------------------------------------------------------------------------------- You can also correct the skew of a previously shot still image. (GP.102) Shooting in Zoom Macro Mode Turn the mode dial to SCENE. Press the MODE button. • The scene mode selection screen appears. Press the !" buttons to select [ZOOM MACRO]. Press the MENU/OK button. -
Page 50: Using The Self-Timer
t Using the Self-Timer You can set the Self-timer to shoot after either two or ten seconds. A setting of two seconds is useful for preventing camera shake. With the camera ready to shoot, press the t (Self- timer) button. •... -
Page 51: Playing Back Images
Playing Back Images Viewing Your Images In playback mode, you can check still images you have taken. You can also delete or zoom in on the images. Press the 6 (Playback) button. • The camera switches to playback mode and the last still image you took is displayed. - Page 52 Turning on the camera in playback mode------------------------------------------------ When the camera is off, pressing the 6 button for more than one second turns the camera on. The camera starts up in playback mode. When the camera has been turned on with the 6 button, pressing the 6 button again switches playback mode to shooting mode.
-
Page 53: Grid View (Thumbnail Display)
Grid View (Thumbnail Display) When playing back images on the picture display, the playback screen can be divided into 12 frames (grid view). The grid view allows you to select an image to enlarge or delete. Press the 6 (Playback) button. -
Page 54: Enlarging Images
Enlarging Images You can enlarge a still image displayed on the picture display. Image Size 3648 × 2736, 3648 × 2432, 3264 × 2448, 2592 × 1944, 2048 × 1536 1600 × 1200, 1280 × 960 640 × 480 Press the 6 (Playback) button. •... -
Page 55: Deleting Files
Deleting Files You can delete unwanted or failed files from the SD memory card or internal memory. You can use the [RECOVER FILE] function to restore needed files that you accidentally deleted. (GP.112) Deleting a File Press the 6 (Playback) button. -
Page 56: Deleting All Files
Deleting All Files Press the 6 (Playback) button. Press the D (Delete) button. Press the !" buttons to select [DELETE ALL]. Press the MENU/OK button. • You will be prompted to confirm that you want to delete all images. If so, press the $ button to select [YES], and then press the MENU/ OK button. - Page 57 Specifying Individual Files to be Deleted Press the !"#$ buttons to select the file you want to delete and press the D button. • The trash symbol is displayed in the upper left corner of the file. Repeat Step 4 to select all the files you want to delete.
- Page 58 Specifying a Range of Files to be Deleted Press ADJ.button. • Press the ADJ. button again to return to the screen for deleting one file at a time. Press the !"#$ buttons to select the starting point of the range of files you want to delete and press the D button.
-
Page 59: Changing The Display With The Disp. Button
Changing the Display with the DISP. Button Pressing the DISP. button allows you to change the screen display mode and toggle the information displayed on the picture display. During Shooting Mode Normal Symbol Display Picture Display Off (Synchro-Monitor Mode) Grid Guide ------------------------------------------------------------------------------------------ This displays auxiliary lines on the picture display to help you compose your picture. -
Page 60: Maximizing The Picture Display Brightness
During Playback Mode Normal Symbol Display No Display Press the DISP. button to change the display. White Saturation Highlights Display ------------------------------------------------------- The white saturation areas of the image flash in black. White saturation is the loss of grayscale that indicates the color shading in an image in which very bright areas of the subject are rendered in white. -
Page 61: Histogram
Histogram When Histogram is on, a histogram appears in the lower right corner on the picture display. A histogram is a graph indicating the number of pixels on the vertical axis and the brightness on the horizontal axis (from left to right, shadows (dark areas), midtones, and highlights (bright areas)). -
Page 63: Advanced Operations
Advanced Operations Read this section when you want to learn more about the different camera functions. 1 Various Shooting Functions ... 62 2 Shooting/Playing Back Movies ... 94 3 Other Playback Functions ... 97 4 Direct Printing... 113 5 Changing Camera Settings ... -
Page 64: Various Shooting Functions
1 Various Shooting Functions Using the ADJ. Button You can assign four functions from the shooting setting menu to the ADJ. button. By assigning functions to the ADJ. button, you can make settings with fewer button operations and without displaying the shooting setting menu. -
Page 65: Functions That Can Be Set In Scene Mode
Functions that can be Assigned to [ADJ BTN. SET] EXPO.CMP, WHT. BAL., ISO, QUALITY, FOCUS, SHARP, EXPO.MET., CONT MODE, AUTO BKT Functions that can be set in Scene Mode The functions that can be set with the ADJ. button in scene mode and movie mode differ from those available in auto shooting mode. -
Page 66: Changing The Text Density (Scene Mode)
Changing the Text Density (Scene Mode) You can change the shading of text for shooting with [TEXT MODE] (GP.44) in scene mode. You can select from [DEEP], [NORMAL] and [LIGHT]. To change the setting, use the shooting setting menu or the ADJ. button. This section explains easy ways to change the shading setting with the ADJ. -
Page 67: Shifting The Af Target (Macro)
Shifting the AF Target (Macro) During macro shooting, pressing the ADJ. button allows you to shift the AF target by using the !"#$ buttons on the camera without moving the camera. You can lock the focus (GP.34) at the position where the AF target is shifted and shoot the picture. This is useful for macro shooting on a tripod. -
Page 68: Shooting Setting Menu
Shooting Setting Menu Press the MENU/OK button in shooting mode to display the shooting setting menu. The shooting setting menu can be used to set the following shooting settings. When Mode Dial is Set to 5/CALS/MY1/MY2 Setting PIC QUALITY/SIZE (*) F3648(10M), [N3648(10M)], F3:2(9M), N3264(8M), FOCUS AE METERING SHARPNESS... - Page 69 Available Settings When Mode Dial is Set to SCENE The following settings are available when in scene mode. HIGH Setting SENS PIC QUALITY/SIZE Text density SIZE FOCUS AE METERING SHARPNESS CONT. MODE COLOR DEPTH AUTO BRACKET TIME EXPOSURE DATE IMPRINT EXPOSURE COMP.
-
Page 70: Using The Menu
Using the Menu In the instructions of this manual, the menu selection is confirmed when you “Press the MENU/OK button” (as in Step 5 below), but you can also confirm the setting and return to the menu screen by pressing the # button. Press the MENU/OK button in shooting mode. -
Page 71: Choosing Picture Quality Mode/Image Size (Pic Quality/Size)
Choosing Picture Quality Mode/ Image Size (PIC QUALITY/SIZE) The file size of a shot still image depends on the picture quality mode and image size settings. For movies, choose the movie size. Figures inside the bold frame indicate those shown on the screen. Still Images Image Size Picture Quality... -
Page 72: The Desired Setting
Note ---------------------------------------------------------------------------------------------- • For picture quality mode, select normal mode (N) or fine mode (F), depending on the desired compression ratio. Normal mode: The compression ratio is high, resulting in a small file. Normally, shooting is done in this mode. Fine mode: The compression ratio is low, resulting in a large file, but the picture quality is better than in Normal. -
Page 73: Changing The Focusing Mode (Focus)
Changing the Focusing Mode (FOCUS) If you shoot the subject in the default focusing mode, the camera focuses automatically with Auto Focus (AF). Select from the following five focusing modes. Focusing Modes Symbol Mode None MULTI AF None SPOT AF MF (Manual Focus) Enables you to adjust the focus manually. -
Page 74: Manual Focus Shooting (Mf)
Manual Focus Shooting (MF) If the camera fails to focus automatically, you can focus manually (MF: Manual Focus). Manual focus enables shooting at a fixed distance. Note ---------------------------------------------------------------------------------------------- • In scene mode, manual focus can be used only when [ZOOM MACRO], [SKEW COR MODE] or [MOVIE] is selected. - Page 75 Press the $ button to display the focus bar. • Each time the $ button is pressed, the focus bar and zoom bar appear alternately. Press the z (Telephoto) button or the Z (Wide-angle) button to adjust the focus. • Pressing the z button adjusts the focus to farther objects. Pressing the Z button adjusts the focus to closer objects.
-
Page 76: Changing The Ae Metering Mode (Ae Metering)
Changing the AE Metering Mode (AE METERING) You can change the metering method (the range to use for metering) used to determine the exposure value. There are three AE metering modes. AE Metering Modes Symbol Mode Description None MULTI The entire shooting range is divided into 256 partitions, and each is metered to determine the overall exposure value. -
Page 77: Changing The Edge Quality Of Still Images (Sharpness)
Changing the Edge Quality of Still Images (SHARPNESS) You can change the edge quality of your still images to either sharp or soft. Display the shooting setting menu. • For the operating procedure, see P.68. Press the " button to select [SHARPNESS] and press the $ button. -
Page 78: Shooting With Multi-Shot (Cont. Mode)
Shooting with Multi-Shot (CONT. MODE) With multi-shot, pictures continue to be taken for as long as you hold down the shutter release button. Still images are recorded one at a time, just as in normal shooting. Display the shooting setting menu. •... - Page 79 Release your finger from the shutter release button to stop taking pictures. • To playback consecutive images shot in multi-shot mode, switch the camera to playback mode (GP.49) and select the still image you want to play back with the !"#$ buttons. Note ---------------------------------------------------------------------------------------------- •...
-
Page 80: Setting The Color Depth (Color Depth)
Setting the Color Depth (COLOR DEPTH) You can set the color depth of still images to [STRONG], [NORMAL], [NEUTRAL], or [B&W]. Display the shooting setting menu. • For the operating procedure, see P.68. Press the " button to select [COLOR DEPTH] and press the $ button. -
Page 81: Shooting Consecutively With Different Exposures (Auto Bracket)
Shooting Consecutively with Different Exposures (AUTO BRACKET) The auto bracketing function automatically shoots three consecutive shots at three exposure levels (-0.5EV, ±0, and +0.5EV) based on the set exposure level. Display the shooting setting menu. • For the operating procedure, see P.68. Press the "... -
Page 82: Shooting Consecutively With Different White Balance (Wb-Bkt)
Shooting Consecutively with Different White Balance (WB-BKT) The white balance bracket function automatically records three images - a reddish image, a bluish image, and an image of the current white balance. This is useful if you cannot determine the appropriate white balance. - Page 83 Note ---------------------------------------------------------------------------------------------- • Cannot be used when multi-shot is set. (GP.76) • The flash cannot be used. • The [TIME EXPOSURE] setting is disabled. (GP.82) • If [COLOR DEPTH] is set to [B&W], the white balance bracket function can be set but it does not operate.
-
Page 84: Using Long Time Exposure (Time Exposure)
Using Long Time Exposure (TIME EXPOSURE) You can select [1 SEC.], [2 SEC.], [4 SEC.], or [8 SEC.] for time exposure. By using long time exposure, you can capture the movement of moving subjects such as the trail of fireworks and car lights when shooting a night scene. -
Page 85: Shooting Pictures Automatically At Set Intervals (Interval)
Shooting Pictures Automatically at Set Intervals (INTERVAL) You can set the camera to automatically take pictures at fixed intervals. You can set the shooting interval from 5 seconds to 3 hours in increments of 5 seconds. Display the shooting setting menu. •... - Page 86 Caution------------------------------------------------------------------------------------------ • The interval shooting setting is cleared when the camera is turned off. • The time until the next picture can be taken according to the shooting menu setting may be longer than the time set for interval shooting. In this case, the shooting interval becomes longer than the set time.
-
Page 87: Inserting The Date Into A Still Image (Date Imprint)
Inserting the Date into a Still Image (DATE IMPRINT) You can insert the date and time (YY/MM/DD hh:mm) or the date (YY/MM/DD) at the lower right of a still image. Display the shooting setting menu. • For the operating procedure, see P.68. Press the "... -
Page 88: Changing The Exposure (Exposure Comp.)
Changing the Exposure (EXPOSURE COMP.) The exposure setting enables you to select the brightness level for your picture. Normally, if your subject is centered, backlight compensation is automatically activated, and you can shoot with the correct exposure. In the following cases, or when you intentionally want to change the exposure, you can adjust the exposure setting. -
Page 89: Using Natural And Artificial Lighting (White Balance)
Using Natural and Artificial Lighting (WHITE BALANCE) Adjust the white balance so that a white subject will appear white. At purchase, the white balance is set to [AUTO]. Normally you do not need to change the setting, but if the camera is having difficulty determining the white balance when shooting an object of a single color or when shooting under multiple light sources, you can change the setting. - Page 90 Press the MENU/OK button. • The symbol appears on the screen. Note ---------------------------------------------------------------------------------------------- • When [AUTO] is selected, the white balance may not be adjusted correctly for a subject that is mostly dark. In this case, add something white to the subject. •...
-
Page 91: Setting The White Balance Manually (Manual Settings)
Setting the White Balance Manually (MANUAL SETTINGS) Press the ADJ. button in shooting mode. Press the ADJ. button or the #$ buttons until the white balance menu appears. Press the !" buttons to select [M]. Point the camera at a piece of paper or something white under the lighting conditions for your picture. -
Page 92: Changing The Sensitivity (Iso Setting)
Changing the Sensitivity (ISO SETTING) ISO sensitivity indicates how sensitive film is to light. A greater value means higher sensitivity. High sensitivity is suitable for shooting an object in a dark place or a fast-moving object while minimizing blurring. You can choose from the following ISO settings: AUTO, ISO 64, ISO 100, ISO 200, ISO 400, ISO 800, ISO 1600 and ISO 3200. -
Page 93: Using The Camera Shake Correction Function To Prevent Camera Shake (Camera Shake Cor)
Using the Camera Shake Correction Function to Prevent Camera Shake (CAMERA SHAKE COR) You can prevent camera shake by turning on the camera shake correction function. At the time of purchase, the camera shake correction function is set to [OFF]. Display the shooting setting menu. -
Page 94: Shooting With The Edit Detection Function (Edit Detection)
Shooting with the Edit Detection Function (EDIT DETECTION) If you take still images when [EDIT DETECTION] is set to [ON] and download the images to your computer, you can use the provided EC1 software or other edit detection software to check and indicate whether the images were edited after they were shot. -
Page 95: Returning The Shooting Setting Menu Settings To Their Defaults (Restore Defaults)
Returning the Shooting Setting Menu Settings to their Defaults (RESTORE DEFAULTS) To return the shooting setting menu settings to their defaults, follow the steps below. Display the shooting setting menu. • For the operating procedure, see P.68. Press the " button to select [RESTORE DEFAULTS] and press the $ button. -
Page 96: Shooting/Playing Back Movies
2 Shooting/Playing Back Movies 3 Shooting Movies You can shoot movies with sound. You can set the image size to either 640 × 480 or 320 × 240 pixels. Each movie you shoot is recorded as an AVI file. Turn the mode dial to SCENE. Press the MODE button. - Page 97 Note ---------------------------------------------------------------------------------------------- • The flash cannot be used. • While shooting movies, only digital zoom can be used. (GP.37) • When the shutter release button is pressed in Step 5, the camera focuses on the subject. • The remaining recording time may not change uniformly because it is recalculated from the remaining memory capacity during movie recording.
-
Page 98: Playing Back Movies
Playing Back Movies To playback movies, follow the steps below. Press the 6 (Playback) button. • The last movie shot is displayed. • The first frame of the movie is displayed as a still image. Select to the movie you want to view using the !"#$ buttons. -
Page 99: Other Playback Functions
3 Other Playback Functions Playback Setting Menu Press the MENU/OK button in playback mode to display the playback setting menu. The playback setting menu allows you to make the settings for the following functions. Setting Options ROTATION RESIZE 1280, 640 CORRECT CONTRAST SKEW CORRECTION PROTECT... -
Page 100: Using The Menu
Using the Menu Press the 6 (Playback) button to select the playback mode. Press the MENU/OK button. • The playback setting menu appears. The menu items are provided on two screens. Press the !" buttons to select the desired item. •... -
Page 101: Rotating Images (Rotation)
Rotating Images (ROTATION) You can rotate and record shot still images. Press the 6 (Playback) button. Press the !"#$ buttons to display the file you want to rotate. Press the MENU/OK button. • The playback setting menu appears. Press the " button to select [ROTATION] and press the $ button. -
Page 102: Changing The Image Size (Resize)
Changing the Image Size (RESIZE) You can reduce the image size of a shot still image to create a new file with a different image size. Original F3648/N3648/F3:2/N3264/N2592/N2048/N1600 N1280 F1280/N1280 Caution------------------------------------------------------------------------------------------ Movies cannot be resized. Note ---------------------------------------------------------------------------------------------- • The ratio of width to height of [F3:2] images is 3:2. When an image of this type is resized, it is reduced to a 4:3 image with black borders at the top and bottom. -
Page 103: Correcting The Image Brightness And Contrast (Correct Contrast)
Correcting the Image Brightness and Contrast (CORRECT CONTRAST) You can correct the brightness and contrast of a shot still image and record the still image. Press the 6 (Playback) button. Press the !"#$ buttons to display the file with the brightness you want to correct. -
Page 104: Straightening Skewed Images (Skew Correction)
Straightening Skewed Images (SKEW CORRECTION) You can straighten rectangular objects, such as a message board or business card, shot at an angle, to make them look as if they were shot squarely. Press the 6 (Playback) button. Press the !"#$ buttons to display the file you want to straighten. - Page 105 Note ---------------------------------------------------------------------------------------------- • The image size does not change for skew corrected images. • If the image size is large, skew correction will take time. Resize the image (GP.100) before performing skew correction to speed up the process. • The following table shows the approximate time required for skew correction. Image Size 3648 ×...
-
Page 106: Write-Protecting Files (Protect)
Write-protecting Files (PROTECT) You can protect files from being accidentally deleted. Caution------------------------------------------------------------------------------------------ Protected files cannot be deleted normally. However, they will be deleted if you format the memory where the files are stored. Protecting a File Press the 6 (Playback) button. •... -
Page 107: Protecting All Files
Protecting All Files To protect all your files, follow the steps below. Press the 6 (Playback) button. Press the MENU/OK button. • The playback setting menu appears. Press the " button to select [PROTECT] and press the $ button. Press the !" buttons to select [ALL FILES]. -
Page 108: Protecting Multiple Files At Once
Protecting Multiple Files at Once To protect selected files all at once, follow the steps below. Press the 6 (Playback) button. Press the 9 (Thumbnail Display) button. • The screen is divided into 12 frames and thumbnails are displayed. Press the !"#$ buttons to select the first file you want to protect. -
Page 109: Displaying Photos In Order Automatically (Slide Show)
Displaying Photos in Order Automatically (SLIDE SHOW) You can display the recorded still images and movie files sequentially on the screen. This is called a slide show. To view a slide show, follow the steps below. Press the 6 (Playback) button. •... -
Page 110: Copying The Contents Of The Internal Memory To An Sd Memory Card (Copy To Card)
Copying the Contents of the Internal Memory to an SD Memory Card (COPY TO CARD) You can copy the contents of the internal memory onto an SD memory card. Turn the camera off. Insert an SD memory card. Turn the camera on. Press the 6 (Playback) button. -
Page 111: Using A Printing Service (Dpof)
Using a Printing Service (DPOF) The still images recorded on an SD memory card can be printed out if you take them to a store that offers a digital camera print service. To use a print service, you must make print settings on your camera. -
Page 112: Setting Dpof For All Still Images
Setting DPOF for All Still Images To apply DPOF settings to all your still images, follow the steps below. Press the 6 (Playback) button. Press the MENU/OK button. • The playback setting menu appears. Press the " button to select [DPOF] and press the $ button. -
Page 113: Setting Dpof For Multiple Still Images
Setting DPOF for Multiple Still Images To make the DPOF settings for selected still images all at once, follow the steps below. Press the 6 (Playback) button. Press the 9 (Thumbnail Display) button. • The screen is divided into 12 frames and thumbnails are displayed. Press the !"#$ buttons to select the first still image for which you want to make the DPOF setting. -
Page 114: Restoring Deleted Files (Recover File)
Restoring Deleted Files (RECOVER FILE) You can restore all deleted files. Deleted files cannot be restored after performing any of the following operations. • Turning the camera off • Switching from playback mode to shooting mode • Using DPOF, RESIZE, COPY TO CARD, SKEW CORRECTION, CORRECT CONTRAST, or ROTATION. -
Page 115: Direct Printing
Direct Print Function The Direct Print standard enables direct printing from a camera to a printer by connecting them via a USB cable. Photos can be printed quickly and easily from your digital camera without using a computer. Caution------------------------------------------------------------------------------------------ You cannot print movies (AVI files) with this function. -
Page 116: Connecting The Camera To A Printer
Connecting the Camera to a Printer Connect your camera to a printer using the USB cable provided. Make sure that the camera is off. Turn the terminal cover knob of the camera in the direction of the arrow to open the cover. Connect your camera to a printer using the USB cable provided. -
Page 117: Printing Still Images
Printing Still Images You can print still images from the camera with a PictBridge- compatible printer. Still images are sent from the internal memory when no SD memory card is loaded or from an SD memory card when one is loaded. Caution------------------------------------------------------------------------------------------ Do not disconnect the USB cable during printing. - Page 118 Only one copy is printed even if you selected more than one copy to print in Step 6 on P.118. (*) Each item is available only when supported by the Ricoh printer connected to the camera.
- Page 119 Press the !" buttons to select the setting, and then press the MENU/OK button. • The display returns to the Direct Print menu. Repeat Steps 7 and 8 to change other settings as required. Note ---------------------------------------------------------------------------------------------- • To specify the settings as the default settings next time the camera is connected to the printer, press the ADJ.
-
Page 120: Printing Several Still Images
Printing Several Still Images Check that the printer is ready to print. • The [CONNECTING...] screen appears. Press the ADJ. button. • The Direct Print playback mode screen appears. Press the 9 (Thumbnail Display) button. • The screen is divided into 12 frames and thumbnails are displayed. Press the !"#$ buttons to select an image for printing. - Page 121 Press the !" buttons to select an item, and then press the $ button to display the detailed options screen. • When [CONNECTING...] is displayed, the connection to the printer is not yet established. When a connection is established, [CONNECTING...] disappears and [DIRECT PRINT] appears.
-
Page 122: Printing Reports
Printing Reports Select [REPORT PRINT] on the Direct Print menu. You can only select [REPORT PRINT] when the camera is connected to a Ricoh printer that supports PictBridge after setting [PAPER SIZE] to [A4] on the menu. The layout that can be selected depends on the connected printer. -
Page 123: Printing A Camera Memo On A Report
Printing a Camera Memo on a Report To print a camera memo on a report, select [REPORT PRINT] on the Direct Print menu and set [MEMO PRINT] to [ON]. Example of Printed Report with Camera Memo W/REMARK SECTION Note ---------------------------------------------------------------------------------------------- For details about the camera memo, refer to the “Software User Guide”. -
Page 124: Changing Camera Settings
5 Changing Camera Settings SETUP Menu You can change the camera settings by displaying the SETUP menu from the shooting setting menu (GP.66) or playback setting menu (GP.97). The SETUP menu enables you to set the items listed in the table below. Setting FORMAT [CARD] FORMAT [INT. -
Page 125: Using The Setup Menu
Using the SETUP Menu In the instructions of this manual, the menu selection is confirmed when you “Press the MENU/OK button” (as in Step 6 below), but you can also confirm the setting and return to the menu screen by pressing the # button. Press the MENU/OK button. - Page 126 Changing the display ---------------------------------------------------------------------- You can select a screen by the screen number: 1 Press the # button to select a screen number on the left of the screen. !" 2 Press the 3 Press the button to return to menu item selection.
-
Page 127: Preparing The Sd Memory Card (Format [Card])
If an error message such as [CARD ERROR] is displayed when an SD memory card is loaded in the camera or the card has been used with a computer or different digital camera, you must format the card with this camera prior to use. -
Page 128: Formatting The Internal Memory (Format [Int. Mem.])
Formatting the Internal Memory (FORMAT [INT. MEM.]) If the error message [FORMAT INTERNAL MEMORY] is displayed, you must format the internal memory prior to use. Caution------------------------------------------------------------------------------------------ Formatting the internal memory deletes all of the images recorded in the memory. If you have images in the internal memory that you do not want to delete, copy the images to the SD memory card before formatting the internal memory. -
Page 129: Adjusting The Brightness Of The Picture Display (Lcd Brightness)
Adjusting the Brightness of the Picture Display (LCD BRIGHTNESS) To adjust the brightness of the picture display, follow the steps below. Display the SETUP menu. • For the operating procedure, see P.123. Press the " button to select [LCD BRIGHTNESS] and press the $ button. -
Page 130: Registering Custom Settings (Reg. My Settings)
Registering Custom Settings (REG. MY SETTINGS) The My Settings function allows you to easily shoot with your desired settings. You can register two groups of settings as “My Settings”. Setting the mode dial to MY1 allows you to shoot with the settings registered in [SETTING1]. - Page 131 Settings Saved in [REG. MY SETTINGS] PIC QUALITY/SIZE FOCUS Focal distance used in Manual AE METERING SHARPNESS CONT. MODE COLOR DEPTH AUTO BRACKET WB-BKT TIME EXPOSURE DATE IMPRINT EXPOSURE COMP. WHITE BALANCE ISO SETTING CAMERA SHAKE COR EDIT DETECTION Zoom position Macro Self-timer Flash...
-
Page 132: Changing The Step Zooming Setting (Step Zoom)
Changing the Step Zooming Setting (STEP ZOOM) Step zooming allows you to set the focal length of the zoom so that it stops at six levels (28, 35, 50, 85, 105, 140 mm, equivalent to that on a 35 mm camera). Available Settings ON (Step zooming on) OFF (Step zooming off) *Default setting... -
Page 133: Changing The Auto Power Off Setting (Auto Power Off)
Changing the Auto Power Off Setting (AUTO POWER OFF) If you do not operate the camera for a set period of time, it shuts off automatically to conserve battery power (Auto Power Off). By default, auto power off is set to one minute, but you can change this setting. -
Page 134: Changing The Operation Sound Setting (Operation Sounds)
Changing the Operation Sound Setting (OPERATION SOUNDS) During operation, the camera generates four types of sounds: start sound, shutter release sound, focus sound, and beep sound. Start sound Shutter release sound : Sound when the shutter release button is pressed. Focus sound Beep sound Available Settings... -
Page 135: Changing The Operation Sound Volume (Vol. Settings)
Changing the Operation Sound Volume (VOL. SETTINGS) The operation sound volume can be changed. Available Settings (Mute) (Small) (Medium) *Default setting (Large) To change the operation sound volume, follow the steps below. Display the SETUP menu. • For the operating procedure, see P.123. Press the "... -
Page 136: Changing Image Confirmation Time (Lcd Confirm.)
Changing Image Confirmation Time (LCD CONFIRM.) Immediately after you press the shutter release button, the still image taken is displayed on the screen for a moment so you can check it. By default, the image confirmation time is set to 0.5 seconds, but this can be changed. -
Page 137: Using The Auto Resize Zoom (Digital Zoom Img)
Using the Auto Resize Zoom (DIGITAL ZOOM IMG) This function allows you to crop and record an image when shooting. Conventional digital zoom enlarges a portion of an image to a set magnification. However, auto resize zoom saves the cropped portion of the image so the image quality is not be decreased. -
Page 138: Auto Rsz
Press the !" buttons to select [AUTO RSZ]. Press the MENU/OK button. Press and hold the z (Telephoto) button until the maximum magnification is reached on the zoom bar, then momentarily release the z button, and then press the z button again. -
Page 139: Assigning A Function To The Adj. Button (Adj Btn. Set.)
Assigning a Function to the ADJ. Button (ADJ BTN. SET.) When functions are assigned to the ADJ. button, you can display various shooting setting screens with fewer button operations and without displaying the shooting setting menu.You can use [ADJ BTN. SET.1] to [ADJ BTN. SET.4] to assign camera functions that can be activated by pressing the ADJ. -
Page 140: Changing The Af Auxiliary Light Setting (Af Aux. Light)
Changing the AF Auxiliary Light Setting (AF AUX. LIGHT) You can set whether to use the AF auxiliary light when shooting with auto focus. When [AF AUX. LIGHT] is set to [ON], the AF auxiliary light lights when it is difficult to measure the distance with auto focus when shooting in dark surroundings, and the auto focus distance is measured. -
Page 141: Enlarging Icon Display (Enlge Photo Icon)
Enlarging Icon Display (ENLGE PHOTO ICON) The following icons are enlarged in normal symbol display (GP.57). Flash, Macro Shooting, Self-timer, White balance, Focus, Exposure compensation, ISO setting When the icons are enlarged, the following items are not displayed: Zoom bar/Focus bar, Date imprint, Sharpness, Color depth, Edit Detection To enlarge the icons on the screen, follow the steps below. -
Page 142: Changing File Name Settings (Sequential No.)
Changing File Name Settings (SEQUENTIAL NO.) When you shoot a still image, it is stored on an SD memory card or in the internal memory with a consecutively numbered file name that is automatically assigned. When you switch SD memory cards, you can set your camera to continue consecutive numbering from the previously loaded card. - Page 143 • When data is recorded to the internal memory, files are assigned consecutively numbered file names, just as if [SEQUENTIAL NO.] is set to [OFF]. • When transferring images to a computer using RICOH Gate La (GP.159), the file being transferred is renamed and saved. The file is saved with the name “RIMG****.jpg”...
-
Page 144: Setting The Date And Time (Date Settings)
Setting the Date and Time (DATE SETTINGS) You can take still images with the time or date stamped onto the picture. The date/time setting on the SETUP menu is explained here. Display the SETUP menu. • For the operating procedure, see P.123. Press the "... -
Page 145: Changing The Display Language (Language/N)
Changing the Display Language (LANGUAGE/N) You can change the language displayed on the screen. The default setting varies depending on where you purchased the camera. Available Settings (Japanese) ENGLISH DEUTSCH (German) FRANÇAIS (French) To change the display language, follow the steps below. Display the SETUP menu. -
Page 146: Selecting The Picture Quality And Size In Cals Mode (Cals Pic Quality)
Selecting the Picture Quality and Size in CALS Mode (CALS PIC QUALITY) You can select the picture quality and size in CALS mode from the following. N3264(8M), N2592(5M), N2048(3M), N1600(2M), F1280(1M), N1280(1M), N640(VGA) At the time of purchase, [CALS PIC QUALITY] is set to [N1280(1M)] (No. -
Page 147: Changing The Camera Memo Mode (Camera Memo Mode)
Changing the Camera Memo Mode (CAMERA MEMO MODE) Image files shot with the camera contain an area where information can be added. The camera memo function allows you to use this area to add a memo about the picture. Before shooting a still image with a camera memo, select [CAMERA MEMO MODE] from [MODE1] or [MODE2] on the SETUP menu. -
Page 148: Displaying The Date And Time At Camera Startup (Start Date/Time)
Displaying the Date and Time at Camera Startup (START DATE/TIME) When [START DATE/TIME] is set to [ON], the next time you turn the camera on and select a shooting mode, the current date and time appear on the picture display for 4 seconds. Display the SETUP menu. -
Page 149: Downloading Images To Your Computer
You can download images to a computer using either of the following methods. • You can use the supplied RICOH Gate La software to collectively download images automatically. To use this method, you must install the software from the supplied CD-ROM. -
Page 150: System Requirements For Using The Supplied Cd-Rom
System Requirements for Using the supplied CD-ROM The following environments are necessary for using the supplied CD-ROM. Please check your computer, or the computer’s user manual. Operating Systems Supported Memory Hard drive space required for installation Display Resolution Display Colors CD-ROM Drive USB Port Caution------------------------------------------------------------------------------------------... -
Page 151: Cd-Rom Setup
CD-ROM Setup Once you insert the supplied CD-ROM in the CD-ROM drive, the installer screen appears automatically. Item Name Installing the Software Installing EC1 Installing DeskTopBinder Lite Use this button to install Desk Top Binder Lite. Browse User’s Manual (Software Version) Browse CD-ROM Content Description Use this button to install software required for batch... -
Page 152: When [Installing The Software] Is Clicked
• For Windows Vista, Windows XP or Windows 2000, administrator privileges are required to install the software. • RICOH Gate La is not network-compatible. Use as a stand-alone application. Note ---------------------------------------------------------------------------------------------- The camera is provided with Irodio Photo & Video Studio software that allows you to display and edit images from your computer. -
Page 153: Windows Vista
Here is an example of the Windows XP screen. Start your computer and insert the supplied CD-ROM in the CD-ROM drive. Operating systems other than Windows Vista • The installer screen appears automatically. Windows Vista • The Autorun screen appears automatically. -
Page 154: Restart Your Computer
• A dialog box indicating that installation of Caplio Software is complete appears. Click [Finish]. Restart your computer. • After restarting your computer, a Windows security warning message appears. Click [Unblock] for RICOH Gate La for DSC. Note ---------------------------------------------------------------------------------------------- You can remove (uninstall) the software. (GP.157) -
Page 155: When [Installing Ec1] Is Clicked
When [Installing EC1] is Clicked EC1 edit detection software for checking whether images have been edited will be installed. To use EC1, if you take still images with [EDIT DETECTION] set to [ON] on the shooting setting menu (GP.92) and transfer the images on your computer, EC1 will detect and indicate whether the images were edited after they were shot. -
Page 156: When [Installing Desktopbinder Lite] Is Clicked
• Select [Run Autorun.exe]. The installer screen appears automatically. Description Software used to manage business documents. Used to connect an earlier model Ricoh camera to a computer running Windows 98 SE/Me/2000. Not available with this camera. Used to connect an earlier model Ricoh camera to a computer... -
Page 157: When [Browse User's Manual (Software Version)] Is Clicked
Click [Installing DeskTopBinder Lite]. • After a few moments, the [Welcome to the InstallShield Wizard for Caplio Software S] screen appears. Click [Next]. • After a few moments, the [Choose Destination Location] screen appears. Confirm where you want to install and then click [Next]. •... -
Page 158: When [Browse Cd-Rom Content] Is Clicked
When [Browse CD-ROM Content] is Clicked You can check folders and files on the CD-ROM. The CD-ROM contains not only the software installed by clicking [Installing the software] but also Acrobat Reader software. This software product can be installed on Windows. For the installation of Acrobat Reader, see P.156. -
Page 159: Uninstalling The Software
Double-click the [Acrobat] folder. Double-click the [English] folder. Double-click [ar500enu] (ar500enu.exe). • A screen appears to confirm user account management for Windows Vista. Select [Continue]. Install Acrobat Reader by following the messages displayed. Uninstalling the Software Caution------------------------------------------------------------------------------------------ • For Windows Vista, Windows 2000/XP, administrator privileges are required to uninstall the software. - Page 160 Irodio Photo & Video Studio/EC1 Click [Start] on the Windows task bar. Select [Settings]-[Control Panel] ([Control Panel] for XP/Vista). Double-click the [Add/Remove Programs] icon (or the [Add or Remove Programs] icon in Windows XP). Select [Irodio Photo & Video Studio] or [EC1]. Click [Change/Remove] for Irodio Photo &...
-
Page 161: Downloading Images Using The Ricoh Gate La
(GP.162) Note ---------------------------------------------------------------------------------------------- • For how to use RICOH Gate La, refer to the “Software User Guide” (PDF file) contained in the provided CD-ROM. (GP.155) • If image transfer does not begin, re-start your computer and perform Steps 1 to 5 again. -
Page 162: Downloading Images Without Using Ricoh Gate La
Downloading Images Without Using RICOH Gate La You can download images from the camera to a computer without having to use software. Make sure that the camera power is off. Connect the accessory USB cable to a USB port of your computer. -
Page 163: Downloading Images From An Sd Memory Card
Downloading Images from an SD Memory Card---------------------------------- It is possible to download images from an SD memory card to the computer via a PC card slot or card reader. Depending on the type of PC card slot or card reader, a memory card adapter may be required when using an SD memory card. -
Page 164: Disconnecting The Camera From Your Computer
Disconnecting the Camera from Your Computer Perform the following operations when disconnecting the camera from your computer. (The display is an example of Windows XP. The terms are different for other operating systems but the operations are the same.) Double-click the [Safely Remove Hardware] icon at the right end of the task bar. -
Page 165: For Macintosh
For Macintosh Refer to P.147 for Windows. This camera supports the following Macintosh operating systems. • Mac OS 9.0 to 9.2.2 • Mac OS X 10.1.2 to 10.5.1 Caution------------------------------------------------------------------------------------------ • You cannot download images from this camera to a Macintosh running Mac OS 8.6. •... -
Page 166: Disconnecting The Camera From Your Computer
From the displayed drive, copy a file to the desired location. • The figure below shows the folder configuration in the drive. • When the contents of the internal memory are displayed, the drive name is [RICOHDCI]. Caution------------------------------------------------------------------------------------------ • Before opening or closing the battery/card cover or terminal cover, be sure to remove any water, sand or mud adhering to the camera, and avoid opening and closing the cover in places where such contaminants may get inside the camera. -
Page 167: Appendices Troubleshooting
7 Appendices Troubleshooting Error Messages If an error message is displayed on the screen, take the corresponding action. Error Message INSERT CARD SET DATE. FILE NUMBER OVER LIMIT UNMATCHED FILE INSUFFICIENT MEMORY. CONTINUE? PROTECTED CARD IS WRITE-PROTECTED. PRINT SETTINGS CANNOT BE SET FOR THIS FILE. -
Page 168: Camera Troubleshooting
Camera Troubleshooting Power Supply Problem The camera does not turn on. The camera turns off during use. The camera does not turn off. The battery has been fully charged, but: • The battery symbol is displayed, indicating a low battery level. •... - Page 169 Shooting Problem Cause The camera does not Battery is exhausted. shoot even if you press the shutter release button. The camera is not on. The camera is in playback mode. The shutter release button is not pressed all the way. The SD memory card is not formatted.
- Page 170 Problem The picture is blurred. The flash does not fire or the flash cannot charge. Even though the flash fired, the picture is dark. Cannot use the ADJ. button function. The image is too bright. The light intensity of the flash is not The image is too dark.
- Page 171 Problem Cause The image lacks natural The picture was shot in conditions color. that made it difficult for auto white balance to adjust the white balance. The date or recording The screen display function is set information does not to no display. appear on the screen.
-
Page 172: Other Problems
Problem A file cannot be deleted. The file is protected. Cannot format the SD memory card. Other Problems Problem Cannot load the SD memory card. The camera does not operate even when the buttons are pressed. The date is incorrect. The set date disappeared. -
Page 173: Software And Computer Troubleshooting
Warning Messages Under Windows XP Service Pack 2 and Windows Vista When software for your Ricoh digital camera is used on a computer with Windows XP Service Pack 2 or Windows Vista installed, the following warning message may appear at software activation or USB connection. - Page 174 Click the [Exceptions] tab. Check that the software is in [Programs and Services]. Click the [Add Program] button to add software that uses the network. If you clicked the [Ask Me Later] button: Each time the program is activated, the [Windows Security Alert] dialog box appears.
-
Page 175: Specifications
Specifications No. of effective pixels (camera) Approx. 10 million pixels Image Sensor 1/2.3" CCD (Total 10.30 million pixels) Lens Focal Length 5.0 mm to 25 mm (equivalent to 28 mm to 140 mm on a 35-mm camera) F-aperture F3.5 to F5.5 Shooting Normal shooting: approx. - Page 176 Number of Still Image Recorded Pixels Movie Text Recording Media Recording 3648 × 2736 Data 3648 × 2432 Capacity 3264 × 2448 2592 × 1944 2048 × 1536 1600 × 1200 1280 × 960 640 × 480 Recording Still Image File Format Movie Compression...
- Page 177 *1 The picture quality mode that can be set varies depending on the image size. *2 Compatible with DCF and DPOF. DCF is the abbreviation for “Design rule for Camera File system” a JEITA standard. (Full compatibility with other devices is not guaranteed.) *3 When the flash is set to [FLASH OFF].
-
Page 178: Number Of Images That Can Be Stored In Internal Memory/Sd Memory Card
Number of Images That Can be Stored in Internal Memory/SD Memory Card The following table shows the approximate number of images that can be recorded in the internal memory and onto an SD memory card at various image size and picture quality settings. Picture Mode Image Size... -
Page 179: Optional Accessories
Optional Accessories The G600 can be used with the items (sold separately) listed below. Items Model Wide Conversion Lens DW-5 AC Adapter AC-4c Rechargeable Battery DB-60 Battery Charger BJ-6 Soft Case SC-600 Using a Wide Conversion Lens A wide conversion lens (DW-5) enables shooting at a lens magnification of 0.8 times (equivalent to a 35mm camera’s 22 mm... -
Page 180: Using The External Flash
Using the External Flash You can attach an external flash and other accessories (available in stores) to the accessory shoe. You can only use an external flash equipped with both of the following functions. • Slave flash function (flash is triggered in response to the firing of another flash) •... -
Page 181: Functions Whose Defaults Are Restored When Camera Is Turned Off
Functions Whose Defaults are Restored When Camera is Turned Off Turning the camera off may reset some function settings to their defaults. The table below indicates whether or not the function is reset to its default when the camera is turned off. Menu Function Shooting... - Page 182 Menu Function SETUP LCD BRIGHTNESS REG. MY SETTINGS STEP ZOOM AUTO POWER OFF OPERATION SOUNDS VOL. SETTINGS LCD CONFIRM. DIGITAL ZOOM IMG ADJ BTN. SET.1 ADJ BTN. SET.2 ADJ BTN. SET.3 ADJ BTN. SET.4 AF AUX. LIGHT ENLGE PHOTO ICON SEQUENTIAL NO.
-
Page 183: Using The Ac Adapter (Sold Separately)
Using the AC Adapter (sold separately) Use of the optional AC adapter is recommended when you use the camera for long periods, such as when you are recording a movie, using interval shooting or reviewing images, and when the camera is connected to a computer. -
Page 184: Disconnecting The Ac Adapter
Disconnecting the AC Adapter Make sure the camera is turned off before disconnecting the AC adapter. Unplug the power plug from the outlet. Press and release the hook. The AC adapter coupler will be ejected. Pull the coupler out of the camera. Close the battery/card cover and turn the knob toward the L mark. -
Page 185: Using Your Camera Abroad
Using Your Camera Abroad AC Adapter (Model: AC-4c), Battery Charger (Model: BJ-6) This AC adapter can be used in regions with a current of 100-240V, 50Hz/60Hz. If you are going to travel to a country that uses a different shaped wall outlet/plug, please consult your travel agent on a plug adapter suitable for wall outlets in your country of destination. -
Page 186: Cautions On Use
• If any foreign object (metal, water, liquid) gets inside the camera, stop using the camera immediately. Turn the power off, remove the battery and memory card, and consult your nearest dealer or Ricoh Repair Center. • In cold climates, if the camera has water droplets adhering to its surface, they may freeze. - Page 187 • This product was manufactured for use in the country in which it was purchased. The warranty is only valid in the country in which the camera was purchased. • Should the product fail or malfunction while you are abroad, the manufacturer assumes no responsibility for servicing the product locally or bearing the expenditure incurred therefore.
-
Page 188: Care And Storage
If dirt cannot be removed or the packing is damaged, request your nearest dealer or Ricoh Repair Center to replace the packing. • In the unlikely event that your camera fails to work properly, please consult your Ricoh Repair Center. - Page 189 If you use the camera frequently in a wet, sandy, or dusty environment, we recommend replacing the packing every year. The replacement will be performed by the Ricoh Repair Center on a chargeable basis. Precautions regarding care of your camera 1.
-
Page 190: Warranty And Servicing
Ricoh Repair Center. Please note that you will be not be reimbursed for the cost of bringing the camera to the Ricoh Repair Center. 2. This warranty does not cover any damage resulting from: 1 failure to follow the instructions in the instruction manual;... -
Page 191: Information To The User
FCC emission limits. (FCC 15.27) COMPLIANCE INFORMATION STATEMENT Product Name: DIGITAL CAMERA Model Number: G600 This device complies with Part 15 of the FCC Rules. Operation is subject to the following two conditions:... -
Page 192: Index
Index Accessory Shoe ... 16, 178 Acrobat Reader ... 156 ADJ BTN. SET.1/2/3/4 ... 137 ADJ./MEMO Button ... 17, 62, 96 AE METERING... 74 AF AUX. LIGHT ... 138 AF Auxiliary Light ... 16, 48 AF target shift ... 65 Alkaline Batteries... - Page 193 RECOVER FILE ... 112 REG. MY SETTINGS ... 128 REPORT PRINT... 120 RESIZE ... 100 RESTORE DEFAULTS ... 93 RICOH Gate La ... 150 ROTATION ... 99 Scene Mode...18, 44 SD Memory Card ...24, 27 SDHC Memory Card ...25 Self-Timer ...48 SEQUENTIAL NO...140...
- Page 194 Wide-angle/Thumbnail Display Button... 17, 37, 51 Zoom ... 37 ZOOM MACRO ... 44, 47...
-
Page 195: Telephone Support Numbers In Europe
Telephone Support Numbers in Europe (from within the UK) (from outside of the UK) Deutschland (innerhalb Deutschlands) (außerhalb Deutschlands) France (à partir de la France) (en dehors de la France) Italia (dall’Italia) (dall’estero) España (desde España) (desde fuera de España) http://www.service.ricohpmmc.com/ 02073 656 580 +44 2073 656 580... -
Page 196: If A Problem Arises
Ricoh is also trying to solve the great subjects of “Saving energy by reducing power consumption” and “Reducing environment-affecting chemical substances contained in products”. If a problem arises First of all, see “Troubleshooting” (GP.165) in this manual. If the issues still persist, please contact a Ricoh office. Ricoh Offices RICOH COMPANY, LTD.