Jenn-Air JMDFS24GS Installation Instructions And Use
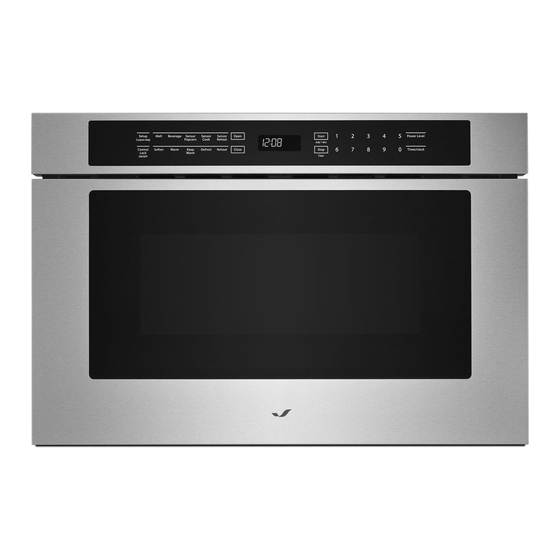
24" (61.0 cm) microwave drawer
Hide thumbs
Also See for JMDFS24GS:
- Use and care manual (36 pages) ,
- Dimensions and installation information (3 pages)
Table of Contents
Advertisement
Available languages
Available languages
Quick Links
Download this manual
See also:
Use and Care Manual
24" (61.0 CM) MICROWAVE DRAWER
INSTRUCTIONS D'INSTALLATION DU TIROIR À
MICRO-ONDES DE 24 PO (61,0 CM)
MICROWAVE DRAWER SAFETY ..................................................2
INSTALLATION REQUIREMENTS .................................................3
Tools and Parts .............................................................................3
Location Requirements ................................................................3
Minimum Dimensions...................................................................3
Electrical Requirements ...............................................................4
24" (61.00 CM) STANDARD MOUNT ............................................5
Cabinet Preparation .....................................................................5
24" (61.00 CM) FLUSH MOUNT ....................................................6
Cabinet Preparation .....................................................................6
INSTALLATION INSTRUCTIONS ...................................................7
Install the Anti-Tip Block ..............................................................7
Install the Microwave Drawer .......................................................7
Install the Deflector Vent For Flush Installation ...........................8
Complete Installation ...................................................................8
ASSISTANCE ..................................................................................8
IMPORTANT:
Installer: Leave installation instructions with the homeowner.
Homeowner: Keep installation instructions for future reference.
IMPORTANT:
Save for local electrical inspector's use.
IMPORTANT :
Installateur : Remettre les instructions d'installation au propriétaire.
Propriétaire : Conserver les instructions d'installation pour référence
ultérieure.
IMPORTANT :
À conserver pour consultation par l'inspecteur local des installations
électriques.
W11101480B
TINKSB229MRR0
INSTALLATION INSTRUCTIONS
Table of Contents/Table des matières
SÉCURITÉ DU TIROIR À MICRO-ONDES ...................................9
EXIGENCES D'INSTALLATION ...................................................10
Outillage et pièces ......................................................................10
Exigences d'emplacement .........................................................10
Dimensions minimales ...............................................................10
Spécifications électriques ..........................................................11
SUPPORT STANDARD DE 24 PO (61 CM) .................................12
Préparation de l'armoire .............................................................12
SUPPORT EN AFFLEUREMENT DE 24 PO (61 CM) .................13
Préparation de l'armoire .............................................................13
INSTRUCTIONS D'INSTALLATION .............................................14
Installation de la cale de bride antibasculement .......................14
Installation du tiroir à micro-ondes ............................................14
installation en affleurement ........................................................15
Terminer l'installation ..................................................................15
ASSISTANCE ................................................................................15
Advertisement
Table of Contents

Related Manuals for Jenn-Air JMDFS24GS


Summary of Contents for Jenn-Air JMDFS24GS
-
Page 1: Table Of Contents
24" (61.0 CM) MICROWAVE DRAWER INSTALLATION INSTRUCTIONS INSTRUCTIONS D’INSTALLATION DU TIROIR À MICRO-ONDES DE 24 PO (61,0 CM) Table of Contents/Table des matières MICROWAVE DRAWER SAFETY ..........2 SÉCURITÉ DU TIROIR À MICRO-ONDES ........9 INSTALLATION REQUIREMENTS ..........3 EXIGENCES D’INSTALLATION ...........10 Tools and Parts ................3 Outillage et pièces ..............10 Location Requirements ..............3 Exigences d’emplacement ............10... -
Page 2: Microwave Drawer Safety
MICROWAVE DRAWER SAFETY... -
Page 3: Installation Requirements
INSTALLATION REQUIREMENTS These installation instructions cover different models. The Minimum Dimensions appearance of your particular model may differ slightly from the illustrations in these Installation Instructions. Minimum Wall Oven Combination Installation Tools and Parts Clearances Gather the required tools and parts before starting installation. For proper installation, the following minimum clearances must Read and follow the instructions provided with any tools listed exist above and below the cutout opening. -
Page 4: Electrical Requirements
Product Dimensions Electrical Requirements " ⁵/₈ " 4¹¹⁄₁₆ (54.9 cm) (11.9 cm) " (4.4 cm ³/₄ 4" (10.2 cm) 16 " " ¹⁹⁄₃₂ (40.6 cm) (37.1 cm) " ¹/₂ (59.7 cm) " ⁷/₈ 1¹⁷/₃₂ " (60.6 cm) (39 mm) IMPORTANT: Observe all governing codes and ordinances. The drawer opens 15 (38.7 cm). -
Page 5: 24" (61.00 Cm) Standard Mount
24” (61.00 CM) STANDARD MOUNT Cabinet Preparation Cabinet Dimensions A. 6” (152.40 mm) minimum 16” (406.40 mm) maximum B. Suggested electrical recepticle location Anti-Tip block C. Anti-Tip block D. 3" (76.20 mm) E. 3 " (88.90 mm) F. 4.5" (114.30 mm) G. -
Page 6: 24" (61.00 Cm) Flush Mount
24” (61.00 CM) FLUSH MOUNT Cabinet Preparation Cabinet Dimensions Note: the face of the shelf must sit 1 " (44.45 mm) back from the face of the cabinet. Shelf face Cabiet face Flush mount de ector vent 23 ¹¹/₁₆" (601.66 mm) ³/₄"... -
Page 7: Installation Instructions
INSTALLATION INSTRUCTIONS Install the Anti-Tip Block Install the Microwave Drawer WARNING WARNING Excessive Weight Hazard Use two or more people to move and install microwave oven. Failure to do so can result in back or other injury. Crush Hazard 1. Empty Microwave Drawer of any loose contents. Microwave drawer can tip and fall out of opening. -
Page 8: Install The Deflector Vent For Flush Installation
9. Install four 1” (2.5 cm) screws to secure the Microwave 4. Guide the drawer into the prepared opening. Avoid contact Drawer in place, then close the drawer. with the sides of the cutout opening and also pinching the cord between the oven and the wall. 5. -
Page 9: Sécurité Du Tiroir À Micro-Ondes
SÉCURITÉ DU TIROIR À MICRO-ONDES Votre sécurité et celle des autres est très importante. Nous donnons de nombreux messages de sécurité importants dans ce manuel et sur votre appareil ménager. Assurez-vous de toujours lire tous les messages de sécurité et de vous y conformer. Voici le symbole d’alerte de sécurité. -
Page 10: Exigences D'installation
EXIGENCES D’INSTALLATION Ces instructions d’installation couvrent plusieurs modèles. Dimensions minimales L’apparence de votre modèle peut différer légèrement des illustrations présentes dans ce manuel. Distance de dégagement minimal pour un four Outillage et pièces encastré combiné Rassembler les outils et pièces nécessaires avant d’entreprendre Pour une installation correcte, les distances de dégagement l’installation. -
Page 11: Spécifications Électriques
Dimensions du produit Spécifications électriques AVERTISSEMENT " ⁵/₈ " 4¹¹⁄₁₆ (54,9 cm) (11,9 cm) " (4,4 cm ³/₄ 4" (10,2 cm) 16 " " ¹⁹⁄₃₂ (40,6 cm) (37,1 cm) Risque de choc électrique Brancher sur une prise à 3 alvéoles reliée à la terre. Ne pas enlever la broche de liaison à... -
Page 12: Support Standard De 24 Po (61 Cm)
SUPPORT STANDARD DE 24 PO (61 CM) Préparation de l’armoire Dimensions de l’armoire A. Minimum de 6 po (152,40 mm), maximum de 16 po (406,40 mm) B. Emplacement suggéré de la prise électrique Cale de bride antibasculement C. Cale de bride antibasculement D. -
Page 13: Support En Affleurement De 24 Po (61 Cm)
SUPPORT EN AFFLEUREMENT DE 24 PO (61 CM) Préparation de l’armoire Dimensions de l’armoire Remarque : le visage de l'étagère doit Assis 1 "(44,45 mm) de retour de Le visage du cabinet. Visage d'étagère armoire visage A eurant support dé ecteur d'échappement 23 ¹¹/₁₆"... -
Page 14: Instructions D'installation
INSTRUCTIONS D’INSTALLATION Installation de la cale de bride antibasculement AVERTISSEMENT ¹³⁄₁₆ " (37,6 cm) Risque d’écrasement Le tiroir à micro-ondes peut basculer et tomber de l’ouverture. Fixer la cale de bride anti-basculement au mur, A. Cale de bride antibasculement conformément aux instructions d’installation. À... -
Page 15: Installer Le Déflecteur D'évacuation Pour Une Installation En Affleurement
AVERTISSEMENT Risque de choc électrique Brancher sur une prise à 3 alvéoles reliée à la terre. Détail de la tablette montrant le déflecteur d’évacuation installé. Ne pas enlever la broche de liaison à la terre. Ne pas utiliser un adaptateur. AVERTISSEMENT Ne pas utiliser un câble de rallonge. -
Page 16: Terminer L'installation
à micro-ondes. La plaque signalétique se trouve sur une surface plane, juste derrière la paroi arrière du tiroir. W11101480B /™ ©2017 Jenn-Air. Used under license in Canada. All rights reserved. ® TINKSB229MRR0 Jenn-Air. Utilisé sous licence au Canada. Tous droits réservés.