Table of Contents
Advertisement
www.proform.com
new products, prizes,
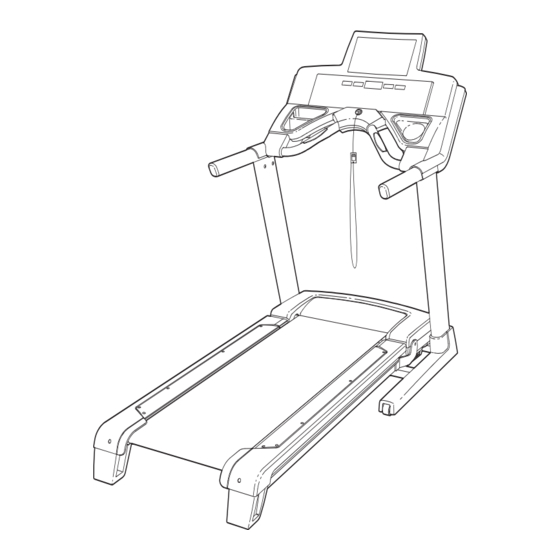
Model No. RBTL79607.0
fitness tips, and much more!
Serial No.
Write the serial number in the space
above for reference.
www.healthrider.com
new products, prizes,
Serial Number
fitness tips, and much more!
Decal
QUESTIONS?
As a manufacturer, we are com-
mitted to providing complete cus-
tomer satisfaction. If you have
questions, or if parts are missing,
www.nordictrack.com
PLEASE DO NOT CONTACT
THE STORE; please contact
new products, prizes,
Customer Care.
fitness tips, and much more!
IMPORTANT: You must note the
product model number and
serial number (see the drawing
above) before contacting us:
CALL TOLL-FREE:
1-877-994-4999
www.weiderfitness.com
Mon.–Fri. 6 a.m.–6 p.m. MST
Sat. 8 a.m.–4 p.m. MST
new products, prizes,
fitness tips, and much more!
ON THE WEB:
www.reebokservice.com
CAUTION
Read all precautions and instruc-
tions in this manual before using
this equipment. Save this manual
for future reference.
Visit our website at
Visit our website at
Visit our website at
Visit our website at
Visit our website at
www.weslo.com
new products, prizes,
USER'S MANUAL
fitness tips, and much more!
Visit our website at
www.freemotionfitness.com
Visit our website at
www.imagefitness.com
new products, prizes,
fitness tips, and much more!
Visit our website at
www.workoutwarehouse.com
new products, prizes,
fitness tips, and much more!
Visit our website at
www.reebokhomefitness.com
®
new products, prizes,
®
fitness tips, and much more!
Advertisement
Table of Contents

Related Manuals for Reebok 8100 ES RBTL79607.0


Summary of Contents for Reebok 8100 ES RBTL79607.0
- Page 1 Visit our website at www.proform.com new products, prizes, Model No. RBTL79607.0 fitness tips, and much more! Serial No. Write the serial number in the space above for reference. Visit our website at www.healthrider.com new products, prizes, Serial Number fitness tips, and much more! Decal QUESTIONS? As a manufacturer, we are com-...
-
Page 2: Table Of Contents
HOW TO FOLD AND MOVE THE TREADMILL ........ -
Page 3: Important Precautions
To reduce the risk of serious injury, read all important precautions and in- structions in this manual and all warnings on your treadmill before using your treadmill. ICON as- sumes no responsibility for personal injury or property damage sustained by or through the use of this product. - Page 4 (See the drawing on page 5 for the location of the circuit breaker.) 21. Do not attempt to raise, lower, or move the treadmill until it is properly assembled.
-
Page 5: Before You Begin
BEFORE YOU BEGIN Thank you for selecting the revolutionary REEBOK 8100 ES treadmill. The 8100 ES treadmill offers an im- pressive selection of features designed to make your workouts at home more enjoyable and effective. And when you’re not exercising, the unique 8100 ES tread- mill can be folded up, requiring less than half the floor space of other treadmills. -
Page 6: Assembly
During shipping, a small amount of lubricant may be transferred to the top of the walking belt or the shipping carton. This is a normal condition and does not affect treadmill perfor- mance. If there is lubricant on top of the walking belt, simply wipe off the lubricant with a soft cloth and a mild, non-abrasive cleaner. - Page 7 2. Insert an Extension Leg (97) into the Base (85) as shown. If necessary, use a rubber mallet to fully insert the Extension Leg. Next, hold two Extension Leg Nuts (10) in the bottom of the Extension Leg, and tighten two 5/16" x 2" Bolts (2) with two 5/16"...
- Page 8 5. With the help of a second person, carefully tip the treadmill onto its right side. Partially fold the Frame (55) so that the treadmill is more stable. Do not fully fold the Frame until the treadmill is completely assembled.
- Page 9 2 1/4" Screws (7). Be careful not to over- tighten the Screws. With the help of a second person, carefully tip the treadmill down so that the Base (85) is flat on the floor. 9. With the help of a second person, hold the con- sole assembly near the Left Upright (111) and the Right Upright (113).
- Page 10 THE TREADMILL FOR USE on page 21). 13. Make sure that all parts are properly tightened before you use the treadmill. Keep the included hex key in a secure place; the hex key is used to adjust the walking belt (see pages 23 and 24). To protect the floor or carpet from damage, place a mat under the treadmill.
-
Page 11: Operation And Adjustment
Failure to use a properly functioning surge suppressor could result in damage to the control system of the treadmill. If the control system is damaged, the walking belt may change speed, accelerate, or stop unexpect- edly, which may result in a fall and serious injury. - Page 12 When the manual mode of the console is selected, you can change the speed and incline of the treadmill with the touch of a button. As you exercise, the console will display instant exercise feedback. You can even mea- sure your heart rate using the handgrip pulse sensor.
-
Page 13: To Turn On The Power
THE INFORMATION MODE on page 20 to turn off the demo mode. Next, stand on the foot rails of the treadmill. Locate the clip attached to the key (see the drawing on page 12), and slide the clip securely onto the waistband of your clothes. - Page 14 The display will also show your heart rate when you use the handgrip pulse sensor (see step 6 on page 15). In addition, the display will show the incline level of the treadmill each time the incline level changes.
- Page 15 Step onto the foot rails, press the Stop button, and adjust the incline of the treadmill to the lowest setting. The incline must be at the lowest setting when you fold the treadmill to the storage posi- tion, or you may damage the treadmill.
- Page 16 3. Press the Start button or Speed increase button to start the workout. A moment after you press the button, the treadmill will automatically adjust to the first speed and in- cline settings of the workout. Hold the handrails and begin walking.
- Page 17 4. Press the Start button or the Speed increase button to start the workout. A moment after you press the button, the treadmill will automatically adjust to the first speed and in- cline settings of the workout. Hold the handrails and begin walking.
- Page 18 Speed and Incline increase and decrease buttons. Every few times a Speed button is pressed, an ad- ditional indicator will light or darken in the Current Segment column.
- Page 19 TO CREATE A CUSTOM WORKOUT on page 3. Press the Start button to start the workout. A moment after you press the button, the treadmill will automatically adjust to the first speed and in- cline settings of the workout. Hold the handrails and begin walking.
-
Page 20: The Information Mode
THE INFORMATION MODE The console features an information mode that keeps track of the total number of hours that the treadmill has been used and the total number of miles that the walk- ing belt has moved. The information mode also allows you to select miles or kilometers as the unit of mea- surement for speed and distance. -
Page 21: How To Fold And Move The Treadmill
HOW TO LOWER THE TREADMILL FOR USE 1. Hold the upper end of the treadmill with your right hand. Pull the latch knob to the left and hold it. It may be necessary to push the frame forward as you pull the knob to the left. Pivot the frame downward and release the latch knob. -
Page 22: Troubleshooting
TROUBLESHOOTING Most treadmill problems can be solved by following the steps below. Find the symptom that applies, and follow the steps listed. If further assistance is needed, see the front cover of this manual. PROBLEM: The power does not turn on SOLUTION: a. - Page 23 PROBLEM: The console displays remain lit when you remove the key from the console SOLUTION: a. The console features a display demo mode, designed to be used if the treadmill is displayed in a store. If the displays remain lit when you remove the key, the demo mode is turned on. To turn off the demo mode, hold down the Stop button for a few seconds.
- Page 24 1/2 of a turn. Be careful not to over- tighten the walking belt. Plug in the power cord, insert the key, and run the treadmill for a few minutes. Repeat until the walking belt is centered. b. If the walking belt slips when walked on, first remove the key and UNPLUG THE POWER CORD.
-
Page 25: Exercise Guidelines
EXERCISE GUIDELINES WARNING: Before beginning any exercise program, consult your physician. This is especially important for persons over the age of 35 or persons with pre-existing health problems. The pulse sensor is not a medical device. Various factors may affect the accuracy of heart rate readings. -
Page 26: Part List
PART LIST—Model No. RBTL79607.0 To locate the parts listed below, see the EXPLODED DRAWING near the end of this manual. Key No. Qty. Description #8 x 1" Tek Screw 5/16" x 2" Bolt 3/8" x 1 3/4" Bolt 3/8" x 1" Bolt 3/8"... - Page 27 Key No. Qty. Description Console Matrix 1/4" Flat Washer Key/Clip 15 1/2" Wire Tie Left Accessory Tray Long Isolator, Left Incline Stop Bracket Latch Knob Idler Pulley Nut 5/16" Flat Washer Left Upright Console Back Right Upright Right Accessory Tray Key No.
-
Page 28: Exploded Drawing
EXPLODED DRAWING A—Model No. RBTL79607.0 R0907A... - Page 29 EXPLODED DRAWING B—Model No. RBTL79607.0 R0907A...
- Page 30 EXPLODED DRAWING C—Model No. RBTL79607.0 89 88 89 88 R0907A...
- Page 31 EXPLODED DRAWING D—Model No. RBTL79607.0 R0907A 99 6...
-
Page 32: Ordering Replacement Parts
ORDERING REPLACEMENT PARTS To order replacement parts, please see the front cover of this manual. To help us assist you, be prepared to pro- vide the following information when contacting us: • the model number and serial number of the product (see the front cover of this manual) •...