Table of Contents
Advertisement
Available languages
Available languages
Quick Links
MICROWAVE
Owner's Manual...........................1 - 12
MICRO ONDE
Manuel du propriétaire................13 - 24
MICROONDA
Manual del propietario................25 - 36
DANBY PRODUCTS LIMITED, ONTARIO, CANADA N1H 6Z9
DANBY PRODUCTS INC., FINDLAY, OHIO, USA 45840
OWNER'S MANUAL
MANUEL DU PROPRIÉTAIRE
MANUAL DEL PROPIETARIO
MODEL • MODÈLE • MODELO
DMW07A2SSDD
DMW07A2BSSDD
2017.08.23
Advertisement
Table of Contents

Related Manuals for Danby DMW07A2SSDD


Summary of Contents for Danby DMW07A2SSDD
- Page 1 MICROWAVE Owner’s Manual......1 - 12 MODEL • MODÈLE • MODELO MICRO ONDE Manuel du propriétaire....13 - 24 DMW07A2SSDD DMW07A2BSSDD MICROONDA Manual del propietario....25 - 36 DANBY PRODUCTS LIMITED, ONTARIO, CANADA N1H 6Z9 DANBY PRODUCTS INC., FINDLAY, OHIO, USA 45840 2017.08.23...
- Page 2 Welcome Welcome to the Danby family. We are proud of our quality products and we believe in dependable service. We suggest that you read this owner’s manual before plugging in your new appliance as it contains important operation information, safety information, troubleshooting and maintenance tips to ensure the reliability and longevity of your appliance.
-
Page 3: Radio Frequency Interference
Important Safety Information READ AND FOLLOW ALL SAFETY INSTRUCTIONS RADIO FREQUENCY INTERFERENCE GROUNDING INSTRUCTIONS This equipment generates and uses ISM frequencies This appliance must be grounded. In the event of an and if not installed and used properly in strict electrical short circuit, grounding reduces the risk of accordance with the manufacturer’s instructions, electrical shock by providing an escape wire for the... - Page 4 Important Safety Information READ AND FOLLOW ALL SAFETY INSTRUCTIONS SAFETY REQUIREMENTS SAFETY - SUPERHEATED LIQUID This appliance is specifi cally designed to heat, Liquids are able to be overheated beyond the cook or dry food. It is not designed for industrial or boiling point without appearing to be boiling laboratory use.
-
Page 5: Cooking Techniques
OPERATING INSTRUCTIONS INSTALLATION INSTRUCTIONS INSTALLATION COOKING TECHNIQUES • Remove all packing materials from the inside To achieve the best results when cooking in this and outside of the appliance. Do not remove the appliance, follow the suggestions below. cardboard mica sheet covering the magnetron. STIRRING •... -
Page 6: Cooking Utensils Guide
OPERATING INSTRUCTIONS COOKING UTENSILS GUIDE LIMITED USE Aluminum Foil: Use narrow strips to prevent Certain utensils are inappropriate for use in a overcooking of exposed areas. Using too much foil microwave. See below for more information on can cause arcing and damage the appliance. Keep which utensils are recommended, which should only a distance of at least 1 inch (2.6 cm) between the have limited use and which are not recommended. -
Page 7: Control Panel
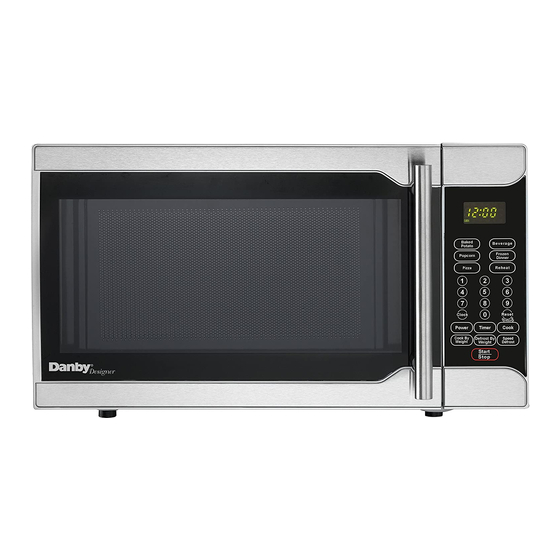
OPERATING INSTRUCTIONS FEATURES 1. Door Lock System 2. Glass Tray 3. Roller Ring 4. Mica Sheet (Do Not Remove) 5. Control Panel CONTROL PANEL 1. Display: Shows cooking time, power level and clock time. 2. Auto Cook Menus: Instant settings to cook popular foods. -
Page 8: Microwave Cooking
OPERATING INSTRUCTIONS FIRST TIME USE MICROWAVE COOKING When the appliance is plugged in for the fi rst time, To set a cooking power and time: the display will show “ENTER CLOCK TIME”. Use the number pad to enter the current time and then 1. -
Page 9: Frozen Dinner
OPERATING INSTRUCTIONS AUTO COOK BEVERAGE For a 5 - 7 oz. serving size: The Auto Cook buttons can be used to set automatic cooking functions for the below food types. 1. Press the Beverage button. 2. Use the number pad from 1 - 4 to enter the BAKED POTATO number of cups. -
Page 10: Cook By Weight
OPERATING INSTRUCTIONS COOK BY WEIGHT SPEED DEFROST 1. Press the Cook By Weight button. 1. Press the Speed Defrost button. 2. Press number 1, 2 or 3 to indicate what type 2. Use the number pads to enter the desired of meat will be cooked, as per the below chart. -
Page 11: Care And Maintenance
CARE AND MAINTENANCE CLEANING MAINTENANCE Turn off and unplug the appliance before To remove odors from the microwave: performing any cleaning. 1. Combine a cup of water with the juice and skin The inside of the appliance should be cleaned with of one lemon in a microwavable bowl. -
Page 12: Troubleshooting
TROUBLESHOOTING Danby Consumer Care: 1-800-263-2629 Hours of operation: Monday to Thursday 8:30 am - 6:00 pm Eastern Standard Time Friday 8:30 am - 4:00 pm Eastern Standard Time Information in this manual is subject to change without notice. PROBLEM POSSIBLE CAUSE No power •... - Page 13 Sale of Goods Act or like legislation or statute is hereby expressly Nothing within this warranty shall imply that Danby will be responsible or liable for any spoilage or damage to food or other c ontents of this appliance, whether due excluded.
- Page 14 Bienvenue Bienvenue à la famille Danby. Nous sommes fi ers de la qualité de nos produits et nous croyons en le service fi able. Nous vous suggérons de lire ce manual d’utilisation avant de brancher votre nouvel appareil car il contient des informations inportantes sur l’utilisation, la sécurité, le dépannage et la maintenance, afi...
- Page 15 Consignes de sécurité importantes LIRE ET SUIVRE TOUTES LES INSTRUCTIONS DE SÉCURITÉ INTERFÉRENCE AUX FRÉQUENCES RADIO INSTRUCTIONS DE MISE À LA TERRE ÉLECTRIQUES Cet appareil doit être mis à la terre. En cas de courtcircuit, la mise à la terre réduit les risques de Cet appareil génère et utilise des fréquences radio ISM et, s’il n’est pas installé...
- Page 16 Consignes de sécurité importantes LIRE ET SUIVRE TOUTES LES INSTRUCTIONS DE SÉCURITÉ EXIGENCES DE SÉCURITÉ SÉCURITÉ - LIQUIDE SURCHAUFFÉ Les liquides peuvent être surchauffés au-delà du point d’ébullition sans que cela soit apparent, en Cet appareil est spécialement conçu pour chauffer, raison de la tension superfi...
- Page 17 INSTRUCTIONS D’INSTALLATION CONSIGNES D’UTILISATION INSTALLATION TECHNIQUES DE CUISSON • Retirez tous les matériaux d’emballage de Pour obtenir les meilleurs résultats lors de la cuisson l’intérieur et de l’extérieur de l’appareil. Ne dans cet appareil, suivez les suggestions ci-dessous. retirez pas la feuille de mica en carton couvrant le magnétron.
-
Page 18: Consignes D'utilisation
CONSIGNES D’UTILISATION GUIDE DES USTENSILES DE CUISINE USAGE LIMITÉ Feuille d’aluminium: Utilisez des bandes étroites Certains ustensiles sont inappropriés pour une pour éviter la surcoupe des zones exposées. utilisation dans un micro-ondes. Voir ci-dessous L’utilisation de trop de papier d’aluminium peut pour plus d’informations sur les ustensiles provoquer des arcs et endommager l’appareil. -
Page 19: Caractéristiques
CONSIGNES D’UTILISATION CARACTÉRISTIQUES 1. Système de verrouillage de porte 2. Plateau en verre 3. Anneau de rouleau 4. Feuille de mica (Ne pas enlever) 5. Panneau de contrôle PANNEAU DE CONTRÔLE 1. Affi cher: Shows cooking time, power level and clock time. -
Page 20: Première Utilisation
CONSIGNES D’UTILISATION PREMIÈRE UTILISATION CUISSON À MICRO-ONDES Lorsque l’appareil est branché pour la première Pour régler la puissance et l’heure de cuisson: fois, l’affi chage indique “ENTER CLOCK TIME”. 1. Utilisez le pavé numérique pour entrer le temps Utilisez le pavé numérique pour entrer l’heure de cuisson désiré. - Page 21 CONSIGNES D’UTILISATION CUISSON AUTOMATIQUE BREUVAGE Pour 5 à 7 oz. portion: Les boutons de cuisson automatique peuvent être utilisés pour régler les fonctions de cuisson 1. Appuyez sur le bouton Breuvage. automatiques pour les types d’aliments ci-dessous. 2. Utilisez le pavé numérique de 1 à 4 pour entrer le nombre de tasses.
- Page 22 CONSIGNES D’UTILISATION CUISSON PAR POIDS DÉGEL RAPIDE 1. Appuyez sur le bouton Cuisson par poids. 1. Appuyez sur le bouton de Dégel rapide. 2. Appuyez sur les numéros 1, 2 ou 3 pour 2. Utilisez les touches numériques pour entrer le indiquer quel type de viande sera cuit, selon temps de dégivrage souhaité.
-
Page 23: Soins Et Entretien
SOINS ET ENTRETIEN NETTOYAGE ENTRETIEN Éteignez et débranchez l’appareil avant de Pour éliminer les odeurs du micro-ondes: procéder à un nettoyage. 1. Mélangez une tasse d’eau avec le jus et la peau L’intérieur de l’appareil doit être nettoyé avec un d’un citron dans un bol à... -
Page 24: Dépannage
DÉPANNAGE Danby soins du consommateur: 1-800-263-2629 Heures d’ouverture: Lundi à Jeudi 8 h 30 à 18 h, heure normale de l’Est Vendredi de 8 h 30 à 16 h, heure normale de l’Est Les informations contenues dans ce manuel sont sujettes à modifi cation sans préavis. - Page 25 En vertu de la présente, il n’existe aucune autre garantie, condition ou représentation, qu’elle soit exprimée ou tacite, de façon Nothing within this warranty shall imply that Danby will be responsible or liable for any spoilage or damage to food or other c ontents of this appliance, whether due manifeste ou intentionnelle, par Danby ou ses distributeurs agréés.
- Page 26 Bienvenido Bienvenido a la familia Danby. Estamos orgullosos de nuestros productos de calidad y creemos en el servicio fi able. Sugerimos que lea este manual del propietario antes de conectar el nuevo aparato ya que contiene información importante sobre la operación, información de seguridad, solución de problemas y consejos de mantenimiento para garantizar la fi...
- Page 27 Importantes Instrucciones de Seguridad LEA Y SIGA TODAS LAS INSTRUCCIONES DE SEGURIDAD INTERFERENCIA DE RADIO FRECUENCIA LA CONECIÓN A TIERRA Este equipo genera y usa frecuencias en la Este artefacto debe ser conectado a tierra. En banda ISM (Industrial, Scientifi c and Medical) y caso de un corto circuito eléctrico, la conexión a si no se instala y se usa estrictamente de acuerdo tierra reduce el riesgo de una descarga eléctrica...
- Page 28 Importantes Instrucciones de Seguridad LEA Y SIGA TODAS LAS INSTRUCCIONES DE SEGURIDAD REQUERIMIENTOS DE SEGURIDAD SEGURIDAD – LIQUIDOS SUPER-CALENTADOS Los líquidos pueden ser sobre-calentados mas allá de su Utilice este aparato sólo para el uso previsto, tal y punto de ebullición si que asi parezca debido la tensión como se describe en este manual.
- Page 29 INSTRUCCIONES DE INSTALACIÓN INSTRUCCIONES DE OPERACIÓN INSTALACIÓN TÉCNICAS DE COCCIÓN Para obtener los mejores resultados al cocinar en • Retire todos los materiales de embalaje del este aparato, siga las siguientes sugerencias. interior y del exterior del aparato. No retire la hoja de mica de cartón que cubre el magnetrón.
-
Page 30: Instrucciones De Operación
INSTRUCCIONES DE OPERACIÓN GUÍA DE UTENSILIOS DE COCINA USO LIMITADO Papel de aluminio: Utilice tiras estrechas para Ciertos utensilios son inadecuados para su uso evitar la cocción excesiva de las áreas expuestas. en un microondas. Vea a continuación para más Utilizar demasiada lámina puede provocar arcos y información sobre qué... -
Page 31: Panel De Control
INSTRUCCIONES DE OPERACIÓN CARACTERISTICAS 1. Sistema de cierre de puerta 2. Bandeja de vidrio 3. Anillo de rodillos 4. Hoja de mica (No quitar) 5. Panel de control PANEL DE CONTROL 1. Pantalla de visualización: Muestra el tiempo de cocción, el nivel de potencia y la hora del reloj. 2. -
Page 32: Ajuste Del Reloj
INSTRUCCIONES DE OPERACIÓN USO PRIMERO COCCIÓN DE MICROONDAS Cuando el aparato esté enchufado por primera vez, Para ajustar la potencia y el tiempo de cocción: la pantalla mostrará “ENTER CLOCK TIME”. Utilice 1. Utilice el teclado numérico para introducir el el teclado numérico para introducir la hora actual y tiempo de cocción deseado. - Page 33 INSTRUCCIONES DE OPERACIÓN COCCIÓN AUTOMÁTICA BEBIDA (BEVERAGE) Para un 5 - 7 onz. tamaño de la porción: Los botones cocción automática se pueden utilizar para confi gurar las funciones de cocción 1. Presione el botón Bebida. automática para los tipos de alimentos siguientes. 2.
-
Page 34: Cocinar Por Peso
INSTRUCCIONES DE OPERACIÓN COCINAR POR PESO DESCONGELAMIENTO VELOCIDAD 1. Presione el botón Cocinar por Peso. 1. Pulse el botón Descongelamiento velocidad. 2. Oprima el número 1, 2 o 3 para indicar qué 2. Utilice las teclas numéricas para introducir el tipo de carne se cocinará, como se indica en la tiempo de descongelación deseado. -
Page 35: Cuidado Y Mantenimiento
CUIDADO Y MANTENIMIENTO LIMPIEZA MANTENIMIENTO Apague y desenchufe el aparato antes de realizar Para eliminar los olores del microondas: cualquier limpieza. 1. Combine una taza de agua con el jugo y la piel El interior del aparato se debe limpiar con un de un limón en un tazón microwavable. - Page 36 SOLUCIÓN SUGERIDA Danby cuidado del consumidor: 1-800-263-2629 Horas de operación: Lunes a Jueves 8:30 am - 6:00 pm Hora estándar del este Viernes 8:30 am - 4:00 pm Hora estándar del este La información de este manual está sujeta a cambios sin previo aviso.
- Page 37 EXCLUSIONES Nothing within this warranty shall imply that Danby will be responsible or liable for any spoilage or damage to food or other c ontents of this appliance, whether due Salvo lo aquí indicado por Danby, no existen otras garantías, condiciones o representaciones, explícitas o implícitas, concretas o to any defect of the appliance, or its use, whether proper or improper.
- Page 38 NOTES / REMARQUES / NOTAS : __________________________________________________________________________________________ __________________________________________________________________________________________ __________________________________________________________________________________________ __________________________________________________________________________________________ __________________________________________________________________________________________ __________________________________________________________________________________________ __________________________________________________________________________________________ __________________________________________________________________________________________ __________________________________________________________________________________________ __________________________________________________________________________________________ __________________________________________________________________________________________ __________________________________________________________________________________________ __________________________________________________________________________________________ __________________________________________________________________________________________ __________________________________________________________________________________________ __________________________________________________________________________________________ __________________________________________________________________________________________ __________________________________________________________________________________________ __________________________________________________________________________________________ __________________________________________________________________________________________ __________________________________________________________________________________________ __________________________________________________________________________________________...
- Page 39 NOTES / REMARQUES / NOTAS : __________________________________________________________________________________________ __________________________________________________________________________________________ __________________________________________________________________________________________ __________________________________________________________________________________________ __________________________________________________________________________________________ __________________________________________________________________________________________ __________________________________________________________________________________________ __________________________________________________________________________________________ __________________________________________________________________________________________ __________________________________________________________________________________________ __________________________________________________________________________________________ __________________________________________________________________________________________ __________________________________________________________________________________________ __________________________________________________________________________________________ __________________________________________________________________________________________ __________________________________________________________________________________________ __________________________________________________________________________________________ __________________________________________________________________________________________ __________________________________________________________________________________________ __________________________________________________________________________________________ __________________________________________________________________________________________ __________________________________________________________________________________________...
- Page 40 MODEL • MODÈLE • MODELO DMW07A2SSDD DMW07A2BSSDD DANBY PRODUCTS LIMITED, ONTARIO, CANADA N1H 6Z9 DANBY PRODUCTS INC., FINDLAY, OHIO, USA 45840 Printed in China Imprimé en Chine Impreso en China...