Advertisement
Quick Links
Advertisement

Summary of Contents for Sony UP860
- Page 1 OPERATORS MANUAL CEC B&W PhotoRide...
-
Page 2: Initial Inspection
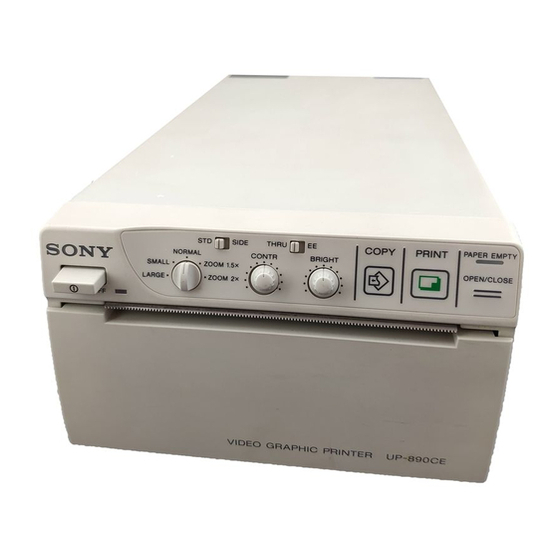
(iii) connect the 3.5mm stereo jack connector to the “remote” connection. Now set the DIL switch settings. Please determine the printer type in use before setting DIL switches. Sony UP860 DIL switches 1 & 8 off. All others on Ensure the gamma switch is set to II... - Page 4 “the self test is complete” On Sony printers the power is applied to the printer whenever the ride is connected to a mains supply. Therefore on Sony models now press the power switch on the printer front and the power LED situated next to the power switch should now illuminate.
-
Page 5: Adjusting Picture Quality
Having sited the Photo Ride, the picture may need adjustment to quality. To ease picture adjustments a monitor taking a PAL input and fitted with a BNC connector is useful and for some adjustments essential. For this purpose Amutec strongly recommend the Sony Viewcam Model FDM030 a) With the power off, connect the monitor to the BNC connector on the rear of the printer marked “Video Output”... - Page 7 8. ADJUSTING PICTURE QUALITY (Continued) ALC Adjustment (Light Metering) Adjustment of light metering between average and peak can be obtained by adjusting ALC Potentiometer. The method of ALC adjustment is as follows:- Take off the ALC cap on the lens cover and turn the ALC potentiometer with a precision screwdriver until suitable exposure is obtained Turn clockwise for average metering Turn anti-clockwise for peak metering...
-
Page 8: Warning Sticker
10. WARNING STICKER Amutec’s rides are provided with comprehensive warning stickers and instructions which are applied to the ride at the time of sale. Operators should ensure:- 1. These stickers remain in place 2. Stickers remain clearly readable and undamaged 3. - Page 9 EVERY YEAR CARRY OUT THE FOLLOWING INSPECTION PROCEDURE ALL INSPECTIONS SHOULD BE CARRIED OUT WITH THE RIDE ISOLATED FROM THE ELECTRICAL SUPPLY. MECHANICAL EXAMINATION Mechanical examination should only be carried out by a competent person. (In the UK registered through BACTA under the Amusement Device Inspection Procedure Scheme) Remove inspection covers and casings to allow a thorough examination of all moving parts and any part of the machine which could conceivably be regarded as vital to the safe operation of the machine.
-
Page 10: General Inspection
GENERAL INSPECTION Only to be carried out by a competent person. (In the UK registered through BACTA under the Amusement Device Inspection Procedure Scheme). Carry out an inspection of fibreglass structures. Pay attention to any damaged fibreglass which should be repaired. Also be aware that older fibreglass can become weak through ageing or weathering and may need to be strengthened. - Page 11 HOW TO ADJUST THE STANDARD OPERATION OF THE RIDE Volume Control (All Models) The volume control knob is fitted to the timer which is situated behind the locked black door at the side of the ride (beneath the printer). Opening this door gives access to live parts. Remove power supply, open door, adjust volume, close door and check that volume is acceptable Ride Time (Integrated Technology Timer) The ride comes set to a standard ride time of 67 seconds.
- Page 12 Scratches Scratches can be removed using a cutting type of polish. Amutec recommend Farecla P315 and P615 cutting compounds for this process. (This material should be used in conjunction with the manufacturer’s instructions). This material is available through Amutec or any good automotive supplier Full Refurbishment Deep scratches can be removed by using a wet/dry finishing paper.
- Page 18 STORING OF PRINT PAPER Store unused or printed paper in a cool, dark place (below 30°C or 86°F). We recommend that you store printed paper in a polypropylene pouch Do not store unused or printed paper in hot or humid place Do not leave unused or printed paper in direct sunlight or other bright place for extended periods Do not allow any volatile organic solvent or vinyl chloride to touch the printed paper.
-
Page 20: Coin Mechanism
COIN MECHANISM Refer to figs. 1,2, and 3 This section is intended to help the user get the most from the S1 acceptor mechanism. It discusses the adjustments and maintenance of the acceptor and related components. No applications section can be complete, however, and customers are always very welcome to contact us direct. - Page 21 COIN MECHANISM Refer to Figs. 1, 2 and 3 THICKNESS To adjust the thickness setting, first release the setting screw locknuts. Place a true coin on a track and adjust the thickness setting to a point where the coin just starts to fall through the coin track at both ends of the track. Before tightening the locknuts, the screws should be withdrawn just sufficient to allow the good coin to ride on the edge of the track at the fixed side.
- Page 22 Fig. 1 S1 Acceptor S1 Acceptor A single coin mechanical 'Roll Down' acceptor, it is jam resistant and comes complete with accept - reject assembly. It is economical in size/shape, simple in construction and easy to adjust. It incorporates the Marinyl switch/cradle assembly (fitted as standard) and is also available with meter microswitch bracket or flip flap assembly.
- Page 23 Fig. 2 Dimensional Checks Fig. 3 Exploded Diagram Parts List Front plate (state coinage) Button Spring U Bolt Button Return Chute Magnet Side (state coinage) Swinging Side Bulldog Spring Slider 1/10 Anti-tilt leg 1/11 Washer catcher 1/12 Button Stop 1/13 Fixed Side (M/Sw Brkt) 1/14 Removable Side (M/Sw Brkt)
- Page 24 WIRING COLOUR CODES – Chuck ‘E’ Cheese Photo Ride Mains Cable: (Size 32 x 0.2mm) 110V Models: Black Live White Neutral Yellow/Green Earth 12V Circuit: (Size 16 x 0.2mm) Coin Mech. Yellow/Black Counter Pink Counter Pink Lamp 1 Green Munch & Helen Lamp 2 Blue Jasper...


