Table of Contents
Advertisement
Advertisement
Table of Contents

Related Manuals for Singer Prima 25


Summary of Contents for Singer Prima 25
-
Page 2: Accessories
10estime necesario Seriai No, • Una marca de lébrica de The Singer Company Numero de serie © ReproducciOn 1994Singer Sewing Machine Company Reservados todos los derechos mundialmente. -
Page 3: Table Of Contents
Table of contents Table des matières For European Tabla de contenido Territories: Instructions importantes de sécurité Important safetv instructions Instrucciones importantes de seguridad Faites connaissance avec votre Gettlng to know vour machine Conocimiento de su mâquina This product is suppressed for radio machine Principal parts... -
Page 4: Important Safety Instructions
IMPORTANT SAFETY INSTRUCTIONS • Do not operate where aerosol (spray) products are being used or where oxvgen is being administered. When using this machine, basic safety precautions should always be followed including • Do not allow to be used as a toy. Close attention is necessary when the machine is used following: by or near... - Page 5 • No usar agujas dobladas. AVERTISSEMENT - Pour réduire le risque de court circuits, incendie, • AI coser, mantenga los dedos apartados de las partes en movimiento secousse électrique ou dommage personnels: Mantener cuidado especial alrededor dei ârea de la aguja.
-
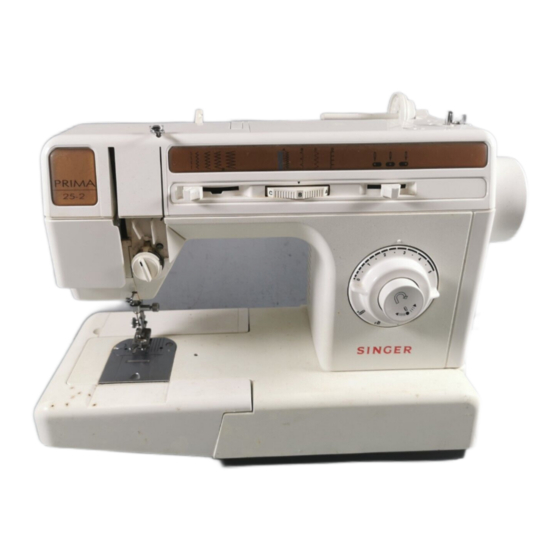
Page 6: Getting To Know Your Machine
Getting to know your machine FLAT BEDI CAMA PLANAI Conocimiento de su maquina BASE PLANE Faites connaissance avec votre machine Principal parts Partes principales Pièces principales Volante l. Le volant Hand wheel Devidoir 2. Devanador Bobbin winder 3. Porte-bobine horizontal Tope y perno porta- 3. - Page 7 Accessories Accesorios Accessoires The following accessories furnished with vour siguientes accesorios, suministrados con Les accessoires suivants sont fournis avec votre sewing machine are designed to simplitv vour ~<,~ maquina de coser, estan diselÏados para machine afin faciliter la couture sewing projects and increase the versatilitv of simplificar sus proyectos costura...
-
Page 8: Connecting The Machine
Conexiôn de la Branchement de Connecting the machine maqulna la machine Pushplug into the receptacle (1) at the right end of the machine. Then connect plug (2) Inserte el enchufe en el receptaculo Introduisez la fiche de branchement to vour socket outlet. à... -
Page 9: Choosing And Changing Needles
Choosing and changing Choisir et changer Selecci6n cambio l'aiguille needles aguias • Soulevez l'aiguille en position haute. • Raise needle to ils highest position • Eleve la aguja a su posiciôn mâs alla. • Dévissez la vis du pince-aiguille el retirez •... - Page 10 Mise en place de la Colocaci6n de la plancha Attaching the feed cubre arrastre (F) plaque à repriser (F) coyer (F) plancha cubre arrastre se usa para aislar Cette plaque est utilisée pour supprimer The feed cover is used to keep the feed from género de los dientes de arrastre, zurcir...
-
Page 11: Fabric, Thread And Needle Table
Fabric, thread and needle table 1..os géneros indicados pueden ser de cualquier flbra: algod6n, lino, seda, lana, sinteticos, rav6n, mezclas. Se relacionan camo Agujas ejemplos de peso. The needle and thread VOUchoose will depend upon the fabric being sewn The table below is a practical guide to needle and thread selection. - Page 12 Insert,ing a bobbin Colocacion de la Mise en place de la bobina canette • Raisepresser foot. • Turnhand wheel toward Vou until needle is • Suba el prensatelas. • Relevezle pied presseur. in its highest position. • Gire el volante hacia Vd. hasta que la aguja •...
-
Page 13: Winding A Bobbin
Devanado de una bobina Winding a bobbin Devanar una bobina es rapido V facil cuando se siguen las directrices abajo indicadas. Winding a bobbin isquick and e asy when Voufollow the directions below.Alwavswind the bobbin Siempre devane la bobina antes de enhebrar la maquina V la aguja. -
Page 14: Threading The Machine
Threading the machine • Raise take-up lever to highest position by turning hand wheel toword you. • Raise presser foot to release thread tension. • Place spool of thread on spool pin. • Slide spool cap firmly over rim of spool to prevent thread tangling. -
Page 15: Raising The Bobbin Thread
Extraccion dei hilo Remonter le fil Raising the bobbin la bobina de canette thread Sujeteel hilo de la aguja suavemente con Tenezlégèrement le fil de l'aiguille de la Hold needle thread looselv with left hand. mano izquierda. main gauche • Turn hand wheel slowlV toward vou, •... -
Page 16: Sewing A Seam
Sewing a seam Realizacion de una Assembler une costura couture You can sew seams easilv and accuratelv wh en VOUfollow the suggestions below. Siguiendo las indicaciones siguientes, podra Pour assembler rapidement une couture, nous realizar costuras con facilidad V precision. vous conseillons la méthode... -
Page 17: Starting A Seam
Comienzo de una costura Starting a seam Débuter une couture Place fabric under presserfoot 1/2inch (12mm) Coloque el tejido debajo dei prensatelas a Positionnez le tissu sous le pied presseur. from rear of fabric. Align the right edge with dei fondo dei tejido. -
Page 18: Straight Stitching
Puntada recta Straight stitching Le point droit Selector anchura Stitch width selector Sélecteur de largeur dei punto de point Before move the selectors to set vour machine for straight stitching, turn the hand Antes de mover losselectores para coser con Remontezl'aiguille en position haute. -
Page 19: Reverse Stitch Button
Applications with Aplicaciones con Applications avec le straight stitching puntada recta point droit Darning Zurcido Repriser Posiciones recomendadas Réglages recommandés Recommended settings Selecci6n punto: Punto recto Stitch Selection: Straight Stitch Point utilisé: point droit Posici6n aguja: Position l'aiguille: Needle Position: Anchura punto: Largeur... -
Page 20: Inserting A Zipper
Inserting a zipper Insercion de Pose d'une fermeture cremalleras glissière Preparation Preparacion Préparation Pattern: Punto: Point: Needle position: Posicion aguja: Position d'aiguille: Stitch width: Anchura punto: Largeur point: Stitch length: Foot: Zipper (E) Longitud punto: Longueur point: Needle plate: General Purpose (A) Prensatelas: Cremalleras Pied presseur:... -
Page 21: Needle Position
Zig-zag Costura en Couture au point stitching • zlg-zag de zig-zag Before moving selector, make sure needle fullV raised. Antes de mover el selector, asegurese de que Avant déplacer sélecteur, assurez-vous aguja estâ en su posici6n mâs alta. que l'aiguille est en position haute. -
Page 22: Pattern Groups Selection
Pattern groups selection Seleccion de los grupos de modelos de puntos The dial localized on panel on vour machine, lets vou choose pattern groups. dial localizado en 10panel de su maquina le permite la selecci6n de grupos de puntos. Raisethe needle to its highest position. Suba la aguja hasta su posici6n mas alta. -
Page 23: Flexi-Stitch Patterns
Flexi stitch patterns Disenos puntadas Points (except machines with 5 stitches) flexibles extensibles Note: Selecting pattern groups, needle (excepto para maquinas con (a l'exception de pour machines position and stitch width is similar to zig- puntos) avec 5 points) -zag stitching. Nota: La seleccion de los grupos de Note: La sélection des groupes de points,... -
Page 24: Decorative Stitch Patterns
Decorative stitch patterns Disenos puntadas flexibles (excepto para maquinas con 5 puntos) Needle Stitch Stitch Pattern Needle Foot position width Application Posicion Anchura length Longitud Prensa- plate Plancha Punto Aplicacion aguja punto punto telas aguja Straight stitch 1 General General General Punto extra elâs-... -
Page 25: Attaching A Button
Attaching a button Pegado de botones Coudre un bouton Recommended settings Posiciones recomendadas Stitch Selection: Zig-Zag Stitch Réglages recommandés Selecci6n punto: Punto zig-zag Sélecteur de point: point zig-zag Needle Position: Posicion aguja: Positiond'aiguille: Stitch Width: Tosuit Button Anchura punto: Apropiada al boton Foot. -
Page 26: Extension Table
Free-arm Costura con Couture avec le • sewlng base libre bras-libre Removing the Desmontaie base Pour dégager le extension table de extensiOn bras-libre To change machine for free-arm sewing lift Para disponer la maquina para este tipo Pour transformer votre machine plateau en right edge (1)of extension table, slide it to the costura, levante el borde de la derecha (1) machine... -
Page 27: Sewing Machine Assembly At Cabinet
Bartacks Presillas Point d'arrêt • Bar tacks reinforce areas of strain and can • Las presillas refuerzan las âreas de tirantez y • Ces points renforcent les emplacements be applied to ready-made garments, as weil pueden aplicarse a prendas confeccio- subissent de fortes fractions. - Page 28 Buttonholes Boutonnières Oiales Recommended settings Posiciones recomendadas Réglages recommandés Stitch Selection: Buttonhole Stitch Selecci6n punto: de Ojal Sélecteur de point: boutonniêre Stitch Width: Pre-set Anchura punto: Prepuesta Sélecteur de largeur: pré-sélectionnée Foot: Buttonhole (L) Prensatelas:Ojales (L) Pied presseur: boutonniêre (L) Needle Plate: General Purpose (A) Plancha aguja: Usogeneral (A) Plaque...
- Page 29 Step 3 Tiempo 3 Temps 3 • Raise needle out of fabric • Saque la aguja dei tejido. • Relevezl'aiguille. • Turnbuttonhole dial to the buttonhole svmbol (3) for the third step. • Gire el mando de ojales hacia el simbolo •...
- Page 30 Balancin9 the NivelaciOn de buttonhole Equilibrage de la oiales boutonnière some kinds of fabrics, there mav be a difference in the densitv of the stitches Enalgunos tipos de tejidos, puede producirse right or the left side of the buttonhole. Dans certains tissus,il peut apparaître une diferencia en la densidad de los puntos différence de densité...
-
Page 31: Twin Needle Sewing
Twin needle sewing Costura Couture à l'aiguille doble iumelée Caution: Procedure Make sure not to use a stitch width • Turnthe machine off. greater than what is recommended Precaucion: Attention: • Insertthe twin needle with the fiat side of the when twin needle stitching Surtout, n'utilisez pas une largeur... -
Page 32: Additional Accessories
Vous pouvez vous procurer les accessoires machine are available for purchase at vour maquina puede adquirirlos en su centro complémentaires dans votre magasin SINGER. SINGER stockist. costura. Plaque aiguille point droit (C) et à Straight stitch presser foot (D) and... -
Page 33: Caring For Your Machine
Caring for your Cuidado de su Nettoyage de votre machine maqulna machine Removing and replacing Como quitar poner la Retirer et replacer le bobbin case caia de bobina support de canette Caution: Before cleaning or adjusting PrecauciOn: Antes de limpiar ajustar la Attention: Avant... -
Page 34: Cleaning The Machine
à maquina deberia ser verificada Votre machine peut être révisée périodi- periodicamente por el servicio SINGER quement par votre magasin SINGER. local por un representante SINGER • Bobbin case and needle plate areas. autorizado para evitar deterioros. - Page 35 à graissage, tournez le volant 10main vers vous When lubricating, apply only SINGER*oil at the movimientos y para proteger las piezas après avoir retiré la plaque de face. pOints shown. SINGERoil is specially prepared metâlicas desgaste excesivo.
- Page 36 Changing the Iight bulb Cambio de la bombilla Changer l'ampoule Before changing light bulb make Caution: Antes de cambiar la bombilla, Precaucion: avant de changer l'ampoule, Attention: surevou have removed plug from socket outlet osegurese de haber desconectado débranchez la machine, retirez la plaque de and remove face plate which covers the light...
-
Page 37: Performance Checklist
Performance checklist Lista de verificaciones When sewing difficulties occur, look back Upper thread breaks uando aparezcan dificultades coser, through this manual to make sure vou are El hilo superior se rompe consulte este manual para asegurarse Is machine properlv threaded? correctlv following the instructions. -
Page 38: Que Faire Si
Que faire si... Si vous éprouvez quelques difficultés lors de L'aiguille casse l'utilisation de votre machine, L'aiguille n'est-elle pas tordue? questionnaire ci-dessous vous permettra de La grosseur de l'aiguille convient-elle à déceler une éventuelle mauvaise nature du fissu cousu? manoeuvre. Les sélecteurs sont-ils bien en place? Les accessoires utilisés conviennent-ils au Si votre aiguille ne bouge pas...