Table of Contents
Advertisement
Quick Links
Thank you for purchasing a Panasonic product.
This document explains how to install the indoor siren properly.
For details about how to use the system, refer to the User's Guide
(page 13).
Please read this document before using the unit and save it for future
reference.
Home Network System
KX-HNS105AZ
Model No.
Installation Guide
Indoor Siren
Advertisement
Table of Contents

Related Manuals for Panasonic KX-HNS105AZ


Summary of Contents for Panasonic KX-HNS105AZ
-
Page 1: Installation Guide
Home Network System Indoor Siren KX-HNS105AZ Model No. Thank you for purchasing a Panasonic product. This document explains how to install the indoor siren properly. For details about how to use the system, refer to the User’s Guide (page 13). -
Page 2: Table Of Contents
Table of Contents Introduction Accessory information ....3 Important Information About this system ......4 For your safety ......4 Important safety instructions ..6 For best performance ....6 Other information .......6 Setup Part names and functions ..8 LED indicator ......8 Setup overview ......8 Registering the siren ....9 Confirming the usage area ..10 Installation .......10... -
Page 3: Introduction
Introduction Accessory information Supplied accessories Accessory item/Part number Quantity AC adaptor/PNLV236AL DC extension cord Wall mounting screws (25 mm) Other information R Design and specifications are subject to change without notice. R The illustrations in these instructions may vary slightly from the actual product. Trademarks R iPhone and iPad are trademarks of Apple Inc., registered in the U.S. -
Page 4: Important Information
These conditions can Panasonic will not be held cause fire or electric shock. Confirm responsible in the event that that smoke has stopped emitting... - Page 5 Important Information R It is advised not to use the R The AC adaptor is used as the main equipment at a refuelling point. disconnect device. Ensure that the Users are reminded to observe AC outlet is installed near the restrictions on the use of radio product and is easily accessible.
-
Page 6: Important Safety Instructions
0 °C or greater than 40 °C. Damp basements should also be The hub and other compatible avoided. Panasonic devices use radio waves to R Operating the product near electrical communicate with each other. appliances may cause interference. - Page 7 Important Information Information on Disposal in other Countries outside the European Union These symbols are only valid in the European Union. If you wish to discard these items, please contact your local authorities or dealer and ask for the correct method of disposal.
-
Page 8: Setup
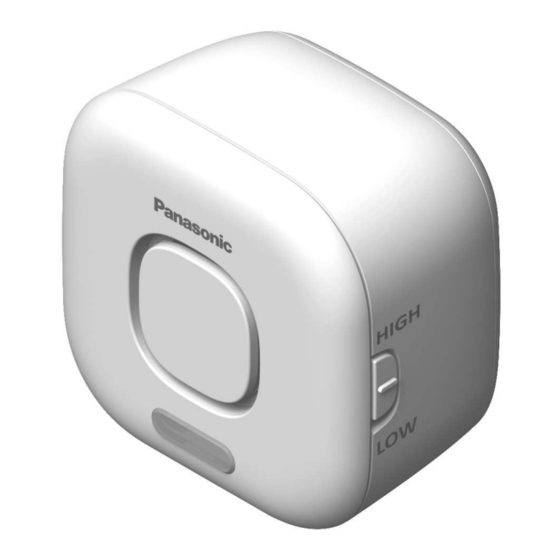
Setup Part names and LED indicator functions You can use the LED indicator to confirm the siren’s status. Indicator Status Green, lit Normal operation Red, Siren is not registered blinking to a hub slowly Red, Siren is out of range of blinking the hub Red,... -
Page 9: Registering The Siren
Setup R If registration fails, the hub sounds Installation several short beeps. Install the siren in the desired location. Using the app When you register the siren by using Registering the siren the [Home Network] app, you can assign a name to your devices and This procedure is not required for group them by location. -
Page 10: Confirming The Usage Area
Using the siren in the following areas less than 25.4 mm thick, etc. may cause deformation, malfunction, or R Use only the supplied Panasonic AC operational failure. adaptor PNLV236AL. R In direct sunlight R Areas exposed to grease or steam,... - Page 11 Setup Remove the rear cover by Note: pressing the upper sides of the R Use the following template cover (A) and sliding it down (B). below when determining the location of the screw holes. 37 mm Attach the rear cover to the wall by using screws ( R Place the rear cover with “UP”...
-
Page 12: Note About Power Connections
Setup Use the DC extension cord (A) to Attach the siren to the rear cover. connect the AC adaptor (B) to the R Insert the grooves on the siren siren. to the 4 tabs on the rear cover, R Insert the male plug of the DC and then push down the siren. -
Page 13: Appendix
[Home Network] app are listed below. For more information, refer to the User’s Guide (page 13). – Alarm system www.panasonic.net/pcc/support/tel/ You can use the app to arm and homenetwork/manual/ disarm the alarm system, confirm the current status of the system’s devices, and view a log of previous events. -
Page 14: Specifications
Appendix Specifications R Standards DECT (Digital Enhanced Cordless Telecommunications) R Frequency range DECT: 1.88 GHz – 1.90 GHz R RF transmission power DECT: Approx. 10 mW (average power per channel) R Power source 220 – 240 V AC, 50/60 Hz R Power consumption Standby: Approx. -
Page 15: Warranty (For New Zealand)
6) Damage to the product caused by accident, misuse or Act of God. 7) Repairs when the product has been dismantled, repaired, modified or serviced by other than a Panasonic Authorised Dealer authorised to service that type of product. IF YOUR PANASONIC PRODUCT FAILS WITHIN THE... - Page 16 Sales Department: 18 Sir Woolf Fisher Drive, Highbrook, East Tamaki, Auckland, New Zealand Phone: (09) 272 0100 Fax: (09) 272 0137 1-62, 4-chome, Minoshima, Hakata-ku, Fukuoka 812-8531, Japan © Panasonic System Networks Co., Ltd. 2015 *PNQX7359ZA* *PNQX7359ZA* PNQX7359ZA CC0715WK0 (E)