
Related Manuals for Sony MHC-V41D


Summary of Contents for Sony MHC-V41D
- Page 1 Home Audio System Getting Started Disc/USB Playback Operating Instructions USB Transfer Tuner BLUETOOTH Connection Gesture Control Sound Adjustment Other Operations Additional Information MHC-V41D...
- Page 2 For customers in Europe WARNING To reduce the risk of fire, do not cover the ventilation opening of the appliance with newspapers, tablecloths, curtains, etc. Do not expose the appliance to naked This appliance is classified as a CLASS flame sources (for example, lighted 1 LASER product under IEC 60825- candles).
- Page 3 Press OPTIONS. directives. Press / repeatedly to select This product has been manufactured by or on behalf of Sony Corporation. “SYSTEM,” then press EU Importer: Sony Europe Limited. Press / repeatedly to select Inquiries to the EU Importer or related “VERSION,”...
- Page 4 Disposal of Old “DVD-R,” “DVD VIDEO,” and the “CD” Electrical & Electronic logos are trademarks. Equipment • WALKMAN® and WALKMAN® logo are registered trademarks of Sony (Applicable in the Corporation. European Union and • MPEG Layer-3 audio coding other European...
- Page 5 Administrator, Inc. in the United performance. States and other countries. • THIS PRODUCT IS LICENSED UNDER • “BRAVIA” is a trademark of Sony THE MPEG-4 VISUAL PATENT Corporation. PORTFOLIO LICENSE FOR THE PERSONAL AND NON-COMMERCIAL •...
-
Page 6: About This Manual
About this manual This manual mainly explains • • operations using the remote control, but the same operations can also be performed using the buttons on the unit having the same or similar names. Icons, such as , listed at the •... -
Page 7: Table Of Contents
......26 Turning on or off the Using the play mode .... 29 BLUETOOTH signal ....45 Restricting playback of Controlling the system the disc (Parental Control) ... 30 using a smartphone or tablet (Sony | Music Center) ...46... - Page 8 Getting the party started Enjoying music with the party with “Fiestable” ....47 light and speaker light ..61 Achieving and sharing Singing along: Karaoke ..61 a Party People ranking and Enjoying sound from a guitar getting bonus features with (Guitar mode) ....... 63 Party King ......
-
Page 9: Unpacking
Playable files on USB device Unpacking Music: • • MP3 files (.mp3) 1), 2) , WMA files This unit (MHC-V41D) (1) • • 2) (.wma) , AAC files (.m4a/.mp4/ Remote control (1) • • 2) 2) .3gp) , WAV files (.wav) R03 (size AAA) batteries (2) •... - Page 10 Discs/files that cannot be played The system may not play back an • • Xvid file when the file has been back combined from two or more Xvid You cannot play back the • • files. following discs • — BDs (Blu-ray Discs) * Mixed Mode CD: This format records •...
-
Page 11: Region Code
Note on DVD VIDEO and VIDEO Depending on the Xvid file, the • • picture may be unclear or the CD playback operations sound may skip. Some playback operations for a DVD VIDEO or VIDEO CD may Notes about USB devices be intentionally restricted by This system is not guaranteed to •... -
Page 12: Websites For Compatible Devices
Websites for compatible devices Check the websites below for the latest information about compatible USB and BLUETOOTH devices. For customers in Latin America: http://esupport.sony.com/LA For customers in Europe and Russia: http://www.sony.eu/support For customers in other countries/ regions: http://www.sony-asia.com/support Compatible iPhone/iPod models The compatible iPhone/iPod models are as follows. -
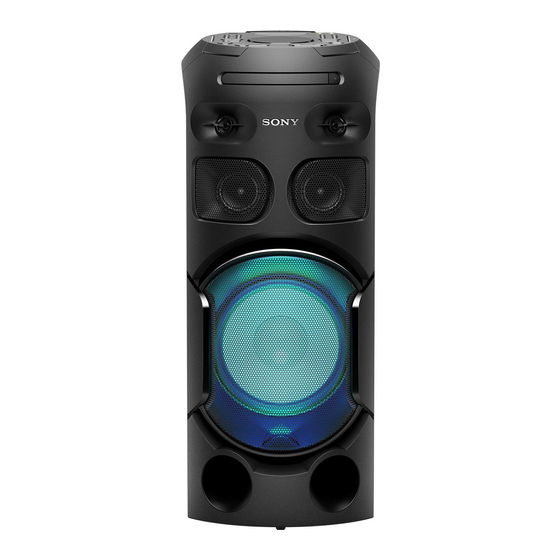
Page 13: Guide To Parts And Controls
Guide to parts and controls Unit (Front): Unit (Rear): Top panel (page 14) Party light* (page 61) Disc tray (page 25) Connector panel (page 19) Tweeter × 2 AC IN jack (page 20) Midrange speaker × 2 * Do not look directly at the light-emitting parts when the speaker light and party light are turned on. - Page 14 Top panel: You can lock the buttons except (power) on the unit to prevent them from being operated by mistake (page 67). (play) button (power) button Press to start playback. Press to turn on the system, or Hold down ...
- Page 15 Display BLUETOOTH indicator (page 40) GESTURE CONTROL BLUETOOTH button (page 48, 49, 50) Press to select the BLUETOOTH function. MIC1 jack (page 61) Use to connect the microphone. PAIRING button Hold down to activate MIC2/GUITAR jack BLUETOOTH pairing during the (page 63) BLUETOOTH function.
- Page 16 Remote control: (open/close) button Press to open or close the disc tray. / (go backward/go forward) button Press to select a track or file. TUNING +/– button (page 39) PLAYBACK button (page 48) DJ button (page 49) SAMPLER button (page 49) KARAOKE button (page 50) ...
- Page 17 MIC LEVEL +/– buttons PARTY LIGHT button (page 61) (page 24, 61) VOCAL FADER button LIGHT MODE button (page 62) (page 61) MIC ECHO button (page 61) PLAY MODE button (page 29, 37) (folder) +/– buttons REPEAT/FM MODE button Press to select a folder on a data (page 30, 39) disc or a USB device.
- Page 18 FUNCTION button (pause) button Press to select a function. Press to pause playback. To resume playback, press . SOUND FIELD +/– button (stop) button (page 50) — Press to stop playback. When pressed twice, resume SEARCH button playback can be canceled.
-
Page 19: Getting Started
Getting Started Hooking up the system securely To wall outlet FM ANTENNA terminal VIDEO OUT jack Find a location and an Use a video cable (not supplied) orientation that provide good to connect to the video input jack reception when you set up the of a TV or projector (page 21). -
Page 20: Deactivating The Demonstration
Audio input and output jacks Deactivating the Use an audio cable (not supplied) demonstration to make either connection as follows: AUDIO/PARTY CHAIN OUT L/R • • To deactivate the demonstration jacks while the system is turned off, press • —... -
Page 21: Connecting The Tv
Connecting the TV Before connecting cables, be sure to disconnect the AC power cord (mains lead). To watch video Select the connection methods according to the jacks on your TV. High quality HDMI cable* (not supplied) Video cable (not supplied) Standard quality Recommended connection Alternative connection... - Page 22 To listen to TV sound via the system If you do not connect the system to the TV’s HDMI IN (ARC) jack, make this connection. Audio cable (not supplied) To listen to TV sound, press FUNCTION repeatedly to select “TV.” Hint You can also enjoy the sound of external equipment (DVD players, etc.) via the system •...
-
Page 23: Changing The Color System
Changing the color Performing the quick system setup (Except for Latin American, Before using the system, you European, and Russian models) can make the minimum basic Set the color system to PAL or NTSC adjustments in the quick setup. depending on the color system of Turn on your TV and select the your TV. -
Page 24: Changing The Display Mode
To change the setting manually See “Using the Setup Menu” (page 32). To quit the quick setup Hold down SHIFT and press SETUP. Note The guide message appears when you turn on the system for the first time or after performing [RESET] (see “Returning the setup menu settings to the default”) (page 76). -
Page 25: Disc/Usb Playback
For USB function: Disc/USB Playback Connect a USB device to the (USB) port. Before using the USB Note device You can use a USB adaptor (not supplied) to connect the USB device to the unit if the USB device cannot be For compatible USB devices, see plugged into the (USB) port. -
Page 26: Other Playback Operations
To play from a specific file Do this Return to Press RETURN. Press MEDIA MODE repeatedly to folder list when select [MUSIC] or [VIDEO]. in file list Press SEARCH to display the Press or Locate a point folder list. quickly in fast during playback. - Page 27 To search using the DVD menu Searching a specific title/ chapter/scene/track/index Press DVD/TUNER MENU. Press / / / , or hold down SHIFT and press the numeric Press SEARCH repeatedly during buttons, to select the title or item playback to select the search you want to play back, then mode.
- Page 28 Changing the language/sound Playing a VIDEO CD with PBC functions Press AUDIO repeatedly during playback to select the audio You can use the PBC (Playback format or mode you want. Control) menu to enjoy the interactive features of VIDEO CD DVD VIDEO (VIDEO CD Version 2.0 and Super You can select audio format...
-
Page 29: Using The Play Mode
Note Multi-disc resume play “FLDR” and “SHUF” light off on the • • display when Normal Play is set to [DISC] or [ONE USB DEVICE]. • • “FLDR” lights up on the display when This system can store playback Normal Play is set to [FOLDER]. resume points for up to 6 discs and resumes playback when you insert Playing in random order... -
Page 30: Restricting Playback Of The Disc (Parental Control)
Playing repeatedly (Repeat Restricting playback of Play) the disc (Parental Control) Press REPEAT/FM MODE repeatedly. You can restrict playback of Depending on the type of disc or file, DVD VIDEOs according to a some settings may not be available. predetermined level. Scenes may be [OFF]: does not play back •... -
Page 31: Viewing Information Of A Disc And Usb Device
Press / repeatedly to select Viewing information of the level you want, then press a disc and USB device The lower the value, the stricter the limitation. To turn off the parental control Information on the TV screen function Set [LEVEL] to [OFF] in Step 8. Hold down SHIFT and press To play back a disc for which the DISPLAY repeatedly during... -
Page 32: Using The Setup Menu
Note Using the Setup Menu Depending on the source being played, • • — some information may not be You can make various adjustments displayed. to items such as picture and sound. — some characters cannot be displayed. Displayed items vary depending on Depending on the play mode, the •... - Page 33 Setting the language Setting the TV screen – [LANGUAGE SETUP] – [VIDEO SETUP] [OSD] [TV TYPE] Sets the language of the on-screen display. [16:9]: Selects this when you connect a wide-screen TV or a TV [MENU] with a wide-mode function. Sets the language for the DVD menu.
- Page 34 [NORMAL]: Changes the picture [FRAME]: The picture, including size to fit the screen size with the subjects that do not move original picture aspect ratio. This dynamically, is output in high setting displays black bands on the resolution. left and right side if you display a 4:3 screen picture.
- Page 35 [DOLBY SURROUND]: Outputs [MULTI-DISC RESUME] multi-channel audio into a 2-channel surround signal. [ON]: Stores the resume playback point in the memory for up to Note 6 discs. This function only works for the [OFF]: Playback starts at the resume HDMI OUT (TV) ARC jack. playback point only for the current disc in the system.
-
Page 36: Usb Transfer
[CONTROL FOR HDMI] USB Transfer [ON]: The Control for HDMI function is enabled. You can operate Before using the USB mutually between system and TV device connected with an HDMI cable. [OFF]: Off. For compatible USB devices, see [AUDIO RETURN CHANNEL] “Websites for compatible devices”... - Page 37 To select the bit rate Prepare the sound source. You can select a higher bit rate to Synchronized Transfer: transfer music with better quality. If the system starts playback automatically, press twice to stop Press OPTIONS. the playback fully. The options menu appears on the When playback is stopped, press display.
-
Page 38: Synchronized Transfer
Synchronized Transfer The transfer stops automatically if: • • — the USB device runs out of space When transferring all tracks during transfer. — the number of audio files or folders from an AUDIO CD on the USB device reaches the limit Folder name: “CDDA0001”* that the system can recognize. -
Page 39: Tuner
Press / repeatedly to select a Tuner folder, then press The file list is displayed on the TV Listening to the radio screen. Press / repeatedly to select Press FUNCTION repeatedly to an audio file you want to erase, select “TUNER FM.” then press If you want to erase all the audio Tune to a station. -
Page 40: Bluetooth Connection
BLUETOOTH Connection Presetting radio stations About the BLUETOOTH You can store up to 20 FM stations as your favorite stations. wireless technology Tune to the station you want. BLUETOOTH wireless technology is Press DVD/TUNER MENU. a short-range wireless technology that enables wireless data Press / repeatedly to select communication between digital the preset number you want,... -
Page 41: Pairing This System With A Bluetooth Device
Select “MHC-V41D” on the Pairing this system display of the BLUETOOTH with a BLUETOOTH device. Perform this step within 5 minutes, device otherwise pairing will be canceled. In this case, repeat from Step 3. Pairing is an operation where Note... -
Page 42: Listening To Music On A Bluetooth Device
To erase pairing information Establish connection with the BLUETOOTH device. You can erase all pairing information by resetting the system. See Press BLUETOOTH on the unit to connect to the last connected “Resetting the system” (page 76). BLUETOOTH device. Note Perform the BLUETOOTH connection After you reset the system, it may not be from the BLUETOOTH device if the... -
Page 43: Connecting This System With Multiple Bluetooth Devices (Multi-Device Connection)
Depending on the BLUETOOTH devices, • • Connecting this system you may not be able to make three BLUETOOTH connections at the same with multiple time. You cannot establish a multi-device • • BLUETOOTH devices connection when using the Wireless Party Chain function, Speaker Add (Multi-device function or hands-free call function. -
Page 44: Setting The Bluetooth Audio Codecs
— Unlock the screen of the smartphone. Note The system can only recognize and • • To terminate the BLUETOOTH connect to one NFC-compatible connection smartphone at a time. If you try to connect another NFC-compatible Touch the smartphone to the smartphone to the system, the currently N-Mark on the unit again. -
Page 45: Setting The Bluetooth Standby Mode
BLUETOOTH signal: — Pairing and/or connecting with a Setting the BLUETOOTH BLUETOOTH device — Using “Sony | Music Center” via a standby mode BLUETOOTH connection — Changing the BLUETOOTH audio codecs The BLUETOOTH standby mode If you touch the N-Mark on the •... -
Page 46: Controlling The System
FM stations. The specifications and display design • • • — browse music content on a disc/ of “Sony | Music Center” are subject to USB device. change without notice. • — view information for disc/USB devices such as playing time and title. -
Page 47: Getting The Party Started With "Fiestable
It is embedded in media. the “Sony | Music Center” app as a The system will also award your plug-in. achievements with bonus features. Search for and download the Note “Sony | Music Center”... -
Page 48: Gesture Control
To deactivate gesture control Gesture Control Press GESTURE ON/OFF. The GESTURE ON/OFF indicator Enjoying gesture turns off. control Using gesture control You can control operations in during playback the PLAYBACK, DJ, SAMPLER and KARAOKE modes by swiping your hand over GESTURE CONTROL on You can use gesture control to the unit. -
Page 49: Creating A Party Atmosphere (Dj Effect)
For SAMPLER mode: Creating a party Swipe in this atmosphere (DJ Effect) direction Output Use the buttons and “Come On!” GESTURE CONTROL on the top panel Output “Let’s Go!” of the unit to perform this operation. Output Reggae Horn sound effect Press GESTURE ON/OFF. -
Page 50: Using Gesture Control During The Karaoke Function
Sound Adjustment Using gesture control during the Karaoke Adjusting the sound function Do this Use the buttons and Reinforce bass Press MEGA BASS GESTURE CONTROL on the top panel sound and create repeatedly to select of the unit to perform this operation. more powerful “BASS ON.”... -
Page 51: Selecting The Virtual Football Mode
Selecting the Virtual Creating your own Football mode sound effect You can experience the feeling of You can raise or lower the levels being in the stadium when watching of specific frequency bands, then a football match broadcast. store the setting in the memory as Note that you can only select “CUSTOM EQ.”... -
Page 52: Other Operations
Hint If you enable the Control for HDMI (“BRAVIA” Sync) function when using a Using the Control for TV manufactured by Sony, the Control for HDMI function of the system is also HDMI function enabled automatically. When settings are completed, “COMPLETE” appears on the display. - Page 53 Audio Return Channel (ARC) Remote Easy Control function function You can select the system by the SYNC MENU button on the TV If the system is connected to a remote control and operate the TV’s HDMI IN jack compatible with system.
-
Page 54: Enjoying Wired Playback Using Multiple Systems (Wired Party Chain Function)
Enjoying wired playback using multiple systems (Wired Party Chain function) You can connect multiple audio systems in a chain to create a more exciting party environment and produce higher sound output. One activated system in the chain serves as the “Party Host” and shares music. Other systems become “Party Guests”... - Page 55 Make sure that a function other than the AUDIO IN function is selected. • • When the AUDIO IN function is selected, this feature cannot be used. If one of the systems is not equipped with the Wired Party Chain function Example: When connecting with this system as the first system Continue the...
- Page 56 • • If one of the systems in the chain is Enjoying a Wired Party Chain performing a USB transfer, wait for the system to complete or stop the transfer Example: When using this before you activate the Wired Party Chain function.
-
Page 57: Enjoying Wireless Playback Using Multiple Systems
Setting a Party Chain sound Enjoying wireless mode playback using multiple systems You can set a sound mode when the Wired Party Chain function is active. (Wireless Party Chain Press OPTIONS. function) The options menu appears on the display. You can connect multiple audio systems in a chain via a BLUETOOTH Press / repeatedly to select connection if all the systems are... - Page 58 Wait 30 seconds after the last Press W.PARTY CHAIN on the Party Guest is connected. unit. “CHAINING” appears on the “P.CHAIN” will stop blinking on the display. The system will enter Party Host and the BLUETOOTH the Wireless Party Chain Setup device will reconnect to the Party Host.
-
Page 59: Listening To Music Wirelessly With Two Systems (Speaker Add Function)
Party Guests are synchronized To operate this function, you need • • with the Party Host. to use “Sony | Music Center” on your • — DJ Effect on both the Party Host smartphone/iPhone. For details on and Party Guests is turned off. - Page 60 Guest system, the settings on the other system are synchronized. Set the output mode using When the Host system is turned off, “Sony | Music Center” on your the Guest system also turns off. smartphone/iPhone. Double mode: outputs stereo Note •...
-
Page 61: Enjoying Music With The Party Light And Speaker Light
To deactivate the Speaker Add function Singing along: Karaoke Follow the instructions on “Sony | Music Center.” Preparing for Karaoke Hint Unless you deactivate the function, the Press MIC LEVEL – (or system will try to re-establish the most recent connection the next time you turn MIC/GUITAR LEVEL –... - Page 62 Note Activating the Karaoke scoring Press MIC LEVEL +/– • • mode (Score mode) (MIC/GUITAR LEVEL +/– on the unit) repeatedly to adjust the microphone You only can use the scoring volume level. You cannot adjust the microphone volume level using function when the microphone is VOLUME +/–...
-
Page 63: Enjoying Sound From A Guitar (Guitar Mode)
Note Enjoying sound from a If the guitar sound is distorted, reduce • • guitar (Guitar mode) the guitar volume level on your guitar until the distorted sound disappears. If the guitar volume level is too low, You can listen to sound from a guitar press MIC/GUITAR LEVEL + repeatedly by connecting the guitar to the to adjust the guitar volume. -
Page 64: Making A Call
• • If the caller cannot hear or can barely Receiving a call hear your voice, talk more closely into the built-in microphone of the system. Noise may result if the system and • • Press when a call is incoming. the BLUETOOTH mobile phone are When an incoming call arrives, placed too close together. -
Page 65: Using The Voice-Assist Function On A Smartphone
For details on which apps work Using the voice-assist with Siri, refer to the operating instructions supplied with the function on a iPhone/iPod. smartphone Note This function only works for The latest version of the app may be the Google app on Android required. -
Page 66: Using The Sleep Timer
To adjust the level of the voice Using the Sleep Timer guidance Press OPTIONS. The system turns off automatically after the preset time. Press / repeatedly to select “SAMPLER,” then press Press SLEEP repeatedly to select the time you want. Press / repeatedly to adjust To cancel Sleep Timer, press SLEEP the voice guidance level, then... -
Page 67: Deactivating The Buttons On The Unit (Child Lock)
Follow the online instructions to update the software. Setting the automatic For customers in Latin America: standby function http://esupport.sony.com/LA For customers in Europe and The system enters the standby Russia: mode automatically in about 15 http://www.sony.eu/support minutes when there is no operation For customers in other countries/ or audio signal output. -
Page 68: Additional Information
AC power cord (mains lead), • — Disconnect then connect the and turn on the system. If the HDMI cable again. issue persists, contact your nearest Sony dealer. There is no microphone sound. Adjust the microphone volume • • General level. - Page 69 The disc tray does not open and Turn off surrounding electrical • • “LOCKED” appears on the display. equipment. Consult your nearest Sony dealer • • The noise generated by the • • or local authorized Sony service cooling fans of the system may be facility.
- Page 70 Playback does not start from the USB device first track. Transferring results in an error. Set the play mode to Normal Play • • You are using an unsupported USB • • (page 29). device. Check the information on Resume Play has been selected. •...
- Page 71 USB device. You are using an unsupported USB • • If this display pattern persists, device. Check the information on contact your nearest Sony dealer. the website about compatible USB Erroneous display. devices (page 12). Turn off the system and reconnect The data stored in the USB •...
- Page 72 Playback does not start from the Picture noise appears. first file. Wipe the disc clean (page 78). • • Set the play mode to Normal Play If video signal from your system • • • • (page 29). has to go through your VCR to your TV, the copy-protection Files cannot be played back.
- Page 73 The camera angles cannot be Connection is not possible. changed. The BLUETOOTH device you • • Multi-angles are not recorded on attempted to connect does not • • the DVD VIDEO being played back. support the A2DP profile, and The DVD VIDEO prohibits changing cannot be connected with the •...
- Page 74 There is severe hum, noise, or Control for HDMI distorted sound. (“BRAVIA” Sync) If there are obstacles between • • The system does not turn on even the system and your BLUETOOTH when the TV is turned on. device, remove or avoid the Hold down SHIFT and press •...
- Page 75 No TV sound is output from the The sound is output from both the system. system and the TV. Check the type and connection of Mute the sound of the system or • • • • the HDMI cable or audio cable that the TV.
- Page 76 Unable to connect a BLUETOOTH [SYSTEM SETUP] and press device with the system in the Speaker Add function. Press / repeatedly to select After connecting two MHC-V41D • • [RESET], then press systems, perform the pairing Press / repeatedly to select...
- Page 77 The memory of the USB device is self-diagnosis function. full. Contact your nearest • • Sony dealer or local ERASE ERROR authorized Sony service Erase of audio files or folders on the facility and give the USB device failed.
-
Page 78: Precautions
NoDEVICE Precautions No USB device is connected or unsupported device is connected. When carrying the unit NO DISC To avoid damaging the disc There is no disc in the unit. mechanism, perform the following NO MUSIC procedure before carrying the unit. No supported audio files exist in the Use the buttons on the unit to playback source. - Page 79 AC power cord (mains lead) must be • • IMPORTANT NOTICE changed only at the qualified service Caution: If you leave a still video shop. image or on-screen display image On handling the unit displayed on your TV for an extended period of time via this system, you This system is not drip-proof or risk permanent damage to your TV...
-
Page 80: Specifications
TV (ARC): when performing communication using Supported audio signal: BLUETOOTH technology. 2-channel Linear PCM Sony cannot be held liable in any way • • MIC1: for damages or other loss resulting Sensitivity 1 mV, impedance from information leaks during 10 kilohms... - Page 81 HDMI section BLUETOOTH section Connector: Communication system: Type A (19 pin) BLUETOOTH Standard version 4.2 Output: Disc player section BLUETOOTH Standard Power System: Class 2 Compact disc and digital audio Maximum communication range: and video system Line of sight approx. 10 m* Laser Diode Properties Frequency band: Emission Duration: Continuous...
-
Page 82: Supported Audio Formats
General NFC section Operating frequency: Power requirements: 13.56 MHz AC 120 V – 240 V, 50/60 Hz Power consumption: Supported audio formats 130 W Supported bit rate and sampling Power consumption (at the Power frequencies: Saving mode): MP3: 0.5 W (When “BT STBY” is set to 32/44.1/48 kHz, “OFF”... -
Page 83: Language Code List
Language code list The language spellings conform to the ISO 639:1988 (E/F) standard. Code Language Code Language Code Language Code Language 1027 Afar 1186 Scots Gaelic 1350 Malayalam 1513 Siswati 1028 Abkhazian 1194 Galician 1352 Mongolian 1514 Sesotho 1032 Afrikaans 1196 Guarani 1353... - Page 84 Parental Control area code list Code Area Code Area Code Area Code Area 2044 Argentina 2165 Finland 2362 Mexico 2149 Spain 2047 Australia 2174 France 2376 Netherlands 2499 Sweden 2046 Austria 2109 Germany 2390 New Zealand 2086 Switzerland 2057 Belgium 2248 India 2379...
- Page 88 ©2018 Sony Corporation Printed in China 4-729-484-13(1)