Dimplex BF33STP Installation Manual
Hide thumbs
Also See for BF33STP:
- Parts and service instructions (27 pages) ,
- Service manual (20 pages) ,
- Installation manual (25 pages)
Table of Contents
Advertisement
Available languages
Available languages
IMPORTANT SAFETY INFORMATION: Always read this manual first before attempting to install or use this fireplace. For your
safety, always comply with all warnings and safety instructions contained in this manual to prevent personal injury or property
damage.
To view the full line of Dimplex products, please visit
www.dimplex.com
Installation Guide
Model
BF33STP/DXP
BF39STP/DXP
BF45DXP
7206350500R08
Advertisement
Chapters
Table of Contents

Related Manuals for Dimplex BF33STP


Summary of Contents for Dimplex BF33STP
-
Page 1: Installation Guide
IMPORTANT SAFETY INFORMATION: Always read this manual first before attempting to install or use this fireplace. For your safety, always comply with all warnings and safety instructions contained in this manual to prevent personal injury or property damage. To view the full line of Dimplex products, please visit www.dimplex.com 7206350500R08... -
Page 2: Table Of Contents
CAUTION: Procedures and techniques which, if not carefully followed, will result in damage to the equipment. WARNING: Procedures and techniques which, if not carefully followed, will expose the user to the risk of fire, serious injury, or death. www.dimplex.com... -
Page 3: Listing And Code Approvals
BF33DXP 33" Deluxe Included 12.0 10.10 11.25 BF33STP 33" Standard 12.0 10.10 11.25 NOTE: Power ratings shown include the light bulbs and motors (275 watts) The installation of the fireplace unit must comply with the applicable Local and/or National Electrical Codes and utility require- ments. -
Page 4: Section A: Installation Information
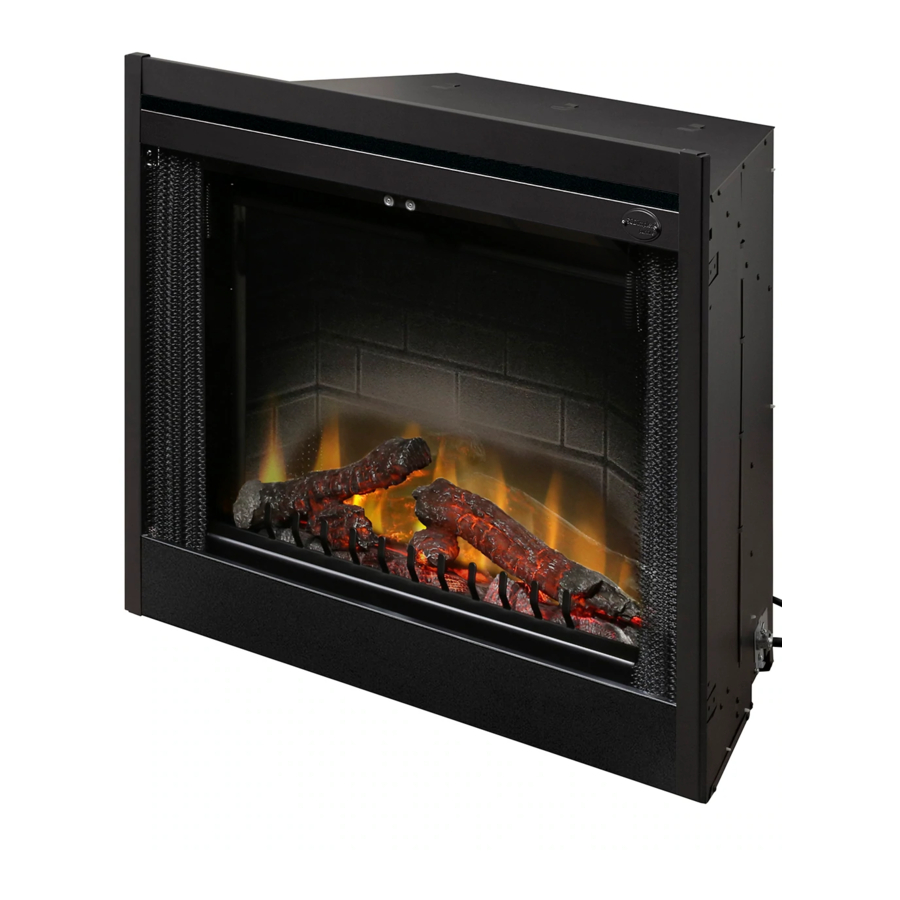
(57.9cm) (83.1cm) (137.2cm) (96.5cm) (96.5cm) 15.0" 33.5" 29.5" 25.7" 14.3" 29.6" 32.8" 18.8" 28.5" 48.0" 34.0" 34.0" BF33STP/DXP (38.1cm) (85.1cm) (75.0cm) (65.3cm) (36.3cm) (75.2cm) (83.3cm) (47.8cm) (72.4cm) (121.9cm) (86.4cm) (86.4cm) Figure 1 Air Intake Slots Rough-In Framing Dimensions Firebox Dimensions... -
Page 5: Section B: General Electrical Information
SECTION B: GENERAL ELECTRICAL INFORMATION RECOMMENDED POWER SUPPLY WIRE SPECIFICATIONS For 120V installations use two conductor, non-metallic sheath cable with ground wire (3 wires total) for the incoming power supply on fireplace inserts. Use the appropriate wire to meet local and national electrical codes for rated power consumption. For 208V / 240V installations use three conductor, non-metallic sheath cable with ground wire (4 wires total) for the incom- ing power supply on fireplace inserts. -
Page 6: Section C: Direct Power Wiring
1. Locate the voltage selector switch inside the exhaust panel on the top right hand corner of the unit. Flip the switch from 240V to 120V configuration. (230 and 115 is printed on switch) 2. Loosen the screw securing the junction box cover and remove the cover. www.dimplex.com... -
Page 7: 120V Installation - No Heat Installation
3. Remove the knockouts (if necessary) or use the provided cable clamp. 4. Pull out the four wires marked L1, L2, N, and G. 5. Connect L1 (black) wire from the unit to the L1 (black) from the power supply. 6. -
Page 8: Section D: Alternate Control Options
15. Ensure that all connections are tight. 16. Insert all the wiring of the main power wall switch into the main switch wall box. 17. Insert all the wiring back into the unit and secure with a cable clamp. www.dimplex.com... -
Page 9: 120V Main Power Wall Switch
120V MAIN POWER WALL SWITCH WHITE - N WHITE – N RED – L2 120 V BLACK – L1 P OWE R W AL L BLACK – L1 S UP P L Y S W IT C H (B R E AK E R GROUND - G GROUND - G P ANE L ) -
Page 10: 120V Main Power Wall Switch - No Heat
15. Insert all the wiring back into the unit and se- NEUTRAL FROM UNIT AND SUPPLY L1 FROM POWER SUPPLY cure with a cable clamp. NEUTRAL FROM UNIT AND SUPPLY L1 FROM POWER SUPPLY 2 CONDUCTOR WIRE FROM POWER SUPPLY 2 CONDUCTOR WIRE FROM MAIN SWITCH www.dimplex.com... -
Page 11: 120V/240V Heater Wall Switch Control
120V/240V HEATER WALL SWITCH CONTROL RED – 2 W AL L RED – 1 S W IT C H GROUND - G NOTE: Before installing the unit complete the following: 1. Install main power connection with appropriate wiring - directly to the main power or through a wall switch. 2. -
Page 12: 120V/240V Wall Mounted Thermostat
13. Insert all the wiring back into the unit and secure with a cable clamp. BLACK BLACK BLACK WIRE GROUND WHITE WIRE GROUND SCREW GROUND GROUND NOTE: This only illustrates thermostat connection, see previous sections for main power connection instruc- tions. GROUND www.dimplex.com... -
Page 13: 120V/240V Wall Mounted Flame Override Switch
120V/240V WALL MOUNTED FLAME OVERRIDE SWITCH BLUE – 4 W AL L BLUE – 3 S W IT C H GROUND - G DO NOT USE WITH NO HEAT INSTALLATIONS NOTE: The fireplace can be wired to have a wall switch operate the flame independent of the heater. NOTE: Before installing the unit complete the following: 1. -
Page 14: Wall Remote - Wrcpf-Kit
12. Fan Off 13. Fan On 14. Low Battery Indicator UNIT INTERNAL WIRING DIAGRAM NOTE: Standard models do not have a log driver Dimplex North America Limited 1367 Industrial Road, Cambridge, ON, Canada N3H 4W3 © 2017 Dimplex North America Limited www.dimplex.com... - Page 15 CONSIGNES DE SÉCURITÉ IMPORTANTES : Toujours lire le présent manuel avant d’essayer d’installer ou d’utiliser ce poêle. Pour votre sécurité, toujours respecter tous les avertissements et suivre les consignes de sécurité compris dans le présent manuel afin de prévenir les blessures ou les dommages matériels. Pour découvrir la gamme complète de produits Dimplex, visiter www.dimplex.com 7206350500R08...
- Page 16 MISE EN GARDE : Marches à suivre et techniques dont le non-respect pourrait causer des dommages matériels. AVERTISSEMENT : Marches à suivre et techniques qui, si elles ne sont pas bien respectées, exposeront l’utilisateur à des risques d’incendie, de blessure grave ou de décès. www.dimplex.com...
-
Page 17: Inscription Et Conformité Aux Codes
Comprise 12.0 10.10 11.25 84cm (33 po) Deluxe BF33STP 12.0 10.10 11.25 84cm (33 po) NOTA: Les puissances nominales indiquées comprennent les ampoules électriques et le moteur (275 W). L’installation du foyer doit être conforme aux codes de l’électricité national et local applicables et aux exigences relatives à l’utilisation de l’appareil. -
Page 18: Section A: Informations Sur L'installation
(96.5cm) 15.0 po 33.5 po 29.5 po 25.7 po 14.3 po 29.6 po 32.8 po 18.8 po 28.5 po 48.0 po 34.0 po 34.0 po BF33STP/DXP (38.1cm) (85.1cm) (75.0cm) (65.3cm) (36.3cm) (75.2cm) (83.3cm) (47.8cm) (72.4cm) (121.9cm) (86.4cm) (86.4cm) Figure 1 Entrées d’air... -
Page 19: Section B: Informations Générales Électrique
SECTION B: INFORMATIONS GÉNÉRALES ÉLECTRIQUE SPÉCIFICATIONS RECOMMANDÉES POUR LES FILS ÉLECTRIQUES Pour les installations de 120 V, un câble doté d’une gaine non métallique à 2 conducteurs avec fil de mise à la terre (3 fils en tout) est nécessaire pour alimenter le foyer interne en électricité. Utiliser le câblage approprié conformément aux codes de l’électricité... -
Page 20: Section C: Câblage D'alimentation Direct
1. Repérer le sélecteur de tension dans le panneau de ventilation, dans le coin supérieur droit du foyer. Faire passer le sélecteur de 240 V à 120 V (il est écrit 230 et 115 sur le sélecteur). 2. Dévisser la vis qui tient en place le couvercle de la boîte de raccordement et enlever le couvercle. www.dimplex.com... -
Page 21: Installation 120V - Sans Installation Pour La Chaleur
3. Retirer les rondelles défonçables (au besoin) ou utiliser le serre-câble fourni. 4. Dégager les 4 fils marqués L1, L2, N et G. 5. Raccorder le fil L1 (noir) du foyer au fil L1 (noir) de la source d’alimentation. 6. Raccorder le fil L2 (rouge) et le fil N (blanc) au fil neutre (blanc) de la source d’alimentation. 7. -
Page 22: Section D: Options De Contrôle Autres
à la terre. 15. S’assurer que les connexions sont bien serrées. 16. Insérer le câblage de l’interrupteur mural principal dans le boîtier mural de l’interrupteur principal. 17. Réinsérer le câblage dans le foyer et le fixer à l’aide d’un serre-câble. www.dimplex.com... -
Page 23: Installations De 120V - Câblage De L'interrupteur Mural Principal
INSTALLATIONS DE 120V - CÂBLAGE DE L’INTERRUPTEUR MURAL PRINCIPAL BLANC - N BLANC – N ROUGE – L2 S OUR C E D’AL IME NT A- NOIR – L1 T ION DE 120 V (P ANNE AU DE INTERRUP- NOIR – L1 TEUR DIS J ONC T E UR S ) MURAL... -
Page 24: Principal D'alimentation 120V Avec Interupteur Mural - Sans De Chaleur
15. Réinsérer le câblage dans le foyer et le fixer à l’aide d’un serre-câble. FIL NEUTRE DU FOYER ET DE LA SOURCE D'ALIMENTATION FIL L1 DE LA SOURCE D'ALIMENTATION FIL À 2 CONDUCTEURS DE LA SOURCE D'ALIMENTATION FIL À 2 CONDUCTEURS DE L'INTERRUPTEUR PRINCIPAL www.dimplex.com... -
Page 25: Interupteur Mural De Contrôle Pour Le Chaleur 120V/240V
INTERUPTEUR MURAL DE CONTRÔLE POUR LE CHALEUR 120V/240V ROUGE – 2 INT E R R R UP T E UR MUR AL ROUGE – 1 MISE À LA TERRE - G NOTA: Faire ce qui suit avant d’installer le foyer : 1. -
Page 26: Câblage Du Thermostat Mural Pour 120/240 V
MISE À LA TERRE AU BOÎTIER MURAL GROUND FIL À 2 CONDUCTEURS DU THERMOSTAT MURAL NOTA: Ceci illustre le seul lien commutateur de chauffage, voir les sections précédentes pour les principaux instructions de connexion de puissance. MISE À LA TERRE www.dimplex.com... -
Page 27: Interrupteur Mural 120V/240V De Contrôle De La Flamme
INTERRUPTEUR MURAL 120V/240V DE CONTRÔLE DE LA FLAMME BLUE – 4 W AL L BLUE – 3 S W IT C H GROUND - G NON OFFERT AVEC L’INSTALLATION SANS CHALEUR NOTA: Le câblage du foyer peut permettre à l’interrupteur de commander seulement les éléments chauffants. NOTA: Faire ce qui suit avant d’installer le foyer : 1. -
Page 28: Mur Télécommande - Wrcp-Kit
13. Activation de la fonction ventilateur 14. Indicateur de piles faibles CIRCUIT DE CÂBLAGE NOTA: Les modèles standard ne disposent pas d’un contrôleur log Dimplex North America Limited 1367 Industrial Road, Cambridge, ON, Canada N3H 4W3 © 2017 Dimplex North America Limited www.dimplex.com... - Page 29 INFORMACIÓN DE SEGURIDAD IMPORTANTE: Lea este manual antes de intentar instalar o usar este calentador de aire. Para su seguridad, tome en cuenta todas las advertencias e instrucciones de seguridad de este manual para evitar lesiones corporales o daños materiales. Para ver toda la línea de productos Dimplex, visite www.dimplex.com 7206350500R08...
- Page 30 PRECAUCIÓN: En caso de no seguir los procedimientos y técnicas cuidadosamente, se dañará el equipo. ADVERTENCIA: Procedimientos y técnicas que, en caso de no seguirse cuidadosamente, expondrán al usuario a riesgo de incendio, lesión grave o muerte. www.dimplex.com...
-
Page 31: Listado Y Códigos De Homologación
2100/2700 BF33DXP 33" de lujo Incluido 12.0 10.10 11.25 BF33STP 33" estándar No aplicable 12.0 10.10 11.25 NOTA: Las potencias nominales indicadas incluyen las bombillas y el motor (275 W). La instalación del calentador de aire debe cumplir con la normativa local y nacional vigente, y con los requisitos de servicio. -
Page 32: Sección A: Información De Instalación
(83.1cm) (137.2cm) (96.5cm) (96.5cm) 15.0" 33.5" 29.5" 25.7" 14.3" 29.6" 32.8" 18.8" 28.5" 48.0" 34.0" 34.0" BF33STP/DXP (38.1cm) (85.1cm) (75.0cm) (65.3cm) (36.3cm) (75.2cm) (83.3cm) (47.8cm) (72.4cm) (121.9cm) (86.4cm) (86.4cm) Figura 1 Orificios de toma de aire Dimensiones de la instalación... -
Page 33: Sección B: Información Eléctrica General
SECCIÓN B: INFORMACIÓN ELÉCTRICA GENERAL ESPECIFICACIONES RECOMENDADAS PARA LA INSTALACIÓN ELÉCTRICA En las instalaciones de 120 voltios, utilice un cable con una funda no metálica, dos conductores y un cable de tierra (3 cables en total) para conectar el calentador de aire a la corriente. Utilice un cable adecuado, que cumpla con la normativa local y nacional para aquel consumo nominal. -
Page 34: Sección C: Cableado De Alimentación Directa
1. Localice el interruptor de voltaje dentro del panel de salida de aire en la esquina superior derecha del aparato. Cambie el interruptor de 240 voltios a 120 voltios (en el interruptor está impreso 230 y 115). 2. Afloje el tornillo que fija la tapa de la caja de conexiones y quite la tapa. www.dimplex.com... -
Page 35: Instalación 120 Volt - Sin Instalación De Calor
3. Quite los separadores, si fuera necesario, o utilice la mordaza del cable que se suministra. 4. Tire de los cuatro cables marcados L1, L2, N y G. 5. Conecte el cable L1 (negro) del aparato con el cable L1 (negro) de la toma de corriente. 6. -
Page 36: Sección D: Opciones Alternativas De Control
3 HILOS CONDUCTORES DESDE EL INTERRUPTOR PRINCIPAL sueltas. 16. Inserte todo el cableado del interruptor de la pared dentro de la caja del interruptor. 17. Inserte todo el cableado otra vez dentro del aparato y fíjelo con la sujeción de los cables. www.dimplex.com... -
Page 37: Instalación 120V De Alimentación Principal De Interruptor De Pared
INSTALACIÓN 120V DE ALIMENTACIÓN PRINCIPAL DE INTERRUPTOR DE PARED BLANCO - N BLANCO – N ROJO – L2 C OR R IE NT E NEGRO – L1 120 V INTER- NEGRO – L1 RUPTOR (P ANE L PARED F US IB L E S ) TIERRA - G TIERRA - G NOTA: No debería utilizarse esta opción con el juego de control remoto. -
Page 38: Instalación 120V De Alimentación Principal De Interruptor De Pared - Sin Instalación De Calor
2 HILOS CONDUCTORES DESDE LA FUENTE DE ALIMENTACIÓN 15. Inserte todo el cableado otra vez dentro del aparato y fíjelo con la sujeción de los cables. 2 HILOS CONDUCTORES DESDE EL INTERRUPTOR PRINCIPAL www.dimplex.com... -
Page 39: Calentador De Pared Interruptor De Control Para Las Instalaciones De 120/240 Voltios
CALENTADOR DE PARED INTERRUPTOR DE CONTROL PARA LAS INSTALACIONES DE 120/240 VOLTIOS ROJO – 2 INT E R R UP T OR ROJO – 1 P AR E D TIERRA - G NOTA: Antes de instalar el aparato, complete lo siguiente: 1. -
Page 40: Conexión Del Termostato De Pared Para Las Instalaciones De 120/240 Voltios
HILO BLANCO CONECTAR LA TOMA A TIERRA A LA CAJA MURAL GROUND NOTA: Esto sólo ilustra la conexión del calentador interruptor, consulte las secciones anteriores para los principales instrucciones de alimentación de conexión. TIERRA www.dimplex.com... -
Page 41: Montado En La Pared Flame Conmutador De Anulación Para Las Instalaciones De 120/240 Voltios
MONTADO EN LA PARED FLAME CONMUTADOR DE ANULACIÓN PARA LAS INSTALACIONES DE 120/240 VOLTIOS AZUL – 4 INTERRUPTOR AZUL – 3 PARED TIERRA - G NO DISPONIBLE EN UNA INSTALACIÓN SIN CALOR NOTA: El calentador de aire se puede conectar para que un interruptor haga funcionar el calentador independientemente de las llamas. -
Page 42: Remoto De Pared - Wrcp-Kit
13. Encender el sistema ventilador 14. Indicador de batería baja DIAGRAMA DE CONEXIÓN ELÉCTRICA NOTA: Los modelos estándar no tiene un log conductor. Dimplex North America Limited 1367 Industrial Road, Cambridge, ON, Canada N3H 4W3 © 2017 Dimplex North America Limited www.dimplex.com...