
Related Manuals for Jensen JCR-315


Summary of Contents for Jensen JCR-315
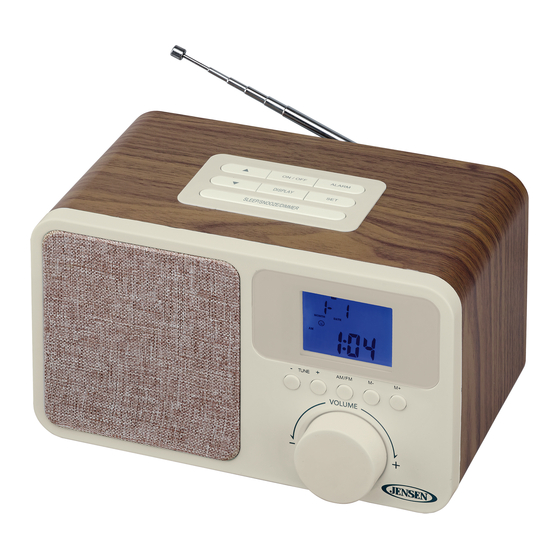
- Page 1 Digital AM/FM Dual Alarm Clock Radio with Wood Cabinet MODEL: JCR-315 USER MANUAL PLEASE READ THIS USER MANUAL COMPLETELY BEFORE OPERATING THIS UNIT AND RETAIN THIS BOOKLET FOR FUTURE REFERENCE...
-
Page 2: Important Safety Instructions
WARNING TO PREVENT FIRE OR SHOCK HAZARD, DO NOT USE THIS PLUG WITH AN EXTENSION CORD, RECEPTACLE OR OTHER OUTLET UNLESS THE BLADES CAN BE FULLY INSERTED TO PREVENT BLADE EXPOSURE. TO PREVENT FIRE OR SHOCK HAZARD, DO NOT EXPOSE THIS APPLIANCE TO RAIN OR MOISTURE. IMPORTANT SAFETY INSTRUCTIONS The Caution Marking is located at the back enclosure of the apparatus. - Page 3 15. Do not overload wall outlet. Use only power source as indicated. 16. Use replacement part as specified by the manufacturer. 17. Upon completion of any service or repairs to this product, ask the service technician to perform safety checks. 18.
-
Page 4: Compliance With Fcc Regulations
COMPLIANCE WITH FCC REGULATIONS This device complies with Part 15 of the FCC Rules. Operation is subject to the following two conditions: (1) This device may not cause harmful interference, and (2) This device must accept any interference received, including interference that may cause undesired operation. - Page 5 The serial number of this product is found on its bottom cover. You should note the serial number of this unit in the space provided as a permanent record of your purchase to aid in identification in the event of theft of loss. Model Number: JCR-315 Serial Number:...
-
Page 6: Location Of Controls
LOCATION OF CONTROLS 1 SPEAKER 12 TIME/ALARM SET DOWN BUTTON 2 TUNE BUTTON - 13 SLEEP/SNOOZE/DIMMER BUTTON 3 TUNE BUTTON + 14 DISPLAY BUTTON 4 AM/FM BUTTON 15 SET BUTTON 5 VOLUME CONTROL 16 ALARM BUTTON 6 M – (MEMORY DOWN BUTTON) 17 USB CHARGING PORT 7 M + (MEMORY UP BUTTON) 18 AUX IN JACK... -
Page 7: Power Source
2 x AAA size batteries (Not included). POWER CONNECTION 1. Connect the cord of the power adaptor to the DC IN JACK (#20) of the JCR-315. 2. Connect the plug of the power adaptor to a wall socket. The JCR-315 is powered and in standby mode when you see the LCD DISPLAY (#8) is switched on. -
Page 8: Time And Calendar Setting
In order for the clock to function properly, the clock has to be set before you use it for the first time. After powering up the JCR-315, the LCD is in time display mode and show 12:00. 1. Press the SET BUTTON (#15), minute digits will blink. -
Page 9: Snooze Function
20 AM stations for easy recall at any time. Tap the ON/OFF BUTTON (#10) to turn on the JCR-315 and select AM/FM band. 2. Tune to the radio station you want to store in memory. Tap the SET BUTTON (#15). -
Page 10: Sleep Operation
1. Recall Preset Station Tap the ON/OFF BUTTON (#10) to turn on the JCR-315 and select AM/FM Mode. Tap the M + (MEMORY UP BUTTON) (#7) or the M - (MEMORY DOWN BUTTON) (#6) to select the preset station. -
Page 11: Earphone Connection
1000MA) 1. Plug the standard end of the USB cable (not included) into the USB CHARGING PORT (#17) located on the back of the JCR-315. Plug the other end of the cable into the device you wish to charge. 2. Observe the battery charge indicator on your device to make sure the charging process starts normally. -
Page 12: Care And Maintenance
CARE AND MAINTENANCE • Clean the radio with a soft damp cloth and let all parts dry completely after cleaning. • Do not use any aggressive cleaners, brushes with nylon bristles, sharp or metallic cleaning utensils, knives, hard scrapers and the like. They could damage the surfaces of the radio. - Page 13 90 DAY LIMITED WARRANTY AND SERVICE VALID IN THE U.S.A. ONLY SPECTRA MERCHANDISING INTERNATIONAL, INC. warrants this unit to be free from defective materials or factory workmanship for a period of 90 days from the date of original customer purchase and provided the product is utilized within the U.S.A. This warranty is not assignable or transferable.