Advertisement
Table of Contents
- 1 Table of Contents
- 2 Specifications & Performance Claims
- 3 Dimensions
- 4 Before You Start
- 5 Installation Requirements
- 6 Typical Installation Illustrations
- 7 Installation Instructions
- 8 Installation Instructions
- 9 Programming the Electronic Controller
- 10 Controller Features / Options
- 11 Wiring Schematic
- 12 Routine Maintenance
- 13 Automatic Electronic Diagnostics
- 14 Troubleshooting
- 15 Exploded View & Parts List
- 16 All Models
- Download this manual
Models NST30ED
NST45ED1
NST70ED1
How to install, operate
and maintain your Demand
Controlled Water Softener
If you have any questions or concerns when
installing, operating or maintaining your water
softener, call our toll free number:
1-800-972-0135
www.northstarwater.com
or visit
When you call, please be prepared to provide
the model and serial number of your product,
found on the rating decal, located on the back
of the controller top cover.
Systems tested and certified by NSF International
against NSF/ANSI Standard 44
for hardness reduction and efficiency,
and certified to NSF/ANSI Standard 372.
Systems tested and certified by the Water Quality
Association against CSA B483.1.
Designed, Engineered &
Assembled in the U.S.A.
Manufactured and warranted by
North Star Water Treatment Systems
1890 Woodlane Drive
Woodbury, MN 55125
7366546 (Rev. B 1/24/18)
Advertisement
Table of Contents

Related Manuals for North Star NST30ED


Summary of Contents for North Star NST30ED
- Page 1 NSF/ANSI Standard 372. Systems tested and certified by the Water Quality Association against CSA B483.1. Manufactured and warranted by North Star Water Treatment Systems Designed, Engineered & 1890 Woodlane Drive 7366546 (Rev. B 1/24/18) Assembled in the U.S.A.
-
Page 2: Table Of Contents
WATER SOFTENER WARRANTY Warrantor: North Star Water Treatment Systems, 1890 Woodlane Drive, Woodbury, MN 55125 Warrantor guarantees, to the original owner, that: One Year Full Warranty: ● For a period of one (1) year from the date of purchase, all parts will be free from defects in materials and workman- ship and will perform their normal functions. -
Page 3: Specifications & Performance Claims
Operational efficiency is the actual efficiency after the system has been installed. It is typically less than the rated efficiency, due to individual application factors including water hardness, water usage, and other con- taminants that reduce a softener's capacity. Model NST30ED NST45ED1 NST70ED1 Model Code... -
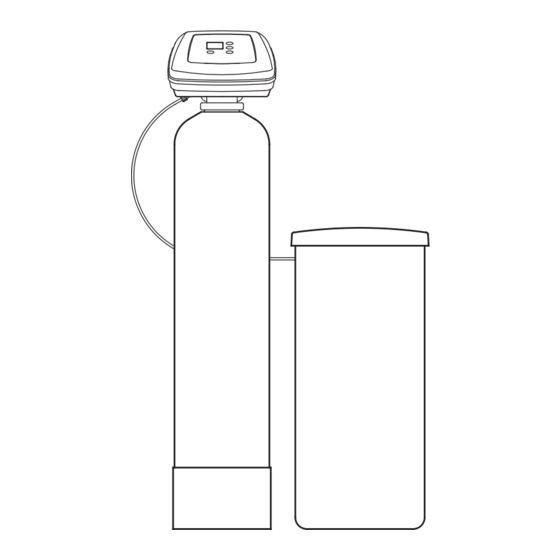
Page 4: Dimensions
Dimensions NST30ED NST45ED1 NST70ED1 14" Nominal Resin 8” dia. 10” dia. 12” dia. 3-3/4" Tank Size x 40” x 40” 54” Dimension 48-3/4” 50” 65-3/4” Dimension 41-1/4” 41-1/4” 57” 8-1/4” dia. 10-1/2” dia. 12-1/4” dia. Dimension INLET - 3-3/8” 3-3/4”... -
Page 5: Installation Requirements
Installation Requirements LOCATION REQUIREMENTS PLUMBING CODES Consider all of the following when selecting an installa- All plumbing must be completed in accordance with tion location for the water softener. national, state and local plumbing codes. = Do not locate the water softener where freezing In the state of Massachusetts: The Commonwealth temperatures occur. -
Page 6: Typical Installation Illustrations
Typical Installation Illustrations Soft CROSSOVER Water Use if water supply flows from the left. Include single or 3-valve bypass. Hard Water Hard Soft Water Water From Hard Water to Softener Softener outside faucets Outlet Inlet 120V, 60 Hz INSTALLATION USING 3-VALVE BYPASS Outlet 1”... -
Page 7: Installation Instructions
Installation Instructions 1. TURN OFF WATER SUPPLY Clip (2) a. Close the main water supply valve near the well pump or water meter. OUTLET Plastic b. Shut off the electric or fuel supply to the water installation heater. adaptors c. Open high and low faucets to drain all water from Turbine the house pipes. - Page 8 Installation Instructions 4. COMPLETE INLET AND OUTLET Ground Wire PLUMBING (not included) Pipe fittings must be 3/4” minimum. Use: = Copper pipe = Threaded pipe Clamp = PEX (Crosslinked Polyethylene) pipe FIG. 10 (2 - not included) = CPVC plastic pipe = Other pipe approved for use with potable water 6.
- Page 9 Installation Instructions 7. INSTALL SALT STORAGE TANK OVER- 9. TEST FOR LEAKS FLOW FITTINGS AND HOSE To prevent air pressure in the water softener and plumbing system, complete the following steps in a. Insert the rubber grommet into the 3/4” diameter order: hole in the salt storage tank sidewall (See Figure 13).
-
Page 10: Installation Instructions
Installation Instructions 10. ADD WATER AND SALT TO THE SALT 13. SANITIZE THE WATER SOFTENER / STORAGE TANK SANITIZE AFTER SERVICE a. Using a container, add about three gallons of clean Care is taken at the factory to keep your unit clean and water into the salt storage tank. -
Page 11: Programming The Electronic Controller
Programming the Electronic Controller Display UP button DOWN button SELECT RECHARGE button button FIG. 15 CONTROLLER SETTINGS REQUIRED 2. When the correct time is displayed, press the SELECT button, and the display will change to upon installation, and after an extended power outage. show the “Hardness”... - Page 12 However, regenerations may occur at the wrong time of day until you reset the North Star demand controlled water softeners regen- clock to the correct time of day. erate only while water is being used and softening capacity must be restored.
-
Page 13: Controller Features / Options
Controller Features / Options OPTIONAL SETTING: SALT EFFICIENCY 1. To set this option, press and hold SELECT for SALT EFFICIENCY: When this feature is ON, the 3 seconds until “000 - -” shows in the display. water softener will operate at salt efficiencies of 4000 grains of hardness per pound of salt or high- er. -
Page 14: Routine Maintenance
Routine Maintenance ADDING SALT CLEANING THE NOZZLE & VENTURI Lift the salt storage tank cover and check the salt level A clean nozzle & venturi (See Figure 28) is a necessity frequently. If the water softener uses all the salt for the water softener to work properly. - Page 15 Troubleshooting Guide PROBLEM CAUSE CORRECTION No soft water No salt in the storage tank. Add salt and then initiate a “Recharge Now”. Salt is “bridged” (a layer of salt in the Break salt bridge, as described on the previous salt storage tank has hardened). page, and then initiate a “Recharge Now”.
-
Page 16: Troubleshooting
Manually Initiated Electronic Diagnostics to further isolate the defect, *199 for model NST30ED and check the water meter. NOTE: If you don't get a reading in the display with... - Page 17 NOTE: If the electronic control is left in a diagnostic display (or a flashing dis- NST30ED NST45ED1 & NST70ED1 play when setting times or hardness), FIG. 33 present time automatically returns if a button is not pressed within 4 minutes.
-
Page 18: Exploded View & Parts List
Softener Exploded View (All Models) Valve Assembly See Pages 20-23 for parts... -
Page 19: All Models
Description Part No. Description 7351054 Power Supply, 24V DC 0502272 Resin, 53 lbs. (1 cu. ft.) Repl.Electronic Control Board 1183000 Tank Foot, 8”, NST30ED 7309358 (PWA) 7302039 Tank Foot, 10”, NST45ED1 Faceplate Cover, NST30ED 7339222 Tank Foot, 12”, NST70ED1 7180291... - Page 20 Valve Exploded View (NST30ED) Wear Strip Seal Cross-section View...
- Page 21 Turbine Plug, Drain Seal Bypass Valve Assembly, 3/4”, in- 7278434 cluding 2 O-Rings (See Key No. 93) To order repair parts call toll free 1-800-972-0135. Manufactured and warranted by North Star Water Treatment Systems 1890 Woodlane Drive Woodbury, MN 55125...
- Page 22 Valve Exploded View (NST45ED1 & NST70ED1) Wear Strip Seal Cross-section View...
- Page 23 2 ea. Clips & O-Rings 7336410 O-Ring, 1-1/16” x 1-5/16”, pack of 20 (See Key Nos. 121 & 123) To order repair parts call toll free 1-800-972-0135. Manufactured and warranted by North Star Water Treatment Systems 1890 Woodlane Drive Woodbury, MN 55125...