Advertisement
Quick Links
Download this manual
See also:
User Manual
SAMSUNG
ML-2165W (MLT-D101S)
®
TONER CARTRIDGE REMANUFACTURING INSTRUCTIONS
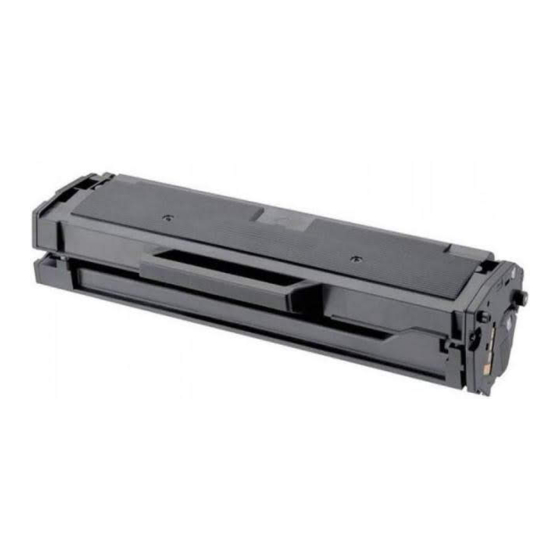
SAMSUNG MLT-D101S TONER CARTRIDGE
www.uninetimaging.com
© 2013 UniNet Imaging Inc. All trademark names and artwork are property of their respective owners. Product brand names mentioned are intended to show compatibility only.
UniNet Imaging does not warrant downloaded information. Unauthorized sale, reproduction or distribution of this article is prohibited. For additional support, please contact techsupport@uninetimaging.com
Advertisement

Related Manuals for Samsung ML-2165W


Summary of Contents for Samsung ML-2165W
- Page 1 ML-2165W (MLT-D101S) ® TONER CARTRIDGE REMANUFACTURING INSTRUCTIONS SAMSUNG MLT-D101S TONER CARTRIDGE www.uninetimaging.com © 2013 UniNet Imaging Inc. All trademark names and artwork are property of their respective owners. Product brand names mentioned are intended to show compatibility only. UniNet Imaging does not warrant downloaded information. Unauthorized sale, reproduction or distribution of this article is prohibited. For additional support, please contact techsupport@uninetimaging.com...
- Page 2 On this opportunity we will touch on the Samsung ML-2160, 2165, SCX-3405 printers with cartridge part number MLT-D101S. Samsung has built in a very devious cartridge replacement limitation on this printer series in which there is a maximum limitation of 250 cartridges per machine allowed.
- Page 3 The starter cartridge shipped with the machine can only be identified by its serial number and the word “Initial” printed in its label. The aspects of the cartridge are rapidly recognized as a Samsung product, however as with prior releases, the presence of plastic rivets instead of classic screws to secure end plates, does create the need to carefully drill all seven positions and replace the rivets with standard self-tapping cartridge screws for proper removing, remanufacturing and assembling.
-
Page 4: Required Tools
SAMSUNG ML-2165W (MLT-D101S) TONER CARTRIDGE REMANUFACTURING INSTRUCTIONS The separation between the roller and the surface of the OPC is about 0.14mm, meaning in effect there is a jump of the toner from the roller surface to the OPC surface in the moment of development of the latent image in the photoreceptor. The surprise does not end there and we see that the doctor blade working at a tangential position is made of stainless steel instead of polyurethane. -
Page 5: Required Supplies
SAMSUNG ML-2165W (MLT-D101S) TONER CARTRIDGE REMANUFACTURING INSTRUCTIONS REQUIRED SUPPLIES 1. New replacement toner for use in Samsung ML-2165W / MLT-D101S 2. New replacement chip for use in ML-2165W to match region 3. New OPC drum (optional) 4. New developer roller (optional) 5. - Page 6 SAMSUNG ML-2165W (MLT-D101S) TONER CARTRIDGE REMANUFACTURING INSTRUCTIONS 3. Tap the four screws into position. 4. Repeat the work sectioning the heads of the rivets on the opposite end cover (marking the center of the rivets, drilling and tap- ping the three screws).
- Page 7 SAMSUNG ML-2165W (MLT-D101S) TONER CARTRIDGE REMANUFACTURING INSTRUCTIONS 5. Proceed now to remove the screws of the end cover on the right (contact side) and pry open with the small screwdriver at different consecutive points until separation is accomplished. Even though the cover seems to be formed by two sections, it is a unit with a rather thin centerpiece.
- Page 8 SAMSUNG ML-2165W (MLT-D101S) TONER CARTRIDGE REMANUFACTURING INSTRUCTIONS 7. Slide the OPC drum axle out just enough to allow the opposite end of the drum to be lifted out of position and remove it. Leave the drum axle inside the OPC.
- Page 9 SAMSUNG ML-2165W (MLT-D101S) TONER CARTRIDGE REMANUFACTURING INSTRUCTIONS 9. Remove both Phillips screws and remove the wiper blade by prying it out. 10. Vacuum the waste bin and surrounding areas. Inspect also the state of the wiper and the recovery blade seals.
- Page 10 SAMSUNG ML-2165W (MLT-D101S) TONER CARTRIDGE REMANUFACTURING INSTRUCTIONS 11. Lubricate the wiper blade with lubricating powder and install with the two Phillips screws. 12. Wipe the PCR surface with a soft cloth to remove all traces of toner, and if need be, use a PCR cleaning liquid. Most marks and even fingerprints can be removed with a damp cloth containing a few drops of neutral detergent and fractioning the surface with axial strokes.
- Page 11 SAMSUNG ML-2165W (MLT-D101S) TONER CARTRIDGE REMANUFACTURING INSTRUCTIONS 13. Clean the OPC surface and proceed to install it in the cartridge, moving the shaft inside just enough to seat the OPC drum properly. Cover the drum section away from light and set aside. Begin work on the developer section.
- Page 12 SAMSUNG ML-2165W (MLT-D101S) TONER CARTRIDGE REMANUFACTURING INSTRUCTIONS 15. At the opposite end, remove the screw holding the contact end plate. It must be noted that there is NO conductive spring or blade doing the electrical work. Instead, a conductive plastic tip at the plate can be found. This is further confirmed by the use of fair amount of conductive grease both at this bearing and the inside of the metal developer roller.
- Page 13 SAMSUNG ML-2165W (MLT-D101S) TONER CARTRIDGE REMANUFACTURING INSTRUCTIONS 18. Remove the two Phillips screws and doctor blade from its place, then clean with a soft cloth. 19. Vacuum the hopper completely, including the feed roller, and remove the fill plug to facilitate the work.
- Page 14 SAMSUNG ML-2165W (MLT-D101S) TONER CARTRIDGE REMANUFACTURING INSTRUCTIONS 20. Install the doctor blade in its place, securing it with the proper screws. The figure show the plate for the gears removed, but normally this is not required. 21. Install the developer roller, ensuring the positioning of the red plastic bushing first.
- Page 15 SAMSUNG ML-2165W (MLT-D101S) TONER CARTRIDGE REMANUFACTURING INSTRUCTIONS 22. On the other end, install the bushing and the contact plate, securing it with the corresponding Phillips screw. 23. Fill the hopper with dedicated toner for use in MLT-D101, and place the filling plug back to close the hole. Check for leaks.
- Page 16 SAMSUNG ML-2165W (MLT-D101S) TONER CARTRIDGE REMANUFACTURING INSTRUCTIONS 24. Now take the image section and place it on top of the developer section as shown, positioning the compression springs properly. 25. While holding both sections together, place the lower part of the end cover in place, matching the chamfered shaft of the OPC with the right hole.
- Page 17 SAMSUNG ML-2165W (MLT-D101S) TONER CARTRIDGE REMANUFACTURING INSTRUCTIONS 26. Work on the opposite end by taking the end cover and lubricating all contact points, and replacing the chip as shown. When installing the cover, ensure proper insertion of the metal contact point through the square hole of the cover.
- Page 18 SAMSUNG ML-2165W (MLT-D101S) TONER CARTRIDGE REMANUFACTURING INSTRUCTIONS 27. Screw on the cover with the chip and proceed to check the cartridge in the machine. For proper protection, use inflatable air bag packaging to transport this cartridge. REPETITIVE DEFECT CHART 62.83 mm 25.45 mm...