Toro TurfMaster 22205TE Operator's Manual
76cm walk-behind lawn mower
Hide thumbs
Also See for TurfMaster 22205TE:
- Operator's manual (140 pages) ,
- Operator's manual (32 pages) ,
- Operator's manual (32 pages)
Table of Contents
Advertisement
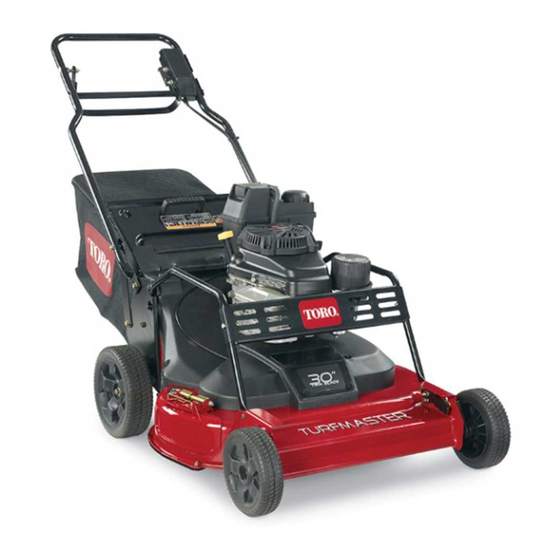
76cm TurfMaster™ Walk-Behind Lawn Mower
Model No. 22205TE—Serial No. 400000000 and Up
Introduction
This rotary-blade, walk-behind lawn mower is intended
to be used by residential homeowners or professional,
hired operators. It is designed primarily for cutting grass
on well-maintained lawns on residential or commercial
properties. It is not designed for cutting brush or for
agricultural uses.
Read this information carefully to learn how to operate and
maintain your machine properly and to avoid injury and
equipment damage. You are responsible for operating the
machine properly and safely.
You may contact Toro directly at www.Toro.com for product
and accessory information, help finding a dealer, or to register
your product.
Whenever you need service, genuine Toro parts, or additional
information, contact an Authorized Service Dealer or Toro
Customer Service and have the model and serial numbers of
your machine ready.
Figure 1
model and serial numbers on the product. Write the numbers
in the space provided.
1. The model and serial number plate is in either of these 2
locations.
Model No.
Serial No.
This manual identifies potential hazards and has safety
messages identified by the safety-alert symbol
which signals a hazard that may cause serious injury or death
if you do not follow the recommended precautions.
© 2017—The Toro® Company
8111 Lyndale Avenue South
Bloomington, MN 55420
identifies the location of the
1
SUPERCEDED
G023543
Figure 1
(Figure
Register at www.Toro.com.
1. Safety-alert symbol
This manual uses 2 words to highlight information.
Important calls attention to special mechanical information
and Note emphasizes general information worthy of special
attention.
This product complies with all relevant European directives.
For details, please see the separate product specific
Declaration of Conformity (DOC) sheet.
Net Torque: The gross or net torque of this engine was
laboratory rated by the engine manufacturer in accordance
with the Society of Automotive Engineers (SAE) J1940.
As configured to meet safety, emission, and operating
requirements, the actual engine torque on this class of mower
will be significantly lower. Go to www.Toro.com to view
specifications on your mower model.
Contents
Introduction .................................................................. 1
Safety ........................................................................... 2
General Safety......................................................... 2
Safety and Instructional Decals ................................. 2
Setup ............................................................................ 5
1 Installing the Handle ............................................. 5
2 Adjusting the Handle Height .................................. 5
3 Filling the Engine with Oil...................................... 6
4 Assembling the Grass Bag ...................................... 6
g023543
Product Overview .......................................................... 8
Controls ................................................................ 8
Specifications ......................................................... 8
Operation ..................................................................... 9
Before Operation ....................................................... 9
Before Operation Safety ........................................... 9
Filling the Fuel Tank ................................................ 9
Checking the Engine-Oil Level.................................10
Adjusting the Cutting Height....................................10
Checking the Blade-Stop System Operation................11
During Operation .....................................................11
During Operating Safety..........................................11
2),
Starting the Engine .................................................12
Shutting off the Engine ...........................................12
Form No. 3409-542 Rev B
Operator's Manual
Figure 2
Original Instructions (EN)
All Rights Reserved *3409-542* B
Printed in the USA
g000502
Advertisement
Table of Contents

Related Manuals for Toro TurfMaster 22205TE


Summary of Contents for Toro TurfMaster 22205TE
- Page 1 For details, please see the separate product specific Declaration of Conformity (DOC) sheet. You may contact Toro directly at www.Toro.com for product and accessory information, help finding a dealer, or to register Net Torque: The gross or net torque of this engine was your product.
- Page 2 Safety Operating the Self-Propel Drive and Engaging the Cutting Blades............12 Engaging and Disengaging the Parking This machine has been designed in accordance with EN ISO Brake ..............13 5395:2013. Recycling the Clippings ...........13 Bagging the Clippings ..........14 General Safety Side-Discharging the Clippings.........14 Operating Tips ............15 This product is capable of amputating hands and feet and After Operation ............15...
- Page 3 decal112-8760 112-8760 1. Thrown object hazard—keep bystanders a safe distance away from the machine. 2. Cutting/dismemberment of hand or foot—stay away from moving parts. decal116-7583 116-7583 1. Warning–Read the Operator’s Manual. Do not operate this 4. Cutting/dismemberment hazard of hand or foot, mower machine unless you are trained.
- Page 4 decal120-9570 120-9570 1. Warning—stay away from moving parts, keep all guards and shields in place. decal121-1449 121-1449 1. Warning—do not park on slopes unless the wheels are chocked or blocked. decal130-9656 130-9656 1. Choke 3. Slow 2. Fast 4. Engine—stop decal127-6864 127-6864 1.
-
Page 5: Figure
Setup Important: Remove and discard the protective plastic sheet that covers the engine and any other plastic or wrapping on the machine. Installing the Handle No Parts Required Procedure G028427 WARNING g028427 Figure 4 Folding or unfolding the handle improperly can 1. -
Page 6: Filling The Engine With Oil
G021 150 g194742 g021150 Figure 6 Figure 5 1. Full 3. Low 1. Lowest handle height 3. Highest handle height 2. High setting setting 2. Middle handle height setting 3. Carefully pour about 3/4 of the engine capacity of oil into the oil-fill tube. -
Page 7: Assembling The Grass Bag
Assembling the Grass Bag No Parts Required Procedure 1. Slip the grass bag over the frame as shown in Figure g027718 g027718 Figure 8 g027717 3. Hook the top and side channels of the bag onto the top and sides of the frame, respectively (Figure g027717 Figure 7... -
Page 8: Product Overview
Controls Product Overview g019652 g019652 Figure 11 Throttle (throttle lever not shown for the sake of clarity) 1. Choke 3. Slow 2. Fast 4. Stop g028352 g028352 Figure 9 1. Spark plug (under brush 10. Control bar guard) 2. Air filter 11. -
Page 9: Operation
Filling the Fuel Tank Operation • For best results, use only clean, fresh, unleaded gasoline Before Operation with an octane rating of 87 or higher ((R+M)/2 rating method). • ETHANOL: Gasoline with up to 10% ethanol (gasohol) Before Operation Safety or 15% MTBE (methyl tertiary butyl ether) by volume is acceptable. -
Page 10: Checking The Engine-Oil Level
Checking the Engine-Oil Level Adjusting the Cutting Height Service Interval: Before each use or daily The cutting heights range from 38 mm (1-1/2 inches) to 127 mm (5 inches) in 13 mm (1/2 inch) increments. 1. Move the machine to a level surface. 2. -
Page 11: Checking The Blade-Stop System Operation
Not Using the Grass Bag 1. Move the machine onto a paved surface in a non-windy area. 2. Set all 4 wheels to the 89 mm (3-1/2 inch) cutting height setting. 3. Take a half sheet of newspaper and crumple it into a ball small enough to go under the machine (about 75 mm or 3 inches in diameter). -
Page 12: Starting The Engine
• Use accessories and attachments approved by the The Toro® Company only. Operating the Self-Propel Slope Safety Drive and Engaging the •... -
Page 13: Engaging And Disengaging The Parking Brake
Disengaging the Parking Brake Disengage the parking brake by pushing the brake lever down to the handle (Figure 22). G019672 g019672 Figure 20 2. Raise the control bar to 1. Slide the control bar to the right. the handle. g028359 g028359 Figure 22 •... -
Page 14: Bagging The Clippings
Bagging the Clippings Installing the Side-Discharge Chute Important: Ensure that the rear-discharge plug is in Use the grass bag when you want to collect grass and leaf place before you recycle the clippings. clippings from the lawn. 1. Shut off the engine and wait for all moving parts to If the side-discharge chute is on the machine, remove it and stop. -
Page 15: Operating Tips
Maintain sharp blades throughout the cutting season. After Operating Safety Periodically file down nicks on the blades. • Replace the blades when necessary with original Toro replacement blades. General Safety • Mow only dry grass or leaves. Wet grass and leaves tend •... -
Page 16: Cleaning The Wheels
g002275 Figure 27 1. Right rear wheel Note: The blades will draw in water and wash out clippings. Let the water run until you no longer see clippings being washed out from under the machine. 4. Shut off the engine and wait for all moving parts to stop. -
Page 17: Maintenance
Maintenance Recommended Maintenance Schedule(s) Maintenance Service Maintenance Procedure Interval • Change the engine oil without the oil filter. After the first 5 hours • Service the blade-drive system. • Check the engine-oil level. • Check the blade-stop system operation. The blades should stop within 3 seconds of releasing the control bar;... -
Page 18: Changing The Engine Oil
Changing the Engine Oil Service Interval: After the first 5 hours—Change the engine oil without the oil filter. Every 50 hours—Change the engine oil (more often in dusty conditions). Note: Run the engine a few minutes before changing the oil to warm it. Warm oil flows better and carries more contaminants. -
Page 19: Changing The Oil Filter
6. Remove the oil filter (Figure 32). Note: Make sure that the oil-filter gasket comes off with the filter. G019648 g019648 Figure 31 5. After draining the used oil, return the machine to the operating position. g019650 g019650 6. Carefully pour about 3/4 of the engine capacity of oil Figure 32 into the oil-fill tube. -
Page 20: Servicing The Spark Plug
Servicing the Spark Plug Emptying the Fuel Tank and Cleaning the Filter Service Interval: Every 100 hours Service Interval: Every 50 hours—Check the fuel hose and Use an NGK BPR5ES spark plug or equivalent. replace it if necessary. 1. Shut off the engine and wait for all moving parts to Every 100 hours—Clean the fuel tank filter. -
Page 21: Servicing The Blade-Drive System
4. Remove the fuel filter (Figure 35) from the fuel line by loosening the tube clamps surrounding the fuel filter. 5. Install a new fuel filter in the fuel line using the tube clamps that you removed in step 4. Servicing the Blade-Drive decal116-8528 System... -
Page 22: Servicing The Cutting Blades
22). If the blade edge is dull or nicked, have it 2. Cutting edge 4. Crack sharpened or replace it. If the blades are worn, bent, damaged or cracked, replace them immediately with a genuine Toro 2. Inspect the blades themselves, especially the curved replacement blades. area (Figure 38). -
Page 23: Removing The Blades
WARNING Replace the blades when they strike a solid object, are out of Incorrectly installing the blades could damage the balance, bent, or worn. Use only genuine Toro replacement machine or cause an injury to the operator or to blades. -
Page 24: Changing The Blade-Drive Belt
Important: Position the curved ends of the blades 4. Tighten the second blade; refer to step 2. to point toward the machine housing. Be sure to 5. Rotate the blades by hand a full 360° turn to ensure nest the raised areas on each blade driver with the that they do not touch. -
Page 25: Changing The Blade-Brake-Clutch (Bbc Belt
2. Disconnect the wire from the spark plug. 3. Remove the 4 bolts that hold the belt cover to the machine housing. Note: Save the bolts for installing the belt cover to the machine housing. 4. Remove the belt cover. 5. - Page 26 Note: Save the bolts for installing the belt cover to the machine housing. 4. Remove any debris from under the belt cover. 5. Loosen the cable-clamp screw (Figure 47). g195615 Figure 49 1. Mark the cable here G019923 g019923 Figure 47 1.
-
Page 27: Adjusting The Transmission
6. Loosen the bracket and rotate the bracket forward 1. Stop the machine and wait for all moving parts to stop. (Figure 51). 2. Loosen the cable-support nut (Figure 52). Note: The bracket prevents the transmission from tipping to the point where the transmission belt comes off. -
Page 28: Storage
Storage 2. Remove the spark plug. 3. Using an oil can, add about 30 ml (1 fl oz), of motor oil to the engine through the spark-plug hole. General Information 4. Slowly pull the starter rope several times to distribute Store the machine in a cool, clean, dry place. -
Page 29: Troubleshooting
Troubleshooting Problem Possible Cause Corrective Action The engine does not start. 1. The fuel tank is empty or the fuel 1. Drain and/or fill the fuel tank with system contains stale fuel. fresh gasoline. If the problem persists, contact an Authorized Service Dealer. 2. - Page 30 Problem Possible Cause Corrective Action There is an uneven cutting pattern. 1. All 4 wheels are not at the same height. 1. Place all 4 wheels at the same height. 2. The blades are dull. 2. Sharpen and balance the blades. 3.
- Page 31 The Way Toro Uses Information Toro may use your personal information to process warranty claims, to contact you in the event of a product recall and for any other purpose which we tell you about. Toro may share your information with Toro's affiliates, dealers or other business partners in connection with any of these activities. We will not sell your personal information to any other company.
- Page 32 1. Contact your seller to arrange service of the product. If for any reason it is impossible for you to contact your seller, you may contact any Toro Authorized Distributor to arrange service. Visit http://www.toro.com/ to SUPERCEDED locate a Toro distributor in your area.