
Related Manuals for EverFocus EQ610e


Summary of Contents for EverFocus EQ610e
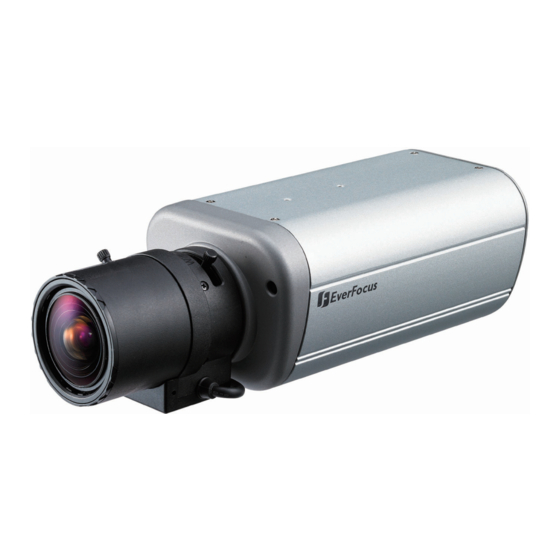
- Page 1 EQ610e Indoor Box Camera 700TVL True Day/Night, D-WDR User’s Manual * Lens not included. Copyright © EverFocus Electronics Corp, Release Date: February, 2013...
- Page 3 CAUTIONS 1. Do not install the camera near electric or magnetic fields. 2. Never disassemble the camera beyond the recommendations in this manual nor introduce materials other than those recommended herein. 3. Try to avoid facing the camera toward the sun. 4.
- Page 4 ED610e 1. INTRODUCTION The EverFocus EQ610e box camera features an incredible 700TVL resolution in full color with a low-light sensitivity of 0.03 lux. Delivered by a 1/3” Sony 960H CCD sensor, the camera also features the added benefits of advanced Effio-E DSP technology to enhance image quality.
- Page 5 ED610e SPECIFICATIONS 1/3" Sony 960H CCD Pickup Device NTSC, PAL Video Format NTSC: 1020 x 508 Picture Elements (H x V) PAL: 1020 x 596 Horizontal Resolution 700TVL Sensitivity 0.03Lux / F1.2 S/N Ratio Over 52dB (AGC off) Video Output 1.0Vp-p Composite, 75Ω...
-
Page 6: Camera Overview
ED610e 2. CAMERA OVERVIEW 2.1 NAMES AND FUNCTIONS OF PARTS 2.1.1 FRONT PANEL Light Sensor Microphone (Reserved for Audio-supporting models) 2.1.2 BRACKET POSITIONS The bracket in the package can be fitted to the screw holes on the top or bottom of the camera for either suspending the camera or supporting it. - Page 7 ED610e 2.1.3 Back Panel Back Panel: AC 24V / LINE IN DC 12V 12 VDC / 24 VAC~ Model 90-260 VAC~ Model Side Panel: 1) Left-scroll button 2) Up-scroll button 3) Set button (push to activate OSD) 4) Right-scroll button 5) Down-scroll button 6) Video Output Connector BNC connector that connects to a 75 Ohm type coaxial cable to feed the...
- Page 8 ED610e INSTALLATION 1. Unscrew the protection cap from the mouth of the lens mounting. 2. If a C-mount lens is to be used, please screw the C-mount adaptor ring (the 5mm-thick ring in the accessory pack) on to the mouth of the lens mounting. 3.
- Page 9 ED610e 4. CONNECTIONS EXT. SENSOR Connect the cable from the video output jack of the camera to the monitor’s input jack. 5. CAMERA SETUP OPERATIONS This camera utilizes an On Screen Display (OSD) user setup menu. 5.1 SETUP BUTTONS To set items on the user setup menu, use the following buttons on the back panel.
- Page 10 ED610e ① ENTER Press this button (by pressing straight down on the stick) to display the OSD’s main menu on the monitor that you have connected directly or indirectly to the camera’s video connector. Also press this button to confirm changes and to open the submenus when they’re available and selected.
-
Page 11: Osd Operation
ED610e 5.2 OSD OPERATION ** SETUP MENU ** ** SETUP MENU ** LENS AUTO ┘ PICT ADJUST ┘ < < SHUTTER / AGC AUTO ┘ MOTION DET < ┘ PRIVACY < WHITE BAL ┘ CAMERA ID < D-WDR ┘ LANGUAGE ENGLISH <... - Page 12 ED610e 5. Return to the previous page Scroll to RETURN and press the ENTER button to return to the previous page. 6. Exit the OSD menu Scroll to EXIT and press the ENTER button to exit the OSD menu. 6. CONFIGURATION WITH THE OSD 6.1 WHITE PIXEL COMPENSATION When there are white pixels on the monitor, follow the instructions below to compensate.
- Page 13 ED610e 6.2 LENS Once you have opened the OSD’s main menu on your screen, use the UP and DOWN buttons to scroll to the “LENS” menu item. Use the LEFT and RIGHT buttons to toggle between the MANUAL and AUTO modes. If you selected AUTO, you can press the ENTER button to open the LENS >...
- Page 14 ED610e 6.3 SHUTTER / AGC (AUTO GAIN CONTROL) Once you have opened the OSD’s main menu on your screen, use the UP and DOWN buttons to scroll to the “SHUTTER / AGC” menu item. Press the LEFT and RIGHT buttons to select the MANUAL or AUTO mode. Press the ENTER button to open the selected mode’s submenu.
-
Page 15: White Balance
ED610e 6.4 NR (NOISE REDUCTION) 1. When the main menu is displayed on the screen, use the UP and DOWN buttons to scroll to the “NR” menu item. ** SETUP MENU ** LENS AUTO ┘ < SHUTTER / AGC AUTO <┘... - Page 16 ED610e PUSH Select this setting if you want the camera to automatically trace the white balance without the same range limitations that apply to ATW. USER 1 Select this mode when the color temperature is around 3200°K (when surrounded by sodium lights). Press ENTER if you want to access the setting options.
- Page 17 ED610e 6.7 BACKLIGHT To set the BACKLIGHT settings, scroll to the BACKLIGHT line and use your RIGHT button to scroll to either BLC, HLC, or OFF. BLC (Back Light Compensation) Even when there is a bright backlight behind an object, clear images of the object and its background can still be captured by selecting BLC mode.
- Page 18 ED610e AUTO ** DAY/NIGHT ** BURST DELAY CNT ||||||||||||||||||| 005 Submenu of the DAY / NIGHT DAY->NIGHT |||||||||||||||||| 003 NIGHT->DAY ||||||| ||||||||||||| 025 RETURN<┘ The camera will switch to DAY (Color) mode or NIGHT (B&W) mode according to the selected values. •...
- Page 19 ED610e Note: 1. The difference in the selected values of DAY NIGHT and NIGHTDAY should be more than 5, or else the camera will keep switching from DAY NIGHT and NIGHTDAY constantly. 2. It is not recommended to use an infrared illuminator when the camera is in DAY/NIGHT >...
-
Page 20: Motion Detection
ED610e 6.10 MOTION DETECTION ** MOTION DET ** To set up Motion Detection areas, scroll to the DETECT SENSE ||||||||||| ||||||||| 115 BLOCK DISP MOTION DET field on the second Main Menu MONITOR AREA AREA SEL |||||| |||||||||||||| 160 page and select ON. Now click ENTER to open BOTTOM |||||||| |||||||||||| 200... - Page 21 ED610e 6.11 PRIVACY ** PRIVACY ** AREA SEL To set up Privacy Mask areas, scroll to the |||||| |||||||||||||| 160 BOTTOM |||||||| |||||||||||| 200 PRIVACY field on the second Main Menu page LEFT ||||||||||| ||||||||| 230 RIGHT ||||||||||| ||||||||| 230 and select ON.
- Page 22 ED610e 6.13 LANGUAGE Use the LEFT & RIGHT buttons to select your language preference. The options are: ENGLISH, DEUTSCH, FRANCAIS, RUSSIAN, PORTUGUES, ESPANOL, JAPANESE, SIMPLIFIED CHINESE 6.14 CAMERA RESET To reset the camera to its default settings, scroll to this field and press ENTER.
- Page 24 EverFocus USA - California: EverFocus USA - New York: 1801 Highland Avenue, Unit A, Duarte, CA 91010, 415 Oser Avenue, Unit S, Hauppauge, NY 11788, TEL: +1 626 844 8888 TEL: +1 631 436 5070 FAX: +1 626 844 8838 FAX: +1 631 436 5027 www.everfocus.com...