Table of Contents
Advertisement
Quick Links
Contents
1 Using Your LE500 Monitor
Safety precautions . . . . . . . . . . . . . . . . . . . . . . . . . . . . . . . . . . . . . . . . . . . . . . . . . . . 2
Setting up the monitor . . . . . . . . . . . . . . . . . . . . . . . . . . . . . . . . . . . . . . . . . . . . . . . . 3
Removing the base . . . . . . . . . . . . . . . . . . . . . . . . . . . . . . . . . . . . . . . . . . . . . . . 5
Starting the monitor . . . . . . . . . . . . . . . . . . . . . . . . . . . . . . . . . . . . . . . . . . . . . . . . . . 6
Adjusting display settings . . . . . . . . . . . . . . . . . . . . . . . . . . . . . . . . . . . . . . . . . . . . . 7
OSD options . . . . . . . . . . . . . . . . . . . . . . . . . . . . . . . . . . . . . . . . . . . . . . . . . . . . 8
Video modes . . . . . . . . . . . . . . . . . . . . . . . . . . . . . . . . . . . . . . . . . . . . . . . . . . . 10
Power management . . . . . . . . . . . . . . . . . . . . . . . . . . . . . . . . . . . . . . . . . . . . . . . . 11
ENERGY STAR . . . . . . . . . . . . . . . . . . . . . . . . . . . . . . . . . . . . . . . . . . . . . . . . 11
Energy declaration . . . . . . . . . . . . . . . . . . . . . . . . . . . . . . . . . . . . . . . . . . . . . . 11
Maintenance . . . . . . . . . . . . . . . . . . . . . . . . . . . . . . . . . . . . . . . . . . . . . . . . . . . . . . 12
Troubleshooting . . . . . . . . . . . . . . . . . . . . . . . . . . . . . . . . . . . . . . . . . . . . . . . . . . . . 13
No picture . . . . . . . . . . . . . . . . . . . . . . . . . . . . . . . . . . . . . . . . . . . . . . . . . . . . . 13
Picture is scrambled . . . . . . . . . . . . . . . . . . . . . . . . . . . . . . . . . . . . . . . . . . . . . 14
Display colors are wrong . . . . . . . . . . . . . . . . . . . . . . . . . . . . . . . . . . . . . . . . . 14
Picture is fuzzy . . . . . . . . . . . . . . . . . . . . . . . . . . . . . . . . . . . . . . . . . . . . . . . . . 15
Picture bounces, jitters, or has waves . . . . . . . . . . . . . . . . . . . . . . . . . . . . . . . 15
Picture has shadows or "ghosts" . . . . . . . . . . . . . . . . . . . . . . . . . . . . . . . . . . . 15
Color is not uniform . . . . . . . . . . . . . . . . . . . . . . . . . . . . . . . . . . . . . . . . . . . . . 16
Image is not sized or centered properly . . . . . . . . . . . . . . . . . . . . . . . . . . . . . . 16
Image cannot be adjusted full screen . . . . . . . . . . . . . . . . . . . . . . . . . . . . . . . 16
Specifications . . . . . . . . . . . . . . . . . . . . . . . . . . . . . . . . . . . . . . . . . . . . . . . . . . . . . . 17
2 Safety, Regulatory, and Legal Information
. . . . . . . . . . . . . . . . . . . . . . . . . . . . . . . . . . . . . . . 1
. . . . . . . . . . . . . . . . . . . . . . 19
i
Advertisement
Table of Contents

Related Manuals for Gateway LE500


Summary of Contents for Gateway LE500
- Page 1 Contents 1 Using Your LE500 Monitor ........1 Safety precautions .
-
Page 3: Using Your Le500 Monitor
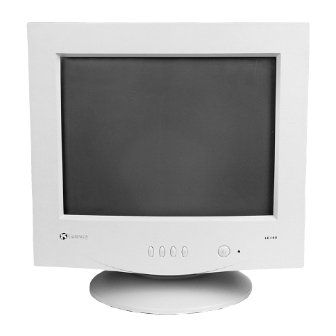
Using Your LE500 Monitor This monitor provides high resolution performance and operates in a variety of video modes. The flat square tube design makes images easier to see. The Microprocessor-based On-Screen Display (OSD) controls let you adjust a variety of... -
Page 4: Safety Precautions
If you are unable to insert the plug into an outlet, contact an electrician to install the appropriate outlet. Do not try to remove any of the prongs. If any problems occur, unplug the monitor and contact technical support. Using Your LE500 Monitor... -
Page 5: Setting Up The Monitor
Setting up the monitor Setting up the monitor consists of two procedures: attaching the base and connecting the monitor cables. If you are setting up your system for the first time, refer to the setup poster for more information about connecting additional peripherals. To attach the base: 1 Carefully set the monitor on its side with the bottom of the monitor facing you. -
Page 6: Removing The Base
2 Carefully set the monitor on its side with the bottom of the monitor facing you. 3 Rotate the base so that you can easily get to the retaining latch on the bottom of the monitor. Using Your LE500 Monitor... - Page 7 4 Press down on the retaining latch. While holding down the latch, slide the base toward the back of the monitor. Setting up the monitor...
-
Page 8: Starting The Monitor
4 Adjust the controls to get the best picture. Experiment with the display settings to choose the ideal image size and position for you. See the “Adjusting display settings” section in this guide for information about changing your display. Using Your LE500 Monitor... -
Page 9: Adjusting Display Settings
Adjusting display settings This monitor features an On Screen Display (OSD) that lets you adjust and save contrast, brightness, and other visual settings for the display image. Button 1. Press to view the OSD. Left arrow button. Press to move between the OSD options. After selecting an option, use to adjust the setting. -
Page 10: Osd Options
Horizontal Position moves the display image to the left or right side of the screen. Vertical Size increases or decreases the height of the display image. Vertical Position moves the display image to the top or bottom of the screen. Using Your LE500 Monitor... - Page 11 Icon Options Pincushion curves the sides of the display image inward or outward. Trapezoid increases or decreases the trapezoid distortion of the display image. Rotation rotates the display to the left or right. Color opens the color menu. Language changes the display language for the OSD control system. Display Frequency displays the horizontal and vertical frequency settings of your monitor.
-
Page 12: Video Modes
If one of the preset modes does not fix the problem, you can make changes to the settings. They will be stored so that you can recall them later. For information about adjusting your monitor’s contrast and brightness, see the “Adjusting Display Settings” section of this manual. Using Your LE500 Monitor... -
Page 13: Power Management
ENERGY STAR ® As an ENERGY STAR Partner, Gateway has determined that this product meets the ENERGY STAR guidelines for energy efficiency. This monitor complies with the EPA's International ENERGY STAR Program, which is a program designed to have manufacturers of computer equipment build circuitry into their products to reduce energy consumption during time of non-use. -
Page 14: Maintenance
Clean the monitor using a soft cloth lightly moistened with water. Wipe the cabinet, glass panel, and controls. Caution Do not use any type of abrasive pad or cleaner. You can permanently scratch the glass panel. Using Your LE500 Monitor... -
Page 15: Troubleshooting
Troubleshooting If you have problems with your monitor, this troubleshooting section may help you identify and fix them. Important Make sure that the monitor has warmed up for approximately 30 minutes before making any judgments about the picture quality. No picture Make sure the power cord is properly connected to both the back of the monitor and the wall outlet. -
Page 16: Picture Is Scrambled
Make sure that the video cable is not damaged. Restart the system (leaving the monitor on). Picture is fuzzy Adjust the contrast and brightness controls to improve the display image. See the “Adjusting display settings” section of this guide for more information. Using Your LE500 Monitor... -
Page 17: Picture Bounces, Jitters, Or Has Waves
Picture bounces, jitters, or has waves Make sure that: Non-shielded speakers are not placed too close to the monitor. The monitor is not positioned too close to another monitor, electric fan, fluorescent light, metal shelf, or laser printer. If none of these suggestions solves the problem, try plugging the monitor into another outlet, preferably one on a different circuit. -
Page 18: Color Is Not Uniform
Some video modes used by your monitor produce images that cannot be adjusted all the way out to the bezel edge (the edge where the screen glass and monitor casing meet). This condition does not indicate that the monitor is defective. Using Your LE500 Monitor... -
Page 19: Specifications
Power management Meets E requirements: NERGY Suspend mode = <15 W Active-off mode = <5 W Many products for Gateway and its subsidiaries are custom engineered by our suppliers to Gateway specifications and may vary with similarly marketed products. Specifications... - Page 20 Using Your LE500 Monitor...
-
Page 21: Important Safety Information
Legal Information Important safety information Your Gateway system is designed and tested to meet the latest standards for safety of information technology equipment. However, to ensure safe use of this product, it is important that the safety instructions marked on the product and in the documentation are followed. - Page 22 To prevent electric shock, never remove the cover. No user serviceable parts inside. Refer servicing to qualified service personnel. Replacement parts and accessories Use only replacement parts and accessories recommended by Gateway. Important Do not use Gateway products in areas classified as hazardous locations. Such areas include patient care areas of medical and dental facilities, oxygen-laden environments, or industrial facilities.
-
Page 23: Regulatory Compliance Statements
Compliance Accessories: The accessories associated with this equipment are: shielded video cable. These accessories are required to be used in order to ensure compliance with FCC rules. Caution Changes or modifications not expressly approved by Gateway could void the FCC compliance and negate your authority to operate the product. Canadian users ICES-003 This digital apparatus does not exceed the Class B limits for radio noise emissions from digital apparatus as set out in the radio interference regulations of Industry Canada. -
Page 24: Vcci Statement
European users European directives This Information Technology Equipment has been tested and found to comply with the following European directives: EMC Directive 89/336/EEC amending directive 92/31/EEC & 93/68/EEC as per - EN 50081-1:1992 according to EN 55022:1994 Class B EN 61000-3-2:1995 or EN 60555-2:1987 EN 61000-3-3:1995 or EN 60555-3:1987 - EN 50082-1:1992 according to EN 61000-4-2:1995 or IEC 801-2:1984... -
Page 25: Epa Energy Star
EPA ENERGY STAR ® As an ENERGY STAR Partner, Gateway has determined that this product meets the ENERGY STAR guidelines for energy efficiency when used with a computer equipped with a Display Power Management System. -
Page 26: Trademark Acknowledgments
For the latest product updates, consult the Gateway Web site at www.gateway.com. In no event will Gateway be liable for direct, indirect, special, exemplary, incidental, or consequential damages resulting from any defect or omission in this manual, even if advised of the possibility of such damages.