Table of Contents
Advertisement
Quick Links
- 1 Introduction
- 2 Quick Start
- 3 Rear Panel – Mixer – Cve-10, Cve-12, Cve-15
- 4 Rear Panel – Mixer – Cve-10, Cve-12, Cve-15
- 5 Rear Panel – Mixer – Cve-18S
- 6 Application #1 – Using a Single Cve-10, Cve-12, or Cve-15
- 7 Application #2 – Connecting a Second Cve-10, Cve-12, or Cve-15 Using Mixed Output
- 8 Application #3 – Connecting a Cve-18S to a Cve-10, Cve-12, or Cve-15 Using Channel Outputs
- 9 Troubleshooting
- Download this manual
Advertisement
Table of Contents

Related Manuals for Cerwin-Vega CVE-10


Summary of Contents for Cerwin-Vega CVE-10
- Page 1 CVE-SERIES MANUAL CVE-10, CVE-12, CVE-15, and CVE-18s Powered Loudspeakers Instruction Manual (English)
- Page 2 Application #1 – Using a single CVE-10, CVE-12, or CVE-15 ....................12 Application #2 – Connecting a second CVE-10, CVE-12, or CVE-15 using MIXED OUTPUT ..........13 Application #3 – Connecting a CVE-18s to a CVE-10, CVE-12, or CVE-15 using Channel Outputs ........14 Application #4 – Daisy-Chain ..............................15 Application #5 –...
-
Page 3: Important Safety Instructions
NOTE: Should the unit become damaged beyond repair or reach the end of its life, please consult the regulations regarding disposal of electronic products in your region. NOTE: Cerwin-Vega cannot be held responsible for damage caused by improper use of the unit and/or the applications provided for use with the unit. - Page 4 CERWIN-VEGA PROFESSIONAL IMPORTANT SAFETY INSTRUCTIONS (continued) 1. The unit and power supply should only be connected to a power outlet that matches the voltage and frequency marked on the rear of the unit. 2. Protect the power cable from being walked on or pinched, particularly at plugs, convenience receptacles, and exit points on the unit.
-
Page 5: Regulatory Certification
CERWIN-VEGA PROFESSIONAL REGULATORY CERTIFICATION Cerwin-Vega declares under sole responsibility that this product, to which this declaration relates, is in conformity with the following standards: The Declarations of Conformity can be obtained from Gibson Europe BV - Kamerlingh Onnesweg, 2 - 4131 PK Vianen - The Netherlands Tel : +31 347 32 40 10 - Fax : +31 347 32 40 15 This device complies with Part 15 of the FCC Rules. -
Page 6: Introduction
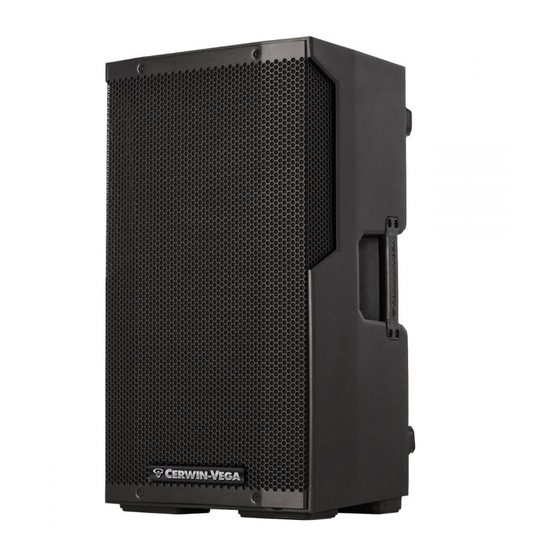
Before you begin This manual covers the CVE-Series active speakers: the CVE-10, CVE-12, and CVE-15 (referred to as “tops”) and the CVE- 18s (referred to as a “sub”). These speakers are designed for portable applications (such as being mounted on a tripod stand or pole mount or stacked directly on a floor, stage, or stable platform) and fixed installations (such as being mounted using the wall/ceiling mount accessory shown on Page 17). -
Page 7: Quick Start
CERWIN-VEGA PROFESSIONAL Quick Start The steps below provide a quick reference on how to set up and use a single loudspeaker. A typical setup will follow the same basic steps. Make sure the loudspeaker is unplugged. STEP 1 Be sure the power switch is set to the OFF position. -
Page 8: Rear Panel – Mixer – Cve-10, Cve-12, Cve-15
CERWIN-VEGA PROFESSIONAL Rear Panel – Mixer – CVE-10, CVE-12, CVE-15 DSP MODE SELECT This mode selection button allows one of five EQ presets to be chosen: LIVE PA – This mode is best used for live music sound. It has a deeper, more-balanced low-end response. -
Page 9: Rear Panel – Mixer – Cve-18S
CERWIN-VEGA PROFESSIONAL Rear Panel – Mixer – CVE-18s DSP MODE SELECT This button allows one of two EQ presets to be chosen: LIVE PA – This mode is best used for live music sound. It has a deeper, more-balanced low-end response. -
Page 10: Using The Cve-10/12/15 As A Floor/Stage Monitor
Using the CVE-10/12/15 as a floor/stage monitor The CVE-10, CVE-12, and CVE-15 can be used as floor monitors by orienting them as shown below. This places them at a fixed 45-degree angle toward the performers. It is recommended to use MONITOR mode for this application, as it reduces the volume of frequencies that are prone to feedback. - Page 11 CERWIN-VEGA PROFESSIONAL CAUTION: When using stands or poles, be sure to observe the following: Make sure the pole stand is capable of handling the weight of the loudspeaker. Be sure to observe all precautions as indicated by the pole stand manufacturer.
-
Page 12: Application #1 – Using A Single Cve-10, Cve-12, Or Cve-15
Application #1 – Using a single CVE-10, CVE-12, or CVE-15 A single CVE-10, CVE-12, or CVE-15 powered speaker can be used to reinforce sound for a wide variety of performances. The diagram below shows an application where a vocal microphone, a line mixer, and a Bluetooth™ streaming device are all being used simultaneously. -
Page 13: Application #2 – Connecting A Second Cve-10, Cve-12, Or Cve-15 Using Mixed Output
A two-speaker system can cover a wider audience and situations where more volume is needed. To add a second CVE-10, CVE-12, or CVE-15 loudspeaker, connect the MIXED OUTPUT of the first speaker to CH 1 INPUT or CH 2 INPUT of the second speaker. -
Page 14: Application #3 – Connecting A Cve-18S To A Cve-10, Cve-12, Or Cve-15 Using Channel Outputs
For demanding applications where even greater bass response is required, a CVE-18s subwoofer can be added to your CVE-10, CVE-12, or CVE-15 pair. In the diagram below, a line mixer is connected to CH 1 INPUT and CH 2 INPUT of the CVE-18s while a Bluetooth™... -
Page 15: Application #4 – Daisy-Chain
CERWIN-VEGA PROFESSIONAL Application #4 – Daisy-Chain Some events may require several CVE speakers spread across a long distance or large stage front to provide adequate sound reinforcement for an entire audience. Use the MIXED OUTPUT to daisy-chain each successive CVE speaker as... -
Page 16: Application #5 – Large Venue/Front Of House
CERWIN-VEGA PROFESSIONAL Application #5 – Large Venue/Front of House In larger venues, the Front-of-House engineer has control of the entire sound reinforcement system using the console mixer. The diagram below shows how a console mixer interfaces with the performers’ on-stage audio equipment and... -
Page 17: Wall/Ceiling Mounting Cve Tops
CERWIN-VEGA PROFESSIONAL Wall/Ceiling mounting CVE tops The CVE tops can be mounted to a ceiling or wall with the CVE wall mount accessory (sold separately). The speaker can be mounted in a variety of positions, as shown below. See wall/ceiling mount accessory user manual for detailed... -
Page 18: Protective Grill
CERWIN-VEGA PROFESSIONAL Protective Grill The CVE speakers are shipped with the grill attached. It is recommended to leave the grill in place, as it will prevent any accidental damage to the drivers that may result during transportation, setup, and general use. -
Page 19: Troubleshooting
CERWIN-VEGA PROFESSIONAL Troubleshooting Problem Cause Solution No Sound No connection to Verify that the loudspeaker is connected to an active AC power source. Various active AC power outlets may need to be switched on. Use a lamp as another way to be sure the AC power source is active. - Page 20 CERWIN-VEGA PROFESSIONAL Troubleshooting (continued) Problem Cause Solution Bad Sound Incorrect equipment Check the meters on the external mixing console to ensure that the signal is settings, causing not being clipped by the mixer. If the levels from the mixer are too high,...
-
Page 21: Care And Maintenance
CERWIN-VEGA PROFESSIONAL Care and Maintenance Before any cleaning or maintenance, be sure the loudspeaker is unplugged, turned off, and that all cables have been removed. Be sure to prevent any moisture coming into the openings of the speaker. The loudspeaker can be maintained cosmetically by using a dry cloth. Avoid using cleaning chemicals, as they may harm the finish of the loudspeaker. - Page 22 CERWIN-VEGA PROFESSIONAL...
-
Page 23: Warranty
Gibson Pro Audio Warranty If at any time your Gibson Pro Audio product (which includes Stanton, KRK, or Cerwin-Vega brands) malfunctions as a result of faulty materials or workmanship, Gibson Pro Audio or one of Gibson Pro Audio’s Authorized Service Centers in the US will repair the defect(s) or replace the merchandise as it deems appropriate at its sole discretion. - Page 24 CERWIN-VEGA PROFESSIONAL THIS WARRANTY IS EXTENDED TO THE ORIGINAL RETAIL PURCHASER ONLY AND MAY NOT BE TRANSFERRED OR ASSIGNED TO SUBSEQUENT OWNERS. TO VALIDATE YOUR WARRANTY, AND AS A CONDITION PRECEDENT TO WARRANTY COVERAGE HEREUNDER, YOU MUST REGISTER YOUR WARRANTY WITHIN FIFTEEN (15) DAYS FOLLOWING THE ORIGINAL DATE OF PURCHASE.
-
Page 25: How To Obtain Warranty Service
CERWIN-VEGA PROFESSIONAL How to Obtain Warranty Service Warranty service outside the United States To initiate a warranty repair, please contact the Authorized Gibson Pro Audio distributor from whom you purchased your merchandise and follow the distributor’s return/warranty policy. Warranty service for merchandise purchased from an authorized Gibson Pro Audio dealer in the U.S.