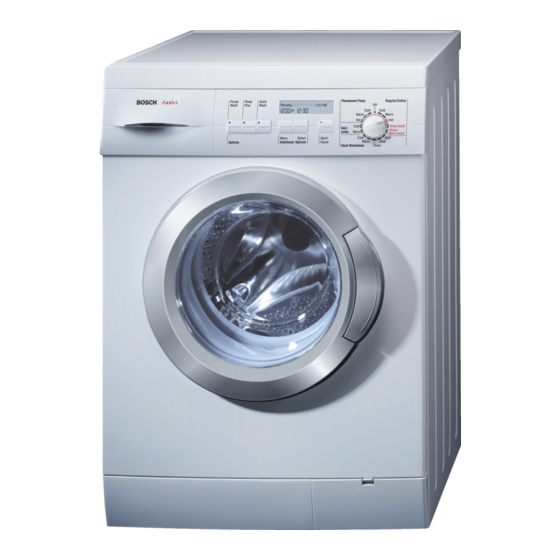
Bosch Axxis+ WFR 2460 Operating, Care And Installation Instructions Manual
Hide thumbs
Also See for Axxis+ WFR 2460:
- Operating & installation instructions manual (49 pages) ,
- Operating & installation instructions manual (49 pages) ,
- Instruction manual and installation instructions (77 pages)

Related Manuals for Bosch Axxis+ WFR 2460


Summary of Contents for Bosch Axxis+ WFR 2460
- Page 1 Axxis WFR 2450 Axxis WFR 2460 am Operating, Care and Installation Instructions...
- Page 2 Table of Contents IMPORTANT SAFETY INSTRUCTIONS ..During Washing ......Reselecting a program .
-
Page 3: Important Safety Instructions
The new washing machine you just purchased is 1. BOSCH washers are provided with a manual, a modern, high quality domestic appliance. including Operating Instructions, User Mainte nance Instructions and Installation Instructions. Your washing machine is distinguished by its Read all instructions before using the washing economical consumption of power, water and machine. -
Page 4: Save These Instructions
12. To reduce the risk of fire, clothes, cleaning 30. Store all laundry chemicals and aids in a cool rags, mop heads and the like which have traces dry place according to the manufacturers in of any flammable substance, such as vegetable structions. -
Page 5: Disposal Information
Disposal Information Environmental Protection/Conservati Disposing of the packaging on Issues The shipping package has protected your new appliance on its way to your home. All packaging Your washing machine uses water, energy and materials are non polluting and recyclable. Please detergent efficiently, thereby protecting the contribute to a better environment by disposing of environment and reducing your household costs. -
Page 6: Your New Washing Machine
Your New Washing Machine Filling in laundry detergent and/or additive dispensers Dispenser I: Detergent for soaking agent. Dispenser II: Detergent for wash, stain remover. Dispenser Cleaning product, e.g. fabric softener, fabric conditioner (do not fill above the lower edge of insert 1). Opening ... -
Page 7: Control Panel
Control panel Buttons for additional options Display field (in addition to the program if required) Indicates the settings which have been selected or which Power Wash: Extended washing time are to be changed (e.g. spin speed, end time, reduced for best stain removal and cleaning results. ironing and child lock) as well as the progress of the program. -
Page 8: Before Using For The First Time
i The individual program steps are indicated in the display field. Before Using For the When Remove laundry" is displayed: First Time q Turn the program selector to Off. Selecting the language The washing machine must have been installed and connected properly (refer to page 39). i The program selector must not be set to Off. -
Page 9: Sorting The Laundry
Sorting the laundry According to colour to degree of dirt Preparing, Sorting CAUTION and Loading the Items of clothing can be discolored. Never wash Laundry new multi colored items together with other items. Preparing the laundry CAUTION Loose debris (e.g. coins, paper clips, needles, nails) can damage items of clothing as well as parts of the washing machine (e.g. - Page 10 Intensive dirt Sorting laundry according to their care label Dirt and/or staining recognizable. specifications Kitchen hand towels that have been used for Fabric Types up to one week. Ó Machine Wash, Cottons Fabric napkins. Ô Machine Wash, Permanent Press Bibs. Ò...
-
Page 11: Loading The Laundry
Loading the laundry q Do not exceed the maximum load: Overloading will cause poor wash results and encourage creasing. RISK OF EXPLOSION! For best results it is recommended to load the Items of clothing that have been pretreated with drum depending on the fabric type: solvent based cleaning agents, e.g. -
Page 12: Laundry Detergents And Additives
Too much detergent: Environmentally incompatible, excessive foam Laundry Detergents reduces wash agitation which causes poor washing and rinsing results. and Additives Filling laundry detergent and/or additive dispensers Dispensing the correct amount of detergent RISK OF POISONING! Keep detergents and additives out of the reach of children. -
Page 13: Programs And Functions
Delicates Delicates settings are intended for use with Programs delicate easy care items made from cotton, satin, synthetic or blended fabrics and curtains. and Functions No spinning between rinse cycles. We do not recommend washing these fabrics with other rougher fabrics. Select the desired program - see also the separate program overview. -
Page 14: Display Field
Maximum spin speeds of the programs Symbol for Reduced ironing" This symbol is being displayed if Reduced ironing" Revolutions Type of laundry/Extra cycle was selected. The selection of Reduced ironing" per minute remains active until it is turned off via the menu. 1200 Regular/Cotton Symbol for signal... -
Page 15: Indicator Light In The Start/Pause" Button
Indicator light in the Load adjust Load adjust" matches the water and power con Start/Pause" button sumption to each program - according to the The indicator light conveys the following amount of laundry and type of fabrics. information: Therefore water and energy consumption are Indicator light flashing red reduced when washing small amounts of laundry. -
Page 16: Washing With Standard Settings
Washing with Standard Settings The specified standard settings are optimally adjusted to the selected program. If you do not want to change these standard settings: q If required, press the button(s) for additional option(s). The indicator light of the selected button shines (red). -
Page 17: Washing With Individual Settings
Washing with Individual Settings You can adjust the settings to your requirements. The steps for changing the settings are described First find a quick overview of the adjustable in detail the following pages. settings. Quick overview Select program with program selector. Load the laundry and close the loading door. -
Page 18: Spin Speed
Spin speed You can reduce the displayed spin speed. You can change other settings The maximum displayed spin speed depends on the selected program. See also information on Page 14. q Turn the program selector to the desired program. q Load the laundry and close the loading door. The Start/Pause indicator light flashes (red). -
Page 19: Program Finished At
Program finished at q Turn the program selector to the desired pro i The end time must be reset if the program, gram. additional options or the current time is changed. q Load the laundry and close the loading door. The Start/Pause indicator light flashes (red). -
Page 20: Reduced Ironing
Reduced ironing Gentler spin with subsequent fluffing. After the spin cycle the laundry is arranged loosely in the drum - creasing is reduced. i Observe maximum load for each type of textile; remove the laundry as soon as the spin cycle is complete. -
Page 21: Signal
Signal The acoustic signal indicates the start or end of the You can change other settings program, operating errors or malfunctions. You can specify the volume of the acoustic signal. q Turn the program selector to the desired program. q Load the laundry and close the loading door. The Start/Pause indicator light flashes (red). -
Page 22: Child Lock
Child lock You can secure your washing machine to prevent Example: selected functions from being inadvertently changed. If the child lock has been selected: No changes can be made while the program is running, Should the appliance be switched off and on while a program is running the program will continue at the point at which it was interrupted,... -
Page 23: Standard Time/Daylight Saving Time
You can change other settings Standard time/Daylight saving time You can switch from winter to Daylight saving time. q Turn the program selector to the desired program. q Load the laundry and close the loading door. The Start/Pause indicator light flashes (red). Example: q Press the Start/Pause button. -
Page 24: Set Clock
You can change other settings Example: q Press the Menu button until Set clock:" is q Press the Start/Pause button. displayed. The program starts. The hour display flashes. The indicator light shines. The Start/Pause indicator light flashes (red). i The individual program steps are indicated in i The menu is being left if a button is not pressed the display field. -
Page 25: Resetting The Settings
You can change other settings q Press the Menu button until the minute display flashes. The Start/Pause indicator light flashes (red). q Press the Start/Pause button. The program starts. The indicator light shines (red). i The individual program steps are indicated in the display field. -
Page 26: During Washing
Topping up the washing/ Interrupting the program During Washing You can put laundry in the drum later, take laundry out of the drum early or interrupt the program at Reselecting a program any time. q If the child lock is active, temporarily deactivate i It is not recommended to add laundry after the it;... -
Page 27: Canceling Active Program
Child lock activated Soaking q Temporarily deactivate the child lock. The Soak setting is used to pre treat heavily See Page 23. stained items: q Load laundry of the same color. i If the Start/Pause indicator light flashes (yellow), the door cannot be opened for q Add the soaking agent to chamber I according reasons of safety (water level, temperature or to the manufacturers specifications. -
Page 28: After Washing
q Turn the program selector to Drain. After Washing The Start/Pause indicator light flashes. q Press the Start/Pause button. The indicator light shines. Display field: Draining water". q When the additional program has ended, open the door. q Turn the program selector to Off. Child lock: ON"... -
Page 29: Emergency Lock Release
Emergency Lock Release When the emergency lock release has been pulled, the loading door can be opened and the laundry taken out of the drum. RISK OF SCALDING! Allow the hot washing solution to cool. Wait until the drum has come to a standstill. q Turn off the water tap. -
Page 30: Cleaning The Detergent Dispenser
Cleaning the detergent dispenser User Maintenance In case residual detergents or additives have accu Instructions mulated: Cleaning and Care RISK OF ELECTRIC SHOCK! Always disconnect the appliance from the mains before cleaning. Never clean the washing machine with a jet of water. -
Page 31: Cleaning The Drain Pump
q Attach the insert and lock into position. q Remove the drain hose from its holder and pull it out of the housing. q Insert the detergent dispenser. Cleaning the drain pump This is necessary if the water cannot be drained 160 °F/ completely. -
Page 32: Cleaning Water Inlet Strainers
q Attach and tighten the pump cap. q Carefully remove the pump cap. q Attach and close the cover plate. To prevent unused detergent from flowing into the drain during the next wash cycle: q Pour 1 litre/1 ¾ pt of water into chamber II. q Select the Drain program. -
Page 33: Descaling The Washing Machine
Cleaning the strainer(s) at the water tap On both the hot and cold water tap: q Pull out the strainer and rinse under running water. q Insert the strainer and reconnect the hose. q Disconnect the hose from the water tap. q Turn on the water tap and check whether water q Rinse the strainer under flowing water. -
Page 34: Customer Service
Customer Service The washing machine requires no special care other than the care and cleaning noted above. If you are having a problem with your washing machine, before calling for service please refer to page 35. If service becomes necessary, contact your dealer or installer or an authorized service center. -
Page 35: Troubleshooting Of Minor Faults
Troubleshooting of Minor Faults If repairs are necessary, and you cannot eliminate RISK OF ELECTRIC the fault yourself with the aid of the following table: SHOCK! q Turn the program selector to Off. Repairs must only be carried out by our q Disconnect the washing machine from the Customer Service or an authorized technician. - Page 36 Fault Possible cause Action Control lights do not Switch on/replace the fuse. A fuse has triggered. shines. Call Customer Service if this fault is repeated. Power failure. An interrupted program will be resumed when power returns. If the laundry is to be removed during a power failure, proceed as described under Emergency lock release";...
- Page 37 Fault Possible cause Action Spinning is already in progress; during spinning the Select speed before spinning. Spin speed cannot speed cannot be changed. be selected. Program selector is set to Drain; spinning is not If required, select another program. possible with this program. Child lock cannot be The program has already started.
-
Page 38: Fault Displays
Fault Possible cause Action This is not a fault. Add a more appropriate amount of detergent next Program duration The foam detection feature has activated an time. extended. additional rinsing cycle to reduce the amount of foam. This is not a fault. Always load large and small items together into the The imbalance compensation system is attempting to drum. -
Page 39: Safety Information
To drain the pump refer to page 31. To drain the water hose(s) refer to page 32. Installation, Take care not to damage the washing machine. Connection Do not hold onto protruding parts (e.g. loading door) when lifting. and Transportation In addition to the safety information listed here, the local water and electricity supplier may have special requirements. - Page 40 Any dampness lift inside the drum was caused by The bag contains: the final testing which every washing machine is subject to before leaving the factory. On the rear of the appliance: Covers to be placed over the holes for the transport bolts (after removing it).
-
Page 41: Installation Area
To reduce the risk of fire this washer mjust be fastened or otherwise secured to an uncovered concrete floor. Pedestal Mounting For mounting the washer on the Bosch 12" pedestal (accessory No. WTZ 1210) follow the instructions supplied with the pedestal. -
Page 42: Built In Installation
Built in Installation Levelling procedure The appliance can be built in; that is, you can install All feet of the appliance must be firmly on the the washing machine under counter in a kitchen ground. The washing machine must not wobble. cabinet opening. -
Page 43: Removing The Transport Bolts
Removing the transport bolts q Insert the covers. CAUTION The transport bolts must be removed before using the appliance for the first time and must be retained for any future transport (e.g. when moving). Preparing Before removing the transport bolts: Storing the transport bolts Always keep the transport bolts for future trans portation of the appliance (e.g. -
Page 44: Hose And Cable Lengths
Hose and cable lengths Water connection Left hand connection Water supply CAUTION approx. 39" (100 cm) The washing machine must only be operated with cold and hot (max. 140 °F // 60 °C) tap approx. 56½"(145 cm) water. Do not connect the appliance to the mixer tap of an unpressurized hot water boiler. - Page 45 Connection options Water drainage A Cold water connection and CAUTION B Hot water connection (max. 140 °F // 60 °C) Do not bend or pull the water drainage hose. Height difference between the placement area of washer and the drainage point: min.
-
Page 46: Electrical Connection
Drainage into a wash basin Electrical connection GROUNDING INSTRUCTIONS This appliance must be grounded. In the event of malfunction or breakdown, grounding will reduce the risk of electrical shock by providing a path of least resistance for the electric current. This ap pliance is equipped with a cord having an equip ment grounding conductor and a grounding plug. -
Page 47: Transport, E.g. When Moving
Transport, e.g. when moving WARNING To reduce the risk of fire or electrical shock, Before transporting the washing machine: DO NOT use an extention cord or an adapter to Turn off the water, connect the washer to the electrical power Drain any remaining water (refer to page 31), supply. - Page 48 1001 am 5500 007 631...