Nokia 6310i Quick Manual
Hide thumbs
Also See for 6310i:
- Service manual (331 pages) ,
- User manual (161 pages) ,
- Quick manual (6 pages)
Table of Contents
Advertisement
Quick Links
Advertisement
Table of Contents

Related Manuals for Nokia 6310i


Summary of Contents for Nokia 6310i
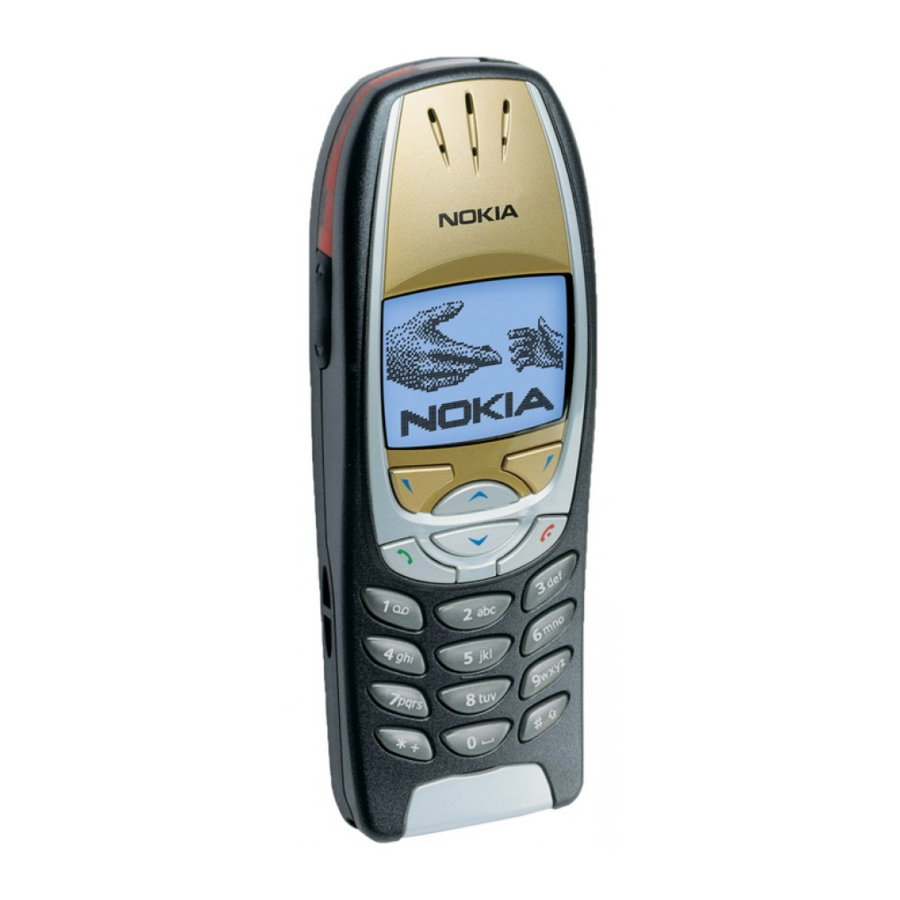
- Page 1 Nokia 6310i at a glance [ 1 ]...
-
Page 2: Quick Guide To Functions
Quick guide to functions Make a call Enter a phone number, press Answer a call Press Answer Answer a call with Press call waiting End a call Press Silence a call Press Silence Decline a call Press or press Decline after pressing silence Redial Press twice... - Page 3 Includes RSA BSAFE cryptographic or security protocol software from RSA Security. The information contained in this user guide was written for Nokia phone 6310i. The right to make changes and improvements to any of the products described in this guide without prior notice is reserved. EXPORT CONTROLS This product contains commodities, technology or software exported from the United States in accordance with the Export Administration regulations.
-
Page 4: Table Of Contents
Quick tips ........12 Welcome to Nokia..... . . 13 Get the most out of this guide. - Page 5 Phone book ......28 Open the Phone book ......28 Phone book options .
- Page 6 2) Call log ....... 55 Missed calls and received calls ....55 Dialed numbers .
- Page 7 5) Applications......68 Launching an application..... . 68 Other options available for each application or appli- cation set .
- Page 8 Personal notes .......82 Wallet settings ......82 Countdown timer .
- Page 9 18)Technical information ....127 19)Nokia One-Year Limited Warranty ..128 Safety: the most important call ... . . 134 A Guide to Safe and Responsible Wireless Phone Use .
-
Page 10: Safety First
Safety first Read these simple guidelines before using your phone. Failure to comply with these guidelines may be dangerous or illegal. • SAFETY GUIDELINES The following are important safety precautions for phone use. Road safety comes first Do not use a handheld phone while driving. Park the vehicle first. -
Page 11: Quick Tips
• QUICK TIPS Observe these brief guidelines for best performance of your phone. Be aware of interference All wireless phones may receive interference that could affect performance. Use your phone sensibly Use your phone only in the normal position (next to the ear). -
Page 12: Welcome To Nokia
Welcome to Nokia Congratulations on your purchase of the Nokia 6310i mobile phone! Your phone can be connected to a PC, laptop, or other device using the data cable or built-in infrared (IR) port. For more information, please refer to the PC Connectivity Guide, which can be downloaded from the Internet at: www.nokia.com. -
Page 13: Network Services And Your Wireless Provider
• BEFORE YOU CONTACT NOKIA Information label If you need help, Nokia Customer Service is available for assistance. However, we recommend that you write down the following information and have it available if you call. Phone specific information can be found on your phone’s label, which is on back... -
Page 14: About The Antenna
Have your phone or accessory handy Please have your phone or accessory with you when you contact any of the numbers below. Nokia Customer Care Center, USA Nokia Mobile Phones, Inc. 7725 Woodland Center Boulevard, Suite #150 Tampa, Florida 33614... -
Page 15: Review The Basics
Review the basics Infrared port LEFT SIDE Internal antenna Power Key Volume control keys BOTTOM Headset/TTY/Data cable Connector Charger Jack [ 16 ]... -
Page 16: Install The Sim Card And Battery
Review the basics • INSTALL THE SIM CARD AND BATTERY Caution: Keep all miniature SIM cards out of the reach of small children. The SIM card and its contacts can easily be damaged by scratches or bending, so be careful when handling, inserting or removing the card. Before installing the SIM card, always make sure that the phone is switched off and then remove the battery. -
Page 17: Charge The Battery
Place the battery on the back of the phone (6) and slide it up the body of the phone until it locks into place (7). • CHARGE THE BATTERY With your phone on or off, connect the plug from the charger to the bottom of the phone. -
Page 18: Important Battery Information
Review the basics • IMPORTANT BATTERY INFORMATION Important:Recharge your battery only with a charger approved by Nokia. This phone is not compatible with the Nokia battery charger ACP-9U. You can use your phone while the battery is charging. If the battery is totally empty, it may take a few minutes for the battery indicator to appear in the display while charging. -
Page 19: The Start Screen
• THE START SCREEN The Start screen is the “home base” for your phone, and indicates the phone is in idle mode. What’s on the Start screen HOME Your wireless provider’s name may appear here. Signal strength. A higher bar indicates a stronger signal. - Page 20 Review the basics Icons as indicators Icon Indicates... Icon Indicates... You are in an The Silent profile has active call been selected Text or number Keyguard is active entry mode You have You have a message voice messages When this icon is Uppercase text blinking, you have a entry mode...
-
Page 21: Use The Selection And Scroll Keys
• USE THE SELECTION AND SCROLL KEYS The left and and right selection keys ( ) are positioned beneath each corner of the display, respectively. Centered beneath both selection keys are the two scroll keys Use the scroll keys for choosing items in a list, paging through menus, and so on. -
Page 22: Adjust Call Volume
Review the basics • ADJUST CALL VOLUME With the phone facing you, the volume key is on the left side of the phone. Volume • Press the top portion of the key to increase your call volume. • Press the bottom portion of the key to decrease your call volume. -
Page 23: Help Texts
Once inside a menu, use the scroll keys ( ) to highlight an item in a list or to page through submenus. Press ( ) to open a highlighted item. Press to exit or return to the previous menu. • HELP TEXTS Your phone displays brief descriptions of most features. -
Page 24: Menu Shortcuts
Review the basics • MENU SHORTCUTS 1 MESSAGES PHONE SETTINGS ..4-4 TONE SETTINGS ..4-5 WRITE MESSAGE ..01-1 ACCESSORY SETTINGS . . . 4-6 INBOX . -
Page 25: Use The Keypad To Enter Text
Use the keypad to enter text • ENTER CHARACTERS AND NUMBERS When you enter text, whether to write a message or enter names and numbers, you have a choice of using either Abc or 123 mode. Whichever mode you’re currently in is indicated by the Abc or 123 icon in the upper left corner of your phone’s display. -
Page 26: Switch Between Uppercase And Lowercase
Use the keypad to enter text Switch between uppercase and lowercase • Press to alternate between uppercase and lowercase characters while in Abc mode. • ENTER SPECIAL CHARACTERS While in Abc mode, press to display a list of special characters. Use the scroll keys ( ) or the 2, 4 6, and 8 keys to highlight a character. -
Page 27: Phone Book
Phone book Use your Phone book for all your contact information. Names, phone numbers, web addresses, postal addresses, and e-mail addresses can be stored in your Phone book. It holds up to 500 names, and you can associate up to 5 numbers and 4 text entries with each name. •... - Page 28 Phone book 1-touch dialing Show a list of 1-touch dialing numbers, if any Voice tags Show a list of voice dialing numbers, if any List the fax, data, and voice numbers saved to your Service nos. SIM card by your wireless provider Shows your phone number or numbers if your SIM Own Numbers card supports multiple phone lines.
- Page 29 Note:SIM card phone book memory does not support text entry. You must enable the Phone’s phone book memory in order to store e-mail, Web addresses, etc. Save a number quickly At the Start screen, enter a number to save. Press and hold Options. A message appears on the screen confirming your number has been saved.
- Page 30 Phone book Scroll to Edit name and press Select. Scroll to the name you wish to edit and press Edit. Edit the name and number using the keypad. • Press Clear to backspace and delete text. • Press and hold Clear to backspace continuously (and delete) After you’ve finished, press OK to accept your changes.
- Page 31 Assign a primary number For names in your Phone book with multiple numbers, specify the number you dial most often (for that name) as the primary number. The primary number is the number your phone calls when you select a name for dialing.
-
Page 32: Customize Your Phone Book
Phone book Continue entering letters to locate the entry, or move through and highlight other entries using the scroll keys. 5 Once you’ve highlighted the desired entry, press Details, and then Options to add a voice tag, edit the number, add info., send a business card, and more. -
Page 33: Your Phone's Memory
At the Start screen, press Names. Scroll up to Caller groups and press Select. The following Caller groups are available. • Family • Friends • Other • VIP • Business Use the scroll keys ( ) to highlight a Caller group. Press Select to enter that group’s option list, where you can rename the group and change other properties. -
Page 34: Select A Memory
Phone book Which memory is best for you? To determine which memory is best for you, refer to the following table: Feature Phone Phone and SIM Name capacity Up to 500 Up to 250 Up to 250 names names names (varies with SIM card) Number capacity Up to 5 numbers... -
Page 35: Copy Memory
Scroll to your choice and press Select. Your selection is confirmed. Tip: If you want to save multiple numbers to a name, choose Phone or Phone and SIM. • COPY MEMORY You can copy entries from your phone memory to the SIM or vice versa. At the Start screen, press Names. -
Page 36: View Service Numbers
Phone book • VIEW SERVICE NUMBERS Your wireless provider may have saved your phone, data, and fax numbers to your SIM card. To view these numbers: At the Start screen, press Names. Scroll to Service nos. and press Select. A list of numbers, if any are available, appear in the display. To view details of a number, scroll to the number and press Select. -
Page 37: Adding A Voice Tag
Adding a voice tag Save or copy in the phone’s memory the names and phone numbers to which you want to add a voice tag. You can also add voice tags to the names in the SIM card, but if you replace your SIM card with a new one, you first need to delete the old voice tags before you can add new ones. - Page 38 Phone book • To erase the voice tag, select Erase and press OK. To change the voice tag, select Change. Press Start to add the new voice tag. [ 39 ]...
-
Page 39: Messages
1 Messages • ABOUT TEXT MESSAGES You can use your phone to send and receive text and/or email messages, if your service provider offers the features. However, before getting started, there are a few things to remember about text and email messaging. Currently, with most carriers, it is only possible to send SMS (Short Message Service) messages to other subscribers within the same service provider network. -
Page 40: Message Icons
Messages Message icons Icons that precede the title of a message indicate the following: The message has not been read The message has been read The message is a delivery report Before you can send and receive messages You’ll need the following to send and receive messages of any type: •... -
Page 41: Read Messages
After a brief pause, the message entry screen appears in the display. Compose a message using the keypad, then press Options. Scroll to Send and press Select. Enter the recipient’s phone number, including the area code, and press OK. Your message is sent. Tip: Press Find to retrieve a number from your Phone book. -
Page 42: E-Mail Messages
Messages The number of the original sender appears in the display. Press OK and your reply is sent. Forward a message While viewing a message, press Options. Scroll to Forward and press Select. Enter the recipient’s phone number, or press Find to retrieve a number from your Phone book. -
Page 43: Picture Messages
You can download pictures, or receive them from compatible phones via SMS to use in messages and caller groups. You can also create pictures and send them to your phone or other compatible phones using Nokia PC Suite. Note: Methods for downloading pictures vary with wireless providers. - Page 44 Messages Compose and send a picture message Like text messages, picture messages can be up to 160 characters in length. Picture sizes vary, but a small picture which fills your display generally takes up about 50 characters (leaving 100 characters or so for text).
-
Page 45: Templates
Back to exit. b) Change picture - Takes you back to the picture list. Scroll to highlight a new picture,. Press View and then press Attach to link the new picture to your message. c) Erase picture - Press OK to erase the picture from your message, or press No to return to the list of options. -
Page 46: Organize Your Messages With Folders
Messages Note: Pictures are also stored in the Templates folder. If you’d like to send the template as is, press Options, scroll to Send, and press Select. Then skip to step 4. If you’d like to modify the template before sending: a) Scroll to Edit instead of Send and press Select. -
Page 47: Inbox Folder
Press Menu 01-1 (Messages - Write message). After a brief pause, the message entry screen appears in the display. Write your message and press Options. Scroll to Save message and press Select. Scroll to the folder where you’d like to save the message and press OK. The message is saved. -
Page 48: Erase Messages
Messages ADD A FOLDER OF YOUR OWN At the Start screen, press Menu 01 (Messages). After a brief pause, Write message appears in the display. Scroll until My folders appears in the display and press Open. Press Options. Add folder is highlighted. Press OK. Enter a name for the new folder and press OK. -
Page 49: Predictive Text
After a brief pause, Write message appears in the display. Scroll to the folder containing the message you wish to erase and press Open. A list of messages appears in the display. Scroll to the message you wish to erase and press Select. The message opens. - Page 50 Messages For example, to write Nokia, with the English dictionary selected, press each of the following keys only once: for N, for o, for i and for a. : The display above shows the letters for each key pressed. •...
-
Page 51: Use Voice Mail
able to add hundreds of words to the dictionary • When the dictionary is full, the most recently added word replaces the first word added. Activate or deactivate predictive text While writing a message, press and hold Options until T9 dictionary activated or T9 dictionary deactivated appears in the display. -
Page 52: Listen To Your Voice Messages
Messages Enter the voice mailbox area code and phone number, OR to retrieve the number from your Phone book as follows: a) Press Options and then press Find. b) Scroll until the voice mailbox number is highlighted and press Select. c) Press OK. - Page 53 Plus symbol. Precedes an international telephone number Pause. The phone pauses for 2.5 seconds, then automatically sends the tones (numbers) that follow it in the dialing string Wait. The phone waits for you to press the Talk key before it sends the tones (numbers) that follow [ 54 ]...
-
Page 54: Call Log
Call log 2) Call log The phone logs the phone numbers of missed, received and dialed calls, and the approximate length and cost of your calls. The phone logs missed and received calls only if the network supports these functions, the phone is switched on and within the network’s service area. -
Page 55: Erase Recent Call Lists
• ERASE RECENT CALL LISTS To erase the recent calls lists, press Menu, select call log and select Erase recent call lists. Select whether you want to delete all the phone numbers in the recent call lists, or only the numbers in the missed calls, received calls or dialed numbers lists. -
Page 56: Profiles
Profiles 3) Profiles Your phone has various profiles which allow you to customize your phone’s tones for different events and environments. You can personalize the profiles, then activate a specific profile in the appropriate setting. Available profiles are: • Normal •... -
Page 57: Alarm Clock
Note:Ringtone settings can also be changed in the Tone settings menu. see “Tone settings” on page 63. Whatever changes you make to your Ringtone settings via the Tone settings menu will override your currently selected Profile. Settings •ALARM CLOCK The alarm clock uses the time format set for the clock. The alarm clock works even when the phone is switched off. -
Page 58: Auto Update Of Date And Time
Profiles The clock also serves the functions Messages, call log, Alarm clock, timed Profiles and Calendar. If the battery is removed from the phone for a long time, you may need to set the time again. Auto update of date and time Press Menu, select Settings, Time settings and Auto update of date &... -
Page 59: Anykey Answer
To see the divert indicators in standby mode, see Standby mode on page Anykey answer Press Menu, select Settings, Call settings and then Anykey answer. Select On and you can answer an incoming call by briefly pressing any key, except Automatic redial Press Menu, select Settings, Call settings and Automatic redial. -
Page 60: Phone Settings
Profiles Line for outgoing calls is a network service to select the phone line (that is, subscriber number) 1 or 2 for making calls. Press Menu, select Settings, Call settings and Line for outgoing calls. If you select Line 2 and have not subscribed to this network service, you will not be able to make calls. -
Page 61: Welcome Note
Welcome note Press Menu, select Settings, Phone settings and Welcome note. Key in the note you would like to be shown briefly when the phone is switched on. To save the note, press Options, and select Save. Network selection The cellular network to which your phone is connected can be selected either manually or automatically. -
Page 62: Tone Settings
• ACCESSORY SETTINGS The accessory settings menu is shown only if the phone is or has been connected to one of the following Nokia accessories, headsets HDC-5, HDE-2 or HDD-1 or handsfree car kit CARK-91. Press Menu, select Settings and Accessory settings. Select Headset, Handsfree or Loopset. -
Page 63: Gprs Modem Settings
You can also set the GPRS modem service settings (Access Point Name) on your PC by using the Nokia Modem Options software, see Modem setup on page 80. If you have set the settings on your PC and your phone, note that the settings made on the PC will be used. -
Page 64: Security Settings
Profiles • SECURITY SETTINGS Note:When security features, which restrict calls, are in use (call barring, closed user group and fixed dialing), calls may be possible to certain emergency numbers in some networks (e.g. 112 or other official emergency number). Press Menu, select Settings and Security settings. Select PIN code request This sets the phone to ask for your PIN code every time the phone is switched on. -
Page 65: Restore Factory Settings
Note:You should avoid using access codes similar to the emergency numbers, such as 112, to prevent accidental dialing of the emergency number. • RESTORE FACTORY SETTINGS To reset some of the menu settings to their original values, press Menu, select Settings and Restore factory settings. Key in the security code and press OK. -
Page 66: Games
Games 4) Games Note:The phone must be switched on to use this function. Do not switch on the phone when the use of a wireless phone is prohibited or when it may cause interference or danger. • STARTING A GAME Press Menu, select Games and Select game. -
Page 67: Applications
5) Applications This menu allows the management of Java applications installed on your phone. Your phone software includes four Java applications designed for your Nokia phone. Some service providers offer other applications via mobile Internet services. • LAUNCHING AN APPLICATION Press Menu, select Applications then View Apps. -
Page 68: Download A New Application
Java installer from PC Suite to download the applications in your phone. CROSS REF TO PC SUITE Note:that Nokia does not warrant for non-Nokia applications. If you choose to download access them, you should take the same precautions, for security or content, as you would with any site. -
Page 69: Calculator
6) Calculator The calculator in your phone adds, subtracts, multiplies, divides, calculates the square and the square root and converts currency values. Note:The phone must be switched on to use this function. Do not switch on the phone when the use of a wireless phone is prohibited or when it may cause interference or danger. - Page 70 Calculator To make the currency conversion, key in the amount to be converted, press Options and select In domestic or In foreign. You can also make the currency conversion in standby mode. Key in the amount to be converted, press Options and select In domestic or In foreign.
-
Page 71: To-Do List
7) To-do list You can save a note for a task you have to do. The notes can be saved in priority order. You may be able to save up to 30 notes, but this depends on how long the notes are. Note:The phone must be switched on to use this function. -
Page 72: Calendar
Calendar 8) Calendar The calendar helps you to keep track of reminders, calls that you need to make, meetings, and birthdays. The phone sounds an alarm tone when the set date for an event is reached. Note: The phone must be switched on to use this function. Do not switch on the phone when the use of a wireless phone is prohibited or when it may cause interference or danger. - Page 73 • Call - Key in the phone number you want, press OK, and key in the name and press OK, or search for them in the phone book. Then key in the time for the call and press OK. If you like, select Alarm on and then the alarm time for the note.
-
Page 74: Infrared
Infrared 9) Infrared You can set up the phone to receive data through its infrared (IR) port. To use an IR connection, the device with which you want to establish a connection must be IrDA compliant. You can send or receive data such as business cards and calendar notes to or from a compatible phone or data device (for example, a computer) via the IR port of your phone. -
Page 75: Bluetooth
10) Bluetooth You can set up the phone to send and receive data through Bluetooth. In the Bluetooth menu, you can manage connections and define settings. Since Bluetooth devices communicate using radio waves, your phone and the other Bluetooth device do not need to be in line of sight. The two devices only need to be within a maximum of 10 meters of each other, although the connection can be subject to interference from obstructions such as walls or other electronic devices. -
Page 76: Pairing With Bluetooth Passcode
Nokia accessories have fixed passcodes that are supplied with the accessory. When forming a Bluetooth connection to devices other than a Nokia accessory, for example to another mobile phone, you can create your own passcode. This passcode is used only once and you do not have to memorize it. -
Page 77: Bluetooth Settings
Shown to all, which is the default mode • Prioritised, to set the phone to be found first by other Nokia phones searching for Bluetooth devices. The phone can be set to high priority mode for one minute, after which the phone automatically returns to the mode it was in before high priority mode. -
Page 78: Extras
Extras 11) Extras Note: The phone must be switched on to use each of the functions in this menu. Do not switch the phone on when wireless phone use is prohibited or when it may cause interference or danger. • VOICE RECORDER You can record speech, sounds or an active call for two minutes. -
Page 79: Voice Commands
Select Erase to erase the recording. Press OK to confirm. Select Add alarm. Key in the date for the alarm and press OK. Key in the time for the alarm and press OK. Alarm replaces Add alarm when the alarm is set on. Select Alarm and the name of the recording, and the date and the time for the alarm are displayed. -
Page 80: Storing Personal Card Information
Extras When you try to access wallet for the first time, you need to create your own wallet code at the prompt Create wallet code:. Key in and accept the wallet code, which can be 4-10 characters long and confirm it at the prompt Verify wallet code: If the verification succeeds, the phone displays Wallet code created. -
Page 81: Personal Notes
• PERSONAL NOTES In personal notes you can store (max 50) sensitive personal notes, for example, passcodes or notations. Press Menu, select Extras, Wallet and Personal notes. By pressing Options you can view notes, add new notes, edit a selected note and sort notes either by name or by date. -
Page 82: Countdown Timer
Extras • COUNTDOWN TIMER Press Menu, select Extras and Countdown timer. Key in the alarm time in hours and minutes and press OK to start the countdown timer. If you like, write your own note text which is displayed when the time expires, and press OK. -
Page 83: Lap Times
Press Options and select Start to start the time observation again. The new time is added to the previous time. Save to save the time. Key in a name for the measured time and press OK. If no name is keyed in, the total time is used as a title. Reset to reset the time without saving it. -
Page 84: Services (Wireless Internet)
Services (Wireless Internet) 12) Services (Wireless Internet) Note: The phone must be switched on to use this function. Do not switch on the phone when the use of a wireless phone is prohibited or when it may cause interference or danger. The WAP services use Wireless Mark-Up Language (WML) on their WAP pages. -
Page 85: Accessing And Using Wap Services
Check the availability of WAP services and pricing with your network operator and/or the service provider whose service you wish to use. Service providers will also give you instructions on how to use their services. • ACCESSING AND USING WAP SERVICES Save the service settings that are needed to access the WAP service that you want to use. - Page 86 Services (Wireless Internet) To discard the received settings, press Options and select Discard. To view the received settings first, press Options and select View. To save the settings, press Save. Keying in the service settings manually Press Menu, select Services, and Settings. Select Active service settings.
- Page 87 • IP address - Key in the address, press for a period, and press OK. You obtain the IP address from your network operator or service provider. • Authentication type - Select Secure or Normal. • Data call type - Select Analogue or ISDN. •...
-
Page 88: Making A Wireless Internet Connection
Services (Wireless Internet) • Login type - Select Manual or Automatic. If you select Manual when the GPRS connection is set to Always online, the Always online connection will be disabled. • User name - Key in the user name and press OK. •... -
Page 89: Browse A Wireless Internet Site
• BROWSE A WIRELESS INTERNET SITE After you have made a connection to the WAP service, you can start browsing the site. The function of the phone keys may vary in different WAP services. Follow the text guides on the phone display. For more information, contact your WAP service provider. - Page 90 Services (Wireless Internet) • When a WAP connection is in progress: Press Options and select Appear. sett.. Select Text wrapping or Show images. Select On or Off for Text wrapping and Yes or No for Show images. When Text wrapping is set to On, the text continues on to the next line if it cannot be shown on one line.
-
Page 91: Bookmarks
Key in the address and the title of the WAP page and press OK. Note: Your phone may have some pre-installed bookmarks for sites not affiliated with Nokia. Nokia does not warrant or endorse these sites. If you choose to access them, you should take the same precautions, for security or content, as you would with any site. -
Page 92: Receiving A Bookmark
Services (Wireless Internet) Receiving a bookmark When you have received a bookmark as a text message, press Options and select View to view the bookmark, Save to save the bookmark, or Discard to discard it. • SERVICE INBOX The phone is able to receive service messages (pushed messages) sent by your service provider. -
Page 93: Security Indicator
• SECURITY INDICATOR If the security indicator is displayed during a WAP connection, the data transmission between the phone and the WAP gateway or WAP server (identified by the IP address in the Edit active service settings) is encrypted. However, the security indicator does not indicate that the data transmission between the gateway and the content server (the location where the requested resource is stored) is secure. - Page 94 Services (Wireless Internet) asks you to key in the PIN code again. After the confirmation has been displayed, the digital signature icon will dissappear, and browsing continues. The WAP service may display a confirmation of your purchase. Certificates There are three kinds of certificates: Server certificates: A server certificate is sent from the server to the phone and its validity is checked using the authority certificates stored in the phone or the security module.
-
Page 95: Security Module Settings
PUK code later, you must first try to use the PIN, and you will then be asked for the PUK code. • DATA AND FAX COMMUNICATION You can transfer data to other compatible devices when your Nokia 6310i phone is connected to a compatible PC via an IR connection, cable or Bluetooth. -
Page 96: Pc Suite
Modem setup Modem setup installs the following components on your PC: • Nokia 6310i data and fax modem adapters which enable you to use your phone as a modem in data and fax calls. • Nokia Modem Options software to set options for the data calls you... -
Page 97: Using Data Communication Applications
make. Here you find the settings for HSCSD and GPRS. Using data communication applications Activate the IR connection (Menu 9) or Bluetooth connection (Menu 10) of your phone, or connect to the other device via the cable. If you are using the IR connection, make sure that the infrared port of the phone faces the infrared port of the PC. -
Page 98: Manage Phone Security
Manage phone security 13) Manage phone security Your phone is equipped with different security features that allow you to do the following: • avoid making accidental calls, • prevent unauthorized use of your phone, and • restrict outgoing or incoming calls. •... -
Page 99: Pin Codes
For more Code Purpose information PIN2 code Required by several phone See entries for show features. call costs, call cost limit, fixed dialing, and PIN and PIN2 codes. Restriction Required by the restrict calls See “About your password feature. restriction password” on page 104. -
Page 100: Puk Codes
Manage phone security Change your PIN or PIN2 code You can change your PIN or PIN2 code to any 4- to 8-digit number. Press Menu 4 8 6 (Settings > Security settings > Change access codes), scroll to the PIN code you want to change, then press Select. Enter the current PIN code and press OK. -
Page 101: Change The Security Code
Change the security code Press Menu 4 8 6 (Settings > Security settings > Change access codes). Scroll to Change security code and press Select. Enter the current security code, then press OK. Enter the new security code, then press OK. Enter the security code again to verify, then press OK. -
Page 102: Restrict Calls
Manage phone security Enter the phone number you want to restrict, then press OK. Repeat steps 3 through 6 for each number you want to add to the list. • RESTRICT CALLS This network service lets you restrict the calls your phone can make and receive. -
Page 103: Set Up A Closed User Group
Status: The phone lists the call types with call restriction active. Press OK. About your restriction password Contact your service provider for the restriction password. Change your restriction password Press Menu 4 8 6 (Settings > Security settings > Change access codes). Scroll to Change restriction password, then press Select. -
Page 104: Locking The Keypad
Manage phone security Locking the keypad Menu In standby mode, press and then within 1.5 seconds to lock the keypad. When the keypad is locked, appears at the top of the display. Unlocking the keypad Unlock Press and then within 1.5 seconds to unlock the keypad. -
Page 105: Reference Information
14) Reference information This section provides information about the phone’s batteries, accessories, chargers, safety guidelines and technical information. Be aware that the information in this section is subject to change as the batteries, chargers, and accessories change. • BATTERIES AND CHARGERS This phone is intended for use when supplied with power from the ACP- 12 charger. - Page 106 Reference information Do not short-circuit the battery. Accidental short-circuiting can occur when a metallic object, like a coin, a clip, or a pen causes a direct connection of the + and - terminals of the battery, which are metal strips on the end of the battery.
-
Page 107: Important Safety Information
• IMPORTANT SAFETY INFORMATION Traffic safety Don’t use a hand-held telephone while driving a vehicle. If you’re using a hand-held phone, park the vehicle before conversing. Always secure the phone in its holder and don’t place the phone on the passenger seat or where it can break loose in a collision or sudden stop. -
Page 108: Hearing Aids
Reference information Hearing aids Some digital wireless phones may interfere with hearing aids. In the event of such interference, consult your wireless provider. Other medical devices Operation of any radio transmitting equipment, including cellular phones, may interfere with the functionality of inadequately protected medical devices. - Page 109 or butane), areas where the air contains chemicals or particles, such as grain, dust or metal powders, and any other area where you would be advised to turn off your vehicle engine. Vehicles Only qualified personnel should install or service the phone in a vehicle. Faulty installation or service may be dangerous and invalidate the warranty.
-
Page 110: Emergency Calls
Reference information Emergency calls Important:This phone, like any wireless phone, operates using radio signals and cannot be guaranteed to connect in all conditions. Therefore, you should never rely solely upon any wireless phone for essential communications (such as medical emergencies). Remember, to make or receive any calls the phone must be switched on and in a service area with adequate signal strength. - Page 111 CERTIFICATION INFORMATION (SAR) THIS MODEL PHONE MEETS THE GOVERNMENT'S REQUIREMENTS FOR EXPOSURE TO RADIO WAVES. Your wireless phone is a radio transmitter and receiver. It is designed and manufactured not to exceed the emission limits for exposure to radio frequency (RF) energy set by the Federal Communications Commission of the U.S.
- Page 112 For body worn operation, to maintain compliance with FCC RF exposure guidelines, use only Nokia-approved accessories. When carrying the phone while it is on, use the specific Nokia belt-clip that has been tested for compliance. Use of non-Nokia-approved accessories may violate FCC RF exposure guidelines and should be avoided.
- Page 113 • Use only the supplied antenna. Removal or replacement of the antenna by anyone other than a Nokia authorized service center is an unauthorized modification and invalidates the warranty, can damage the phone, and may violate regulations governing radio devices.
-
Page 114: Accessories
The use of any other types may invalidate any approval or warranty applying to the phone, and may be dangerous. Note: For availability of approved accessories, please check with your authorized Nokia dealer. • BATTERY This section provides information about the phone’s battery. Be aware that the information in this section is subject to change. -
Page 115: Charging Time
Charging time Times are approximate. Charging for the specified time will charge the battery to about 80% capacity. At 80% capacity, the battery scroll bars on your phone’s screen stop scrolling. To obtain 100% charge, allow another two hours to “trickle-charge” the battery. ACP-7U ACP-8U LCH-9... -
Page 116: Chargers And Other Accessories
The chargers and accessories that are described in this section are available for your phone. Contact your dealer for details on the entire line of Nokia Original Accessories. available for your phone Rapid Travel Charger (ACP-12) This lightweight AC charger can be used with all battery options.. - Page 117 The input voltage range is from 11 to 32V DC, negative grounding. Avoid prolonged charging with the Rapid Cigarette Lighter Charger (LCH-9) when the car engine is not running; this may cause the battery of your car to drain. In some cars the cigarette lighter plug is not provided with electricity if the ignition is not switched on.
-
Page 118: Care And Maintenance
Care and maintenance 15) Care and maintenance Your phone is a product of superior design and craftsmanship and should be treated with care. The suggestions below will help you to fulfill any warranty obligations and to enjoy this product for many years. When using your phone, battery, charger, or any accessory: •... -
Page 119: Troubleshooting
personnel there will assist you, and if necessary, arrange for service. • TROUBLESHOOTING The following table lists some common problems and their solutions. Problem Possible cause Possible solution [ 120 ]... -
Page 120: Frequently Asked Questions (Faq)
Frequently Asked Questions (FAQ) 16) Frequently Asked Questions (FAQ) Q. What if my phone is lost or stolen? A. Contact your wireless provider immediately. Q. Does the phone have to be on in order for me to receive a call? A. - Page 121 A. You can download tones using SMS. Call your wireless provider for more information. Q. Where is my phone’s model number and Serial number? A. On the information label, which is on back of the phone under the battery. The model number of this phone is 6310i. [ 122 ]...
-
Page 122: Glossary
Glossary 17) Glossary Term Definition antenna The portion of your phone designed to transmit and receive the wireless signal antenna jack The connector used to attach an external antenna to your mobile phone (typically used by the Handsfree kit) battery The source of power for your phone when its not connected to the charger bookmark... - Page 123 Term Definition Electronic Serial Number. Used to identify your phone. fax call A call placed or received where phone functions as a data/fax modem, connected to your PC via the DLR-3P cable or Infrared (IR). home system The wireless system on which you are a subscriber. IMEI International Mobile Equipment Identifier.
- Page 124 Glossary Term Definition predictive text A system developed for the rapid entry of text. input ringing option The way your phone plays (or does not play) the selected ringing tone when you have an incoming call. For example; ascending, descending. ringing tone The tone that your phone plays (or doesn’t play) when you have an incoming call.
- Page 125 Term Definition Universal Resource Locator. A specific address or location on the internet such as www.nokia.com voice mail A system maintained by your wireless provider, used to record voice messages, when you’re unable to answer a call. voice mailbox The repository on your wireless provider’s network for all voice mail messages.
-
Page 126: Technical Information
Technical information 18) Technical information Weight 110 grams (3.88 ounces) with BPS-2 1100 mAh Li-polymer Battery Wireless networks GSM 900, 1800 and1900 networks Size (volume) 5.92 cubic inches (97 cc) Frequency range (Tx) GSM 900: 880 - 915 Mhz GSM 1800: 1710 - 1785 Mhz GSM1900: 1850 - 1910 Mhz Frequency range (Rx) GSM 900: 925 - 960 Mhz... -
Page 127: Nokia One-Year Limited Warranty
No charge will be made to the Consumer for any such parts. NOKIA will also pay for the labor charges incurred by NOKIA in repairing or replacing the defective parts. - Page 128 The Consumer shall bear the cost of shipping the Product to the Customer Service Department of NOKIA. NOKIA shall bear the cost of shipping the Product back to the Consumer after the completion of service under this limited warranty.
- Page 129 Product. e) NOKIA will repair or authorize the repair of the Product under the limited warranty within 30 days after receipt of the Product by NOKIA or an NOKIA authorized service center. If NOKIA cannot...
- Page 130 ARISING FROM BREACH OF THE WARRANTY, BREACH OF CONTRACT, NEGLIGENCE, STRICT TORT, OR ANY OTHER LEGAL OR EQUITABLE THEORY, EVEN IF NOKIA KNEW OF THE LIKELIHOOD OF SUCH DAMAGES. NOKIA SHALL NOT BE LIABLE FOR DELAY IN RENDERING SERVICE UNDER THE LIMITED WARRANTY, OR LOSS OF USE DURING THE PERIOD THAT THE PRODUCT IS BEING REPAIRED OR LOSS OF DATA.
- Page 131 This is the entire warranty between NOKIA and the Consumer, and supersedes all prior and contemporaneous agreements or understandings, oral or written, and all communications relating to the Product, and no representation, promise or condition not contained herein shall modify these terms.
- Page 132 Nokia One-Year Limited Warranty Save this page for warranty card [ 133 ]...
-
Page 133: Safety: The Most Important Call
Safety: the most important call • A GUIDE TO SAFE AND RESPONSIBLE WIRELESS PHONE USE Tens of millions of people in the U.S. today take advantage of the unique combination of convenience, safety and value delivered by the wireless telephone. Quite simply, the wireless phone gives people the powerful ability to communicate by voice –... - Page 134 Nokia One-Year Limited Warranty WIRELESS PHONE “SAFETY TIPS” Below are safety tips to follow while driving and using a wireless phone which should be easy to remember. • Get to know your wireless phone and its features such as speed dial and redial.
- Page 135 you begin your trip, or attempt to coincide your calls with times you may be stopped at a stop sign, red light or otherwise stationary. But if you need to dial while driving, follow this simple tip – dial only a few numbers, check the road and your mirrors then continue.
- Page 136 *Not all handsfree accessories are available for all phone models. See the enclosed accessories literature for full details. For more information, call 1-888-NOKIA-2U 6000 Connection Drive, Irving, Texas 75039 or visit us at www.nokia.com [ 137 ]...
-
Page 137: Information From The Fda
Information from the FDA The U.S. Food and Drug Administration’s Center for Devices and Radiological Health Consumer Update on Mobile Phones FDA has been receiving inquiries about the safety of mobile phones, including cellular phones and PCS phones. The following summarizes what is known—and what remains unknown—about whether these products can pose a hazard to health, and what can be done to minimize any potential risk. - Page 138 Nokia One-Year Limited Warranty rapidly with distance from the source. The safety of so-called “cordless phones,” which have a base unit connected to the telephone wiring in a house and which operate at far lower power levels and frequencies, has not been questioned.
- Page 139 years. When 20 types of glioma were considered separately, however, an association was found between mobile phone use and one rare type of glioma, neuroepithelliomatous tumors. It is possible with multiple comparisons of the same sample that this association occurred by chance.
- Page 140 Nokia One-Year Limited Warranty words, numbers, or pictures, or in their spatial memory, but they were able to make choices more quickly in one visual test when they were exposed to simulated mobile phone signals. This was the only change noted among more than 20 variables compared.3...
- Page 141 called a case-control study. The current case-control study of brain cancers by the National Cancer Institute, as well as the follow-up research to be sponsored by industry, will begin to generate this type of information. WHAT IS FDA’S ROLE CONCERNING THE SAFETY OF MOBILE PHONES? Under the law, FDA does not review the safety of radiation-emitting consumer products such as mobile phones before marketing, as it does...
- Page 142 Nokia One-Year Limited Warranty • Occupational Health and Safety Administration • National Telecommunications and Information Administration The National Institutes of Health also participates in this group. IN THE ABSENCE OF CONCLUSIVE INFORMATION ABOUT ANY POSSIBLE RISK, WHAT CAN CONCERNED INDIVIDUALS DO? If there is a risk from these products—and at this point we do not know...
- Page 143 Transmitters”): http://www.fcc.gov/oet/rfsafety • World Health Organization (WHO) International Commission on Non- Ionizing Radiation Protection (select Qs & As): http://www.who.int/emf • United Kingdom, National Radiological Protection Board: http://www.nrpb.org.uk • Cellular Telecommunications Industry Association (CTIA): http:// www.wow-com.com • U.S. Food and Drug Administration (FDA) Center for Devices and Radiological Health:http://www.fda.gov/cdrh/consumer/ 1 Muscat et al.
- Page 144 Nokia One-Year Limited Warranty [ 145 ]...
- Page 145 40 personal unblocking key 93 adjust the volume 13 compose a picture message 36 antenna compose e-mail 35 location 5 contacting Nokia 4 Customer Care 5 Battery 107 charge time 108 DCH-9 charging stand 110 charging 8 download...
- Page 146 frequency range 119 phone help 14 phone size 119 help 14 phone weight 119 picture messages icons 3 compose and send 36 interactive user guide 3 modifying 37 interference 2 when received 36 international calls PIN code 92 restrict access 95 power on your phone 9 predictive text activate 43...
- Page 147 prevent unauthorized use 92 PUK code 93 weight 119 require password 92 wireless network services 4 restrict calls 95 write and send a message 32 selection keys 12 sending e-mail 34 messages 32 picture messages 35 template messages 37 shortcuts 14 SIM card feature fixed dialing 94 size 119...
- Page 148 [ 149 ]...