
Related Manuals for Fisher & Paykel HF60CSW2


Summary of Contents for Fisher & Paykel HF60CSW2
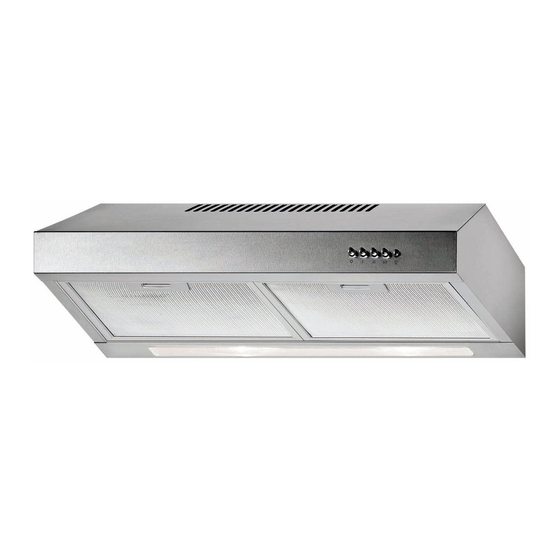
- Page 1 Installation instructions Freestanding canopy User guide HF60CSW2 & HF60CSX2 models NZ AU...
-
Page 3: Table Of Contents
Contents Safety and warnings Getting started quickly Cleaning and maintenance Manufacturer’s Warranty Customer Care Important! SAVE THESE INSTRUCTIONS The models shown in this User Guide may not be available in all markets and are subject to change at any time. For current details about model and specification availability in your country, please visit our local website listed on the back cover or contact your local Fisher &... -
Page 4: Safety And Warnings
Safety and warnings Important! Please read the entire set of instructions before installing the rangehood. ■ ■ This appliance is not intended for use by persons (including children) with reduced physical, ■ ■ sensory or mental capabilities, or lack of experience and knowledge, unless they have been given supervision or instruction concerning use of the appliance by a person responsible for their safety. - Page 5 Installation instructions Contents of packaging 1 x freestanding canopy ■ ■ 1 x installation instructions ■ ■ 2 x aluminium mesh filters ■ ■ 1 x outlet ducting collar ■ ■ Typical equipment required Electric drill ■ ■ Screwdriver ■ ■ Duct tape ■...
-
Page 6: Ducting Options
Installation instructions Ducting options Recirculation For recirculation, please purchase a charcoal filter, which is fitted onto the motor behind the aluminium filters supplied with the hood. The charcoal filter purifies the air before allowing the air to return back to the kitchen through the air vents at the front of the hood. Note: a ducting hole is not required in the wall or ceiling if the canopy is fitted with a charcoal filter. - Page 7 Installation instructions Rear venting installation Establish the desired height of the 60 – 75 cm rangehood above the cooking surface according to the ‘Installation height requirements’ on page 4. Measure this distance from the top of the cooking Fig.1 Establishing height of rangehood surface and, using a spirit level, draw a light horizontal line on the wall.
- Page 8 Installation instructions 538 mm Determine location of the fixing “keyholes” on the wall. The hood is secured to the wall by two “keyholes” located on the rear panel of the hood in the top left and right hand corners. From the point where the horizontal and vertical lines drawn earlier intercept, use a spirit level and pencil and draw another horizontal line 120 mm above...
- Page 9 Installation instructions Setting your hood to recirculate Note: an additional charcoal filter (fig.7) is required to be fitted when setting the hood to recirculation mode. Remove the grease filters. Locate the lever positioned on the motor casing above the left hand light fitting (fig.8). The factory default setting for the lever is to the ‘ducted’...
- Page 10 Installation instructions Under cupboard installation Ensure the fitted height of the rangehood above the cooking surface is in accordance with the ‘Installation height Ø 6 mm requirements’ on page 4. Remove the grease filters (this is to make installation easier). Press inward on the catch, found on the handle, and pull the filter downward.
-
Page 11: Getting Started Quickly
Getting started quickly Control panel Fig.16 Slide control = Fan Off = Fan On / Low = Fan On / Medium = Fan On / High = Lights On = Lights Off... -
Page 12: Cleaning And Maintenance
Cleaning and maintenance Caution! Never use abrasive or oil based liquid cleaners. General maintenance The manufacturer is not liable for any damage caused by not following these instructions. The freestanding canopy should be cleaned regularly using warm water with soap or mild liquid detergents. -
Page 13: Manufacturer's Warranty
Manufacturer’s Warranty You automatically receive a 2 year Manufacturer’s Warranty with the purchase of this Product covering parts and labour for servicing within the country of purchase. Fisher & Paykel undertakes to: Repair or, at its option, replace without cost to the owner either for material or labour any part of the Product, the serial number of which appears on the Product, which is found to be defective within TWO YEARS of the date of purchase. -
Page 14: Customer Care
Customer Care Before you call for service or assistance… Check the things you can do yourself. Refer to your User Guide and check: Your appliance is correctly installed. You are familiar with its normal operation. If after checking these points you still need assistance, please refer to your nearest Fisher & Paykel Authorised Repairer, or contact us through our local website listed on the back cover. - Page 16 www.fisherpaykel.co.nz www.fisherpaykel.com.au Copyright © Fisher & Paykel 2011. All rights reserved. The product specifications in this booklet apply to the specific products and models described at the date of issue. Under our policy of continuous product improvement, these specifications may change at any time. You should therefore check with your Dealer to ensure this booklet correctly describes the product currently available.