Table of Contents
Advertisement
TRACTOR
INSTRUCTION BOOK
Read and keep this book for future reference.
This book contains important information on
SAFETY, ASSEMBLY, OPERATION, MAINTENANCE & STORAGE.
PRODUCT INFORMATION
The owner must be certain that all the product information is in-
cluded with the unit. This information includes the INSTRUCTION
BOOKS, the REPLACEMENT PARTS and the WARRANTIES.
This information must be included to make sure state laws and
other laws are followed.
RECORD THE FOLLOWING INFORMATION ABOUT YOUR UNIT.
THIS INFORMATION IS NECESSARY WHEN ORDERING PARTS
OR IN CASE OF LOSS OR THEFT.
WHERE PURCHASED: _____________________________
DATE PURCHASED: Month______ Day ______ Year ______
MODEL NO.: _________ DATE OF MANUFACTURE: _________
198339 03.21.05 RD
Model
425014X92E
(96014000100)
02478
Printed in U.S.A.
Advertisement
Table of Contents

Related Manuals for Murray 425014X92E


Summary of Contents for Murray 425014X92E
- Page 1 THIS INFORMATION IS NECESSARY WHEN ORDERING PARTS OR IN CASE OF LOSS OR THEFT. WHERE PURCHASED: _____________________________ DATE PURCHASED: Month______ Day ______ Year ______ MODEL NO.: _________ DATE OF MANUFACTURE: _________ 198339 03.21.05 RD Model 425014X92E (96014000100) 02478 Printed in U.S.A.
-
Page 2: Table Of Contents
TABLE OF CONTENTS Warranty ... 2 Safety Rules ... 3 Product Specifi cations ... 6 Assembly/Pre-Operation ... 8 Operation... 11 MURRAY, INC. Two Year Limited Warranty Murray, Inc. warrants to the original purchaser that this unit shall be free from defects in material and workmanship under normal use and service for a period of Two (2) Years from the date of purchase;... -
Page 3: Safety Rules
OWNER'S INFORMATION This instruction book is written for a person with some mechanical ability. Like most ser- vice books, not all the steps are described. Steps on how to loosen or tighten fasten- ers are steps anyone can follow with some mechanical ability. - Page 4 • Never direct discharged material toward anyone. Avoid discharging material against a wall or obstruction. Material may ricochet back toward the operator. Stop the blades when cross- ing gravel surfaces. • Do not operate machine without the entire grass catcher, discharge guard, or other safety devices in place and working.
- Page 5 • Never carry children, even with the blades shut off. They may fall off and be seriously injured or interfere with safe machine operation. Children who have been given rides in the past may suddenly appear in the mowing area for another ride and be run over or backed over by the machine.
-
Page 6: Product Specifi Cations
• Be sure the area is clear of bystand- ers before operating. Stop machine if anyone enters the area. • Never carry passengers. • Do not mow in reverse unless abso- lutely necessary. Always look down and behind before and while backing. •... -
Page 7: Unassembled Parts
UNASSEMBLED PARTS Steering Wheel Insert (1) Hex Bolt 5/16-18 x 4 Steering Wheel Adapter (1) Washer 17/32 x 1-3/16 x 12 Gauge (1) Oil Drain Tube For Future Use Keys (2) Keys Steering Wheel (1) 5/16 Lock Washer Steering Seat (1) Lock Washer 1/2 (1) Bolt... -
Page 8: Assembly/Pre-Operation
ASSEMBLY/PRE-OPERATION Your new tractor has been assembled at the factory with the exception of those parts left unassembled for shipping purposes. To ensure safe and proper operation of your tractor all parts and hardware you as sem ble must be tightened securely. Use the correct tools as nec es sary to in sure proper tightness. - Page 9 7. Slide seat until a comfortable position is reached which allows you to press clutch/brake pedal all the way down. 8. Get off seat without moving its ad- just ed position. 9. Raise seat and tighten adjustment knob securely. Seat Seat Pan Flat Washer 02464...
- Page 10 CHECK TIRE PRESSURE The tires on your tractor were over in - fl ated at the factory for shipping pur pos es. Correct tire pressure is important for best cutting performance. • Reduce tire pressure to PSI shown in “PRODUCT SPEC I FI CA TIONS” section of this manual.
-
Page 11: Operation
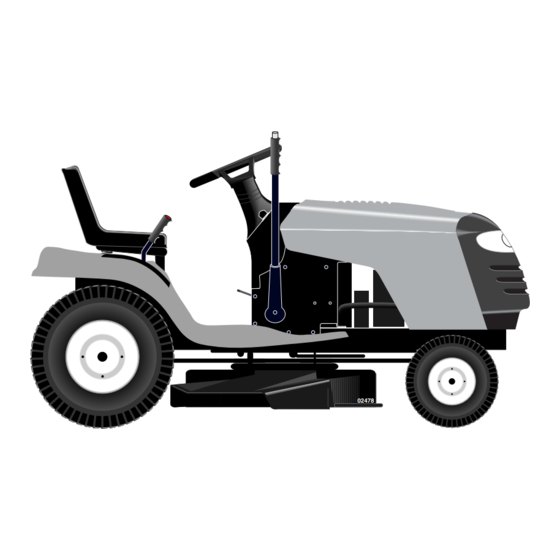
These symbols may appear on your tractor or in literature supplied with the product. Learn and understand their meaning. REVERSE NEUTRAL HIGH REVERSE ENGINE ON ENGINE OFF OPERATION SYSTEM (ROS) OIL PRESSURE FUEL OVER TEMP LIGHT ATTACHMENT ATTACHMENT CLUTCH DISENGAGED CLUTCH ENGAGED LIGHTS ON FREE WHEEL... - Page 12 KNOW YOUR TRACTOR READ THIS OWNER'S MANUAL AND SAFETY RULES BEFORE OPERATING YOUR TRACTOR Compare the illustrations with your tractor to familiarize yourself with the locations of various controls and ad just ments. Save this manual for future reference. Light Switch Throttle/Choke Control Clutch/Brake...
- Page 13 The op er a tion of any trac tor can result in foreign objects thrown into the eyes, which can result in severe eye dam age. Al ways wear safety glass es or eye shields while op er at ing your trac tor or per form ing any ad just ments or repairs.
- Page 14 • The average lawn should be cut to ap- prox i mate ly 2-1/2 inches during the cool season and to over 3 inches during hot months. For healthier and better look- ing lawns, mow often and after moder- ate growth. •...
- Page 15 TO OPERATE ON HILLS WARNING: Do not drive up or down hills with slopes great er than 15° and do not drive across any slope. Use the slope guide provided at the back of this manual. • Choose the slowest speed before start- ing up or down hills.
- Page 16 TO START ENGINE When starting the engine for the fi rst time or if the engine has run out of fuel, it will take extra cranking time to move fuel from the tank to the engine. 1. Sit on seat in operating position, depress clutch/brake pedal and set parking brake.
-
Page 17: Maintenance Schedule
MAINTENANCE SCHEDULE FILL IN DATES AS YOU COMPLETE REGULAR SERVICE Check Brake Operation Check Tire Pressure Check Operator Presence and ROS Systems Check for Loose Fasteners Sharpen/Replace Mower Blades Lubrication Chart Check Battery Level Clean Battery and Terminals Check Transaxle Cooling Check V-Belts Check Engine Oil Level Change Engine Oil (with oil filter) - Page 18 TRACTOR Always observe safety rules when per- form ing any main te nance. BRAKE OPERATION If tractor requires more than fi ve (5) feet to stop at highest speed in high est gear on a level, dry concrete or paved surface, then brake must be checked and ad just ed.
- Page 19 4. Reassemble blade bolt, lock washer and fl at washer in exact order as shown. 5. Tighten blade bolt securely (27-35 Ft. Lbs. torque). IMPORTANT: Blade bolt is heat treated. If bolt needs replacing, replace only with approve bolt shown in the Repair Parts. Trailing Edge Up Blade...
- Page 20 Change the oil after every 25 hours of op- eration or at least once a year if the trac- tor is not used for 25 hours in one year. Check the crankcase oil level before starting the engine and after each eight (8) hours of operation.
-
Page 21: Service And Adjustments
SERVICE AND ADJUSTMENTS WARNING: TO AVOID SERIOUS INJURY, BEFORE PERFORMING ANY SER- VICE OR AD JUST MENTS: 1. Depress clutch/brake pedal fully and set parking brake. 2. Place gearshift lever in neutral (N) position. 3. Place attachment clutch in “DISENGAGED” position. 4. - Page 22 6. Connect anti-sway bar to chassis bracket and secure with retainer spring. 7. Push clutch cable housing guide into bracket, slide collar onto guide and secure with large retainer spring. 8. Place fl at washer and clutch spring on idler pulley bolt and secure with small retainer spring.
- Page 23 TO REPLACE MOWER BLADE DRIVE BELT The mower blade drive belt may be re- placed without tools. Park the tractor on level surface. Engage parking brake. BELT REMOVAL - 1. Remove mower from tractor (See “TO REMOVE MOW ER” in this sec tion of manual).
- Page 24 TO REPLACE MOTION DRIVE BELT Park the tractor on level surface. En gage parking brake. For as sis tance, there is a belt installation guide decal on bottom side of left footrest. BELT REMOVAL - 1. Remove mower (See “TO RE MOVE MOWER”...
- Page 25 TO REMOVE WHEEL FOR REPAIRS 1. Block up axle securely. 2. Remove axle cover, retaining ring and washers to allow wheel removal (rear wheels have a square key - Do not lose). 3. Repair tire and reassemble. NOTE: On rear wheels only: align grooves in rear wheel hub and axle.
- Page 26 TO REPLACE HEADLIGHT BULB 1. Raise hood. 2. Pull bulb holder out of the hole in the backside of the grill. 3. Replace bulb in holder and push bulb holder securely back into the hole in the backside of the grill. 4.
-
Page 27: Storage
Immediately prepare your tractor for stor- age at the end of the season or if the trac- tor will not be used for 30 days or more. WARNING: Never store the trac tor with gas o line in the tank inside a building where fumes may reach an open fl... -
Page 28: Troubleshooting
TROUBLESHOOTING CHART PROBLEM CAUSE Will not start 1. Out of fuel. 2. Engine not “CHOKED” properly. 3. Engine fl ooded. 4. Bad spark plug. 5. Dirty air fi lter. 6. Dirty fuel fi lter. 7 Water in fuel. 8. Loose or damaged wiring. 9. - Page 29 TROUBLESHOOTING CHART PROBLEM CAUSE Loss of power 3. Build-up of grass, leaves and 3. Clean un der side of mower (continued) trash under mower. 4. Dirty air fi lter. 5. Low oil level/dirty oil. 6. Faulty spark plug. 7. Dirty fuel fi lter. 8.
- Page 30 TROUBLESHOOTING CHART PROBLEM CAUSE Mower blades will 1. Obstruction in clutch not rotate mechanism. 2. Worn/damaged mower drive 2. Replace mower drive belt. belt. 3. Frozen idler pulley. 4. Frozen blade mandrel. Poor grass 1. Engine speed too slow. discharge 2.
-
Page 32: Repair Parts
This product has been expertly engineered and carefully manufactured to rigid quality standards. As with all mechanical products, some adjustments or part replacement may be necessary during the life of your unit. For Parts and Service, contact our authorized distributor: call 1-800-849-1297 •...