Table of Contents
Advertisement
Quick Links
Advertisement
Table of Contents

Related Manuals for AT&T Axon M


Summary of Contents for AT&T Axon M
- Page 1 User Guide...
- Page 2 Copyright © 2017 ZTE CORPORATION. All rights reserved. ZTE, Axon M, and the ZTE logos are trademarks of the ZTE Corporation. AT&T, the AT&T logo and all other AT&T marks contained herein are trademarks of AT&T Intellectual Property and/or AT&T.
-
Page 3: Table Of Contents
Contents Getting Started ..........7 Installing the Nano-SIM Card and Memory Card . - Page 4 Knowing the Basics ..........26 Monitoring the Phone Status .
- Page 5 Working With the Call History ....... 63 Calling Your Contacts ........64 Checking Voicemail .
- Page 6 Messaging ............87 Setting Message Backup .
- Page 7 Music ............104 Copying Music Files to Your Phone .
- Page 8 For Your Safety ..........132 General Safety .
-
Page 9: Getting Started
Getting Started Installing the Nano-SIM Card and Memory Card You do not need to power off your phone before installing or replacing the nano-SIM card or before installing or removing the memory card (not included). You need to unmount the memory card before removing it (see Connecting to Networks and Devices –... - Page 10 If the battery is low, there will be a pop-up message on the screen. As you charge your phone, the screen will show you the exact battery level on the Status Bar. This device contains a nonremovable battery. Attempting to remove will void your warranty and could cause serious injury.
-
Page 11: Extending The Battery Life
Extending the Battery Life Active applications, screen brightness levels, Bluetooth and Wi-Fi usage, and GPS functionality can drain your battery. You can follow the helpful tips below to conserve your battery power: • Reduce the screen backlight time. • Lower the screen brightness. •... -
Page 12: Locking/Unlocking The Screen And Keys
Locking/Unlocking the Screen and Keys Your phone allows you to quickly lock the screen and keys (put the phone into Sleep mode) when not in use and also to turn the screen back on and unlock it when you need it. Locking the Screen and Keys To quickly turn the screen off and lock the keys, press the Power key. - Page 13 • Tap – When you want to type using the on-screen keyboard, select on-screen items (such as application and settings icons), or press on-screen buttons, simply tap them with your finger. • Press and Hold – To open the available options for an item (for example, a message or link in a web page), press and hold the item.
-
Page 14: Getting To Know Your Phone
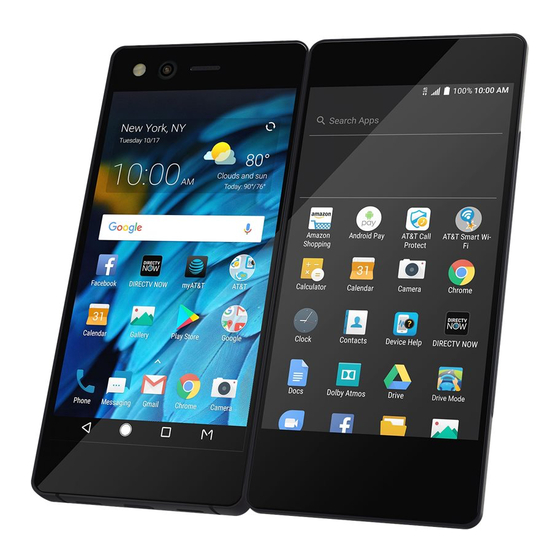
Getting to Know Your Phone Earpiece Headset port Microphone Camera Indicator light Flash Proximity and light sensor Nano-SIM/ Memory card tray Volume key Power key/ Fingerprint sensor Right screen Left screen Quick Launch button Back key Mode key Home key Recent apps key Speaker... -
Page 15: Key Functions
Key Functions Function Press and hold to turn Airplane mode on or off, restart, or power off. Press to turn the screen display on Power key/ or off. Fingerprint sensor Press to use any fingerprint functions you have enabled. (See Personalizing – Using Your Fingerprint.) Press to return to the home screen from any application or screen. -
Page 16: Getting To Know The Multi-Screen
Shortcut Primary shortcuts Navigation bar Your Axon M offers a variety of different screen modes. To switch modes, flip open your device and tap Note: The device’s multi-screen functionality is dependent on magnetic flux level. It will be disabled in environments with high temperatures or high iron content. -
Page 17: Mirror Mode
Mirror Mode To use Mirror Mode, tap . In this mode, the left and right screens show the same view. Extended Mode To use Extended Mode, tap . In this mode, the left and right screens show a single extended view. Dual Mode To use Dual Mode, tap . -
Page 18: Extending The Home Screen
Extending the Home Screen Your home screen is extendable, providing more space for shortcuts, widgets, and more. Simply swipe left or right to see the extended panels. You can add or remove home screen panels or adjust their order. To add a new home screen panel: 1. -
Page 19: Personalizing
Personalizing Changing the System Language 1. Tap the Arrow or swipe up from the bottom of the home screen, and tap Settings Languages & input Languages. 2. To add a system language, tap Add a language, and then select the language you need. 3. -
Page 20: Changing The Ringtone And Notification Sound
Changing the Ringtone and Notification Sound You can customize the default ringtone for incoming calls, the default notification sound, and the default alarm ringtone. 1. Tap the Arrow or swipe up from the bottom of the home screen, and tap Settings Sound. 2. -
Page 21: Adjusting Volumes
Adjusting Volumes 1. Tap the Arrow or swipe up from the bottom of the home screen, and tap Settings Sound. 2. Drag the sliders below Media volume, Alarm volume, Ring volume, and Notification volume to adjust the volume for each type of audio. Note: You can adjust the media volume when a media application is in use by pressing the Volume key. -
Page 22: Using Do Not Disturb Mode
Notes: • Silent and vibration modes will not silence your alarm sound. • To restore normal sound settings, press or hold up on the Volume key. Using Do Not Disturb Mode You can limit interruptions with Do not disturb mode. This mode silences your phone so that it doesn’t make sounds or vibrate when you don’t want it to. -
Page 23: Applying New Wallpapers
• If you have selected Priority only, you can customize the types of allowed sounds or vibrations under Priority interruptions. Tap the switches next to the items you want to allow. Tap Messages or Calls to set preferences for which messages and calls will be allowed. -
Page 24: Changing The Screen Brightness
Changing the Screen Brightness 1. Tap the Arrow or swipe up from the bottom of the home screen, and tap Settings Display Brightness level. 2. Drag the slider to manually adjust the screen brightness. Notes: • Your phone can automatically adjust the screen brightness for available light. -
Page 25: Protecting Your Phone With Screen Pinning
3. For Pattern, PIN, or Password lock, select either Require pattern/PIN/password to start device or No thanks. Note: Until your phone starts up, it cannot receive calls, messages, or notifications, including alarms. When this feature is enabled, you must unlock your phone to allow it to start up. 4. -
Page 26: Using Your Fingerprint
4. If there are many app tabs, swipe up to find on the front- most tab. GOT IT. 5. Tap Unpinning the Screen To unpin the screen and return to normal use, press and hold the Back key. If you have turned on Ask for unlock pattern / PIN / password before unpinning, press and hold on the lock screen and draw the pattern or enter the PIN/password. - Page 27 Note: Tap an existing fingerprint record to change its name or delete it. Setting Fingerprint Actions 1. Tap the Arrow or swipe up from the bottom of the home screen, and tap Settings Security Fingerprint. 2. Enter the screen lock pattern, PIN, or password you set. 3.
-
Page 28: Knowing The Basics
Knowing the Basics Monitoring the Phone Status The status bar at the top of the home screen provides phone and service status icons on the right side. Below are some of the icons you may see. Indicator What it means Indicator What it means 4G LTE™... -
Page 29: Managing Notifications
Managing Notifications The Status Bar at the top of the home screen provides notification icons on the left side. Below are some of the icons you may see. Indicator What it means Indicator What it means New SMS/MMS Upcoming event New Gmail™... -
Page 30: Responding To Or Removing A Notification
• To open the Notification Panel, swipe your finger down from the top of the screen. • To close the Notification Panel, swipe your finger up on the screen or press the Back key. Responding to or Removing a Notification In the Notification Panel, you can respond to or remove notifications. - Page 31 Swipe down with two fingers from the top of the screen, or open the Notification Panel and drag the panel downward to view the following Quick Settings: • Brightness: Uncheck AUTO and drag the brightness slider to adjust the screen brightness. •...
- Page 32 • Do not disturb: Tap to turn on Do not disturb mode and select options. Tap MORE SETTINGS for more options, or tap DONE to turn on Do not disturb mode with the options you have selected. Tap again to turn off Do not disturb mode. Press and hold to open the Do not disturb menu.
-
Page 33: Managing Shortcuts And Widgets
• Nearby: Tap to find apps and websites for what’s around you (Tap to add this option to Quick Settings.) Note: At the top of the Quick Settings panel, tap to open the Settings menu, or tap to add, remove, or rearrange Quick Settings icons. -
Page 34: Organizing With Folders
2. An outline appears around the widget. Drag the outline to resize the widget. Note: Not all widgets can be resized. Organizing With Folders You can create folders on the home screen and add shortcuts to them. You can move or remove folders in the same way that you move or remove shortcuts. -
Page 35: Entering Text
Entering Text You can enter text using the on-screen keyboard. Some apps open it automatically. In others, you open it by tapping where you want to type. You can press the Back key to hide the on-screen keyboard. You can also enter text by speaking with the Google voice typing feature. -
Page 36: Google Keyboard
Google Keyboard The Google Keyboard provides a layout similar to a desktop computer keyboard. When screen auto-rotation is enabled, turn the phone sideways and the keyboard will change from portrait to landscape. The landscape keyboard is not supported in all applications. -
Page 37: Gesture Typing
• Tap to use Google voice typing. • Press and hold to change the input language or set up the Google Keyboard. • Press and hold and slide to to enable one-handed mode. to switch to the right-hand or left-hand keyboard, respectively. -
Page 38: Touchpal Keyboard
• Lift your finger at the end of the word. A space is added automatically when you begin to trace the next word. TouchPal Keyboard TouchPal Keyboard offers three layouts: FULL, PHONEPAD and T+. You can tap to select a layout or an input language. You can also use Curve - Word gesture and Wave™... - Page 39 • The delete key: Tap to delete text before the cursor. You can also press and hold the key to quickly delete multiple characters, or slide left on the key to delete a whole word. • More options: Tap to access TouchPal quick settings, use voice input, resize the keyboard, and more.
- Page 40 To enable and use Curve - Word gesture: Settings Prediction and 1. On the TouchPal Keyboard, tap check Curve ® - Word gesture. 2. Press the Back key twice, tap inside a text field to open the keyboard, and then tap FULL to switch to the FULL layout.
-
Page 41: Google Voice Typing
2. Press the Back key twice, tap inside a text field to open the keyboard, and then tap FULL to switch to the FULL layout. 3. Tap or use Curve - Word gesture to enter the first word. As the first word appears on the text field, candidate words appear on the keyboard for you to choose from as the following word. -
Page 42: Editing Text
2. When you see the microphone image, speak what you want to type. 3. You can continue entering text, or tap an underlined word to change or delete it. Note: Say “comma,” “period,” “question mark,” “exclamation mark,” or “exclamation point” to enter punctuation. Editing Text •... -
Page 43: Opening And Switching Apps
Opening and Switching Apps Opening an App 1. Tap the Arrow or swipe up from the bottom of the home screen to open the application list, where you can find all of the apps on your device. 2. Slide up or down on the screen to view all of the apps. Tap an app to open it. -
Page 44: Connecting To Networks And Devices
Connecting to Networks and Devices Connecting to Mobile Networks Controlling Mobile Data Use To enable or disable data access: 1. Tap the Arrow or swipe up from the bottom of the home screen, and tap Settings Mobile networks Mobile Networks. 2. -
Page 45: Connecting To Wi-Fi
Note: To set the APN to default settings, tap Reset to default CONTINUE. Connecting to Wi-Fi Wi-Fi is a wireless networking technology that can provide Internet access at distances of up to 300 feet, depending on the Wi-Fi router and your surroundings. Turning Wi-Fi On and Connecting to a Wi-Fi Network 1. - Page 46 Adding a Wi-Fi Network You can add a Wi-Fi network if the network does not broadcast its name (SSID) or if you are out of range. To connect to a secured network, you first need to get the security details from the network’s administrator. 1.
- Page 47 Method One: WPS Button (Recommended) 1. Tap the Arrow or swipe up from the bottom of the home screen, and tap Settings Wi-Fi. 2. Slide the switch to the On position. 3. Tap Advanced WPS Push Button. 4. Press the WPS button on the wireless router, and the access point will recognize your phone and add it to the network.
- Page 48 • Keep Wi-Fi on during sleep: Set conditions for keeping Wi-Fi on in Sleep mode. • MAC address: Check the MAC address. • IP address: Check the phone’s IP address. • Install certificates: Install certificates needed for connecting to certain Wi-Fi networks. •...
-
Page 49: Connecting To Bluetooth Devices
3. Tap Advanced Wi-Fi Direct. Your phone will search for other devices enabled with Wi-Fi Direct connections. 4. Tap a device name under Peer devices to connect with it. The other device will receive a Wi-Fi Direct connection prompt and need to accept the request for connection. -
Page 50: Changing The Device Name
Changing the Device Name 1. Tap the Arrow or swipe up from the bottom of the home screen, and tap Settings Bluetooth. 2. Slide the switch to the On position if Bluetooth is off. Rename this device. 3. Tap 4. Edit the name and tap RENAME. Pairing With Another Bluetooth Device 1. -
Page 51: Sending Data Via Bluetooth
Forgetting (Unpairing With) a Bluetooth Device You can make your phone forget its pairing connection with another Bluetooth device. To connect to the device again, you may need to enter or confirm a passkey again. 1. Tap the Arrow or swipe up from the bottom of the home screen, tap Settings Bluetooth, and make sure Bluetooth is turned on. -
Page 52: Using Nfc
Using NFC Near Field Communication (NFC) allows your phone to exchange data with another NFC-enabled device when they touch or are in close proximity to each other. Depending on the applications that you have installed on your phone, you might be able to use your phone as a transit pass or access pass. - Page 53 Using Tap and Pay You can tap and pay with your phone at merchants that accept contactless payments. To use the tap and pay feature, you must turn on NFC (see Turning NFC On/Off in this section) and have a payment app (such as Android Pay™) set up on your phone.
-
Page 54: Connecting To Your Computer Via Usb
Connecting to Your Computer via USB You can connect your phone to a computer with a USB cable and transfer music, pictures, and other files in both directions. Your phone stores these files in internal storage or on a removable memory card. -
Page 55: Using The Memory Card As Portable Or
1. Connect the phone with your computer via USB and choose Media device (MTP). 2. Open Windows Media Player and synchronize video, picture, and music files. Disconnecting Your Phone From the Computer To disconnect the phone from the computer, simply unplug the USB cable when you’re finished. - Page 56 Erasing and Formatting the Memory Card 1. Tap the Arrow or swipe up from the bottom of the home screen, and tap Settings Storage. 2. Tap the card name in the Portable storage section. 3. Tap Format ERASE & FORMAT DONE. Caution: The formatting procedure erases all the data on the memory card, after which the files CANNOT be retrieved.
- Page 57 Moving data between the internal storage and the memory card: With the memory card as part of the internal storage, you can move your photos, files, and other data between the internal storage and the card any time. 1. Tap the Arrow or swipe up from the bottom of the home screen, and tap Settings Storage.
-
Page 58: Sharing Your Mobile Data Connection
Notes: • If the memory card has been ejected, you’ll need to mount it first. • Before the formatting, ensure that you have moved data and apps to the internal storage. 1. Tap the Arrow or swipe up from the bottom of the home screen, and tap Settings Storage. - Page 59 Note: To stop sharing your data connection, tap USB tethering again or disconnect the USB cable. Sharing Your Mobile Data Connection via Bluetooth If your computer can obtain an Internet connection via Bluetooth, you can configure your phone to share its mobile data connection with your computer.
- Page 60 2. Slide the switch to the On position. (If Wi-Fi was on, tap OK to turn it off.) After a moment, the phone starts broadcasting its Wi-Fi network name (SSID). 3. On another device, locate your phone via Wi-Fi and connect with it to start using the phone’s mobile data.
-
Page 61: Connecting To Virtual Private Networks
Connecting to Virtual Private Networks Virtual private networks (VPNs) allow you to connect to the resources inside a secured local network. VPNs are commonly deployed by corporations, schools, and other institutions to let people access local network resources when not on campus, or when connected to a wireless network. - Page 62 Modifying a VPN 1. Tap the Arrow or swipe up from the bottom of the home screen, and tap Settings More VPN. 2. Tap next to the VPN that you want to modify. 3. Edit the VPN settings and tap SAVE. CONNECTING TO NETWORKS AND DEVICES...
-
Page 63: Phone Calls
Phone Calls You can place calls from the Phone app, the Contacts app, or other apps or widgets that display contact information. Wherever you see a phone number, you can usually tap it to dial. Placing and Ending Calls Placing a Call by Dialing 1. -
Page 64: Video Calling
Video Calling Your phone supports video calling. The Video call and Enhanced LTE Services settings must be enabled before you can place or receive video calls. (See Phone Calls – Adjusting Your Call Settings – Turning Video Call On or Off and Settings – Wireless & Networks – Enhanced LTE Services.) Note: Not available in all calls. -
Page 65: Answering Or Rejecting Calls
Answering or Rejecting Calls When you receive a phone call, the phone displays the Caller ID or the information about the caller that you’ve entered in Contacts. You can answer or reject the call, or reject it with a text message. Answering a Call To answer an incoming call, •... -
Page 66: Calling Your Contacts
To open the call history, from the home screen, tap RECENTS. (If the dialpad is visible, tap to close it.) Placing a Call From the Call History 1. Open the call history. 2. Tap a listing, and then tap Note: You can tap View full call history to see more entries, and then tap , or to filter the records by call type. -
Page 67: Using Options During A Call
2. Press and hold the 1 key in the dialer. If prompted, enter your voicemail password. 3. Follow the voice prompts to listen to and manage your voicemail messages. Notes: • See Phone Calls – Adjusting Your Call Settings – Setting Voicemail for how to set your voicemail service. -
Page 68: Managing Multi-Party Calls
• Tap to switch call type. • Tap to end the current call. Note: During a video call, tap the screen to see options. Not all options are available during all calls. Warning! Because of higher volume levels, do not place the phone near your ear during speakerphone use. -
Page 69: Adjusting Your Call Settings
Setting Up a Conference Call With this feature, you can talk to two people at the same time. 1. Place the first call. 2. Once you have established the connection, tap and dial the second number. The first call will be placed on hold. 3. - Page 70 2. Tap the option you want to configure: • Tap Phone ringtone to select the ringtone for incoming calls. • Check Also vibrate for calls to enable vibration when ringing. • Check Dialpad tones to play sounds when you tap the dialpad keys.
-
Page 71: Forwarding Incoming Calls
Setting Voicemail 1. From the home screen, tap Settings Call settings. 2. Tap Voicemail to configure voicemail settings: • Tap Service to select the voicemail service provider. Your carrier is the default. • Tap Setup Voicemail number to edit the voicemail number. •... -
Page 72: Setting Call Waiting
2. Tap an available option (Call forwarding-Unconditional, Call forwarding-Busy, Call forwarding-No reply, or Call forwarding-Not reachable) to enable it. Setting Call Waiting This option allows you to get notified of incoming calls during a call. Settings Call settings 1. From the home screen, tap Call waiting. -
Page 73: Setting Tty Mode
Setting TTY Mode Your phone is a teletypewriter (TTY) compatible device. A TTY device can allow people with hearing or speech disabilities to communicate by telephone. Simply connect the TTY device to the phone’s headset jack. Select a TTY mode for your phone to work with a TTY device, or turn TTY off. -
Page 74: Setting Hearing Aid Compatibility
Setting Hearing Aid Compatibility Your phone supports the Hearing Aid Compatibility (HAC) function. If you use a hearing aid with a telecoil and turn on hearing aid compatibility, it will help you to hear more clearly during phone calls. 1. From the home screen, tap Settings Accessibility. -
Page 75: Contacts
Contacts You can add contacts on your phone and synchronize them with the contacts in your Google account or other accounts that support contact syncing. To see your contacts, tap the Arrow or swipe up from the bottom of the home screen, and tap Contacts. From there, you can tap the tabs at the top of the screen to quickly switch to favorite contacts or contact groups. -
Page 76: Setting Up Your Own Profile
Setting Up Your Own Profile You can create your own name card in your phone. 1. Tap the Arrow or swipe up from the bottom of the home screen, and tap Contacts CONTACTS. 2. Tap My Info. If a profile has already been set up, tap the listing below ME. -
Page 77: Sharing Contacts
3. If prompted, choose to import one, multiple, or all vCard files, and then tap OK. 4. If prompted, choose the vCard file(s) you would like to import, and then tap OK. Exporting Contacts to the Nano-SIM Card 1. Tap the Arrow or swipe up from the bottom of the home screen, and tap Contacts. -
Page 78: Adding A Contact To Favorites
Adding a Contact to Favorites 1. Tap the Arrow or swipe up from the bottom of the home screen, and tap Contacts CONTACTS. 2. Tap a contact, and then tap at the top of the screen. Removing a Contact From Favorites 1. -
Page 79: Deleting A Group
6. Tap 7. If necessary, tap the field below RingTone or Notification sound to set a special ringtone for incoming calls or messages from the group members, and then tap OK. 8. Tap to save the group. Deleting a Group 1. -
Page 80: Editing Contacts
2. Tap and enter the contact name or other information (such as phone number) you want to search for. The contacts matched will be listed. Editing Contacts Editing Contact Details 1. Tap the Arrow or swipe up from the bottom of the home screen, and tap Contacts CONTACTS. -
Page 81: Linking Contacts
Linking Contacts As your phone synchronizes with multiple online accounts, you may see duplicate entries for the same contact. You can merge all the separate information of a contact into one entry in the Contacts list. 1. Tap the Arrow or swipe up from the bottom of the home screen, and tap Contacts CONTACTS. -
Page 82: Accounts
Accounts Adding or Removing Accounts You can add multiple Google accounts and Microsoft Exchange ActiveSync accounts. You may also add other kinds of accounts, ® depending on the apps installed on your phone. Adding an Account 1. Tap the Arrow or swipe up from the bottom of the home screen, and tap Settings Accounts Add account. -
Page 83: Configuring Account Sync
Configuring Account Sync Configuring Auto-sync Settings 1. Tap the Arrow or swipe up from the bottom of the home screen, and tap Settings Accounts. 2. Tap Auto-sync data OK to enable or disable the auto-sync feature. • When automatic sync is turned on, changes you make to information on your phone or on the web are automatically synced with each other. - Page 84 2. Tap the account category and then the account. The Sync settings screen appears, showing a list of information the account can sync. 3. When auto-sync is enabled, tap items to turn syncing on or off as you need. Items with syncing turned on will be kept in sync automatically.
-
Page 85: Email
Email From the home screen, tap . Use Gmail to receive and send email from Microsoft Exchange ActiveSync, Gmail, Hotmail, Yahoo! , and more. ® Setting Up the First Email Account 1. From the home screen, tap 2. Tap Add an email address. 3. -
Page 86: Checking Your Email
Attach file to add audio files, images, videos, and 4. Tap other types of files as attachments. (Options may vary by account type.) 5. Tap at the top of the screen to send the message. Notes: • If you have more than one email account added on the phone, tap the From field to select the account you want to use to send the message. -
Page 87: Deleting An Email
• To forward the message, tap 3. Edit your message and tap Marking or Flagging an Email You can mark an email as read or unread, or flag important emails with a star. While reading a message, • Tap to mark it as unread. •... -
Page 88: Adding And Editing Email Accounts
2. Select the account you want to add a signature to. 3. Tap Signature and enter the text. 4. Tap OK. Adding and Editing Email Accounts After setting up your first email account (see Email – Setting Up the First Email Account), you can add more email accounts and manage them separately. -
Page 89: Messaging
Messaging From the home screen, tap . You can use Messaging to exchange text messages (SMS) and multimedia messages (MMS). Setting Message Backup This device allows you to back up your messages to the AT&T cloud. When you open the Messaging app for the first time, you can tap Turn it on OK to enable backup for up to 90 days. - Page 90 (You can tap to enter numbers with a dialpad.) If the phone presents a few suggestions, tap the one you want to add. • Select recipients from your contacts by tapping FREQUENTS or ALL CONTACTS and tapping a name. • To add more recipients, enter another number or contact name, or tap to select from your contacts.
-
Page 91: Adding An Attachment
Adding an Attachment Number Function Snap a photo; it will be attached instantly. Start recording a video. Tap to stop recording; the video will be attached instantly. Open the mini camera viewscreen (shown) to capture a new photo or video to attach. Select from photos you’ve already taken. -
Page 92: Replying To A Message
Enlarge the camera viewscreen to full size. and flip the device over to switch to the back camera. and flip the device over to return to the front camera. Select a focus area. Notes: • Swipe up on the mini viewscreen to enlarge it to full size; swipe down to return to the mini viewscreen. -
Page 93: Deleting Messages Or Threads
Deleting Messages or Threads 1. On the Messaging screen, press and hold a thread you want to delete. If there are more threads you want to delete, tap them one by one. -or- Tap a thread and press and hold the message you want to delete. -
Page 94: Calendar
Calendar Calendar on the phone works with the web-based Google Calendar™ service for creating and managing events, meetings, and appointments. It also works with the Microsoft Exchange ActiveSync calendar once you sign in to your Exchange account on the phone. From the home screen, tap Viewing Your Calendars and Events Selecting Visible Calendars... -
Page 95: Viewing Event Details
Go to, swipe • To quickly switch to a specific date, tap horizontally to find the month you want, and then tap a day OK. Viewing Event Details In Agenda, Day, or Week view, tap an event to view its details. In Month view, tap a day to view events on that day, and then tap an event to view its details. -
Page 96: Changing Calendar Settings
Changing Calendar Settings To change Calendar settings, open a Calendar view (Day, Week, Settings. Month, or Agenda) and tap Searching for an Event Search, and then type the event in the Search field or tap to speak out the event you want to search. CALENDAR... -
Page 97: Browser
Browser Use Chrome™ to view web pages and search for information. Opening the Browser 1. From the home screen, tap to launch the web browser. Note: The web browser also opens when you tap a web link – for example, in an email or a text message. 2. -
Page 98: Downloading Files
Downloading Files 1. Press and hold an image or a link to a file or to another web page. 2. In the menu that opens, tap Download image or Download link. The downloaded files are saved to your phone or the memory card. -
Page 99: Camera
Camera You can take photos and record videos. Photos and videos are stored to the phone’s internal storage or the memory card. You can copy them to your computer or access them in the Gallery app. Capturing a Photo 1. From the home screen, tap Note: You can quickly open the Camera from any screen by double-tapping the Quick Launch button. - Page 100 Number Function Set a time delay before the camera takes a picture after you tap the shutter icon. Change the High-Dynamic Range (HDR) setting (back camera only). Switch mode: VIDEO (front or back camera), PHOTO (back camera) / SELFIE (front camera), or MANUAL (back camera) / BEAUTIFY (front camera) Exit the camera.
-
Page 101: Using Manual Camera Mode
Capture a LIVE photo. View pictures and videos you have taken. Use special photo or video camera modes: PANORAMA, MULTI EXPOSURE, TIMELAPSE, SUPER NIGHT, MAGIC SHUTTER, and SLOW MOTION. Adjust the focus point and exposure. Change the camera settings. Switch between back and front camera. Change the flash setting (back camera only). -
Page 102: Using Other Camera Modes
2. Tap MANUAL. 3. Aim the camera at the subject. You can make the following adjustments: • Drag the green circle to any area on the screen that you want to focus on. Press and hold the circle to lock the focus. •... -
Page 103: Recording A Video
Recording a Video You can record video clips at normal speed with the front or back camera. The back camera also allows you to record time- lapse videos. 1. From the home screen, tap VIDEO to capture a normal- speed video. 2. - Page 104 • Video quality: (VIDEO mode) Set the quality for your video. • Tap to capture: (SELFIE, BEAUTIFY modes) Tap on the screen to take photos. • Mirror image: (SELFIE, BEAUTIFY modes) Save the captured photo as it appears in the preview. •...
- Page 105 • Volume key: (PHOTO, MANUAL, SELFIE, BEAUTIFY modes) Assign the function of the Volume key for the Camera app: Take photo, Zoom, or Volume. • Anti-banding: Set the anti-banding value to avoid stripes on the screen when you take pictures or record videos of TV or computer screens.
-
Page 106: Music
Music Tap the Arrow or swipe up from the bottom of the home screen, and tap Play Music to play audio files stored on your phone. Play Music supports a wide variety of audio formats, so it can play music you purchase from online stores, music you copy from your CD collection, and more. -
Page 107: Viewing Your Music Library
Downloading From the Internet You can download music from various sources, including Google Play Music (requires a Google account). Receiving via Bluetooth You can receive music files from other devices via Bluetooth (see Connecting to Networks and Devices – Connecting to Bluetooth Devices –... -
Page 108: Playing Music
Playing Music Tap a song in the music library to listen to it. Tap the bar at the bottom of the screen to open the following playback screen. Number Function Song, album, and artist information. Tap to go back to the music library. Album artwork (if available). -
Page 109: Managing Playlists
Playback control. Skip songs or pause and resume playback. Drag the slider to jump to any part of the song. Give the song a thumbs-down. It will immediately be skipped. Play the current playlist in shuffle mode, where tracks are played in random order. View more options. -
Page 110: Tv Mode
TV Mode With TV Mode, you can quickly launch your favorite video app directly from any screen, including the lock screen, so your favorite entertainment is always right at your fingertips. Setting Up TV Mode During initial setup of your phone (see Getting Started – Setting Up Your Phone for the First Time), you will be guided through setting up TV Mode. -
Page 111: Launching Tv Mode
Launching TV Mode It’s easy to quickly launch TV Mode: • Press and hold on the lock screen. • Press and hold the Quick Launch button. Note: When you launch some video apps for the first time, you may be prompted to log in to your account. Switching Between Different Apps You can change the video app launched by TV Mode at any time. -
Page 112: Google Play Store
Google Play Store From the home screen, tap . You can buy (or in some cases, rent) music, books, movies, and apps, and download them to your phone. Notes: • You must sign in to a Google account to use Google Play Store. •... -
Page 113: Managing Your Downloads
3. Wait for the app to be downloaded and installed automatically. Payment needs to be authorized before paid apps start downloading. After the app is successfully installed, you can find it on your phone after tapping the Arrow or swiping up from the bottom of the home screen. -
Page 114: More Apps
More Apps Clock Tap the Arrow or swipe up from the bottom of the home screen, and tap Clock. The Clock app allows you to check local time in places around the world, set alarms, and use timers. Setting a New Alarm 1. -
Page 115: File Manager
File Manager Quickly access all of your images, videos, audio clips, and other types of files on your phone and on the memory card. Tap the Arrow or swipe up from the bottom of the home screen, and tap File Manager. You can find the file you need by tapping a category, or browse folders and files by tapping Storage Space to view the phone storage or SD Card to view the memory card (if one is installed). -
Page 116: Google Apps
To play any saved memo: 1. Tap at the top right of the screen to see all recordings. 2. Tap the title of a memo to play it. Editing a Voice Memo You can trim a voice recording. 1. While playing a recording, tap to open the editing screen. - Page 117 • Gmail: Send and receive emails via your Gmail account or other email accounts. • Google: Use Google search or get information when you need it with the Google feed. • Maps: Find your place and find your way in the world. •...
-
Page 118: Settings
Settings Tap the Arrow or swipe up from the bottom of the home screen, and tap Settings. Settings contains most of the tools for customizing and configuring your device. Wireless & Networks Wi-Fi Turn Wi-Fi on or off and configure your Wi-Fi connections (see Connecting to Networks and Devices –... -
Page 119: Airplane Mode
You can check how much data has been used during the time cycle you set, set a mobile data limit and warning, see what apps have been using mobile data, or restrict background data for individual apps. Note: The data usage is measured by your phone, and your carrier’s data usage accounting may differ. -
Page 120: Device
Tap More, and then tap the NFC switch to turn this feature on or off. When NFC is on, you can exchange data with another NFC-enabled device when they touch each other or are in close proximity. (See Connecting to Networks and Devices – Using NFC.) Android Beam Tap More Android Beam, and then tap the switch to turn this... - Page 121 Quick Launch Button By default, pressing and holding the Quick Launch button launches TV Mode. You can change the following settings: • Double-tap for Camera: Enable or disable double-tapping the Quick Launch button to open the Camera app. • Long press: Select the app that is launched when you press and hold the Quick Launch button.
- Page 122 • Wallpaper: Select a background image for the home screen and/or the lock screen. • Theme: Select a theme for the device. • Sleep: Set the length of time of inactivity before the screen turns off automatically. • Screen saver: Manage the Screen saver function. When this feature is enabled, photos or animations will be displayed as a screensaver.
- Page 123 Sound Adjust different types of volume (see Personalizing – Adjusting Volumes), manage Dolby Atmos and Headset HiFi settings, select notification mode (see Personalizing – Switching to Silent or Vibration Mode), enable vibration when a call is answered, manage Do not disturb settings (see Personalizing – Using Do Not Disturb Mode), set ringtone, notification, and alarm sounds (see Personalizing –...
- Page 124 Storage Check memory information for your external memory card and internal storage. You can choose the default location for new data, such as downloaded files and captured photos. • Save location: Select the default location for new data, such as files downloaded, photos captured, and voice recorded.
-
Page 125: Personal
Tap & Pay (This menu is visible only when NFC is enabled.) You can tap and pay with your phone at merchants that accept contactless payments. (See Connecting to Networks and Devices – Using NFC – Using Tap and Pay.) Flashlight Turn the flashlight function on or off. - Page 126 • Battery saving: Use only Wi-Fi and mobile networks to get your approximate location. This will drain less power from your battery than using GPS. • Device only: Use GPS to pinpoint your location. In the Location menu, tap Google Location History or Google Location Sharing to configure Google location options (Google account required).
- Page 127 Note: Put all your confidential passwords in a safe place for future use. If you enter the wrong SIM PIN more times than allowed, your nano-SIM card will be locked and you cannot access the mobile phone network. Contact your operator for a PIN Unlock Key (PUK) to restore the nano-SIM card.
- Page 128 Google Manage settings for Google apps and services that are installed on your device. Languages & Input • Languages: Select a language for your system. • Spell checker: Enable Google Spell Checker to check for spelling errors when entering text, and change its settings. •...
-
Page 129: System
– Default language status: Check whether the text-to-speech output feature supports the current system language. • Pointer speed: Select how fast the pointer/mouse should scroll when you connect the phone to a trackpad or mouse accessory. Backup & Reset • Back up my data: Back up app data, Wi-Fi passwords, and other settings to Google servers after you sign in to your Google account. -
Page 130: About Phone
Printing Manage printer plug-ins installed from the Play Store or your printer manufacturer. AT&T Software Update Check for available software updates for your device. About Phone View phone status, legal information, and other information. You can also tap Additional system updates Storage card updates to install updates from update packages copied to the storage card. -
Page 131: Troubleshooting
Troubleshooting If you encounter problems while using the phone, or if it performs abnormally, you can refer to the chart below. If your particular problem cannot be resolved using the information in the chart, contact the dealer where you purchased the phone. Problem Possible causes Possible solution... - Page 132 Problem Possible causes Possible solution The battery or battery charger Contact the dealer. is damaged. The phone’s temperature is Adjust the battery charging Battery not below 32°F (0°C) or higher than environment to avoid extremes charging 113°F (45°C). of temperature. Check all connectors to make Poor contact between the sure all connections have been...
- Page 133 Problem Possible causes Possible solution The nano-SIM card has Take the nano-SIM card to your malfunctioned or is damaged. service provider for testing. Nano-SIM The nano-SIM card is inserted Insert the nano-SIM card card error improperly. properly. Debris is on the nano-SIM card Use a soft, dry cloth to clean the contacts.
-
Page 134: For Your Safety
For Your Safety General Safety Don’t make or receive Don’t use at gas stations. phone calls while driving. Never text while driving. Your phone may produce Keep your phone at least a bright or flashing light. 10 mm (0.4 in.) away from your ear or body while Don’t dispose of your making calls. -
Page 135: Fcc Rf Exposure Information (Sar)
FCC RF Exposure Information (SAR) This phone is designed and manufactured not to exceed the emission limits for exposure to radio frequency (RF) energy set by the Federal Communications Commission of the United States. During SAR testing, this device was set to transmit at its highest certified power level in all tested frequency bands, and placed in positions that simulate RF exposure in usage against the head with no separation, and near the body with the separation of... -
Page 136: Fcc Regulations
For this device, the highest reported SAR value for usage against the head is 1.05 W/kg, for usage near the body is 1.20 W/kg. While there may be differences between the SAR levels of various phones and at various positions, they all meet the government requirement. -
Page 137: Hearing Aid Compatibility (Hac) Regulations
the instructions, may cause harmful interference to radio communications. However, there is no guarantee that interference will not occur in a particular installation. If this equipment does cause harmful interference to radio or television reception, which can be determined by turning the equipment off and on, the user is encouraged to try to correct the interference by one or more of the following measures: •... - Page 138 Some hearing devices are more immune than others to this interference noise, and phones also vary in the amount of interference they generate. The wireless telephone industry has developed a rating system for wireless phones to assist hearing device users in finding phones that may be compatible with their hearing devices.
-
Page 139: Distraction
Switch” or “Telephone Switch”) than unrated phones. T4 is the better/higher of the two ratings. (Note that not all hearing devices have telecoils in them.) Your phone meets the M4/T4 level rating. Hearing devices may also be rated. Your hearing device manufacturer or hearing health professional may help you find this rating. - Page 140 • Always treat your phone and its accessories with care, and keep it in a clean and dust-free place. • Keep the screen and camera lens clean. An unclean screen or camera lens may slow down the phone’s reaction to your operations or lower image quality.
-
Page 141: Small Children
Small Children Do not leave your phone and its accessories within the reach of small children or allow them to play with it. They could hurt themselves or others, or could accidentally damage the phone. Your phone contains small parts with sharp edges that may cause an injury or may become detached and create a choking hazard. -
Page 142: Repetitive Strain Injuries
Seizures/Blackouts The phone can produce a bright or flashing light. A small percentage of people may be susceptible to blackouts or seizures (even if they have never had one before) when exposed to flashing lights or light patterns, such as when playing games or watching video. -
Page 143: Phone Heating
Phone Heating Your phone may become warm during charging and during normal use. Electrical Safety Accessories Use only approved accessories. Do not connect with incompatible products or accessories. Take care not to touch or allow metal objects, such as coins or key rings, to contact or short-circuit in the battery terminals. - Page 144 • Do not modify or remanufacture, attempt to insert foreign objects into the battery, immerse or expose to water or other liquids, expose to fire, explosion or other hazard. • Only use the battery for the system for which it is specified. •...
-
Page 145: Radio Frequency Interference
Radio Frequency Interference General Statement on Interference Care must be taken when using the phone in close proximity to personal medical devices, such as pacemakers and hearing aids. Pacemakers Pacemaker manufacturers recommend that a minimum separation of 15 cm (6 in.) be maintained between a mobile phone and a pacemaker to avoid potential interference with the pacemaker. -
Page 146: Interference In Cars
Aircraft Power off your wireless device whenever you are instructed to do so by airport or airline staff. Consult the airline staff about the use of wireless devices on board the aircraft. If your device offers airplane mode, this must be enabled prior to boarding an aircraft. Interference in Cars Please note that because of possible interference with electronic equipment, some vehicle manufacturers forbid the... -
Page 147: Warranty
Product. This limited warranty is applicable only to end users in the United States. 1. This product is warranted for 24 (twenty-four) months from date of purchase and includes benefits of the Axon M Passport program. Go to www.zteusa.com/passportM to view your benefits. -
Page 148: Limited Warranty
b) Defects or damages from abnormal use, abnormal conditions, improper storage, exposure to moisture, dampness or corrosive environments, unauthorized modifications, unauthorized repair, neglect, rough handling, abuse, accident, alteration, improper installation, incorrect voltage application, food or liquid spillage, acts of God. c) Normal wear and tear. -
Page 149: How To Get Warranty Service
OR CONSEQUENTIAL LOSS OR DAMAGE. TO THE EXTENT PERMITTED BY APPLICABLE LAW, ZTE’S LIABILITY SHALL BE LIMITED TO THE PURCHASE VALUE OF THE PRODUCT. THE ABOVE LIMITATIONS SHALL NOT APPLY TO DEATH OR PERSONAL INJURY CAUSED BY DEFECT OF PRODUCT IN MATERIAL, DESIGN, AND WORKMANSHIP. -
Page 150: Specifications
Specifications Handset specifications are shown in the following table: Operating system Android™ 7.1.2 (Nougat) Network frequency LTE: B2/B4/B5/B12/B29/B30/B66 HSPA: 850/1900/AWS GSM/EDGE: 850/1900 Processor Qualcomm MSM8996 Pro Quad-core 2.15 GHz Dimensions 5.94" (H) x 2.82" (W) x 0.48" (D) Weight 8.1 oz. Display Dual 5.2"... - Page 151 Notes NOTES...