
Related Manuals for Omron BP769CAN


Summary of Contents for Omron BP769CAN
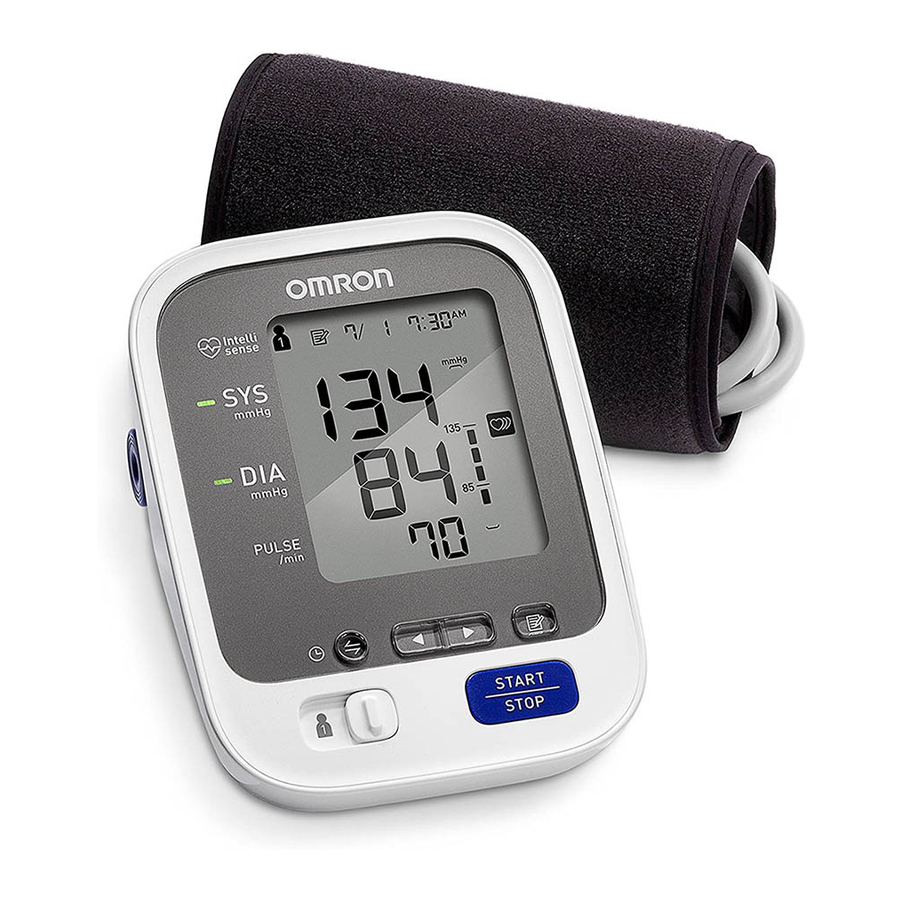
- Page 1 English Français Blood Pressure Monitor / Tensiomètre Model / Modèle BP769CAN Instruction Manual / Guide de l’utilisateur 3124754-8A...
- Page 2 Le produit inclut : AC Adapter 4 “AA” batteries Adaptateur c.a. 4 piles “AA” Easy-Wrap ComFit Cuff Brassard facile à enrouler ComFit Monitor Tensiomètre GETTING STARTED Blood Pressure Monitor BP769CAN Quick Start Guide Guide de démarrage rapide Instruction Manual Guide de l’utilisateur...
-
Page 4: Table Of Contents
Table Of Contents Introduction ...........1 6. Other Settings .............31 Definitions / Symbols ........2 6.1 Turning Bluetooth “OFF” ..... 31 Important Safety Information .......4 6.2 Turning Bluetooth “ON” ..... 32 1. Know Your Monitor ..........9 6.3 Restoring Your Monitor to the Default Setting ........ -
Page 5: Introduction
An oscillometric monitor does not need a stethoscope so this monitor is simple to use. Safety Instructions This instruction manual provides you with important information about the OMRON BP769CAN Blood Pressure Monitor. To ensure the safe and proper use of this monitor, READ and UNDERSTAND all of the safety and operating instructions. -
Page 6: Definitions / Symbols
Definitions / Symbols Indicates a potentially hazardous situation, which if not avoided, Warning Temperature limitation could result in death or serious injury. Indicates a potentially hazardous situation, which if not avoided, may result in minor or moderate Caution Humidity limitation injury to the user or patient, or cause damage to the equipment or other property. - Page 7 Definitions / Symbols Class II equipment. Protection Serial number against electric shock The device is protected against solid foreign objects of 12.5 mm IP20 For indoor use only diameter and greater such as a finger. The device is protected against solid foreign objects of 12.5 mm diameter and greater such as a IP21...
-
Page 8: Important Safety Information
Important Safety Information Please read the Important Safety Information in this instruction manual before using this monitor. Please follow this instruction manual thoroughly for your safety. Please keep for future reference. For specific information about your own blood pressure, CONSULT WITH YOUR PHYSICIAN. - Page 9 Important Safety Information AC Adapter Handling and Usage • DO NOT use the AC adapter if this monitor or the AC adapter cable is damaged. If this monitor or the cable is damaged, turn off the power and unplug the AC adapter immediately. •...
- Page 10 Important Safety Information • DO NOT use this monitor in a moving vehicle such as in a car. • DO NOT drop or subject this monitor to strong shocks or vibrations. • DO NOT use this monitor in places with high or low humidity or high or low temperatures. Refer to chapter 10, “Specifications”.
- Page 11 Important Safety Information Data Transmission • DO NOT replace batteries or unplug the AC adapter while your readings are being transferred to your smart device. This may result in incorrect operation of this monitor and failure to transfer your blood pressure data. •...
- Page 12 Important Safety Information Battery Handling and Usage • DO NOT insert batteries with their polarities incorrectly aligned. • ONLY use 4 “AA” alkaline or manganese batteries with this monitor. DO NOT use other types of batteries. DO NOT use new and used batteries together. •...
-
Page 13: Know Your Monitor
1. Know Your Monitor Open the rear cover page to read the following: The letter identifiers on the rear cover page correspond to those in the body of this page. Monitor Battery compartment AC adapter jack Air jack Blood pressure level indicator (color) * Arm cuff Connection button User ID selection switch... -
Page 14: Display Symbols
1. Know Your Monitor Display Symbols Memory symbol Appears when you press the memory button along with the stored readings. User ID symbol The user ID number appears when selecting the user with user ID selection switch. Average value symbol Appears when you press and hold the memory button for more than 3 seconds. -
Page 15: Movement Error Symbol
1. Know Your Monitor Date and Time display Movement error symbol Appears when your body is moving during a measurement. If the movement symbol appears, remove the arm cuff, and wait for 2 to 3 minutes. After 2 to 3 minutes, remain still and take another measurement. - Page 16 1. Know Your Monitor Deflation symbol Flashes while your monitor is deflating the arm cuff. Pulse display / Memory number Pulse rate appears after the measurement. When pressing the memory button, the memory number appears for approximately one second before the pulse rate appears on the display.
-
Page 17: Preparation
2. Preparation 2.1 Battery Installation Remove the battery cover. Insert 4 “AA” batteries as indicated in the battery compartment. Replace the battery cover. NOTES: • When the depleted battery symbol “ ” appears on the display, turn your monitor off, then replace all batteries at the same time. -
Page 18: Using The Ac Adapter
2. Preparation 2.2 Using the AC adapter NOTES: • Make sure to use an easily accessible power socket when plugging and unplugging the AC adapter. • We recommend keeping batteries in your monitor at all times, even if you choose to use the AC adapter. •... -
Page 19: Setting The Date And Time
2. Preparation Open the rear cover page to read the following: The letter identifiers on the rear cover page correspond to those in the body of this page. 2.3 Setting the Date and Time The date and time are automatically set when you pair with your smart device. To set manually, follow the instructions below. - Page 20 2. Preparation Press the or button to change the year. Press the button to confirm the year and then the month flashes. Repeat the same steps to change the month, day, hour, and minute. Year Month Hour Minute Change Confirm Change Confirm Change...
-
Page 21: Applying The Arm Cuff
• The blood pressure can differ between the right arm and the left arm, and the readings can be different. OMRON recommends to always use the same arm for measurements. If the readings between both arms differ substantially, please check with your physician as to which arm to use for your measurements. -
Page 22: Before Taking A Measurement
2. Preparation 2.5 Before Taking a Measurement To help ensure an accurate reading, follow these directions: Avoid bathing, drinking alcohol or caffeine, smoking, exercising and eating for at least 30 minutes before taking a measurement. Rest for at least 5 minutes before taking a measurement. Remove tight-fitting or thick clothing from your arm while taking a measurement. -
Page 23: How To Sit Correctly
2. Preparation 2.6 How to Sit Correctly To take a measurement, you need to be relaxed and comfortably seated, at a comfortable room temperature. • Sit in a chair with your legs uncrossed and your feet flat on the floor. •... -
Page 24: Using Your Monitor Without A Smart Device
3. Using Your Monitor without a Smart Device Taking a Measurement You can use your monitor without pairing to a smart device. For pairing, refer to section 4.1. NOTES: • Check if the date and time are correct on the display when taking a measurement. For setting the date and time manually, refer to section 2.3. - Page 25 3. Using Your Monitor without a Smart Device Press the [START/STOP] button. The monitor automatically starts to inflate. START INFLATING DEFLATING COMPLETED What to do if your systolic pressure is more than 210 mmHg After the arm cuff starts to inflate, press and hold the [START/STOP] button until your monitor inflates 30 to 40 mmHg higher than your expected systolic pressure.
-
Page 26: Using The Guest Mode
3. Using Your Monitor without a Smart Device Using the Guest Mode Your monitor stores readings for 2 users in the memory. The guest mode can be used to take a single measurement for another user. No readings are stored in the memory when the guest mode is selected. -
Page 27: Using Your Monitor With A Smart Device
Download and install the free “OMRON connect US/CAN” app onto your smart device. If you already have the “OMRON connect US/CAN” app, and have created your account, visit “Manage Devices” in the “Profile” section of the “OMRON connect US/CAN” app to add your new monitor. - Page 28 4. Using Your Monitor with a Smart Device Press and hold the button for more than 2 seconds. The connection symbol “ ” and “P” flashes on the display of the monitor. Follow the pairing instructions shown on your smart device, while the connection symbol is flashing on the display of the monitor.
- Page 29 • If the Bluetooth feature of your monitor is turned off, turn Bluetooth on. Refer to section 6.2. • If you use any other app instead of “OMRON connect US/CAN”, the date and time on your monitor may not automatically be set. For setting the date and time manually, refer to section 2.3.
-
Page 30: Taking A Measurement
Please make sure your monitor is within 16 ft. (5 m) of your smart device and your “OMRON connect US/CAN” app is active. As soon as a measurement has completed, tap the “sync” icon in the “OMRON connect US/CAN” app on your smart device to transfer the readings. - Page 31 • If “-/ - -:--” appears on the date and time display during or after measurement, the readings will not be transferred. For setting the date and time manually, refer to section 2.3. • If you use an app other than the “OMRON connect US/CAN” app, the date and time may not be set automatically on your monitor.
-
Page 32: Using The Memory Function
5. Using the Memory Function 5.1 Viewing Your Readings Stored in the Memory Your monitor automatically stores readings up to 60 for each user (1 and 2). It can also calculate an average value based on the last 3 readings taken within 10 minutes. -
Page 33: Viewing The Average Value
5. Using the Memory Function Press the button to view the readings stored in the memory. : To view the older readings : To view the more recent readings 5.2 Viewing the Average Value Select your user ID (1 or 2). Press and hold the button for more than 3 seconds. -
Page 34: Deleting All The Readings Stored In The Memory
5. Using the Memory Function 5.3 Deleting All the Readings Stored in the Memory The readings stored in the memory are deleted by each user ID. Select your user ID (1 or 2). Press the button. The memory symbol “ ” appears. While holding the button down, press the [START/STOP] button for... -
Page 35: Other Settings
6. Other Settings 6.1 Turning Bluetooth “OFF” This product emits radio frequencies (RF) in the 2.4 GHz band. DO NOT use this product in locations where RF is restricted, such as on an aircraft or in hospitals. Turn off the Bluetooth feature in this monitor, remove batteries and/or unplug the AC adapter in those areas. -
Page 36: Turning Bluetooth "On
6. Other Settings 6.2 Turning Bluetooth “ON” Make sure if your monitor has been turned off. If not, turn the monitor off by pressing the [START/STOP] button. Press and hold the button for more than 10 seconds. Release the button when “on” appears on the display. -
Page 37: Restoring Your Monitor To The Default Setting
6. Other Settings 6.3 Restoring Your Monitor to the Default Setting To delete all the information stored in your monitor, follow the instructions below. Make sure that the monitor is turned off. It is off when the screen is not showing numbers or symbols. While holding the button down, press the [START/STOP] button... -
Page 38: Error Messages And Troubleshooting
7. Error Messages and Troubleshooting 7.1 Error Messages Display Possible Cause Solution Remove the arm cuff. Wait 2-3 minutes and then take another measurement. Irregular heartbeats are detected. Repeat the steps in chapter 3. If this error continues to appear, contact your physician. Carefully read and repeat the steps in Movement during a measurement. - Page 39 7. Error Messages and Troubleshooting Display Possible Cause Solution Repeat measurement. Remain still and do not talk during measurement. Refer to chapter 3. Movement during measurement and the If “E2” appears repeatedly, inflate the arm cuff arm cuff has not been inflated sufficiently. manually until it is 30 to 40 mmHg above your previous measurement result.
-
Page 40: Troubleshooting
Data is not being transmitted. devices again. Refer to section 4.1 or visit the “Help” section in the “OMRON connect US/CAN” app for further help in pairing your smart device. The monitor is not ready. If the monitor is on, press the [START/STOP]... -
Page 41: Maintenance
8. Maintenance 8.1 Maintenance To protect your monitor from damage, please follow the directions below: • Store your monitor and other components in a clean, safe location. • Changes or modifications not approved by the manufacturer will void the user warranty. DO NOT disassemble or attempt to repair this monitor or other components. -
Page 42: Cleaning
8. Maintenance 8.3 Cleaning • Do not use any abrasive or volatile cleaners. • Use a soft dry cloth or a soft cloth moistened with neutral soap to clean your monitor and the arm cuff, and then wipe them with a dry cloth. •... -
Page 43: Optional Accessories
9. Optional Accessories Arm Cuff AC Adapter Arm circumference 9” - 17” (22 - 42 cm) Easy-Wrap ComFit Cuff Model: HEM-ADPTW5 Model: CFX-WR17 (HEM-FL31) -
Page 44: Specifications
10. Specifications BP769CAN HEM-7320T-CACS Model Display LCD digital display Cuff pressure range Pressure: 0 to 299 mmHg Measurement range Pressure: 20 to 280 mmHg Pulse: 40 to 180 beats / min. Accuracy Pressure: 3 mmHg Pulse: 5% of display reading... - Page 45 10. Specifications Applied part Type BF Protection against electric shock Internally powered ME equipment (When using only batteries) Class II ME equipment (AC adapter) NOTES: • These specifications are subject to change without notice. • In the clinical validation study, K5 was used on 85 subjects for determination of diastolic blood pressure. •...
-
Page 46: Fcc/Ic Statement
11. FCC/IC Statement FCC CAUTION Changes or modifications not expressly approved by the party responsible for compliance could void the user’s authority to operate the equipment. NOTE: This equipment has been tested and found to comply with the limits for a Class B digital device, pursuant to part 15 of the FCC Rules. -
Page 47: Limited Warranty
12. Limited Warranty Your BP769CAN Blood Pressure Monitor, excluding the arm cuff, AC adapter and batteries are warranted to be free from defects in materials and workmanship appearing within 5 years from the date of purchase, when used in accordance with the instructions provided with the monitor. The arm cuff and AC adapter are warranted to be free from defects in materials and workmanship appearing within 1 year from the date of purchase when the monitor is used in accordance with the instructions provided with the monitor. -
Page 48: Guidance And Manufacturer's Declaration
Nevertheless, special precautions need to be observed: • The use of accessories and cables other than those specified by OMRON, with the exception of cables sold by OMRON as replacement parts for internal components, may result in increased emission or decreased immunity of the device. - Page 49 Guidance and manufacturer’s declaration - electromagnetic immunity OMRON BPM including AC-adapter is intended for use in the electromagnetic environment specified below. The customer or the user of this OMRON BPM including AC-adapter should assure that it is used in such environment.
- Page 50 Guidance and manufacturer’s declaration - electromagnetic immunity OMRON BPM including AC-adapter is intended for use in the electromagnetic environment specified below. The customer or the user of this OMRON BPM including AC-adapter should assure that it is used in such environment.
- Page 51 OMRON BPM including AC-adapter OMRON BPM including AC-adapter is intended for use in an electromagnetic environment in which radiated RF disturbances are controlled. The customer or the user of this OMRON BPM including AC-adapter can help prevent electromagnetic interference by maintaining a minimum distance between portable and mobile RF communications equipment (transmitters) and the OMRON BPM including AC-adapter as recommended below, according to the maximum output power of the communications equipment.
- Page 54 Bluetooth SIG, ® Inc. and any use of such marks by OMRON HEALTHCARE Co., Ltd. is under license. Other trademarks and trade names are those of their respective owners. Apple and the Apple logo are trademarks of Apple Inc., registered in the U.S. and other countries.