
Related Manuals for Hawking HMPS2U

Summary of Contents for Hawking HMPS2U
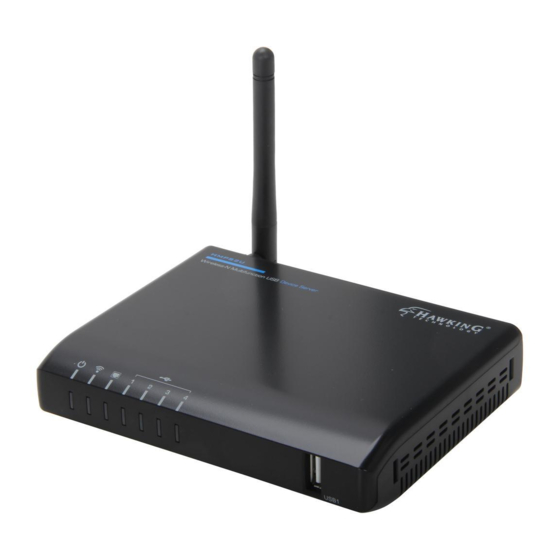
- Page 1 Wireless-N Multifunction USB Device Server HMPS2U website www.hawkingtech.com USER’S MANUAL e-mail techsupport@hawkingtech.com © COPYRIGHT 2015 HAWKING TECHNOLOGIES,INC. ALL RIGHTS RESERVED.
- Page 2 COPYRIGHT Copyright ©2015 by Hawking Technologies, Inc. All rights reserved. No part of this publication may be reproduced, transmitted, transcribed, stored in a retrieval system, or translated into any language or computer language, in any form or by any means,...
- Page 3 Federal Communication Commission Interference Statement FCC Part 15 This equipment has been tested and found to comply with the limits for a Class B digital device, pursuant to Part 15 of FCC Rules. These limits are designed to provide reasonable protection against harmful interference in a residential installation.
- Page 4 R&TTE Compliance Statement This equipment complies with all the requirements of DIRECTIVE 1999/5/EC OF THE EUROPEAN PARLIAMENT AND THE COUNCIL of March 9, 1999 on radio equipment and telecommunication terminal Equipment and the mutual recognition of their conformity (R&TTE). The R&TTE Directive repeals and replaces in the directive 98/13/EEC (Telecommunications Terminal Equipment and Satellite Earth Station Equipment) As of April 8, 2000.
-
Page 5: Table Of Contents
3.2.3 Methods for Setting the IP Address ........9 3.2.4 Server Names and Server Name Rules ......10 3.2.5 Setting the IP Address Using DHCP ........ 10 3.2.6 Setting the IP Address Using the HMPS2U Software..10 CHAPTER 4 USING THE HMPS2U ..........13 Introduction .............. - Page 6 CHAPTER 7 RESTORE FACTORY DEFAULTS ......... 36 Using the Server’s Web Pages ........36 Using Init Button............36 Default Parameters List ..........36 CHAPTER 8 UPGRADE FIRMWARE ..........38 CHAPTER 9 THE INIT BUTTON ............ 39...
-
Page 7: Chapter 1 Introduction
Chapter 1 Introduction Thank you for purchasing the HMPS2U Wireless-N Multifunction USB Device Server (in the following referred to as “Server”). This Server is designed to connect your Printers, Multifunction Printers, Speakers, Scanners, Fax, and USB hard drives, allowing all network users’... -
Page 8: Chapter 2 Product Overview
All packing materials are recyclable. Please confirm the items in the package below: This Server (HMPS2U) CD (Hawking Wireless-N Multifunction USB Device Server setup software, User’s Manual and Quick Installation Guide) Power Adaptor (12V/2A) ... -
Page 9: Supported Usb Devices
USB Indicator is lit when a USB device connects to a USB Port of this Server. Supported USB Devices The HMPS2U supports the following types of USB devices. USB Printer USB multifunction printer (MFP/AIO) USB scanner ... -
Page 10: Chapter 3 Basic Installation
Chapter 3 Basic Installation Connecting the Hardware 1. Make sure that your USB devices are switched off and that the Server’s Power Adapter is disconnected. 2. Connect the USB devices to the USB ports with the USB cables. 3. Connect the Server to the network with a twisted-pair category 5 cable, 10baseT or 100baseTX. -
Page 11: Server Names And Server Name Rules
3.2.4 Server Names and Server Name Rules The default server name of the Server is “HMPS2U”. If you put two or more Servers in your local area network, to avoid using the same server names you have to change the server names by using the setup software or the server’s web pages. - Page 12 Double click the highlighted server (or click the “Configure Server” button. This will open a web browser showing the web interface of the HMPS2U. Click the “CONFIG” button. Login with administrator ID (default: admin) and its password (default: admin).
- Page 13 Click the button corresponding to your choice of IP setting methods (static or dynamic using DHCP). When assigning a static IP address you also have to define Subnet Mask. The default IP of the HMPS2U is 192.168.1.100 Click Submit to save your settings. And the Server will reboot. You have now...
-
Page 14: Chapter 4 Using The Hmps2U
HMPS2U via TCP/IP. The simplest way to do this is using HMPS2U’s setup software to search for the HMPS2U server on the network and change its IP address to be the same subnet as your PC. If the server and your PC are not in the same TCP/IP subnet, the HMPS2U’s setup software will show the server in red, as shown in the following figure. -
Page 15: Installation Of A Usb Device
When the installation program asks you to plug-in the USB device, run the “Hawking Control Center” software. In the Control Center software, select the HMPS2U that has the desired USB device attached. Click the desired USB device as the following figure. - Page 16 Now, the installation program will detect the USB device and continue to install driver. After the installation is completed, click the USB device in the HMPS2U Software and then click the “Disconnect” button to disconnect the USB device. Note: On Mac, the “Disconnect” button is denoted by:...
-
Page 17: Auto-Connect Printer
Speakers, Cameras, cannot use this method. They must use the standard Manual Connect. A. In the HMPS2U software, click the USB device server that has the desired printer (or MFP) attached. B. Click the desired printer (or MFP). C. Click the “Auto Connect Printer” button and choose “Set Auto-Connect Printer”. - Page 18 D. Choose the desired printer. The desired printer must be the Windows printer (this is a logical printer) that matches the printer attached on the USB device server (this is a physical printer). Then click the “Apply” button. E. The printer will then be marked as an “Auto-Connected Printer” in red. If you choose “Auto-Connected Printer List”...
-
Page 19: Network Scanner
Try to issue a print job to the desired printer. You will see the HMPS2U will automatically do a connect operation and allow you to print. G. Even you already properly setup an auto-connected printer, the HMPS2U software must be running (in the background) while a print job is issued. This means you should have the HMPS2U software run every time after you login into your computer. - Page 20 C. Click the “Network Scanner” button. Note: On Mac, the “Network Scanner” button is denoted by You should see that the HMPS2U will automatically do a “connect” operation. The following window will appear. D. Choose one of TWAIN or WIA item. Click “OK”. The following window will appear.
-
Page 21: Usb Storage
E. Follow the usual steps to do scanning. After the scanning, close the “Auto-Connect Scanner” window. USB Storage You must use “manually connect” for USB storage. If the USB storage is a flash drive, the new disk is a “removable disk”. -
Page 22: Request To Connect
We offer a mechanism to notify the other user. It is called “Request to Connect”. Note: On Mac, the “Request to Connect” button is denoted by The user on one computer can click the “Request to Connect” button in the HMPS2U software. The following window appears. -
Page 23: Quitting The Hmps2U Setup Software
Quitting the HMPS2U Setup Software The HMPS2U setup software doesn’t really quit if you click the “X” box (close box) at the top right corner of the window. Instead, it just minimizes itself to the system tray. There are two ways to really close the software. -
Page 24: 4.11 Apple Airplay
B. Only one PC can get the ownership of the same USB device at the same time. 4.11 Apple Airplay™ Enjoy music from your iTunes library with the HMPS2U anywhere in your home. Requirements: USB Speakers attached to the HMPS2U Mac or Windows PC with iTunes 10+ iPad or iPhone or iPod Touch (iOS 4.3+) - Page 25 Streaming music stored in iPhone, iPod touch, or iPad directly to the HMPS2U If you update your “iPhone/iPod touch/iPad” to iOS 4.3 or later, you can stream music stored in your “iPhone/iPod touch/iPad” directly to your HMPS2U 1. Open the Music Player 2.
-
Page 27: Chapter 5 The Server's Web
The Server’s Web Pages Introduction The HMPS2U has a web user interface. Users may use the web pages to see the HMPS2U’s system status and configure the device. You may access this page by running the HMPS2U’s software and clicking configure or by directly typing in the IP address of the device into your web browser. - Page 28 Network Status Server Name: the network name of the HMPS2U Storage Access Mode: which storage mode the HMPS2U is in IP Address: the current IP address of the HMPS2U Subnet Mask: the current subnet mask of the HMPS2U ...
- Page 29 Wireless Status Station Name: Mac address of device SSID: Wireless name of network BSSID: Mac Address of connected AP Channel No.: Which wireless channel of connected network Network Type: Using ad-hoc or infrastructure Link Quality: Signal Quality of the Connected Network ...
-
Page 30: Setting Up Server Configuration
General USB Server Information: You have to set the Server Name, which is the name to represent the Server. Server Name: The network name of the HMPS2U. Workgroup: The workgroup name of the HMPS2U Description: This is an optional setting so you can put in a description of the ... - Page 31 Wireless: You can make your wireless settings for the HMPS2U here. Basic: Choose you wireless network type, infrastructure (if connected to a WiFi router/access point) or ad-hoc (if connected directly to another WiFI device). SSID is the name of the WiFi network you plan to connect to Security: If your WiFI network is secure, please type in your WiFi password.
- Page 32 WPS: You can click the WPS button for quick connect if your wireless network supports it. Press enter to go into the settings. PBC is for push button WPS. Press the WPS button on your wireless router/access point and then press the “Trigger” button on this page within 120 seconds.
- Page 33 Administrator: You can change administrator name and password. If you forgot administrator name and password, you must perform Restore Factory Default action by plugging in the power adaptor while pressing the Init button. Please refer to the chapter “Restore Factory Defaults”. Administrator: enter your desired administrator name.
- Page 34 You can also setup user accounts for your USB hard drives/flash drives. Type in a username and password and set the permission to read, read/write. Click add to add the user or select a previous user and click delete to remove them. Maintenance If you want to restore factory default values of the Server or ...
-
Page 36: Chapter 6 Troubleshooting
If firewall software has been installed on your PC, it may block the communication between the PC and the HMPS2U so that the HMPS2U cannot work properly. To solve this problem, either disable the firewall or configure the firewall to allow the following TCP... -
Page 37: Chapter 7 Restore Factory Defaults
Chapter 7 Restore Factory Defaults You may restore the HMPS2U default parameters by one of the following methods. Using the Server’s Web Pages 1. Go to the Server’s web page and click CONFIG 2. Enter administrator (default: admin) and password (default: admin). - Page 38 General Information Server Name: HMPS2U TCP/IP Automatically get IP by DHCP: Enabled Static IP: Disabled - IP Address: 192.168.1.100 - Subnet Mask: 255.255.255.0 User Accounts Administrator: admin Password: admin...
-
Page 39: Chapter 8 Upgrade Firmware
Servers and display their statuses. 3. Select the Server that you want to upgrade the firmware. Double click the selected Server to get into the HMPS2U’s web page. Check the system status page to make sure you need an upgrade. -
Page 40: Chapter 9 The Init Button
(by plugging in the power adaptor) the HMPS2U until the USB LED indicator simultaneously blink. After that, the HMPS2U will do the following tasks: A. Perform a Factory Default restoration of the HMPS2U, which will restore most of the parameters and settings to factory default values.