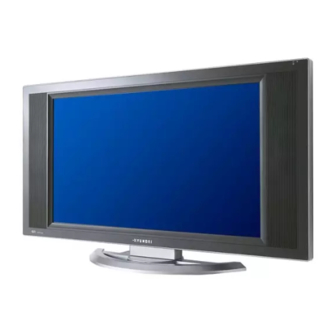
Hyundai HQL260WR User Manual
Hide thumbs
Also See for HQL260WR:
- User manual (85 pages) ,
- Service manual (85 pages) ,
- User manual (22 pages)

Related Manuals for Hyundai HQL260WR


Summary of Contents for Hyundai HQL260WR
- Page 1 FCC ID : PJILT26AW000 ATTACHMENT E -2. - USER’S MANUAL - REPORT NO. : HCT-F04-0303 HYUNDAI C–TECH...
-
Page 2: Customizing The Sound
Customizing the Sound Press the MENU button. Press the ( button to select the Sound group and press MENU the ( or OK button. FAVORITE Press the ( button to select Balance and press the button to adjust the sound balance. Press the ( button to select Equalizer and press the button. - Page 3 Adjusting the Speaker Volume & Selecting the Speaker Sound Source Press the MENU button. Press the ( button to select the Sound group and press MENU the ( or OK button. FAVORITE Press the ( button to select Volume (speaker). Press the ( button to adjust the speaker volume.
-
Page 4: Listening To Stereo Sound / Sap
Listening to Stereo Sound / SAP Depending on the particular program being broadcast, you can listen to stereo, mono, or a Secondary Audio Program. (SAP audio is usually a foreign-language translation. Sometimes SAP has unrelated information like news or weather.) Listening to Stereo Sound / Secondary Audio Program DISPLAY CLOCK ADD/ERASE... -
Page 5: Setting The Date And Time
Setting the Date & Time Press the MENU button. Press the ( button to select Clock and press the ( MENU OK button. FAVORITE Press the ( button to move between year Month Date. Press the ( or number (0~9) buttons to adjust the year Picture and repeat the above steps 3-4 to adjust the Month and Sound... -
Page 6: Setting The Preset Time ( On / Off )
Setting the Preset Time ( On / Off ) This function is available after you set the clock first. Press the MENU button. Press the ( button to select Clock and press the ( MENU or OK button. FAVORITE Press the ( button to select Clock in the Wake up mode and press the ( button to select the Hour or Minute. -
Page 7: Setting Restrictions On Button Input
Viewing the Closed Captions Setting the Closed Captions Picture Sound Clock Press the MENU button. Install Language Advanced Press the ( button to select the Advanced group and MENU : Previous : Select press the ( or OK button. INPUT : Exit OK : Select : Position The Advanced group are displayed with Caption selected. -
Page 8: Setting The Osd Display Time
Setting the OSD Display Time Advanced Press the MENU button. Caption Local Lock Press the ( button to select the Advanced group and Osd Timeout No Operation Timeout press the ( or OK button. No Signal Timeout Favorite Channel Press the ( button to select Osd Timeout. -
Page 9: No Signal Auto Power Off
No Signal Auto Power Off Automatically turns the power off if there is no broadcast signal or button pressed for some time. Press the MENU button. Advanced Caption Local Lock Press the ( button to select the Advanced group and Osd Timeout No Operation Timeout press the (... -
Page 10: Reducing Picture Noise
Reducing Picture Noise Use this function when you have a bad image with the picture noise. Advanced Press the MENU button. Caption Local Lock Press the ( button to select the Advanced group and Osd Timeout No Operation Timeout press the ( or OK button. -
Page 11: Display The Picture In Picture ( Pip )
Display the Picture in Picture ( PIP ) Press the PIP( ) button. You will see the PIP in the at upper right corner. INPUT Press the ( INPUT ) button to select the external signal source for the PIP. SIZE POSITION P.MODE... - Page 12 Display the Picture in Picture (PIP ) Changing the PIP Size Press the ( Size ) button on the remote control. The PIP will change among 6 different sizes whenever you INPUT press this button. SIZE POSITION P.MODE SWAP Changing the PIP Mode Press the ( P.Mode ) button on the remote control.
-
Page 13: Changing The Picture Size
Changing the Picture Size VIDEO INPUT Press the ( Aspect ) button on the remote control. STILL ASPECT SLEEP When you are viewing watch the Main image: The image will change as shown below whenever you P.MODE S.MODE S.EFFECT press this button. (16:9 Zoom Panorama) DISPLAY... -
Page 14: Connecting To The Pc
Connecting to the PC Rear of the PC Rear of the TV 15Pin D-Sub Cable Connect the 15Pin D-Sub Cable to the RGB INPUT port on the TV and output port on the Rear of the PC. To use the TV as a PC Display VIDEO INPUT Turn the PC on. -
Page 15: Setting The Pc Software
Setting the PC Software First, click on Settings on the Windows start menu and click on "Control Panel". Double click on the Display icon. Click on the Settings tab on the display dialog-box. Adjust the resolution to 1280x768 pixels. Click the Advanced button and click the Monitor tab on the dialog-box. -
Page 16: Adjusting The Screen Position
Adjusting the Screen Position Adjusting the horizontal position Geometry Picture Press the MENU button. Sound Clock Language Press the ( button to select the Geometry group and Advanced press the ( or OK button. MENU : Previous : Select INPUT : Exit OK : Select Press the ( button to select H.Position. -
Page 17: Adjusting Contrast
Adjusting the Screen Color Selecting the mode Geometry Picture Sound Press the ( ) button to select the mode. Clock The modes will change in the following order. Language Advanced Standard Sports Natural Mild Custom MENU : Previous : Select INPUT : Exit OK : Select : Position... -
Page 18: Standard Display Mode
Standard Display Mode If the signal from the system equals the standard signal mode, the screen will adjust automatically. If the signal from the system does not equal the standard signal, adjust the display mode as shown below referring to your video card instructions. Otherwise there will be no picture or only power may turn on. Resolution Horizontal (KHz) Vertical (Hz) -
Page 19: Troubleshooting
Troubleshooting For TV No picture or sound. Make sure the TV is plugged in. Make sure the power cord is connected to the consent correctly. Check the power failure. Screen is black. Make sure the external signal source mode is selected. Press the INPUT button to change to TV. - Page 20 Troubleshooting For Monitor no signal message Check if the signal cable(15Pin D-sub) is properly connected to the computer. (See page 32) cable" message This message may appear when the resolution and frequency of the video card in the computer are out the range of the TV. Select the proper resolution and frequency for the TV.
- Page 21 SpecificationsH Model name HQL260WR 26" Diagonal Size 566.4mm (H) 339.84mm (V) Display Size 0.4425mm (H) x 0.4425mm (W) Pixel Pitch Pixel Number 1280 RGB 768 Type a-si TFT active maxrix Brightness 500 cd / m Contrast Ratio 500 : 1...