Table of Contents
Advertisement
a WARNING: Read and follow all Safety Rules and Operating Instructions before
using this product. Failure to do so can result in serious injury.
Quick-Start Guide
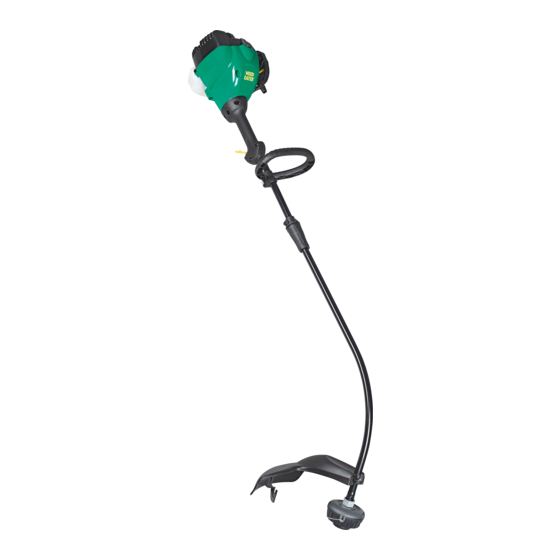
NOTE: Your product may differ slightly from the item shown.
ASSEMBLE SHAFT (MODELS WITH
KNOCKDOWN SHAFT)
a WARNING: To avoid personal injury or damage
to the unit, turn the unit off when assembling or
disassembling the shaft.
CAUTION: When assembling or disassembling the shaft,
place the unit on a flat surface for stability.
1. Align the tab on the coupler (A) with the slot on the
lower tube (B).
2. Press the lower shaft into the coupler until the tube
ends are touching (C).
3. Install the coupler knob (D) on the same side as the
screw head and tighten securely.
CAUTION: To avoid personal injury or damage to the unit,
periodically check to ensure the tube ends are touching
and the knob is tight.
ADJUST HANDLE
1.
Loosen wing nut on handle.
2.
Rotate the handle on the shaft to an upright position; retighten
wing nut.
ATTACH SHIELD
1.
Mount shield to bracket by inserting TAB (A) on shaft bracket into
SLOT (B) in shield.
2.
Rotate shield until bolt goes through bracket.
3.
Attach wing nut (C).
A
FILL TANK
Mix 2.6 oz. of full synthetic 2-Cycle Oil with 1 gallon of gasoline for a
50:1 mixture. Shake well. Pour into fuel tank.
CAUTION: Do not use alternate fuels such as ethanol blends above
10% by volume (E-15, E-85) or any methanol blended fuel.
590203801 Rev. A 2017-02-24
B
C
W25CB / W25CBK
W25SB / W25SBK
PLACE IN STARTING POSITION
Hold trimmer firmly on the ground (as shown).
START COLD ENGINE
Press the primer bulb 6 times firmly.
Move the choke lever to the full choke
(bottom) position.
Squeeze the throttle trigger while pulling
the starter rope handle 6 times rapidly.
Move the choke lever to the half choke
(middle) position.
Squeeze the throttle trigger while pulling
starter rope rapidly until the engine starts,
but no more than 6 pulls.
If the engine does not start, see
"STARTING A FLOODED ENGINE" in the
"OPERATION" section.
Move the choke lever to the run (top)
position.
Allow the engine to warm up for one minute.
START HOT ENGINE
Follow steps 4-6 in
START COLD ENGINE.
LT25NCOP
LT25NSOP
Advertisement
Table of Contents

Summary of Contents for Weed Eater W25CB
- Page 1 W25CB / W25CBK a WARNING: Read and follow all Safety Rules and Operating Instructions before using this product. Failure to do so can result in serious injury. W25SB / W25SBK Quick-Start Guide NOTE: Your product may differ slightly from the item shown.
- Page 2 Keep cutting line at proper length. manual. Never allow children to operate this unit. • Use only recommended WEED EATER brand line. Never use wire, rope, string, etc. a WARNING: Never use blades or flailing devices. This •...
- Page 3 CUTTING SAFETY reach sparks or open flames from water heaters, electric motors or switches, furnaces, etc. • Store unit so line limiter blade cannot accidentally cause a WARNING: Inspect the area before each use. injury. The unit can be hung by the shaft. Remove objects (rocks, broken glass, nails, wire, etc.) •...
- Page 4 OPERATION KNOW YOUR TRIMMER Compare the illustrations with your unit to familiarize yourself with the location of the various controls and READ THIS INSTRUCTION MANUAL AND SAFETY adjustments. Save this manual for future reference. RULES BEFORE OPERATING YOUR UNIT. A. Curved shaft models 2.6 fluid ounces of oil with 1 gallon of unleaded gasoline.
- Page 5 OPERATING INSTRUCTIONS PERSONAL PROTECTIVE EQUIPMENT STARTING A COLD ENGINE (OR A HOT ENGINE AFTER RUNNING OUT OF FUEL) Press the primer bulb 6 times firmly. Always wear: Move the choke lever to the full choke (bottom) position. 1. Hearing protection 2.
- Page 6 If any dealer other than an authorized service dealer FUEL TANK performs work on the product, WEED EATER may not pay for repairs under warranty. It is your responsibility to Discontinue use of unit if fuel tank, fuel cap, and/or fuel maintain and perform general maintenance.
- Page 7 MUFFLER AND SPARK ARRESTING SCREEN Wipe off unit with a clean dry cloth. As your unit is used, carbon deposits build up on the CLEAN AIR FILTER muffler and spark arresting screen. A dirty air filter decreases engine performance and For normal homeowner use, however, the muffler and increases fuel consumption and harmful emissions.
- Page 8 2. Remove trimmer head by turning counterclockwise 7. Position the lines in the guide slots. (looking from bottom of unit). 3. Thread replacement trimmer head onto the shaft by turning clockwise. Tighten until secure. STRAIGHT SHAFT MODELS 1. Align hole in the dust cup with the hole in the side of the gearbox by rotating the dust cup.
- Page 9 • Store unit and fuel well out of the reach of children. During storage of your gas/oil mixture, the oil will separate from the gas. SEASONAL STORAGE We recommend that you shake the gas can weekly to Prepare unit for storage at end of season or if it will not be insure proper blending of the gas and oil.
- Page 10 U.S. EPA / CALIFORNIA / ENVIRONMENT CANADA EMISSION CONTROL WARRANTY STATEMENT IMPORTANT: This product is compliant with U.S. EPA Phase 3 regulations for exhaust and evaporative emissions. To ensure EPA Phase 3 compliance, we recommend using only genuine replacement parts. Use of non-compliant replacement parts is a violation of federal law.


