Table of Contents
Advertisement
Advertisement
Table of Contents

Related Manuals for Polaroid PDM-0752


Summary of Contents for Polaroid PDM-0752
- Page 1 7” Swivel Screen Portable DVD Player PDM-0752 User’s Manual 20060807...
-
Page 2: Important Safety Instructions
Important Safety Instructions CAUTION: TO REDUCE THE RISK OF ELECTRIC SHOCK, DO NOT REMOVE COVER (OR BACK). NO USE-SERVICEABLE PARTS INSIDE. REFER SERVICING TO QUALIFIED SERVICE PERSONNEL. WARNING: TO REDUCE THE RISK OF FIRE OR ELECTRIC SHOCK, DO NOT EXPOSE THIS APPLIANCE TO RAIN OR MOISTURE. - Page 3 Important Safety Instructions CAUTION: These servicing instructions are for use by qualifi ed service personnel only. To reduce the risk of electric shock, do not perform any servicing other than that contained in the operating instructions unless you are qualifi ed to do so. Refer to service manual for servicing instructions.
-
Page 4: Copyright Protection
To fi nd out how to properly dispose of this product, please go to www.polaroid. com and click on “Company“ or call the customer service number for your country listed in the instruction manual. -
Page 5: Features
High-quality Audio and Video • Excellent Sound: Dolby Digital Decoder delivers great sound. • AV Input: External audio, video can be connected to most external AV sources. • AV Output: Analog audio output can be connected to external amplifi er. Advanced Playing Functions •... -
Page 6: Accessories
ITEM ITEM Note: Accessories and their parts numbers are subject to change without prior notice. Accessories NAME NAME Power Supply Cord with AC Adaptor Rechargeable Battery Pack DC Adapter (Car Adapter) Audio/Video Cord Operation Manual... -
Page 7: Table Of Contents
Important Safety Instructions Features Accessories View of Front Panel View of Side Panels View of Bottom Panel Revolving LCD Screen System Connections Power Supply Rechargeable Battery Notes on Discs Playback Operation DVD Playback CD Playback JPEG Playback System Setup Defi nitions Troubleshooting Specifi... -
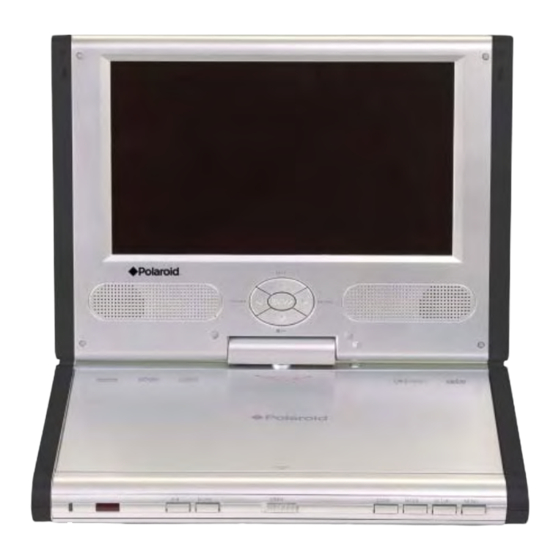
Page 8: View Of Front Panel
LCD screen / /+ button: press to select different items; press + button to increase the level of brightness, contrast, and color. / /- button: press to select different items; press press the (PLAY) button to resume playback from the stopped spot; press the MODE button and then press the - button to decrease the level of brightness, color, and contrast. -
Page 9: View Of Side Panels
Ride Side View Volume Control Knob: Used to adjust the volume of headphones and speaker Headphone Jack: Used to connect to headphones for private listening. When headphone is plugged in, the speakers will automatically turnoff. Audio Input/Output Jack: For connecting to an external amplifi er or audio source Video Input/Output Jack: For connecting to an external monitor or video source AV IN/OUT Switch: Switch to “IN”... -
Page 10: View Of Bottom Panel
View of Bottom Panel Rechargeable Battery Contacts: For connecting the rechargeable battery pack... -
Page 11: Revolving Lcd Screen
Revolving Steps The revolving LCD screen is one of the outstanding features about this product. Here are some suggested steps for proper operation: Revolving LCD Screen Open the screen cover to position (A) as shown at left, where the screen is vertical to the operation panel. Revolving the screen horizontally about its axis in the clockwise only. -
Page 12: System Connections
• Always endure that the DVD player, TV, and any other electrical equipment to be connected are switched off and unplugged from the power supply. • Ensure that you observe the color coding when connecting audio and video cables. Connecting to a TV Follow the drawing below to connect the DVD player to the TV’s audio/video input with the audio/video cables. -
Page 13: Power Supply
Using the AC Adapter The player is supplied with an AC adapter for powering the unit and charging the batter. Connect the AC adapter to the left side of the DVD player in the pack marked DC 9.5/12V IN. Plug the two-prong end of the power cord into a grounded electrical outlet. The power indicator lights red when charging the battery and green when complete. -
Page 14: Rechargeable Battery
About Your Rechargeable Battery Pack Your portable DVD player comes with a lithium ion polymer rechargeable battery that attaches to the bottom of the DVD player. Charge the battery fully before initial use. Charging time is normally about 5 hours. A fully- charged battery delivers about 3 hours of use, but playing time varies disc to disc. -
Page 15: Attaching The Battery Pack
Attaching the Battery Pack With one hand on the DVD player to prevent it from moving, take the battery and align the plastic tabs on the battery pack with the holds on the player, and push the battery pack into the DVD player. Slide the battery pack until you hear it click and lock in place. -
Page 16: Notes On Discs
Compatible Disc Formats JPEG Operation methods of some DVD discs are specifi ed by the software manufacturer. Please follow the instructions of the disc. Care of Discs Holding Discs • When loading or removing discs, try not to touch their play surfaces. Cleaning Discs •... -
Page 17: Playback Operation
Please read the following instructions carefully before using your Warning: To avoid damaging the lens, do not play poor quality discs. Pre-Operation Connect the unit to power supply through the provided AC adaptor. Switch POWER ON/OFF to ON to turn the DVD player on. Push the OPEN switch on the unit to open the disc tray cover. -
Page 18: Dvd Playback
Features are available on both the DVD player and remote control unless otherwise noted. DVD Playback ENTER/ENT button PAUSE/ button STOP/ button MENU button ZOOM button & buttons & buttons SLOW button Playback Operation When you load a disc in, the player will search the disc and play it automatically. -
Page 19: Cd Playback
CD Playback Press the PAUSE/ PAUSE/ button to resume normal playback. During playback, press the STOP/ ■ button once to stop and then press the PLAY/ STOP/ ■ button pressed. Press the STOP/ ■ button twice repeatedly to stop playback completely. Press the it (and hold it several seconds) repeatedly, the fast forward/rewind playback will be buttons... -
Page 20: Rotating Pictures
JPEG Playback (continued) Rotating Pictures While viewing a picture, use the direction buttons to rotate the picture. ► Press the button to rotate the current picture clockwise: ◄ Press the button to rotate the current picture counterclockwise: ▲ Press the button to fl... -
Page 21: System Setup
You can change the default settings of this unit to customize its performance to your own preferences. Note: Program the system while playback is stopped completely or there is no disc in the payer. To Set up your system: Press the SETUP button and the setup menu will appear on the screen. Press the direction buttons to select a sub-menu to program and press the ENT/ENTER button to access. -
Page 22: Speaker Setup
General Setup (continued) Speaker Setup System Setup SCREEN SAVER • This item is used to turn on and off the screen saver. • Press the buttons to highlight this item. • Press the button to access. • The default setting of this unit is on. •... -
Page 23: Dolby Digital Setup
Dolby Digital Setup Video Setup System Setup DUAL MONO • This item is used to set the channel output mode. • Press the buttons to highlight this item. • Press the button to access. • It includes L-mono, R-mono, and Mix-mono, Stereo by default. •... -
Page 24: Preferences Setup
Video Setup (continued) Preferences Setup System Setup CONTRAST • This item is used to set the contrast of the screen. • Press the buttons to highlight this item. • Press the button to access. • It includes High, Medium, Low, low by default. •... - Page 25 Preferences Setup (continued) System Setup DISC MENU • This item is used to set the menu langauge • Press the buttons to highlight this item. • Press the button to access. • There are several languages for you to choose. •...
-
Page 26: Defi Nitions
Letterbox screen This refers to a screen on which the playback picture of wide-screen DVDs appears with black bands running along the top and bottom. Pan & Scan screen This refers to a screen on which the playback picture of wide-screen DVDs is cut off at the left and right sides. Title, Chapter (DVD) DVDs are divided into some large sections (titles) and some small sections (chapters). -
Page 27: Troubleshooting
If you suspect there is something wrong with the DVD player, immediately turn off the power. Disconnect the power connector and check that there is no smoke or excessive heat coming from the unit. Never open or try to repair the unit yourself. There are no user serviceable parts inside. PROBLEM The player cannot play There is no sound... -
Page 28: Specifi Cations
“Dolby” and the double-D symbol are trademarks of Dolby Laboratories. Confi dential unpublished works. © 1992-1997 Dolby Laboratories, Inc. For service, support and warranty information, visit www.polaroid.com. “Polaroid” and “Polaroid and Pixel” are trademarks of Polaroid Corporation, Waltham, MA, USA. Specifi cations 7 inches (16:9)