Table of Contents
Advertisement
Advertisement
Table of Contents

Related Manuals for Polaroid ProCamCamera


Summary of Contents for Polaroid ProCamCamera
-
Page 2: Important Safeguards
POLAROID SERVICE CENTER. 5. TO AVOID ELECTRICAL SHOCK HAZARDS, DO NOT DISASSEMBLE UNIT. SERVICE OR REPAIR WORK MUST BE DONE ONLY BY AN AUTHORIZED POLAROID SERVICE CENTER. INCORRECT REASSEMBLY CAN CAUSE ELECTRICAL SHOCK WHEN UNIT IS USED AGAIN. DO NOT IMMERSE IN WATER OR OTHER FLUIDS. -
Page 3: Table Of Contents
Table of contents 5 Camera features 8 Opening and closing the camera 9 Loading the film 9 Cleaning the rollers 10 Removing an empty film pack 10 Framing the subject 11 Taking the picture 12 Lighten/Darken control 13 Autofocus system 14 Automatic flash system 15 Date display buttons 18 ProCam Close-up Lens... -
Page 5: Camera Features
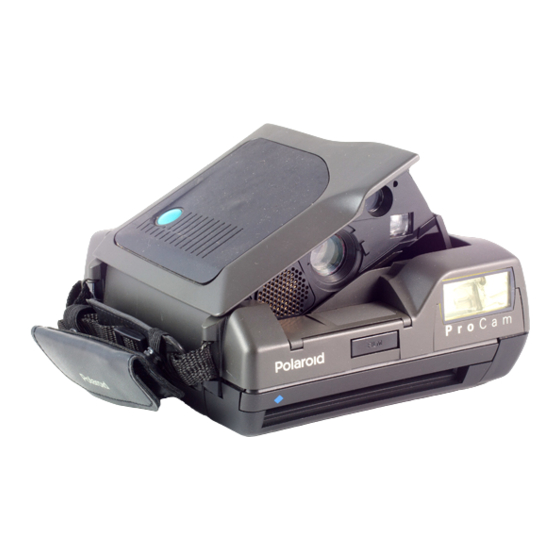
Camera features The Polaroid ProCam is a rugged, portable, folding camera designed to meet the needs of business users for documentation, verification and identification. It has a wide angle lens and can focus on subjects as close as 18 inches (46cm) to meet a wide range of photographic requirements. - Page 7 The control panel (picture 2) a Release latch: Slide it up to open the camera. b Exposure control: Set it to normal for most pictures. Slide the but- ton up to lighten or down to darken a picture. c Sonar autofocus override: Slide the switch up to turn off the auto- focus system (i.e., for pictures through glass).
-
Page 8: Opening And Closing The Camera
Opening and closing the camera To open the camera Slide your right hand through the hand strap and hold the camera as you would a pair of binoculars (picture 3). Slide the OPEN switch on the back of the camera’s control panel. -
Page 9: Loading The Film
film. Spectra/lmage The film pack contains a Other mercury-free battery. Polaroid films cannot be used with this camera. When the camera is open, push the film door release button in the front of the camera. The film door will open. Hold the film... -
Page 10: Removing An Empty Film Pack
Removing an empty film pack Remove the empty film pack when loading a new pack into the camera. When the film pack is empty, the picture counter on the control panel sets to zero and you will hear three chimes when the camera is open and when the shut- ter button is pressed. -
Page 11: Taking The Picture
Taking the picture Slide your right hand through the hand strap and hold the camera as you would a pair of binoculars (picture 7). Rest your index finger on the shutter button. Look through the viewfinder to frame your subject. Press the shutter button then release while holding the camera steady until all motor sound stops and the picture has... -
Page 12: Lighten/Darken Control
Lighten/Darken control Use the exposure control when you want to a picture to retake make it lighter or darker. When retaking a picture to make it Slide the control lighter: all the way up. When retaking a picture to make it Slide the control darker: all the... -
Page 13: Autofocus System
Autofocus system The ProCam has a computerized sonar autofocus system which uses sound waves to measure accurately the distance to your subject and set the lens. Check that the AF switch on the control panel is set on the following: Photographing a distant scene through glass To avoid focusing on the glass... -
Page 14: Automatic Flash System
Automatic flash system Every time you take a picture, indoors or outdoors, your camera blends light from the scene with just enough flash to provide the right lighting for the best possible picture. Wait for the flash charge/ ready light on the control panel to be READY (green) before taking a flash picture. -
Page 15: Date Display Buttons
Date display buttons The date display buttons (picture 9) on the control panel allow you the option to imprint a date and/ or time (1.8mm high) in the upper left-hand corner of your photo- graphs. The date display buttons are used to set the display to Jap- anese, U.S. - Page 16 It has a life expectancy of approximately five years. If the LCD appears dim when the camera is in the closed position, your date display battery needs replacement. Contact the nearest Polaroid office listed in this instruction book.
-
Page 18: Procam Close-Up Lens
1 Orient the Close-up Lens onto the front of the camera as shown in the illustration with the word “Polaroid” facing out. 2 Position the lens (a) over the cam- era lens, first seating the lower tab behind the lens guard (g). - Page 19 field is not visible. Retake your picture. If this does not correct the problem, review this sec- tion or call us at the nearest Polaroid Service Center. See page 25.
-
Page 20: Troubleshooting
Troubleshooting Blurry picture Cause When subject is not centered in • the picture, the sound waves pass by the subject and measure the distance to the background. This causes the subject to be unsharp because the lens focuses on the background. - Page 21 Background too dark Cause Background too far from subject • or beyond flash range. Solution • Be sure the exposure control is in the center position; place subject near a background and keep both within the 18 in. to 18 feet (46cm to 5.5m).
- Page 22 Cause When a bright source of light • (such as lamplight) is in the central part of the scene and in front of the subject, the camera’s photocell will measure the bright light, caus- ing the subject to be too dark. Solution Move the source of light to one •...
-
Page 23: Full Lifetime Warranty
(original owners only). See Your war- ranty options. To obtain warranty service, please call Polaroid at the toll-free number listed or write to the Polaroid Resource Center, 784 Memorial Drive, Cambridge, Massa- chusetts 02139-4688. -
Page 24: Camera, Film Specifications
Date and/or time imprint 1.8mm high in picture. Film advance Automatic film advance; motorized picture ejection. Film Polaroid Spectra or Image color film only. Starts developing in seconds. Ten pictures per pack. Film size Outer border: 4 x 4.06 in. (10.1 x 10.3cm). - Page 25 Polaroid office listed in this instruction book. If you write, please explain the nature of the problem and, if possi- ble, enclose sample pictures.
- Page 26 This device complies with Part 15 of the FCC rules. Operation is sub- ject to the following two condi- tions: This device may not cause harm- • ful interference. This device must accept any inter- • ference received, including inter- ference that may cause undesired operation.