Table of Contents
Advertisement
Advertisement
Table of Contents

Related Manuals for Polaroid a700


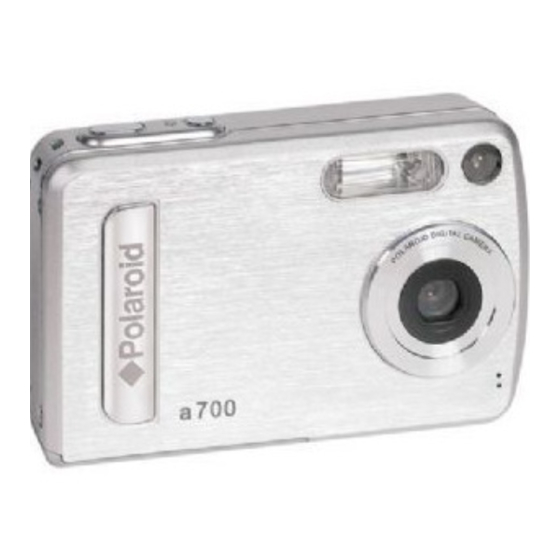
Summary of Contents for Polaroid a700
-
Page 1: User Guide
User Guide a700 7.0 Megapixel Digital Camera www.polaroid.com... -
Page 2: Product Overview
15. Wrist strap holder 16. Mode button 17. Flash / Up button 18. Self-timer / Right button 19. Down button 20. LCD screen on / off button 21. OK button Product Overview � � � � Polaroid Digital Camera User Guide www.polaroid.com... - Page 3 22. Tripod mount 23.USB port 24.Battery / SD card door Polaroid Digital Camera User Guide www.polaroid.com...
-
Page 4: Table Of Contents
• Setting the Image Size and Compression ...30 • Setting Exposure Compensation for Pictures ...33 • Changing the ISO Speed ...34 • Setting White Balance for Pictures...35 • Setting the Sharpness...36 • Setting Light Metering ...37 Table of Contents Polaroid Digital Camera User Guide www.polaroid.com... - Page 5 • Computer System Requirements ...67 9 Transferring Pictures and Video Clips to a Computer ...68 • Before Transferring File..68 • Connecting to Your Computer ...68 • Transferring Pictures and Video Clips to a Computer...69 10 Troubleshooting Problems...70 Polaroid Digital Camera User Guide www.polaroid.com...
- Page 6 • ArcSoft Software Help...74 12 Appendix...75 • Technical Specifications...75 • Capacity of SD Card...77 • Uninstalling Polaroid Digital Camera Driver (PC Only) ...80 • Camera Default Settings ...81 • Tips, Your Safety & Maintenance ...82 • Regulatory Information...83 Polaroid Digital Camera User Guide...
-
Page 7: Getting Started
Designed to be the flagship for Polaroid digital cameras, this Polaroid digital camera has a inch color LCD for viewing images. Your camera is the perfect choice for the photographer looking for point and shoot simplicity with excellent performance and a variety of features. -
Page 8: Camera Package Contents
���� Quick Start Guide Warranty Card 4 X AAA Battery The CD-ROM includes a700 Digital Camera Driver (PC only) ArcSoft® PhotoStudio® 5.5 (PC) /ArcSoft® PhotoStudio® 4.3 (Mac) ArcSoft PhotoPrinter® 5 Beta (PC) /ArcSoft PhotoPrinter® 4 (Mac) Adobe® Acrobat® Reader™ (PC&Mac) -
Page 9: Attaching The Wrist Strap
• Attaching the Wrist Strap Polaroid Digital Camera User Guide www.polaroid.com... -
Page 10: Using Your Battery
Please replace the battery immediately. 3.We recommend user to use Ni-mh rechargeable battery. icon appears on the LCD screen. icon appears on the LCD screen Polaroid Digital Camera User Guide www.polaroid.com... -
Page 11: Turning The Camera On And Off
On LED screen turns on. 2.Press the button again to turn off the camera. IMPORTANT! All operations, including taking pictures and video clips, and adjusting settings for shooting and playback, are performed while the camera is powered on. Polaroid Digital Camera User Guide www.polaroid.com... -
Page 12: Camera Setting
Auto Flash * Red-eye Reduction Flash Always Slow Sync X2.0 3072X2304 Histogram Focus Frame Polaroid Digital Camera User Guide 2-SEC. Self-timer 10-SEC. Self-timer Digital Zoom Status Number of pictures that can be taken Image Size 3072 x 2304* 2304 x 1728... - Page 13 Value ISO Sensitivity Auto White Balance Auto * Daylight Cloudy Tungsten Fluorescent Light metering Average * Center Spot * Default setting Polaroid Digital Camera User Guide www.polaroid.com Sharpness Strong Normal * 3072 X2304 Soft Compressin Super Fine * Fine Normal...
-
Page 14: Video Mode
Tungsten Fluorescent Playback Mode Locked File File Type Picture Video Clip SD Card Recording Indicator ELapsed Time Video Resolution 320 x 240 640 x 480 * 0001/0002 File Number 2004/09/05 Date and Time 13:05:12 Polaroid Digital Camera User Guide www.polaroid.com... -
Page 15: Camera Modes
Use the up and down buttons to scroll up and down, and use the left and right buttons to scroll left and right. Use the your choice. The currently selected option will be accessed and takes effect immediately. Polaroid Digital Camera User Guide www.polaroid.com button to confirm... -
Page 16: Setup Menu
The setup menu can be accessed in all two working modes to customize your camera settings. Here we take the Press the button to access the main menu. Press the select the SETUP option. mode for an example. button to Polaroid Digital Camera User Guide SETUP SETUP STRONG AVERAGE SETUP SETUP SETUP FORMAT... - Page 17 SETUP submenu. Use the button to enter the next submenu for that particular option. LANGUAGE DEFAULT SETTING Polaroid Digital Camera User Guide www.polaroid.com buttons to select a setup option and then press the SETUP SETUP FORMAT...
-
Page 18: Setting The Current Date And Time
7. Press the button. button to select “DATE button to select the button to select “DATE button to adjust the value Polaroid Digital Camera User Guide SETUP SETUP FORMAT DATE / TIME AUTO OFF BEEP... -
Page 19: Setting Auto Power Off
• While the camera is running a slide show. • While the camera is connecting to PC, printer. Polaroid Digital Camera User Guide www.polaroid.com button to confirm The camera is designed to switch off automatically to save battery life after the specified period of inactivity. -
Page 20: Setting The Beep Sound On / Off
4. Select the frequency of your own country using button. Press the confirm your choice. NOTE: 50 HZ For European users For United States users 60 HZ button. button to Polaroid Digital Camera User Guide www.polaroid.com SETUP SETUP FORMAT DATE / TIME AUTO OFF BEEP FREQUENCY BEEP... -
Page 21: Setting The Display Language
3. Press the button to access the DATE STAMP submenu. 4. Select ON or OFF using the Press the button to confirm your choice. Polaroid Digital Camera User Guide www.polaroid.com button to confirm your button. SETUP SETUP LANGUAGE DATE STAMP... -
Page 22: Changing The Usb Mode Between Msdc And Pictbridge
Mass storage is the driver type by default. MSDC(Mass Storage Digital Camera) is a computer interface between a computer and a digital camera which shows the digital camera as a removable disk drive attached to the computer. You may view and download pictures and video clips stored in your camera’s internal memory... -
Page 23: Restoring Default Settings
3. Press the button. 4. Select OK using the button to restore default settings. NOTE: Selecting CANCEL will cancel the operation and return to the previous menu. Polaroid Digital Camera User Guide www.polaroid.com button. Press the SETUP SETUP LANGUAGE DATE STAMP... -
Page 24: Switching The Information Display And Lcd Screen On And Off
The LCD Screen can be changed by pressing the 3072X2304 Press LCD screen on with basic information display 3072X2304 Press LCD screen on with basic information and a histogram Press Polaroid Digital Camera User Guide button. LCD screen on with information display off www.polaroid.com... - Page 25 LCD screen on with detailed information displayed mode: LCD screen on with basic information display Polaroid Digital Camera User Guide www.polaroid.com Press LCD screen on with information display off Press 0001/0002 Press 2006/01/01 12:00:00 LCD screen on with information display off...
-
Page 26: Taking Pictures
Most settings are saved by the camera when the power is turned off so that the same setting is automatically available when the power is turned on again. Make sure you verify your settings when turning the camera on again. 3 Taking Pictures Polaroid Digital Camera User Guide www.polaroid.com... - Page 27 1. Press the mode button to set the camera to the Still Image mode. 2. Frame your subject using the LCD screen. 3. Hold the camera steady and slowly press the shutter button down to take your image. Polaroid Digital Camera User Guide www.polaroid.com 3072 X2304...
-
Page 28: Setting Flash Mode
1.0 m (3.3 ft) to 2.2 m (7.3 ft) 1. Press the mode button to set the camera mode 2. Press the button to cycle through the flash options and select the one you need. Polaroid Digital Camera User Guide www.polaroid.com... - Page 29 There is a slight delay in the flash than it does in Auto. NOTE: Never touch or block the flash with your fingers. Doing so can damage these components and interfere with the correct flash operation. Polaroid Digital Camera User Guide www.polaroid.com Icon shown Select this mode on the LCD screen...
-
Page 30: Setting The Image Size And Compression
3072X2304 pixels is the default and optimal image size setting. It is recomended to use this setting for printing. button to confirm button to give up Polaroid Digital Camera User Guide IMAGE SIZE IMAGE SIZE 3072 X 2304 SUPER FINE... - Page 31 COMPRESSION submenu. 5. Select the compression you prefer using the Press the button to confirm your choice, press the to give up confirmation and return previous. Polaroid Digital Camera User Guide www.polaroid.com button. button COMPRESSION COMPRESSION 3072 X 2304 SUPER FINE...
- Page 32 Therefore, the number of picture or the length of video clips you can store on a memory card may vary. The number of pictures on the LCD screen is for reference only. Fine Super Fine Polaroid Digital Camera User Guide Normal www.polaroid.com...
-
Page 33: Setting Exposure Compensation For Pictures
• When shooting under very dark or very bright conditions, you may not be able to obtain satisfactory results even if performing exposure compensation. Polaroid Digital Camera User Guide www.polaroid.com enter button. -
Page 34: Changing The Iso Speed
The higher the ISO value, the less light needed to make an exposure, allowing the same exposure to be achieved with higher shutter speeds or smaller apertures. In a digital camera, higher ISO value allows higher shutter speed, at the expense of mottle or grain appearing in the final picture. -
Page 35: Setting White Balance For Pictures
When shooting under these conditions Automatic adjustment Outdoor sunny day Cloudy Indoors, illuminated by light bulbs Indoors, illuminated by cool white fl uorescent lighting Polaroid Digital Camera User Guide www.polaroid.com Select this setting Auto Daylight Cloudy Tungsten Fluorescent WHITE BALANCE... -
Page 36: Setting The Sharpness
Increases contrast on the edge of the picture. Image color noise may occur. NORMAL The edges of the image are sharp, this is suitable for printing. SOFT Softens the edge of the picture. button to select the Polaroid Digital Camera User Guide SHARPNESS SHARPNESS STRONG AVERAGE SETUP SHARPNESS... -
Page 37: Setting Light Metering
Similar to Center, except the metering is concentrated on a smaller area of the subject centered on the LCD. Ideal when an exact exposure of a specifi c area in the picture is needed. Polaroid Digital Camera User Guide www.polaroid.com LIGHT METERING LIGHT METERING... -
Page 38: Setting Self-Timer
Your camera is designed with a self-timer function which allows you to take pictures with the 2-second or 10-second built-in timer. Press the mode button to set the camera mode to Press the right/self-timer button to select Self-timer. Polaroid Digital Camera User Guide www.polaroid.com... -
Page 39: Zoom Feature
Zoom Out button. NOTE: • You may notice a decrease in image quality when using the digital zoom. • Digital zoom feature is also available in Video and Playback modes. Polaroid Digital Camera User Guide www.polaroid.com X2.0X3.0X4.0 X2.0... -
Page 40: Recording Video Clips
• The zoom feature is not available during recording video clips. • The length of clips may vary with scene complexity. Recording Indicator icon will appear on the LCD screen. Recording Polaroid Digital Camera User Guide Video Time Elapsed www.polaroid.com... -
Page 41: Setting Video Image Size
Please refer to “Capacity of SD Card” on page 77 for further details. Resolution: 640 x 480 320 x 240 Polaroid Digital Camera User Guide www.polaroid.com IMAGE SIZE IMAGE SIZE 640 X 480 AUTO... -
Page 42: Setting White Balance For Video Clips
Indoors, illuminated by cool white fl uorescent lighting button to select White button . Select this setting Auto Daylight Cloudy Tungsten Fluorescent Polaroid Digital Camera User Guide WHITE BALANCE WHITE BALANCE 640 X 480 AUTO SETUP WHITE BALANCE WHITE BALANCE AUTO DAYLIGHT... -
Page 43: Managing Pictures And Video Clips
LCD screen with the latest displayed file highlighted. Use the in full screen by pressing the Polaroid Digital Camera User Guide www.polaroid.com buttons to select a thumbnail file and view it button. -
Page 44: Playing The Video Clip
4. Select ON or OFF using the 5. Press the button to confirm your choice, press the your confirmation and return previous. Movie button. button to give up Polaroid Digital Camera User Guide www.polaroid.com 0001/0002 2004/09/05 13:05:12 MENU MENU ERASE... -
Page 45: Running A Slide Show
5. Press button to select ON. The slide show will automatically run from the currently displayed picture after you press the button. Press the shutter button to exit. Polaroid Digital Camera User Guide www.polaroid.com AUTO PLAY AUTO PLAY ERASE PROTECT... - Page 46 1, 10 SECONDS Every picture will continually exist on the LED at an interval of 1,10 seconds. AUTO PLAY AUTO PLAY SETUP SLIDE SHOW SLIDE SHOW DIRECTION INTERVAL SLIDE SHOW SLIDE SHOW 1 SEC 10 SEC Polaroid Digital Camera User Guide www.polaroid.com...
- Page 47 NOTE: The slide show will keep running as long as all the pictures or video clips stored in the camera are displayed. Polaroid Digital Camera User Guide www.polaroid.com AUTO PLAY AUTO PLAY SETUP SLIDE SHOW...
-
Page 48: Deleting Picture(S) And Video Clip(S)
Erase the selected picture or video clip. Please select the picture or video you want to delete before pressing the Erase button. Erase all pictures and video clips stored in the current memory. Polaroid Digital Camera User Guide WHITE BALANCE WHITE BALANCE ERASE PROTECT... -
Page 49: Print Setting
Refer to "Camera/Printer Connection" on page 53 for details. 4. Select print settings. Use the camera's function and navigation buttons to select the print settings. Refer to page 54 for details. 5. Printing Press the button to start printing. Polaroid Digital Camera User Guide www.polaroid.com 6 Print Setting... -
Page 50: The Button
“CONTINUE”. In that case, select “CANCEL” and press button. MENU MENU DELETE PROTECT SLIDE SHOW COPY TO CARD PRINT SETTING PICTBRIDGE PICTBRIDGE PICTBRIDGE DPOF PLEASE PLEASE CONNECT TO DEVICE CONNECT TO DEVICE Polaroid Digital Camera User Guide www.polaroid.com... - Page 51 NO MARKING AGENT INK COVER IS OPENED NO INK CARTRIDGE SPECIFIED INFO IS TOO LARGE FILE DECODE ERROR Polaroid Digital Camera User Guide www.polaroid.com Paper cassette runs out of paper. Paper is not loaded or incorrectly loaded. Paper is not ejected correctly.
- Page 52 Connect the camera with the printer via a USB cable. Press the button. NOTE: To print a single image, select the image before enabling PictBridge mode. button to select Polaroid Digital Camera User Guide PICTBRIDGE PICTBRIDGE PICTBRIDGE DPOF PLEASE PLEASE...
- Page 53 Not following this sequence will result in connection failure. Polaroid Digital Camera User Guide www.polaroid.com Plug USB cable into the port of your camera marked socket on your printer.
- Page 54 Number of Copies Print Layout DEFAULT File Name On/Off DEFAULT Date Stamp On/Off DEFAULT Paper Size DEFAULT button and select setting contents button to start printing. Polaroid Digital Camera User Guide PICTBRIDGE PICTBRIDGE THIS IMAGE ALL IMAGES ALL INDEX www.polaroid.com...
- Page 55 NAME”. 2. Press the button to select “DEFAULT” or “OFF”. DEFAULT Print settings differ according to the printer model. Print without the file name. Polaroid Digital Camera User Guide www.polaroid.com NUMBER OF COPY NUMBER OF COPY DEFAULT DEFAULT DEFAULT DEFAULT...
- Page 56 DATE PRINT DEFAULT DEFAULT DEFAULT DEFAULT PAPER SIZE PAPER SIZE DEFAULT DEFAULT DEFAULT DEFAULT PROGRESSING 1/1 PROGRESSING 1/1 LEFT KEY TO CONTINUE LEFT KEY TO CONTINUE RIGHT KEY TO CANCEL RIGHT KEY TO CANCEL Polaroid Digital Camera User Guide www.polaroid.com...
-
Page 57: About Dpof
The selected picture in the memory card will be printed up to 99 copies. ALL IMAGES All pictures in the memory card will be printed up to 99 copies for each picture. Polaroid Digital Camera User Guide www.polaroid.com PICTBRIDGE PICTBRIDGE PICTBRIDGE... - Page 58 NOTE: Make sure you turn off the camera before inserting or removing a memory card. 12. Press the Print button on the printer to start printing. button. Polaroid Digital Camera User Guide PRINT THIS COPY PRINT THIS COPY www.polaroid.com...
-
Page 59: Using Memory
• Using memory Your camera comes with built-in flash memory for storing pictures and video clips. You can expand the memory using a Polaroid SD card (up to 1 GB). The camera senses whether a memory card is inserted, and automatically saves pictures and video clips accordingly. - Page 60 The manufacturer is not liable for losing or corrupting any valuable data or files in your SD card due to improper operation. • Your digital camera works best with a Polaroid memory card. Polaroid Digital Camera User Guide...
- Page 61 Open the SD card door by pushing it outwards as illustrated. Insert the SD card, ensuring the card is inserted correctly as illustrated. Close the SD card door by pressing it downwards and then slide it back to lock. Polaroid Digital Camera User Guide www.polaroid.com...
-
Page 62: Formatting Memory
NOTE: • SD cards formatted in another camera, computer or other devices may not work properly. It is recommended to format SD cards with your digital camera. • Note that data deleted by formatting operation cannot be recovered. Make sure you do not have any useful data currently stored on a memory card before you format it. -
Page 63: Copying Pictures, Video Clips To Memory Card
With a memory card inserted into the camera, the card memory has a higher priority over the internal memory. The selected picture or video clip can be only copied from internal memory to the memory card. Polaroid Digital Camera User Guide www.polaroid.com MENU... -
Page 64: Installing The Software Onto A Computer
If you don’t know about the software installation, please read the “ReadMe” file in the CD first. IMPORTANT! (For Windows® 98SE) Windows® 98SE needs to install your digital camera Driver for Mass Storage function. After the installation, please restart the Windows before connecting the camera to the PC. - Page 65 For Macintosh Users: Before you begin, close all other software applications open on your computer. Insert the CD supplied into the computer CD-ROM Drive. Double click the CD-ROM icon “Polaroid”. Install the software included. Polaroid Digital Camera User Guide www.polaroid.com...
-
Page 66: Software Included With Your Camera
• Software Included with Your Camera Polaroid Digital Camera Driver Plug & Play removable disk (For Windows® 98SE) Easy to use, just plug the camera to a computer and use it as a removable disk. Use the ArcSoft® PhotoStudio® to edit and print the pictures. Only install for Windows®... -
Page 67: Computer System Requirements
USB Port • 128MB RAM (256 MB recommended) • 500MB free disk space • Color monitor with high color (16-bit) graphic capability or higher • CD-ROM drive • Standard mouse and keyboard • Stereo speakers Polaroid Digital Camera User Guide www.polaroid.com... -
Page 68: Transferring Pictures And Video Clips To A Computer
• Before you Transfer Pictures IMPORTANT! (For Windows® 98SE Only) Before you transfer your pictures make sure you have installed the Polaroid Digital Camera Driver from the CD. Please refer to “Installing the Software onto a Computer” on page 64. -
Page 69: Transferring Pictures And Video Clips To A Computer
This drive name will vary from different version of Mac OS system. Double click the folder “Unlabelled” to enter sub-folder “DCIM”. Double click the folder “DCIM” and then any sub folder inside. You can copy the pictures and video clips from this directory folder. Polaroid Digital Camera User Guide www.polaroid.com... -
Page 70: Troubleshooting Problems
Check to see if the USB control in your BIOS is activated. To learn how to activate the USB in your computer, please visit the Polaroid website. Check that all cable connections are secured. You need to install the camera driver for Windows 98SE systems. - Page 71 Symptom I cannot run the “Polaroid Digital Conflict with another camera driver or Camera Driver”. capture device. My CD Installation Wizard does The auto installation file is switched not work. off or the CD-ROM is disconnected. Polaroid Digital Camera User Guide www.polaroid.com...
- Page 72 Disconnect the crashed network drive and reserve this drive letter for the camera. Remove and re-install the battery or batteries to reset the camera. Your valuable data stored in the camera will not be lost. Polaroid Digital Camera User Guide Solution www.polaroid.com...
- Page 73 Please also refer to the help files & User Guides that accompany the enclosed applications. For further information and support, please visit our website: http://www.polaroid.com Polaroid Digital Camera User Guide www.polaroid.com Problem If the battery is exhausted, recharge or replace your batteries.
-
Page 74: Getting Help
Fax: +81-3-5795-1397 E-mail: support@arcsoft.jp Web: http://www.arcsoft.jp Visit http://www.arcsoft.com for technical support and frequently asked questions (FAQ’s). “Polaroid” and “Polaroid and Pixel” are trademarks of Polaroid Corporation, Waltham, MA, USA. 11 Getting Help For Latin America E-mail:latinsupport@arcsoftsupport.com For China ArcSoft China Support Center (Hangzhou) Tel.: +86-571-88210575... -
Page 75: Appendix
Auto, 100, 200, 400 Shutter Speed Mechanical shutter 1/1000 sec. ~ 2 sec. White Balance Auto, Daylight, Cloudy, Tungsten, Fluorescent Storage Internal Memory Polaroid Digital Camera User Guide www.polaroid.com 12 Appendix - 1/2.5 inch - 7 Mega Pixel CCD ~Infinity Aperture: F2.8 Focal Length:6.45mm... - Page 76 • Size: 94 mm (3.7 inches)(W) x 60 mm (2.4 inches ) (H) x 24 mm(0.8 inches) (D) • Weight: Approximately 105g excluding batteries or card Operating • For Windows® Users: Microsoft® Windows® 98SE, Me, 2000 or System • For Macintosh Users: Mac OS 9.2~X Polaroid Digital Camera User Guide www.polaroid.com...
-
Page 77: Capacity Of Sd Card
• Capacity of SD Card Resolution 3072 x 2304 2304 x 1728 2048x 1536 1600 x 1200 640 x 480 Polaroid Digital Camera User Guide www.polaroid.com Quality 32MB Internal Memory Super Fine Fine Normal Super Fine Fine Normal Super Fine... - Page 78 Normal 2304 x 1728 Super Fine Fine Normal 2048 x 1536 Super Fine Fine Normal 1600 x 1200 Super Fine Fine Normal 640 x 480 Super Fine Fine Normal 128MB 256MB 512MB Polaroid Digital Camera User Guide www.polaroid.com 1GB SD...
- Page 79 Therefore, the number of pictures and the length of video clips you can store on a memory card may vary. Polaroid Digital Camera User Guide www.polaroid.com Resolution...
-
Page 80: Uninstalling Polaroid Digital Camera Driver (Pc Only)
Windows 98SE needs to install the digital camera driver. 1. Open Add / Remove Program Properties in Control Panel and select “Polaroid Digital Cam" program, then click “Add / Remove” . 2. The following dialog box appears, click "OK" to confirm removing the camera driver. -
Page 81: Camera Default Settings
• Camera Default Settings Camera Mode Setup Mode Polaroid Digital Camera User Guide www.polaroid.com Description Image Resolution Compression Exposure Compensation ISO Sensitivity White Balance Light Metering Resolution Exposure Compensation White Balance Date Format Auto Off Beep Sound Frequency Language Date Stamp... -
Page 82: Tips, Your Safety & Maintenance
ALWAYS remove dust or stains with a soft cloth dampened with water or neutral detergent. • NEVER place hot items on the surface of the Camera. • NEVER attempt to open or disassemble Camera as this will affect any warranty claim. Polaroid Digital Camera User Guide www.polaroid.com... -
Page 83: Regulatory Information
Shielded cable must be used with this unit to ensure compliance with the Class B FCC limits. Under the environment with electrostatic discharge, the product may malfunction and require user to reset the product. Polaroid Digital Camera User Guide www.polaroid.com... - Page 84 US 0806 Part No.: OM3529US001...