
Related Manuals for Kawai Novus NV10


Summary of Contents for Kawai Novus NV10
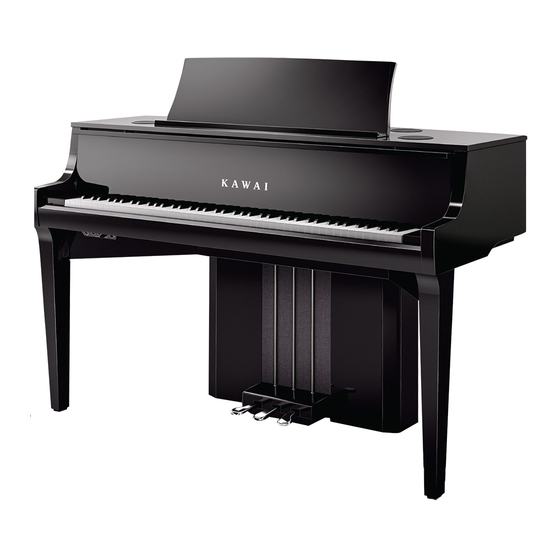
- Page 1 Introduction Playing the Piano Recorder NV10 Music Screen Owner’s Manual Favorite Screen Settings Appendix...
- Page 2 Thank you for purchasing this Kawai NOVUS NV10 hybrid digital piano. This owner’s manual contains important information regarding the instrument’s usage and operation. Please read all sections carefully, keeping this manual handy for future reference. About this Owner’s Manual Before attempting to play this instrument, please read the Introduction section (page 10) of this owner’s manual.
-
Page 3: Important Safety Instructions
Important Safety Instructions SAVE THESE INSTRUCTIONS INSTRUCTIONS PERTAINING TO A RISK OF FIRE, ELECTRIC SHOCK, OR INJURY TO PERSONS WARNING CAUTION TO REDUCE THE RISK OF FIRE OR ELECTRIC SHOCK, DO NOT RISK OF ELECTRIC SHOCK EXPOSE THIS PRODUCT TO DO NOT OPEN RAIN OR MOISTURE. - Page 4 Règles de sécurité (Supplémentairespour le Canada) CONSERVEZ CES INSTRUCTIONS AVERTISSEMENT CAUTION POUR REDUIRE LES RISQUES D’INCENDIE OU D’ELECTROCUTION, RISK OF ELECTRIC SHOCK PROTEGEZ CET APPAREIL DE LA DO NOT OPEN PLUIE OU DE L’HUMIDITE. AVIS : RISQUE DE CHOC ELECTRIQUE - NE PAS OUVRIR.
- Page 5 WARNING - When using electric products, basic precautions should always be followed, including the following. WARNING Indicates a potential hazard that could result in death or serious injury if the product is handled incorrectly. The product should be connected to G If you are going to use an AC power cord, 120V 230V...
- Page 6 Indicates a potential hazard that could result in injury or CAUTION damage to the product or other property if the product is handled incorrectly. Do not use the product in the following areas. Using the product in such areas may result in product breakdown.
- Page 7 • The Bluetooth® word mark and logos are registered trademarks owned by the Bluetooth SIG, Inc. and any use of such marks by Kawai Musical Instruments Mfg. Co., Ltd. is under license. Other trademarks and trade names are those of their respective owners.
-
Page 8: Table Of Contents
Music Screen Welcome to the NOVUS NV10 . . . . . . . . . . . . . . . . . . . 10 About the Music Screen . - Page 9 10. Hammer Delay 13. LCD Contrast . . . . . . . . . . . . . . . . . . . . . . . . . . . . . . . 112 .
-
Page 10: Welcome To The Novus Nv10
Shigeru Kawai SK-EX concert grand piano reproduced with latest SK-EX Rendering sound technology The magnificent tone of Kawai’s flagship Shigeru Kawai SK-EX full concert grand piano is at the heart of the NOVUS NV10 hybrid digital piano. Widely regarded as the ‘premier pianos of Japan’, Shigeru Kawai instruments grace the stages of concert halls and musical institutions throughout the world, and are prized for their tonal clarity and exceptional dynamic range. - Page 11 USB to Device functionality, with MP3/WAV file recording and playback The NOVUS NV10 hybrid digital piano is equipped with USB connectors that not only allow the instrument to be connected to a computer for MIDI use, but also to load and save data to USB memory devices directly. This ‘USB to Device’ feature allows recorded songs stored in internal memory to be saved to USB for posterity, or standard MIDI files (SMF) downloaded from the internet to be conveniently played back without additional hardware.
-
Page 12: Part Names And Functions
Part Names and Functions LINE IN LINE OUT USB to HOST MIDI LEVEL STEREO L / MONO... - Page 13 a POWER button f LINE IN STEREO jack This button is used to turn the instrument on/off. Be sure to This jack is used to connect the 1/8” stereo output from turn off the instrument after playing. smart phones, tablets, computers, or other electronic audio equipment to the NV10 hybrid digital piano’s amplifier and * The NV10 hybrid digital piano features a power saving mode that speakers.
-
Page 14: Setting Up The Piano
Press the POWER button located on the right hand side of the control box. The instrument will turn on and the KAWAI logo will appear in the touchscreen display. After a short period, the Pianist mode screen will appear, indicating that the instrument is ready to be played. To turn off the power, press and hold the POWER button again for 1~2 seconds. -
Page 15: Key Cover And Music Rest
Key cover and music rest Opening the key cover Gently lift the key cover with both hands. To close the key cover, slowly push or pull it forwards. The Soft Fall system will gently lower the key cover naturally. * Please do not apply additional force on the key cover while it is closing. -
Page 16: Volume And Headphones
Setting Up the Piano Volume and headphones A djusting the volume The MASTER VOLUME knob controls the volume level of the instrument’s speakers, or headphones if connected. Decrease Volume Increase Volume Turn the knob clockwise to increase the volume, and anti- clockwise to decrease the volume. -
Page 17: Pedals
The NV10 hybrid digital piano features the Grand Feel Pedal System, which replicates the position and individual weighting of the damper, soft, and sostenuto pedals of a Shigeru Kawai SK Concert Grand piano. It is also possible to adjust the sensitivity of the damper pedal, and the effectiveness of the soft pedal using the ‘Half-Pedal Adjust’... -
Page 18: Touchscreen Operations
Setting Up the Piano Touchscreen Operations The NV10 hybrid digital piano’s touchscreen display is used to provide useful information about the currently selected sound mode/name, function, and setting. The display is also used to control the instrument’s various features by tapping on buttons and icons, swiping in different directions, or tapping and holding onscreen elements. The explanations below outline the different methods of interacting with the touchscreen, and how these operations are referenced in this owner’s manual. -
Page 19: User Interface Overview
User Interface Overview The NV10 hybrid digital piano’s user interface is arranged into four different screens, which are selected by tapping the corresponding icons shown at the bottom of the touchscreen display. Screen Explanation Pianist mode The instrument’s primary SK-EX Rendering sound engine, recommended for solo piano performance. This screen will appear automatically when the NV10 hybrid digital piano is turned on. - Page 20 Setting Up the Piano Status bar a Headphone icon Appears headphones are connected to the instrument, disabling the built-in speakers. a bc b USB Device icon Appears when a USB memory device is connected to the instrument. c Bluetooth icon Appears when Bluetooth MIDI or Bluetooth Audio is enabled.
- Page 21 Screen bar a Pianist button Show the Pianist mode screen, utilising the SK-EX Rendering piano sound engine. b Sound button Show the Sound mode screen, utilising the multi-instrument sound engine. c Music button Show the Music screen, used for accessing the built-in demonstration songs, piano music pieces, lesson songs, recorder songs, and the USB audio player.
-
Page 22: Pianist Mode Screen
Pianist mode screen The Pianist mode screen utilises the NV10 hybrid digital piano’s new SK-EX Rendering piano sound engine. This mode delivers the most realistic acoustic piano playing experience possible, and is therefore recommended for solo piano performance. Tap the [Pianist] button to show the Pianist mode screen. Pianist button a Menu button Tap to display the function/settings menu for the Pianist mode... -
Page 23: Rendering Character And Resonance Depth
Rendering character and Resonance depth The SK-EX Rendering piano sound engine combines high resolution multi-channel sampling with advanced modelling algorithms to reproduce 10 different acoustic piano rendering characters, suitable for a variety of musical genres. Rendering character Description Classic A standard grand piano sound with a broad dynamic range. Romantic A mellow grand piano sound with soft hammers. -
Page 24: Pianist Mode Menu
Pianist mode screen Pianist mode menu The Pianist mode menu contains settings and functions related to the Pianist mode screen. Tap the [Menu] button to show the Pianist mode menu. Menu button Pianist mode menu a Ambience type Swipe left/right or tap the arrow buttons to change the ambience type used for the SK-EX Rendering piano sound engine. - Page 25 Ambience types Ambience Type Description Natural Simulates the ambience of a natural environment. Small Room Simulates the ambience of a small room. Medium Room Simulates the ambience of a medium-sized room. Large Room Simulates the ambience of a large room. Studio Simulates the ambience of a recording studio.
-
Page 26: Sound Mode Screen
Sound mode screen Sound mode screen The Sound mode screen utilises the NV10 hybrid digital piano’s secondary sound engine. This mode features a wide selection of realistic instrument sounds suitable for various musical styles. These instrument sounds are arranged into eight categories, with several sounds assigned to each category. In additional to playing instrument sounds individually, it is also possible to play two sounds simultaneously, either by layering (Dual) or splitting the keyboard into two sections (Split/4Hands). -
Page 27: Single
Single By default, the SK-EX Concert Grand piano sound will be selected in Single keyboard mode, meaning that one sound is used across the full width of the keyboard. Selecting sounds 1. Tap the sound selection area to enter sound selection mode. 2. - Page 28 Sound mode screen Dual keyboard mode settings Dual setting Description Default Setting Balance Adjust the volume balance between the main and layered sounds. 9 - 9 Layer Octave Shift Raise/lower the pitch of the layered sound in octave steps. Dynamics Adjust the dynamic sensitivity of the layered sound relative to the main sound.
-
Page 29: Split
Split The Split keyboard mode function divides the keyboard into two sections, allowing each section to be played with a different sound. For example, a bass sound in the lower section, and a piano sound in the upper section. Selecting Split keyboard mode Tap the [Split] button to select Split keyboard mode. - Page 30 Sound mode screen Tap the [Menu] button to show the Sound mode menu. Next, tap [Keyboard Settings] to show the Split keyboard mode settings. Keyboard Settings a Back button Tap to return to the Sound mode menu b Balance Long press and drag the slider to adjust the volume balance between the upper section and lower section sounds.
-
Page 31: Hands
4Hands The 4Hands keyboard mode function divides the keyboard into two sections in a similar way to that of the Split keyboard mode. However, with 4Hands keyboard mode enabled, the octave/pitch of each section is automatically adjusted to create two separate 44-key instruments with the same playing range. Furthermore, the damper (right) pedal and soft (left) pedal act as separate damper pedals for the respective upper and lower sections, allowing two people to perform piano duets using a single instrument. - Page 32 Sound mode screen Tap the [Menu] button to show the Sound mode menu. Next, tap [Keyboard Settings] to show the 4Hands keyboard mode settings. Keyboard Settings a Back button Tap to return to the Sound mode menu b Balance Long press and drag the slider to adjust the volume balance between the right section and left section sounds.
-
Page 33: Reverb
Reverb Reverb adds reverberation to the sound, simulating the acoustic environment of a recital room, stage, or concert hall. Some sound types, such as acoustic pianos, enable reverb automatically in order to improve acoustic realism. The NV10 hybrid digital piano features six different reverb types, which can be adjusted via the Sound mode menu. ... -
Page 34: Effects
Sound mode screen Effects In addition to reverb, various other effects can be applied to the selected sound, altering the tonal character and feeling of the instrument. As with reverb, some sound types enable certain effects automatically in order to enhance tonal quality. -
Page 35: Effect Types
Effect types Effect type Description Mono Delay Applies an echo effect to the sound, playing through both speakers simultaneously. Ping Delay Applies a ‘ping pong’ echo effect to the sound, giving the impression that it is ‘bouncing’ from left to right. -
Page 36: Metronome / Drum Patterns
Metronome / Drum Patterns The Metronome function provides a steady beat to aid practicing the piano at a consistent tempo. In addition to regular metronome beats, the NV10 hybrid digital piano also features a variety of drum rhythms to accompany most playing styles and musical genres. -
Page 37: Metronome Settings
Metronome settings The Metronome settings allow the tempo, beat, and volume of the metronome to be adjusted. Tap the [Open Metronome] button to expand the Metronome bar and show the additional metronome/rhythm settings. Open Metronome button Metronome settings a Metronome bar Tap to close the metronome settings. -
Page 38: Drum Rhythms
Metronome / Drum Patterns Drum rhythms As an alternative to the simple metronome count, it is also possible to select a drum pattern from one of 100 different rhythm styles. For a complete listing of available drum rhythms, please refer to page 170 of this owner’s manual. While the metronome settings menu is open, tap the [DRUM] button to select drum rhythm mode. -
Page 39: About The Recorder
Internal Recorder USB Audio Recorder Pianist Mode Sound Mode Pianist Mode & Sound Mode Recorder Format MP3 audio (256 kbit/s) Kawai song format MP3 audio (256 kbit/s), WAV audio (1411 kbit/s) No. of parts 1 part 2 parts 1 part No. -
Page 40: Song Recorder (Internal Memory)
Song Recorder (Internal memory) Recording a song: Pianist mode In Pianist mode, the NV10 hybrid digital piano allows up to 3 different songs to be recorded, stored in internal memory, and immediately played back. Recorder bar Tap the Recorder bar to expand the Recorder. a Recorder bar Tap to close the Recorder settings. - Page 41 Recording a song 1. Tap the [Record Start/Stop] button. The Recorder will enter Standby mode. * Press and hold the [Record Start/Stop] button to cancel the Standby mode. Record Start/Stop button 2. Press a key on the keyboard, or tap the [Record Start/Stop] button again.
- Page 42 Song Recorder (Internal memory) 2. Tap the [Play/Stop] button again to stop playback. * For more information about playing back Recorder songs, please refer to page 69. Erasing the song 1. Tap the [Menu] button. Menu button The Pianist mode internal recorder menu will be shown. 2.
-
Page 43: Recording A Song: Sound Mode
Recording a song: Sound mode In Sound mode, the NV10 hybrid digital piano allows up to 10 different songs to be recorded, stored in internal memory, and immediately played back. In addition, each song can consist of two separate tracks – referred to as ‘parts’... - Page 44 Song Recorder (Internal memory) Selecting the song memory and part 1. Swipe the song memory left/right or tap the arrow buttons to change the song memory to be used for recording. * In Sound mode, up to 10 songs can be recorded. Song memory selection 2.
- Page 45 3. Tap the [Record Start/Stop] button again to stop the recording. The selected [01] button will change colour (blue) to indicate that part1 has been recorded to. Part recorded * In Sound mode, the maximum internal recording capacity is approximately 90,000 notes, with button and pedal presses also counted as one note.
- Page 46 Song Recorder (Internal memory) Recording the song (part2) 1. Tap the circle button to the right of the [02] button to select part2 for recording. * The circle will turn red to indicate that this part will be recorded to. Part2 selected for recording 2.
- Page 47 Playing the song (part2) 1. Tap the [Play/Stop] button. The previously recorded part1 and part2 of the song will start to play simultaneously. Play/Stop button 2. Tap the [Play/Stop] button again to stop playback. * For more information about playing back Recorder songs, please refer to page 69.
- Page 48 Song Recorder (Internal memory) Erasing the song/part 1. Tap the [Menu] button. Menu button The Sound mode internal recorder menu will be shown. 2. Tap [Erase Song] or [Erase Song Part1/Part2]. A confirmation box will be shown. 3. Tap the [Yes] button to erase the song/part, or the [No] button to cancel Yes/No button...
-
Page 49: Audio Recorder
Audio Recorder (USB memory) Recording an audio file: Pianist and Sound mode The NV10 hybrid digital piano is also capable of recording performances as digital audio – saving the data to a USB memory device in either MP3 or WAV format. This useful function allows professional quality recordings to be produced directly on the instrument –... - Page 50 Audio Recorder (USB memory) USB memory recorder menu Tap the [Menu] button to show the USB memory recorder menu. a Format select Tap the [MP3] or [WAV] buttons to select the desired audio recorder file format. * MP3 audio files require less storage space than WAV audio files. * MP3 audio files will be recorded at a bitrate of 256 kbit/s.
- Page 51 3. Tap the [Record Start/Stop] button again to stop the recording. A confirmation box will be shown prompting to save the file to USB memory. 4. Tap [Yes], then enter the desired filename for the recorded audio file using the onscreen keyboard. * The recorded audio file will be saved in the root folder of the USB memory device.
-
Page 52: Music Screen
Piano Music Tap to enter the Piano Music function. This function will play back a selection of classical music pieces using the Shigeru Kawai SK-EX grand piano sound. c Lesson Songs Tap to enter the Lesson Songs function. This function allows aspiring pianists to learn and practise the piano using a selection of classical and contemporary lesson books. -
Page 53: Demo Songs
Demo Songs The Demo Songs function provides an excellent introduction to the varied capabilities of NV10 hybrid digital piano. There are over 35 different demonstration songs available, highlighting the instrument’s rich selection of high quality sounds and its power speaker system. For a complete listing of demonstration songs, please refer to page 160 of this owner’s manual. - Page 54 Demo Songs Selecting a demo song Tap an instrument sound name to select the demo song for playback. The demo song playback screen will be shown, and the selected song will begin to play. Demo songs list Demo song playback screen a Back button Tap to return to the Demo Songs screen.
-
Page 55: Piano Music
Piano Music In addition to the sound demonstration songs, the NV10 hybrid digital piano also features a selection of popular classical piano works from the Baroque and Romantic periods. Notated scores are provided in the separate ‘Classical Piano Collection’ book*, assisting the musical appreciation and study of each piece. * Depending on market area. - Page 56 Piano Music Piano Music playback screen a Back button Tap to return to the Piano Music songs screen. b Piano Music menu button Tap to open the Piano Music settings menu. c Piece title Displays the title of the currently selected Piano Music piece. d Previous button Tap to select the previous Piano Music piece for playback.
-
Page 57: Lesson Songs
Lesson Songs The Lesson Songs function allows budding pianists to practice the piano using a selection of built-in song books and finger exercises. The left and right-hand parts of each piece can be practiced separately, while the tempo can also be adjusted to perfect difficult passages. For a complete listing of the built-in lesson material, please refer to the separate ‘Internal Song Lists’... - Page 58 Lesson Songs Lesson Song screen a Back button Tap to return to the Music screen. b Lesson Song book list Tap a lesson song book to select the book for practise. Swipe up or down to scroll through the list of lesson song books.
- Page 59 Lesson Song playback screen a Back button Tap to return to the Lesson Song book screen. b Lesson Song menu button Tap to open the Lesson Song settings menu. c Song/Piece title Displays the title of the currently selected lesson song/piece. d Bar/Beat indicator Displays the bar and beat of the currently playing lesson song/ piece.
- Page 60 Lesson Songs Lesson Song settings menu a Balance Long press and drag the slider to adjust the volume balance between the right-hand and left-hand parts of the selected lesson song/piece. b Close Menu Tap to close the menu and return to the Lesson Song playback screen.
- Page 61 Changing the lesson song playback mode Tap the playback mode button to change the lesson song playback mode. Play the selected song/piece once, then stop. Play the selected song/piece repeatedly. Play the selected song/piece, then play other songs from the current lesson book in order.
- Page 62 Lesson Songs Adjusting the lesson song/piece playback tempo It is possible to adjust the playback tempo of the current lesson song/piece, allowing difficult passages to be practised more conveniently. 1. Tap the [Open Metronome] button to expand the Metronome bar.
-
Page 63: Concert Magic
Concert Magic The Concert Magic function allows complete beginners to enjoy playing the piano by simply selecting one of the 176 pre-programmed songs, then tapping the keyboard with a steady rhythm and tempo. For a complete listing of available Concert Magic songs, please refer to the separate ‘Internal Song Lists’ booklet.. From the Music screen, tap [Concert Magic] to enter the function. - Page 64 Concert Magic Concert Magic playback screen a Back button Tap to return to the Concert Magic categories screen. b Concert Magic menu button Tap to open the Concert Magic settings menu. c Song title Displays the title of the currently selected Concert Magic song. d Playback mode button Tap to change the playback mode.
-
Page 65: Concert Magic Song Playback
Concert Magic song playback The Concert Magic playback function allows the currently selected song to be played automatically, without pressing the keyboard. Playing the selected Concert Magic song 1. Tap the [Play/Stop] button. The selected Concert Magic song will start to play. 2. - Page 66 Concert Magic Adjusting the Concert Magic song balance It is also possible to adjust the volume balance between the right-hand and left-hand parts of the current Concert Magic song, allowing each hand to be practiced separately when using the playback function. 1.
-
Page 67: Concert Magic Song Performance
Concert Magic song performance Concert Magic performance function allows the currently selected song to be performed by pressing the keys with a steady rhythm and tempo. Concert Magic songs are divided into three different arrangement types, each requiring a different level of skill to be performed correctly. - Page 68 Concert Magic Performing the selected Concert Magic song Press a key on the keyboard. The song will advance with every key that is pressed. Pressing the keys gently will produce a soft sound, while pressing heavily will produce a loud sound. ...
-
Page 69: Recorder Playback
Recorder Playback The Recorder Playback function is used to playback songs that have been recorded to the instrument’s internal memory using Pianist mode or Sound mode. For more information about the internal song recorder, please refer to page 40. From the Music screen, tap [Recorder Playback] to enter the function. - Page 70 Recorder Playback Recorder Playback playback screen a Back button Tap to return to the Recorder Playback song selection screen. b Recorder Playback menu button Tap to open the Recorder Playback settings menu. c Song title Displays the title of the currently selected internal recorder song.
-
Page 71: Part Select
* This function applies to internal songs recorded in Sound mode only. e Load Song from USB Tap to load a Kawai KSO format song saved to a USB memory device into one of the instrument’s internal song memories. f Erase Song Tap to erase the currently selected recorder song from internal memory. -
Page 72: Transposing The Song
When playing songs recorded in Sound mode, these functions allow the currently selected song to be saved to USB memory in internal Kawai (KSO) or Standard MIDI File (SMF) formats. 1. Tap the [Menu] button to show Recorder Playback settings menu. - Page 73 Loading a song into internal memory This function allows NV10 recorder songs (KSO format) stored on a USB memory device to be loaded into the instrument’s internal memory. 1. Tap the [Menu] button to show Recorder Playback settings menu. 2.
- Page 74 Recorder Playback Erasing the song This function allows the current internal recorder song to be erased from memory. 1. Tap the [Menu] button to show Recorder Playback settings menu. 2. Tap [Erase Song]. A confirmation box will be shown. Erase Song 3.
-
Page 75: Usb Memory Player
From the Music screen, tap [USB Memory Player] to enter the function. USB Memory Player USB Memory Player supported formats Song Kawai Song file Format 0, Format 1 Audio 32 kHz/44.1 kHz/48 kHz, Mono/Stereo, 8-320 kbit/s (fixed & variable) 32 kHz/44.1 kHz/48 kHz, Mono/Stereo, 16 bit ... - Page 76 USB Memory Player USB Memory Player playback screen a Back button Tap to return to the USB Memory Player song selection screen. b USB Memory Player menu button Tap to open the USB Memory Player settings menu. c Song/Audio file title Displays the title of the currently selected song/audio file.
- Page 77 Playing the selected song/audio file 1. Tap the [Play/Stop] button. The selected song/audio file will start to play. The position bar will indicate the current playing position. 2. Tap the [Play/Stop] button. The song/audio file will stop playing. Play/Stop button 3.
- Page 78 USB Memory Player 2. Tap the [A-B Repeat] button again to specify the end point of the loop. A ‘B’ symbol will appear above the button, and the defined section will be repeated continuously. 3. Tap the [A-B Repeat] button again to cancel the repeat function.
- Page 79 Adjusting the volume of the song/audio file. This setting allows the volume of the song/audio file to be adjusted. 1. Tap the [Menu] button to show USB Memory Player settings menu. 2. Long press and drag the slider to adjust the playback volume of the currently selected song/audio file.
-
Page 80: About The Favorite Screen
About the Favorite Screen About the Favorite Screen The Favorite function allows the current instrument setup (sound selections, split point, reverb and effect settings, and various other panel options) to be stored to a memory and immediately recalled with a single tap. The Favorite screen displays 4 memories per page, with a maximum of 4 pages, allowing a total of 16 different Favorite memories to be stored. -
Page 81: Favorite Screen
Favorite screen a Menu button Tap to open the Favorite settings menu. b Page indicator Indicates the current Favorite page, and how many Favorite pages (1~4) are available. c Favorite memory buttons Tap to select the desired Favorite memory. Swipe this area left/right to cycle through the available Favorite pages. -
Page 82: Storing And Selecting Favorite Memories
About the Favorite Screen Storing and Selecting Favorite memories Storing a Favorite memory The following procedure will store the current instrument settings to a Favorite memory. 1. In either Pianist or Sound mode, tap the [Menu] button to show the mode’s menu. Menu button Pianist Mode Sound Mode... - Page 83 Selecting a Favorite memory The following procedure will select a previously stored Favorite memory. 1. Tap the [Favorite] button. The Favorite screen will be shown. * If a Favorite memory was selected previously, that memory will be re-selected automatically. Favorite button 2.
-
Page 84: Editing Favorite Memories
About the Favorite Screen Editing Favorite memories Renaming a Favorite memory The following procedure will rename the currently selected Favorite memory. 1. Tap the [Menu] button. Menu button The Favorite settings menu will be shown. 2. Tap [Rename Selected Favorite]. The Favorite Name screen will be shown. - Page 85 Deleting a Favorite memory The following procedure allows Favorite memories to be deleted. 1. Tap the [Menu] button. Menu button The Favorite settings menu will be shown. 2. Tap [Edit Favorite]. The Edit Favorite screen will be shown. Edit Favorite 3.
- Page 86 About the Favorite Screen Repositioning a Favorite memory The following procedure allows a Favorite memory to be repositioned. 1. Tap the [Menu] button. Menu button The Favorite settings menu will be shown. 2. Tap [Edit Favorite]. The Edit Favorite screen will be shown. Edit Favorite 3.
- Page 87 Startup with Favorite function When the Startup with Favorite function is enabled, the NV10 hybrid digital piano will show the Favorite screen when the instrument is turned on, and will select the first Favorite memory automatically. 1. Tap the [Menu] button. Menu button The Favorite settings menu will be shown.
-
Page 88: About Settings
About Settings About Settings The Pianist mode menu and Sound mode menu contain a variety of options to adjust the NV10 hybrid digital piano’s operation and sound. These settings are grouped by category, providing convenient access to relevant controls. The available settings will differ depending on whether Pianist mode or Sound mode is being used. Once adjusted, settings can be stored to one of the instrument’s 16 Favorite memories for instant recall. -
Page 89: Depth
Pianist mode menu a Ambience type (p. 89) Swipe left/right or tap the arrow buttons to change the ambience type used for the SK-EX Rendering piano sound engine. Ambience refers to the sense of sound moving around in a virtual room. - Page 90 About Settings Ambience types Ambience Type Description Natural Simulates the ambience of a natural environment. Small Room Simulates the ambience/reverberation of a small room. Medium Room Simulates the ambience/reverberation of a medium-sized room. Large Room Simulates the ambience/reverberation of a large room. Studio Simulates the ambience/reverberation of a recording studio.
- Page 91 About Pianist Demos pieces Piece name Composer Polonaise in A-flat major, Op. 53 Frédéric Chopin Suite bergamasque - Prélude Claude Debussy Turkish March Wolfgang Amadeus Mozart Other Pianist mode menu settings For information regarding the other Pianist mode menu settings, please refer to the pages below: Virtual Technician: page 98 Sound Settings: page 123...
-
Page 92: Sound Mode Menu
About Settings Sound mode menu The Sound mode menu contains the following settings and functions. Sound mode settings and functions Setting menu Description Available Settings Page no. Reverb Adjust the acoustic environment of a virtual room. Type p. 95 Depth p. - Page 93 Setting menu Description Available Settings Page no. Sound Settings Adjust settings related to the overall sound, such as Tuning p. 124 the volume of speakers, headphones, line inputs, etc. Damper Hold p. 124 Tone Control p. 125 Speaker Volume p. 127 Line In Level p.
- Page 94 About Settings Sound mode menu a Reverb settings (p. 95) Tap to open the Reverb settings menu. This menu is used to adjust the Reverb type and depth. b Reverb ON/OFF (p. 95) Tap to turn Reverb On/Off. c Effects settings (p.
- Page 95 Adjusting the Reverb settings Reverb refers to the acoustic environment of a virtual room. 1. Tap the [ON/OFF] buttons to turn Reverb on/off. Reverb ON/OFF button 2. Tap [Reverb] to open the Reverb settings menu. Reverb settings Menu button 3.
- Page 96 About Settings Adjusting the Effect settings Effects alter the tonal character and feeling of an instrument sound. 1. Tap the [ON/OFF] buttons to turn Effects on/off. Effects ON/OFF button 2. Tap [Effects] to open the Effects settings menu. Effects settings Menu button 3.
- Page 97 Adjusting the Transpose setting The Transpose setting allows the pitch of the NV10 hybrid digital piano keyboard to be raised or lowered in semi-tone steps. This is particularly useful when accompanying instruments tuned for different keys, or when a song learned in one key must be played in another key.
-
Page 98: Virtual Technician
Virtual Technician Virtual Technician The Virtual Technician menu contains a variety of settings that allow the character of the NV10’s acoustic piano to be dramatically adjusted. There are two methods of using the Virtual Technician: Smart Mode and Advanced Mode. Tap [Virtual Technician] to open the Virtual Technician menu. - Page 99 Changing the Smart Mode preset Adjust the overall character of the sound using a preset. 1. Swipe left/right or tap the arrow buttons to change the Smart Mode preset The tonal character of the piano sound will change, and information about the selected Smart Mode preset will be shown in the explanation area.
- Page 100 Virtual Technician Advanced Mode In Advanced Mode, the player is given full control over every aspect of the piano’s configuration, allowing precise adjustments over hammer hardness, action regulation, cabinet size, and a variety of other acoustic characteristics. This mode is recommended for musicians that enjoy fine-tuning individual details of the piano sound in order to suit their personal preferences.
-
Page 101: Save To Sound
Storing the Virtual Technician settings Store the current Virtual Technician settings to the selected instrument sound. 1. Tap [Store to Sound]. The current Virtual Technician settings will be saved to the selected instrument sound, and recalled automatically whenever that sound is selected. * In Pianist mode, the Store to Sound function can be used to automatically recall preferred settings whenever the instrument is turned on, without needing to use Favorite memories. -
Page 102: Touch Curve
The default ‘Normal’ setting is designed to accurately recreate the touch of a Kawai concert grand piano. However, if the keyboard feels too light, or fortissimo playing is achieved too easily, it may be desirable to select a heavier touch curve. -
Page 103: User Touch Curve
Changing the Touch Curve type Swipe left/right or tap the arrow buttons to change the Touch Curve type. * The Touch Curve can be set to one of 7 types. The perceived weight of the keyboard will change depending on the selected touch curve. -
Page 104: Voicing
Virtual Technician Voicing Pianist Mode Sound Mode On an acoustic piano, the shape, density, and texture of the hammers all influence on the tonal character of the instrument’s sound. Technicians utilise a variety of tools such as needles, files, and brushes to manipulate these hammer felts, with the ultimate goal of achieving a balanced tonal character across the keyboard. -
Page 105: User Voicing
User Voicing Pianist Mode Sound Mode The User Voicing function allows each of the 88 keys to be voiced individually. Adjusting the User Voicing function 1. Swipe left/right or tap the arrow buttons to select the User Voicing type. * In Sound mode, User Voicing is performed and stored independently for each sound. -
Page 106: Damper Resonance
Virtual Technician Damper Resonance Sound Mode Pressing the damper pedal of an acoustic piano raises all dampers, allowing the strings to vibrate freely. When a note or chord is played on the piano with the sustain pedal pressed, not only will the strings of the notes played vibrate, but also the strings of other notes, vibrating in sympathetic resonance. -
Page 107: String Resonance
String Resonance Sound Mode String Resonance refers to a phenomenon that exists in acoustic pianos whereby the strings of held notes resonate ‘sympathetically’ with other notes of the same harmonic overtone series. The NV10 hybrid digital piano recreates this phenomenon, with the String Resonance setting allowing the volume of this resonance to be adjusted. -
Page 108: Undamped String Resonance
Virtual Technician Undamped String Resonance Sound Mode The dampers of an acoustic piano span almost the full width of the keyboard. However, the topmost 18 keys (approximately 1.5 octaves) do not incorporate dampers, as the shorter strings for these treble notes decay quickly and therefore do not need to be dampened. -
Page 109: Cabinet Resonance
Cabinet Resonance Sound Mode While the fundamental sound of an acoustic piano is produced by vibrating strings, transmitting energy through a spruce soundboard, the cabinet of the instrument itself also contributes a variety of subtle tonal characteristics that enrich the playing and listening experience. The keybed, inner and outer rim, iron plate, and beams all play a role in disseminating sound energy, which in turn gives the piano a living, breathing quality. -
Page 110: Key-Off Effect
Virtual Technician Key-off Effect Sound Mode When playing an acoustic piano – particularly in the bass region of the keyboard – if a key is played with force and released quickly, it is often possible to hear the faint sound of the damper touching the strings immediately before the vibrations are stopped. -
Page 111: Fall-Back Noise
Fall-back Noise Pianist Mode Sound Mode When playing an acoustic piano, it is often possible to hear the faint sound of the keyboard action returning (i.e. ‘falling back’) to the neutral position after a key is released. The NV10 hybrid digital piano reproduces this sound, with the Fall-back Noise setting allowing the volume of this sound to be adjusted. -
Page 112: Hammer Delay
Virtual Technician Hammer Delay Pianist Mode Sound Mode When playing pianissimo passages using an acoustic piano, there may be a perceived delay between a key being pressed and the hammer striking the strings. If desired, the NV10 hybrid digital piano can recreate this delay, with the Hammer Delay setting allowing the delay length to be adjusted. -
Page 113: Topboard Simulation
Topboard Simulation Sound Mode When playing an acoustic grand piano, the position of the instrument’s topboard (lid) affects both the volume and ‘openness’ of the tone produced. A fully open topboard allows sound waves to reflect off the polished lid surface and project into the room, while a closed lid has the opposite effect, resulting in a darker, more opaque tone. -
Page 114: Decay Time
Virtual Technician Decay Time Sound Mode When playing an acoustic grand piano, the length of the instrument influences the speed at which held notes decay, with longer grand pianos (i.e. longer strings) characterised by longer decay times. The NV10 hybrid digital piano simulates this characteristic, with the Decay Time setting allowing the length of decay while keys are pressed to be adjusted. -
Page 115: Stretch Tuning
Stretch Tuning Sound Mode Stretch tuning is a piano-specific tuning method used by acoustic piano technicians in which the lower octaves are tuned slightly flatter and the upper octaves are tuned slightly sharper to match the natural harmonics of an acoustic piano. -
Page 116: User Tuning
Virtual Technician User Tuning Sound Mode The User Tuning function allows each of the 88 keys to be tuned individually. Adjusting the User Tuning function 1. Swipe left/right or tap the arrow buttons to select the User Tuning type. * In Sound mode, User Tuning is performed and stored independently for each sound. -
Page 117: Temperament
Temperament Sound Mode The Temperament setting allows the tuning system used by the NV10 hybrid digital piano to be changed from the modern ‘Equal Temperament’ standard to one of the various temperaments popularised during the Renaissance and Baroque periods. It is also possible to create customised temperaments using the User Temperament function. * This Virtual Technician setting will affect all sounds. -
Page 118: User Temperament
Virtual Technician User Temperament Sound Mode The User Temperament function allows custom temperaments to be created. Adjusting the User Temperament function 1. Swipe left/right or tap the arrow buttons to select the User Temperament type. 2. Tap the [Edit] button. The User Temperament screen will be shown. -
Page 119: Temperament Key
Temperament Key Sound Mode The Temperament Key setting allows the key of the selected temperament to be specified. When using a temperament other than Equal temperament, use this setting to specify the key signature of the piece. * This Virtual Technician setting will affect all sounds. * This setting will only affect the ‘balance’... -
Page 120: Key Volume
Virtual Technician Key Volume Pianist Mode Sound Mode The Key Volume setting allows the volume of different regions of the keyboard to be subtly reduced. There are four different damping presets available, with an additional ‘User’ setting allowing players to perform subtle volume adjustments on each individual key. -
Page 121: User Key Volume
User Key Volume Pianist Mode Sound Mode The User Key Volume settings allows the volume of each of the 88 keys to be adjusted individually. Adjusting the User Key Volume function 1. Swipe left/right or tap the arrow buttons to select the User Key Volume type. -
Page 122: Half-Pedal Adjust
Virtual Technician Half-Pedal Adjust Pianist Mode Sound Mode The Half-Pedal Adjust setting allows the point at which the damper/sustain pedal becomes effective (i.e. when the dampers of the piano begin to lift from the strings) to be adjusted. This setting may be useful for pianists that habitually rest their right foot on the damper/sustain pedal, but do not necessarily wish to sustain the sound. -
Page 123: Sound Settings
Sound Settings The Sound Settings menu contains settings for adjusting the overall sound of the instrument, such as pitch, tone control, and headphone enhancements. * The Sound Settings menu settings in Pianist mode and Sound mode are shared (i.e. adjustments made in Pianist mode will also affect Sound mode and vice versa). -
Page 124: Tuning
Sound Settings Tuning The Tuning setting allows the overall pitch of the NV10 hybrid digital piano to be raised and lowered in 0.5 Hz steps, and may therefore prove useful when playing with other instruments. * The Tuning setting will be hidden in Pianist mode. ... -
Page 125: Tone Control
Tone Control The Tone Control setting allows the overall sound character of the NV10 hybrid digital piano to be adjusted to provide the best sound quality within the area that the instrument is located. There are five different preset EQ settings available, with an additional ‘User’... -
Page 126: User Tone Control
Sound Settings User Tone Control The User Tone Control option allows finer control over the instrument’s sound character, allowing the volume of four frequency bands to be adjusted individually. It is also possible to adjust the frequency range of the mid-low and mid-high frequency bands. -
Page 127: Speaker Volume
Speaker Volume The Speaker Volume setting allows the maximum volume level of the NV10 hybrid digital piano’s speaker output to be reduced, providing finer adjustment control over the master volume. This setting can also function as a volume limiter, preventing the instrument from being played too loudly in the home or classroom etc. * This setting does not affect the headphones or Line Out volume. -
Page 128: Line In Level
Sound Settings Line In Level The Line In Level setting allows the volume level of the instrument’s Line In input jacks to be adjusted digitally. This setting may be useful when using the USB Recorder function and attempting to balance an external audio source with the instrument’s sound. -
Page 129: Wall Eq
Wall EQ The Wall EQ setting optimises the sound character of the soundboard speaker depending on whether the NV10 hybrid digital piano (back) is placed beside a wall, or in an area away from a wall. * This setting does not affect the headphones or Line Out output. ... -
Page 130: Shs Mode
Sound Settings SHS Mode Spatial Headphone Sound (SHS) is a special feature of the NV10 hybrid digital piano that enhances the depth and realism of the acoustic piano sound when listening through headphones or earphones. The SHS Mode setting allows the player to select from one of three different acoustic presets that adjust the spatial positioning of the sound, while also helping to reduce auditory fatigue when using earphones or headphones for extended periods of time. -
Page 131: Phones Type
Phones Type The Phones Type setting optimises the sound of the NV10 hybrid digital piano when listening through different types of headphones or earphones. * This setting does not affect the speaker or Line Out sound. Phones Type setting Phones Type Description Normal... -
Page 132: Phones Volume
Sound Settings Phones Volume The Phones Volume setting allows the maximum volume level of the headphones output to be increased. The default setting for Phones Volume is ‘Normal’ in order to protect an individual’s ears from excessive volume levels. The ‘High’ setting may be selected when using headphones with a high impedance, or in situations where it is desirable to increase the maximum volume level of the headphones output. -
Page 133: System Settings
System Settings The System Settings menu contains settings and functions related to the instrument’s operation, such as Bluetooth and MIDI connectivity, USB functions, LCD appearance, etc. * The System Settings menu settings in Pianist mode and Sound mode are shared (i.e. adjustments made in Pianist mode will also affect Sound mode and vice versa). -
Page 134: Bluetooth® Midi
* For a list of potential issues and recommended solutions when using Bluetooth communications, please refer to page 158 of this owner’s manual. * For more detailed instructions regarding Bluetooth connectivity, please refer to the supplementary Bluetooth® Connectivity Guide, available from the Kawai Global website: http://www.kawai-global.com/support/bluetooth... -
Page 135: Bluetooth® Audio
* For a list of potential issues and recommended solutions when using Bluetooth communications, please refer to page 158 of this owner’s manual. * For more detailed instructions regarding Bluetooth connectivity, please refer to the supplementary Bluetooth® Connectivity Guide, available from the Kawai Global website: http://www.kawai-global.com/support/bluetooth... -
Page 136: Bluetooth® Audio Level
System Settings Bluetooth® Audio Level The Bluetooth Audio Level setting is used to increase or decrease the volume level of Bluetooth Audio playback. While it’s generally preferable to adjust the audio volume level on the smart device itself, this setting may still be useful in certain situations. -
Page 137: Rename File
Rename File The Rename File function is used to rename song (SMF/KSO) and audio (MP3/WAV) files stored on a USB memory device. * This function will only be visible when a USB memory device is connected to the NV10 hybrid digital piano. ... -
Page 138: Delete File
System Settings Delete File The Delete File function is used to delete song, audio, and registration files stored on a USB memory device. Once a file has been deleted from the USB device it cannot be recovered. * This function will only be visible when a USB memory device is connected to the NV10 hybrid digital piano. ... -
Page 139: Usb Format
USB Format The USB Format function is used to format the connected USB memory device, erasing all stored data. * This function will only be visible when a USB memory device is connected to the NV10 hybrid digital piano. The USB Format function will erase all data stored on the connected USB memory device. Exercise caution when using this function in order to prevent accidental data loss. -
Page 140: Midi Overview
System Settings MIDI Overview The term MIDI is an acronym for Musical Instrument Digital Interface, an international standard for connecting musical instruments, computers, and other devices to allow the exchange of performance data. MIDI Terminals MIDI terminal Function MIDI IN Receiving note, program change, and other data. -
Page 141: Midi Functions
MIDI Functions The NV10 hybrid digital piano supports the following MIDI functions: Transmit/receive note information Transmit/receive program change information Transmit/receive note information to/from a MIDI-connected Transmit/receive program change data to/from a MIDI- musical instrument or device. connected musical instrument or device. Transmit/receive channel settings Transmit/receive pedal data Specify transmit/receive channels within the range of 1 to 16. -
Page 142: Midi Channel
System Settings MIDI Channel The MIDI Channel setting allows the transmit/receive channel to be specified. The selected channel will function as both the transmit and receive channel (separate transmit/receive channels cannot be specified). Changing the MIDI Channel Swipe left/right or tap the arrow buttons to change the MIDI Channel setting. -
Page 143: Send Program Change Number
Send Program Change Number The Send Program Change Number function is used to send a Program Change Number (1-128) to the connected MIDI device. Sending the Program Change Number 1. Swipe up/down or tap the arrow buttons above and below each digit to set the Program Change Number. -
Page 144: Transmit Program Change Numbers
System Settings Transmit Program Change Numbers The Transmit Program Change Numbers setting determines whether the NV10 hybrid digital piano will transmit program change information via MIDI when the instrument’s panel buttons are pressed. Transmit Program Change Numbers setting Transmit PGM# Multi-timbral setting Effect of pressing panel buttons Off, On1... -
Page 145: Multi-Timbral Mode
Multi-timbral Mode The Multi-timbral Mode setting determines whether or not the NV10 hybrid digital piano is able to receive MIDI information on more than one MIDI channel simultaneously. This allows the instrument to play back multi-track, multi-timbral performance data sent from an external MIDI device. ... -
Page 146: Lcd Contrast
System Settings LCD Contrast The LCD Contrast setting is used to adjust the contrast of the NV10 hybrid digital piano’s touchscreen display. The contrast of the display becomes sharper as the value increases. Adjusting the LCD Contrast setting Long press and drag the slider to adjust the LCD Contrast setting. -
Page 147: Auto Power Off
Auto Power Off The Auto Power Off setting can be used to automatically turn off the instrument after a specified period of inactivity. This function may be enabled by default, depending on the market location. * This setting will be stored automatically, and recalled every time the instrument is turned on. ... -
Page 148: Factory Reset
System Settings Factory Reset The Factory Reset function clears any user adjustments stored to sound memories, restoring the NV10 hybrid digital piano to its factory default settings. * This function will not clear Favorites memories or recorder songs stored in internal memory. ... -
Page 149: Assembly Instructions
Assembly Instructions Please read these assembly instructions thoroughly before attempting to assemble the NV10 hybrid digital piano. Please ensure that three or more people work on assembling the NV10 hybrid digital piano, especially when lifting the main body of the instrument onto the stand. ... - Page 150 Assembly Instructions 1. Attaching the legs to the pedal base 2. Removing the main unit from the box Place the pedal base (D) on a flat floor. Check that there are Check that the main unit box is facing upward, then open no musical scores or parts on the floor, and ensure that the the upper side of the box.
- Page 151 3. Mounting the main body onto the stand Ensure that three or more people undertake the When lifting and positioning the main body, do following step of the assembly process. not hold the gray shaded areas. Remove the main body from the box, lifting the unit sufficiently onto the back of the stand.
- Page 152 Assembly Instructions 4. Fastening the main body to the stand 5. Connecting the cords Loosely attach the main body to the stand using 2 screws Carefully connect the two cords to their respective plugs. at the front of the instrument (through the legs), and 10 screws towards the back of the instrument.
- Page 153 6. Attaching the stand back board 8. Attaching the headphone hook (optional) Attach the stand back board (E) to the pedal base using 5 screws A headphone hook is included with the NV10 hybrid digital piano and can be used to hang headphones when not in use. Ensure that cords 1 and 2 do not get trapped between the stand If desired, attach the headphone hook to the underside of the back board and the pedal base’s metal fittings.
-
Page 154: Connecting To Other Devices
Connecting to Other Devices Connecting to Other Devices The NV10 hybrid digital piano features a variety of jacks that allow the instrument to be connected to MIDI devices, computers, speakers, and mixers. It is also possible to connect external audio sources, such as an MP3 player, tablet, or a secondary keyboard, to the instrument’s amplifier and speaker system. -
Page 155: Jack Panel
Jack Panel LINE IN STEREO jack (1/8” phone jack) LINE OUT jacks (1/4” phone jack) This jack is used to connect the 1/8” stereo outputs from These jacks are used to connect the stereo output of the NV10 smart phones, tablets, computers, or other electronic audio hybrid digital piano’s sound to external speakers, amplifiers, equipment to the NV10 hybrid digital piano’s amplifier and... -
Page 156: Usb Midi (Usb To Host Connector)
Windows 98 se http://www.kawai-global.com/support/downloads/ Windows 2000 Windows Vista (no SP) * After driver installation, ensure that the ‘KAWAI USB MIDI’ device is correctly selected in the application software. USB MIDI is not supported. Windows Vista 64-bit (no SP) Please upgrade to service pack 1 or service pack 2. -
Page 157: Troubleshooting
Troubleshooting The tables below summarise issues that may be experienced with the NV10 hybrid digital piano, explaining the typical cause(s), and recommended solution(s). Power Problème Cause possible et solution Page The instrument does not turn on. Check that the power cable is firmly attached to the instrument, and p. - Page 158 Check that a USB MIDI driver is installed on the computer. p. 156 computer using a USB cable, however Check that ‘USB Audio Device’ or ‘KAWAI USB MIDI’ is selected in the p. 156 the software does not respond to key software’s input/output device settings.
- Page 159 MP3/WAV/SMF files Issue Possible Cause and Solution Page no. No sound can be heard when playing an Check that the audio player volume is not set to 0. p. 79 MP3 or WAV audio file stored on a USB Check that the format of the audio file is supported and listed in the ‘USB p.
-
Page 160: Demo Song List
Chopin EX Concert Grand La Campanella Liszt SK-5 Grand Lieder Ohne Worte No.18 "Duetto" Mendelssohn Jazz Clean Original Kawai Warm Grand Sonata No.30 Op.109 Beethoven Warm Grand 2 La Fille aux Cheveux de lin Debussy Standard Grand Petit chien Chopin... -
Page 161: Sound List (Sound Mode)
Sound List (Sound mode) Piano 1 Bright Ensemble SK ConcertGrand Full Organ EX ConcertGrand Reed Ensemble Harpsi & Mallets SK-5 GrandPiano Jazz Clean Harpsichord Jazz Old School Harpsichord Oct Warm Grand Vibraphone Warm Grand 2 Clavi Standard Grand Marimba Piano 2 Celesta Pop Grand Harpsichord 2... -
Page 162: Program Change Number List
Program Change Number List Program Change Number List Multi-timbral mode = off/on1 Multi-timbral mode = on2 Sound Name Bank Program Number Program Number Piano 1 SK ConcertGrand EX ConcertGrand SK-5 GrandPiano Jazz Clean Jazz Old School Warm Grand Warm Grand 2 Standard Grand Piano 2 Pop Grand... - Page 163 Multi-timbral mode = off/on1 Multi-timbral mode = on2 Sound Name Bank Program Number Program Number Soft Diapasn Soft Strings Mellow Flutes Medium Ensemble Loud Ensembe Bright Ensemble Full Organ Reed Ensemble Harpsi & Mallets Harpsichord Harpsichord Oct Vibraphone Clavi Marimba Celesta Harpsichord 2 Bell Split...
- Page 164 Program Change Number List Multi-timbral mode = off/on1 Multi-timbral mode = on2 Sound Name Bank Program Number Program Number Bass & Guitar Wood Bass Finger Bass Fretless Bass W.Bass & Ride E.Bass & Ride Ballad Guitar Pick Nylon Gt. Finger Nylon Gt MIDI Tones Rock Piano –...
- Page 165 Multi-timbral mode = off/on1 Multi-timbral mode = on2 Sound Name Bank Program Number Program Number Nylon Acoustic3 – Steel Guitar – 12 String – Mandolin – Steel Guitar 2 – Jazz Guitar – Pedal Steel – Electric Guitar – E. Guitar 2 –...
- Page 166 Program Change Number List Multi-timbral mode = off/on1 Multi-timbral mode = on2 Sound Name Bank Program Number Program Number StringEnsemble2 – Synth Strings – Synth Strings 3 – Synth Strings 2 – Choir 3 – Voice Oohs – Humming – Synth Vocal –...
- Page 167 Multi-timbral mode = off/on1 Multi-timbral mode = on2 Sound Name Bank Program Number Program Number Blown Bottle – Shakuhachi – Whistle – Ocarina – Square – Square 2 – Sine – Classic Synth – Classic Synth 2 – Lead – Classic Synth 3 –...
- Page 168 Program Change Number List Multi-timbral mode = off/on1 Multi-timbral mode = on2 Sound Name Bank Program Number Program Number Bag Pipe – Fiddle – Shanai – Tinkle Bell – Agogo – Steel Drums – Woodblock – Castanet – Taiko Drums –...
- Page 169 Multi-timbral mode = off/on1 Multi-timbral mode = on2 Sound Name Bank Program Number Program Number Jet Plane – Starship – Burst Noise – Applause – Laughing – Screaming – Punch – Heartbeat – Foot Step – Gunshot – Machine Gun –...
-
Page 170: Drum Rhythm List
Drum Rhythm List Drum Rhythm List Rhythm Name Rhythm Name 8 Beat 16 Beat Dance 8 Beat 1 Dance 1 Dance 2 8 Beat 2 8 Beat 3 Dance 3 Pop 1 Disco Pop 2 Techno 1 Techno 2 Pop 3 Pop 4 16 Beat Swing Pop 5... -
Page 171: Specifications
Specifications Keyboard Millennium III Hybrid action with 88-key graded ABS hammers and damper mechanism Integrated Hammer Sensing System (IHSS), contact-less optical sensors Sound Source Pianist mode SK-EX Rendering: 88-key multi-channel piano sampling, 88-key resonance modelling Sound mode Harmonic Imaging XL: 88-key piano sampling Internal Sounds Pianist mode SK-EX Concert Grand, 10 rendering characters... -
Page 172: Midi Exclusive Data Format
10th byte Byte ID Description 1 F0 Start code 2 40 Kawai ID number 3 00 - 0F MIDI channel 4 10, 30 Function code (30 when setting Multi-timbre On/Off) 5 04 Indicates that the instrument is an electric piano... -
Page 173: Midi Implementation Chart
[HYBRID DIGITAL PIANO] Date: September 2017 MIDI Implementation Chart Kawai NOVUS NV10 Version: 1.0 Function Transmitted Section Remarks Default 1 - 16 1 - 16 Basic Channel Changed 1 - 16 1 - 16 Default Mode 3 Mode 1 * The default for the OMNI mode is ON. - Page 176 NV10 Owner’s Manual 818746 KPSZ-0909 R101 OW1112E-S1709 Copyright © 2017 Kawai Musical Instruments Mfg. Co.,Ltd. All Rights Reserved. Printed in Indonesia...