Table of Contents
Advertisement
Quick Links
Download this manual
See also:
Instruction Manual
Advertisement
Table of Contents

Related Manuals for Minelab GPZ 7000


Summary of Contents for Minelab GPZ 7000
- Page 1 Instruction Manual...
- Page 2 No part of this document may be used or reproduced by any means or by any process, in any form, without the prior written permission of the copyright owner Minelab Electronics Pty Ltd of 118 Hayward Avenue, Torrensville, SA 5031, Australia.
-
Page 3: Table Of Contents
Adjust Sensitivity Settings Charging Batteries Volume BC 10 Battery Charger Detect Plus Battery LED Power LED Threshold Level GPZ 7000 Battery Volume Limit Recharge the Lithium-Ion Battery Pack Threshold Pitch WM 12 Battery Ground-Balance Mode Recharge the WM 12 Auto... - Page 4 Loss of GPS Position Fix during a GeoHunt Wireless Audio Module Connect the WM 12 Reset the WM 12 Minelab XChange 2 Communicating between GPZ 7000 and your PC System Requirements Install XChange 2 on your PC Start the XChange 2 Application Connect GPZ 7000 to your PC...
-
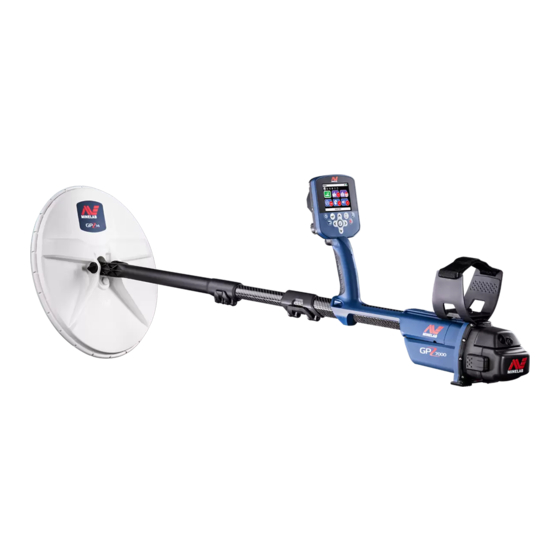
Page 5: Detector Parts
Detector Parts Detector Parts Headphone Module GPZ 7000 is not waterproof Battery Pack Armrest Strap Battery Latches Armrest Stand Armrest Lock Control Box Handle Control Panel Upper Shaft USB Connector Upper Cam Lock Trigger Mid Shaft Lower Cam Lock Lower Shaft... - Page 6 Detector Parts See page 39 for the list of accessories available for use with the GPZ 7000. Items may vary from those shown.
-
Page 7: Assembly
Assembly Assembly Attach mid shaft to upper shaft Release the cam lock on the upper shaft by pulling Assembling the Detector the lever away from the shaft. Attach coil and lower shaft to mid shaft Release the camlock on the lower shaft by pulling the lever away from the lower shaft The mid shaft can only be inserted into the upper shaft in one orientation. - Page 8 It is a good idea to go detecting with a fully charged battery. See page 6 for information on how to recharge the GPZ 7000 battery. Fit the battery pack onto the control box and close the latches to secure it in place.
-
Page 9: Connecting Headphones
Assembly Connecting Headphones Attach Armrest Lift the armrest lock until it is fully open. Slide the The headphones can be connected directly to the armrest onto the rail on top of the chassis. Ensure detector or to the WM 12. that the sloping sides of the armrest face toward the It is recommended that the WM 12 is used to generate audio. -
Page 10: Changing Coils
Charging Batteries Changing Coils A range of accessory coils are available for your GPZ 7000. To change a coil, follow the ‘Assembling the detector’ steps with the alternative coil. Always check that the coil connector is dry and free of grit and dust before connecting to the detector. -
Page 11: Bc 10 Battery Charger
GPZ 7000 Battery cable provided. A USB connection is provided for charging the WM 12 (page 8). The GPZ 7000 standard pack is supplied with a sealed rechargeable Lithium-Ion (Li-Ion) smart battery. This battery pack is supplied partially charged and should be charged for up to eight hours to maximise your first use. -
Page 12: Recharge The Lithium-Ion Battery Pack
Charging Batteries WM 12 Battery Recharge the Lithium-Ion Battery Pack Remove the battery pack from the detector and The WM 12 contains a rechargeable Li-Ion battery, place it into the charger unit, ensuring that the which can be charged by the Li-Ion battery charger or a connector pins line up. -
Page 13: Control Panel
Control Panel Control Panel Power Button Press to turn the GPZ 7000 On/Off Press and hold from Off to access the Reset User Button menu (page 24) Press to activate your selected function GPZ 7000 Page and (default Backlight) Back Button... -
Page 14: Gpz 7000 User Interface
The Status Bar is displayed at the top of all screens and Typical Screen Elements provides status information for the following functions: The GPZ 7000 graphical user interface (GUI) displays all • WM 12 Headphone connection* detection information and detector settings options via •... -
Page 15: Types Of Selection Screens
Charging Batteries Summary of Status Bar icons Record Pause GeoHunt No Icon Backlight No Icon 100% Empty Jupiter Battery (Flashing) Example of a selection box Types of Selection Screens Selection List When you select an Item on a page, the options relating Select an option from a list. -
Page 16: Menu Navigation
Charging Batteries Menu Navigation Pages. The detector settings are grouped into six pages: • Detect The GPZ 7000 GUI has two main menus: • Detect Plus • Detector Settings Menu – where you can access all Detector Settings Pages • Settings •... -
Page 17: Map
(or metres) in the north-south vertical direction. GeoTrail. The map displays north-south and east-west grid lines, On the GPZ 7000, GPS provides the capability to store centred on your current location. The distance between location data relating to FindPoints and WayPoints, and to the grid lines will depend on your current zoom level record GeoHunts. -
Page 18: Map Elements
• Names of GeoStore items (FindPoints, WayPoints) A FindPoint stores the location and details of a target. When you choose to store a FindPoint (page 29), the GPZ 7000 stores the following information: • Location (Latitude/Longitude) • Time and date •... -
Page 19: Geohunts
Navigation Tool. GeoHunts When the GeoHunt function is active, the GPZ 7000 stores your position information while you are detecting. It allows you to see a map view of the ground you have covered, and records the location, time and detector settings used. -
Page 20: Detector Settings Menu
Detector Settings Menu Detector Settings Menu Settings Page Overview Connect WM 12 Wizard Detector Settings Menu Structure Connect Additional Wizard WM 12 All functions and settings are grouped into six pages: Preferences Page Overview • Detect Options Actions • Detect Plus -12:00 to +12:00 •... -
Page 21: Detect
These unwanted Quick Start offers minimal setting adjustment, ideal for target signals are known as ground noise. The GPZ 7000 beginner users. When Quick Start is selected, the Quick detector has been designed to remove unwanted ground Start wizard is launched. -
Page 22: Noise Cancel
Select the Noise Cancel icon, then select Manual. detector. Press the left or right arrow buttons to select a The GPZ 7000 may become noisy due to electrical channel. Pause and listen to the interference coming interference from power lines, electrical equipment or from the detector. -
Page 23: Detect Plus
Detect Plus If the Threshold Level is too high, faint targets will be harder to hear above the Threshold ‘hum’ . Detect Plus If the Threshold Level is too low, the slight variation caused by a small or deep target may not be sufficient The Detect Plus page contains settings for the detector’s to hear. -
Page 24: Threshold Pitch
Detect Plus Threshold Pitch Manual When set to Manual Ground Balance Mode, the detector Range: 1–100 will not automatically maintain ground balance. When Factory Preset: 50 using manual mode you must regularly perform a Threshold Pitch allows you to adjust the pitch of the Quick-Trak to maintain an accurate ground balance. -
Page 25: Settings
GPS has the following options: The Connect Additional WM 12 function is used to pair • Off additional WM 12’s that receive audio from the GPZ 7000. This allows you to use more than one WM 12 with your • On detector. -
Page 26: Preferences
Preferences Preferences The Preferences page displays the following Items: • Time Zone • Time Format • Coordinates Format • Length Units • Weight Units • Wizards Time Zone Time Zone is based on Universal Coordinated Time (UTC), and options range from UTC - 12:00 to UTC + 14:00, increasing in 30 minute increments. -
Page 27: User Button
User Button View Coordinates User Button Press the User Button to toggle the Latitude/Longitude coordinates on and off. View Navigation Tool This page allows you to assign the function of the User Button. Press the User Button to toggle the Navigation Tool on and off. -
Page 28: Reset
(default English). You will be prompted to select the detector The GPZ 7000 is delivered in its factory preset state language on initial startup, and when the detector and any changes made to the detector’s settings are reboots following a Reset All. -
Page 29: Map Menu
Map Menu Map Menu Create GeoData Page Overview Options: Map Menu Structure Create FindPoint All functions and settings are grouped into four pages: Create WayPoint Start GeoHunt • Map Stop GeoHunt • GeoStore Pause GeoHunt • Display • Create GeoData The following overviews provide a quick reference guide to each page. -
Page 30: Geostore
GeoStore To sort the list, select the first option in the list ‘Sort’ . GeoStore The Sort selection box will be displayed with the following options: • Proximity (from your current location) The GeoStore page allows you to adjust the zoom levels of the Map, and to store, sort and view up to 100 •... -
Page 31: Go To Start/End Of A Geohunt
GeoStore Go to Start/End of a GeoHunt From the GeoStore page, select GeoHunts. The selection box will be displayed with the following options: • Go to start • Go to end • Delete Use the arrow buttons to highlight your required option and press Select. -
Page 32: Display
Display View Names Display View Names will show or hide the names of all FindPoints and WayPoints displayed on the Map. By default, View Names is ‘On’ , but names can be hidden to save space The Display page is where you control which elements when many items are displayed on the Map at once. -
Page 33: Create Geodata
After a few seconds the message will disappear and you will be returned to the Map. If the detector’s internal memory becomes full, the GPZ 7000 will stop recording and an alert message will be Control a GeoHunt displayed. -
Page 34: Wireless Audio Module
Wireless Audio Module Wireless Audio Module To connect the WM 12 to your detector, navigate to ‘Connect WM 12’ in the Settings menu and select it The Wireless Audio Module (WM 12) facilitates the use of to launch a wizard that will guide you through the wireless audio, using advanced WiStream technology to connection process. -
Page 35: Minelab Xchange 2
Minelab XChange 2 Minelab XChange 2 Connect GPZ 7000 to your PC Insert one end of the USB cable into your GPZ 7000 Communicating between GPZ 7000 and and the other end into your PC. your PC Start XChange 2 on your PC. -
Page 36: Detecting Basics
Detecting Basics Detecting Basics You will obtain the best performance when the coil is swept close and parallel to the ground at all times. This will increase detection depth and improve the response Holding the Detector to small objects. Avoid excessive brushing of the coil on Thread your arm through the the ground. -
Page 37: Detector Sounds
Follow these hints and techniques to help you to utilise Variations in the Threshold allow you to hear very small the power of your GPZ 7000 detector, to ensure that every and deep targets. It is also used to help distinguish trip is a success. -
Page 38: Simple Detecting Exercise
Detecting Basics the high degree of mineralisation and/or salt. • In some mineralised soils a response may be received from a concentration of orange/reddish dyke material or clay. Remember, a metal target will get louder by moving the coil even centimetres closer. •... -
Page 39: Pinpointing
Pinpointing Pinpointing Locating the target. Pinpointing narrows down the location of a buried target, allowing you to determine its exact location before digging. Accurate pinpointing is important to prevent damage to the buried object, which can significantly reduce it’s value. To find a target, and reduce the size of the hole required to remove it from the ground, it is necessary to pinpoint the exact location of the target. -
Page 40: Target Recovery
• A pick with broad scraping blade (essential) Note: The GPZ 7000 is a ‘motion’ detector. This means the coil must be moving over the target, or the target moving • A crowbar (for very deep objects in hard ground) over the coil, in order for the detector to ‘see’... -
Page 41: Detector Care And Safety
Detector Care and Safety Detector Care and Safety The GPZ 7000 is a high-quality electronic instrument, finely engineered and packaged in a durable housing. Taking proper care of your detector is vital to ensure its ongoing reliability. • Avoid getting sand and grit into the shafts or WARNING fastenings (e.g. -
Page 42: Battery Care And Safety
The sand seal is not removable. • In the event of a fault, return the battery to a Minelab authorised service centre for repair. The use of 7. Ensure the battery clips are fully closed. -
Page 43: Gpz 7000 Accessories
• PRO-SWING 45 detecting harness • PRO-FIND 25 Pinpointer If you would like to purchase any accessories for your GPZ 7000 or any other Minelab product, please feel free to contact us directly or via your local Authorised Minelab dealer. -
Page 44: Factory Presets
Factory Presets Factory Presets User Button Presets Backlight Selected Detect Presets Navigation Tool Unselected Coordinate View Unselected Quick Start Snapshot Unselected Target Size Small Nuggets Other Unselected Ground Type Normal Noise Cancel Auto Display Presets Sensitivity View Trail Volume View Navigation Tool Detect Plus Presets View Names View Coordinates... -
Page 45: Technical Specifications
Technical Specifications Technical Specifications WARNING Any changes or modifications not expressively approved by Minelab Electronics Pty Ltd could void the user’ s authority to operate this equipment. GPZ 7000 Technical Specifications Transmission Full Band Spectrum 2 (FBS 2) Simultaneous Frequency Transmission ranging from 1.5–100 kHz Coil 14”... - Page 46 Detector Parts...