Table of Contents
Advertisement
Advertisement
Table of Contents

Related Manuals for Planet WAP-4060PE


Summary of Contents for Planet WAP-4060PE
- Page 1 54/108Mbps Super G Wireless LAN Managed Access Point WAP-4060PE User’s Manual...
-
Page 2: Federal Communication Commission Interference Statement
Copyright Copyrightã 2005 by PLANET Technology Corp. All rights reserved. No part of this publica- tion may be reproduced, transmitted, transcribed, stored in a retrieval system, or translated into any language or computer language, in any form or by any means, electronic, mechani- cal, magnetic, optical, chemical, manual or otherwise, without the prior written permission of PLANET. - Page 3 All guidelines of this and of the computer manufac- ture must therefore be allowed at all times to ensure the safe use of the equipment. Revision User’s Manual for PLANET 802.11g Wireless LAN Managed Access Point Model: WAP-4060PE Rev: 1.0 (January, 2005) Part No. EM-WAP4060...
-
Page 4: Table Of Contents
CHAPTER 1 INTRODUCTION ... 1 1.1 Package Contents ... 1 1.2 System Requirements ... 1 1.3 Features ... 1 1.4 Physical Details... 2 1.5 Specification... 3 1.6 Wireless Performance ... 4 CHAPTER 2 INSTALLATION ... 6 2.1 General Installation... 6 2.2 Using PoE (Power over Ethernet)... - Page 5 4.6.2 802.1x Authentication Setup ... 49 4.7 Using 802.1x Mode (without WPA) ... 52 CHAPTER 5 OPERATION AND STATUS ... 53 5.1 Operation ... 53 5.2 Status Screen ... 53 5.3.1 Statistics Screen ... 55 5.3.2 Profile Status... 56 5.3.3 Activity Log... 57 5.3.4 Station List ...
-
Page 6: Introduction
SSIDs, VLAN support, WPA support, RADIUS MAC authentication, rogue AP detection, and so on. The LAN port of WAP-4060PE is 802.3af compliant. Therefore, it can be installed anywhere without the constraint on power socket. Provided with one reversed-polarity SMA male connec- tor, WAP-4060PE is easy to connect external antenna and booster to extend the wireless distance. -
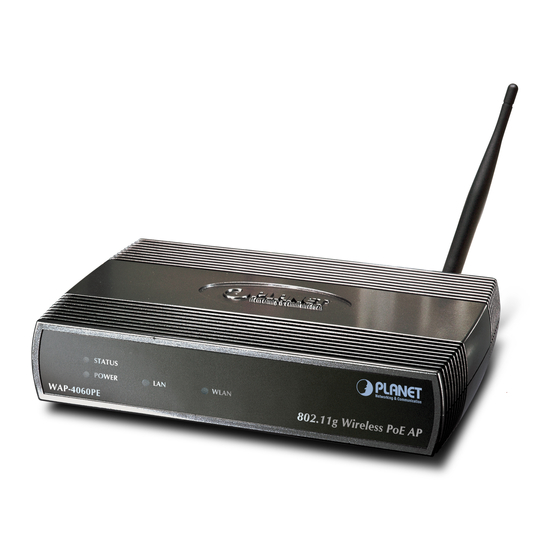
Page 7: Physical Details
CONSOLE RESET Button This button has two (2) functions: · Reboot. When pressed and released, the WAP-4060PE will reboot (restart). · Reset to Factory Defaults. This button can also be used to clear ALL data and restore ALL settings to the factory default values. -
Page 8: Specification
TWICE. 4. Release the Reset Button. The factory default configuration has now been restored, and the WAP-4060PE is ready for use. Use a standard LAN cable (RJ45 connectors) to connect this port LAN (PoE) to a 10BaseT or 100BaseT hub on your LAN. -
Page 9: Wireless Performance
Keep the number of walls, or ceilings between AP and clients as few as possible; otherwise the signal strength may be seriously reduced. Place WAP- 4060PE in open space or add additional WAP-4060PE as needed to improve the cover- age. - Page 10 WAP-4060PE. 4. WLAN type If WAP-4060PE is installed in an 802.11b and 802.11g mixed WLAN, its performance will reduced significantly. Because every 802.11g OFDM packet needs to be preceded by an RTS-CTS or CTS packet exchange that can be recognized by legacy 802.11b devices.
-
Page 11: Installation
4060PE is usually at the center of your wireless network, with line of sight to all of your mobile stations. 2. Assemble the antenna to WAP-4060PE. Try to place them to a position that can best cover your wireless network. The antenna’s position will enhance the receiving sensitivity. -
Page 12: Access Point Setup
After the installation completes, you can start this utility from “Start”>”Program Files”>”Planet”>”WAP-4060PE Manager”. 3.2.1 Main Screen When the utility is executed, it searches the network for all active WAP-4060PE, and lists them on screen, as shown by the example below. Wireless Access Points The main panel displays a list of all Wireless Access Points found on the network. -
Page 13: Setup Procedure
1. Use a PC which is already connected to your LAN, and start the Web browser. 2. In the Address box, enter the IP address of the WAP-4060PE you want to cobnfig- ure. You should then see a login prompt, which will ask for a User Name and Password. - Page 14 Wireless Access Point. If you can't connect: It is likely that your PC’s IP address is incompatible with the WAP-4060PE’s IP address. This can happen if your LAN does not have a DHCP Server. The default IP address of the Wireless Access Point is 192.168.0.228, with a Network Mask of 255.255.255.0.
-
Page 15: Access Control
3.4 Access Control This feature allows you to block certain access from unknown or distrusted wireless stations. Click Access Control on the menu to view a screen like the following. Data - Access Control Screen Use this checkbox to Enable or Disable this feature as desired. Enable Warning: Ensure your own PC is in the "Trusted Wireless Sta- tions"... - Page 16 Here lists ass Wireless Stations which you have designated Trusted Wireless as “Trusted”. Stations Here lists all Wireless Stations detected by the WAP-4060PE, Other Wireless which you have not designated as "Trusted". Stations The name assigned to the Trusted Wireless Station. Use this Name when adding or editing a Trusted Station.
-
Page 17: Security Profiles
Stations" list, enter the required data and click this button. Clear the Name and Address fields. Clear 3.5 Security Profiles Security Profiles contain the SSID and all the security settings of this WAP-4060PE. · Up to eight (8) Security Profiles can be defined. ·... - Page 18 Data - Security Profiles Screen Profile All available profiles are listed. For each profile, the following Profile List data is displayed: · · · · · · Buttons · · Primary Profile Select the primary profile for 802.11b and 802.11g AP mode. 802.11b/g AP Only enabled profiles are listed.
-
Page 19: Vlan Configuration Screen
802.11b/g Bridge Select the primary profile for 802.11b and 802.11g Bridge Mode. This setting determines the SSID and security settings Mode used for the Bridge connection to the remote AP. Isolation If this option is selected, wireless clients using different pro- None files (different SSIDs) are not isolated, so they will be able to communicate with each other. - Page 20 Data - VLAN Configuation Screen VLAN – Client Traffic Each profile is listed, whether currently enabled or not. You can Profile assign traffic from each profile (SSID) to a different VLAN if de- sired. To assign multiple profiles to the same VLAN, just enter the same VLAN ID for each profile.
-
Page 21: Configure Security Profile
Specified If selected, you can enter the desired VLAN ID. Normally, this ID should be one of the client VLAN IDs defined above. VLAN ID 3.6 Configure Security Profile This screen is displayed when you select a Profile on the Security Profiles screen, and click the Configure button. -
Page 22: Security Settings - None
If this option is selected: · This WAP-4060PE must have a "client login" on the Radius Server. · Each user must have a "user login" on the Radius Server. · Each user's wireless client must support 802.1x and provide the login data when required. - Page 23 6. Add Users on the Radius server as required. The username must be the MAC address of the Wireless client you wish to allow, and the password must be blank. 7. When clients try to associate with the WAP-4060PE, their MAC address is passed to the Radius Server for authentication.
-
Page 24: Uam
· Add a RADIUS client on RADIUS server, using the IP address or name of the WAP-4060PE, and the same shared key as pre-configured. · Ensure the WAP-4060PE has the correct address, port number, and shared key for login to your Radius Server. These parameters are entered either on the Security page, or the UAM sub-screen, depending on the security method used. - Page 25 · Ensure the WAP-4060PE has the correct address, port number, and shared key for login to your Radius Server. These parameters are entered either on the Security page, or the UAM sub-screen, depending on the security method used. 2. On your Web Server, create a suitable welcome page. The welcome page must have a link or button to allow the user to input their user name and password on the uamlogon.htm page on the WAP-4060PE.
-
Page 26: Security Settings - Wep
Data - UAM Screen Enable this if you want to use this feature. See the section above Enable for details of using UAM. If selected, then when a user first tries to access the Internet, Internal they will be blocked, and re-directed to the built-in login page. Web-based The logon data is then sent to the Radius Server for authentica- Authentication... - Page 27 Data - WEP Screen Select the desired option, and ensure your Wireless stations Data have the identical setting: Encryption · · · Normally, you can leave this at “Automatic”, so that Wireless Authentication Stations can use either method ("Open System" or "Shared Key".).
-
Page 28: Security Settings - Wpa-Psk
Passphrase Use this to generate a key or keys, instead of entering them directly. Enter a word or group of printable characters in the Passphrase box and click the "Generate Key" button to auto- matically configure the WEP Key(s). The current status is displayed. Radius MAC Authentication Click the "Configure"... -
Page 29: Security Settings - Wpa-802.1X
WPA standard. If this option is selected: · This WAP-4060PE must have a "client login" on the Radius Server. · Each user must have a "user login" on the Radius Server. Normally, a Certifi- cate is used to authenticate each user. - Page 30 This read-only field displays the current login name, which is Client Login Name the same as the name of the WAP-4060PE. The Radius Server must be configured to accept this login. This is used for the Client Login on the Radius Server. Enter Shared Key the key value to match the Radius Server.
- Page 31 4060PE. bership terminates Enable this if you want this WAP-4060PE to send accounting Radius Account- data to the Radius Server. If enabled, the port used by your Radius Server must be entered in the “Radius Accounting Port" field.
-
Page 32: Security Settings - 802.1X
WEP encryption. If this option is selected: · This WAP-4060PE must have a "client login" on the Radius Server. · Each user must have a "user login" on the Radius Server. Normally, a Certifi- cate is used to authenticate each user. - Page 33 Select the desired index value. Wireless stations must use the same key index. Enable this if you want this WAP-4060PE to send account- ing data to the Radius Server. If enabled, the port used by your Radius Server must be entered in the Radius Accounting Port field.
-
Page 34: System Screen
Data - System Screen Identification Enter a suitable name for this WAP-4060PE. Access Point Name If desired, you can enter a description for the WAP-4060PE. Description Country Do- Select the country or domain matching your current location. main IP Address... -
Page 35: Ghz Wireless
WINS If your LAN has a WINS server, you can enable this to have Enable WINS this AP register with the WINS server. Enter the name or IP address of your WINS server. WINS Server Name/IP Ad- dress 3.8 2.4GHz Wireless There are two configuration screens available: ·... - Page 36 Data - Basic Settings Screen Operation Select the desired option: Wireless Mode · · · · · · Disable - select this if for some reason you do not want this AP to transmit or receive at all. 802.11b and 802.11g - this is the default setting, and will allow connections by both 802.11b and 802.1g wireless sta- tions.
- Page 37 · None (disable) - Disable Bridge mode. Use this if you want this WAP-4060PE to act as an AP only. · Point-to-Point Bridge (PTP) - Bridge to a single AP. You must provide the MAC address of the other AP in the PTP Bridge AP MAC Address field.
-
Page 38: Advanced Settings
APs". Parameters · Channel No · This displays the current channel used by the WAP-4060PE. Current Chan- nel No. 3.8.2 Advanced Settings Clicking the Advanced link on the menu will result in a screen like the following. allowed APs. - Page 39 Do NOT select the "802.11g" or "ODFM" options unless ALL of your wireless clients support this. 802.11b clients will not be able to connect to the WAP-4060PE if either of these modes is selected. If enabled, each Wireless station using the WAP-4060PE is invisible to other Wireless stations.
- Page 40 Select the desired power output. Higher levels will give a greater range, but are also more likely to cause interfer- ence with other devices. WAP-4060PE has only 1 antenna, there is only 1 option available. Select the desired option. The default is CTS-only.
-
Page 41: Pc And Server Configuration
4.1 Overview All Wireless Stations need to have settings which match the Wireless Access Point. These settings depend on the mode in which the WAP-4060PE is being used. · If using WEP or WPA-PSK, it is only necessary to ensure that each Wireless station's settings match those of the WAP-4060PE, as described below. -
Page 42: Using Wpa-802.1X
The WAP-4060PE will use its Default Name as its Client Login name. (However, your Radius server may ignore this and use the IP address instead.) · The Shared Key, set on the Security Screen of the WAP-4060PE, must match the Shared Secret value on the Radius Server. ·... -
Page 43: Windows 2000 Domain Controller Setup
· dhcpd · · rras · webserver (IIS) · Radius Server (Internet Authentication Service) · Certificate Authority 4.5.1 Windows 2000 Domain Controller Setup 1. Run dcpromo.exe from the command prompt. 2. Follow all of the default prompts, ensure that DNS is installed and enabled during installation. -
Page 44: Dhcp Server Configuration
6. Enter the information for the Certificate Authority, and click Next. 7. Click Next if you don't want to change the CA's configuration data. 8. Installation will warn you that Internet Information Services are running, and must be stopped before continuing. Click Ok, then Finish. 4.5.3 DHCP server configuration 1. - Page 45 3. Click Next when the New Scope Wizard Begins. 4. Enter the name and description for the scope, click Next. 5. Define the IP address range. Change the subnet mask if necessary. Click Next. 6. Add exclusions in the address fields if required. If no exclusions are required, leave it blank.
-
Page 46: Certificate Authority Setup
11. If you don't want a WINS server, just click Next. 12. Select Yes, I want to activate this scope now. Click Next, then Finish. 13. Right-click on the server, and select Authorize. It may take a few minutes to com- plete. - Page 47 4. Select Start - Programs - Administrative Tools - Active Directory Users and Com- puters. 5. Right-click on your active directory domain, and select Properties. 6. Select the Group Policy tab, choose Default Domain Policy then click Edit.
- Page 48 7. Select Computer Configuration - Windows Settings - Security Settings - Public Key Policies, right-click Automatic Certificate Request Settings - New - Automatic Cer- tificate Request. 8. When the Certificate Request Wizard appears, click Next. 9. Select Computer, then click Next.
-
Page 49: Internet Authentication Service (Radius) Setup
2. Right-click on Clients, and select New Client. 3. Enter a name for the access point, click Next. 4. Enter the IP address of the WAP-4060PE, and set the shared secret, as entered on the Security Profile screen of the WAP-4060PE. -
Page 50: Grant Remote Access For Users
9. Click Permitted, then OK. Select Next. 10. Select Grant remote access permission. Click Next. 11. Click Edit Profile... and select the Authentication tab. Enable Extensible Authenti- cation Protocol, and select Smart Card or other Certificate. Deselect other authentication methods listed. Click OK. 12. -
Page 51: 802.1X Client Setup On Windows Xp
3. Select the Dial-in tab, and enable Allow access. Click OK. 4.6 802.1x Client Setup on Windows XP Windows XP ships with a complete 802.1x client implementation. If using Windows 2000, you can install SP3 (Service Pack 3) to gain the same functionality. If you don't have either of these systems, you must use the 802.1x client software provided with your wireless adapter. - Page 52 4. On the first screen (below), select Request a certificate, click Next. 5. Select User certificate request and select User Certificate, the click Next.
- Page 53 6. Click Submit. 7. A message will be displayed, then the certificate will be returned to you. Click Install this certificate.
-
Page 54: 802.1X Authentication Setup
8. . You will receive a confirmation message. Click Yes. 9. Certificate setup is now complete. 4.6.2 802.1x Authentication Setup 1. Open the properties for the wireless connection, by selecting Start - Control Panel - Network Connections. 2. Right Click on the Wireless Network Connection, and select Properties. 3. -
Page 55: Encryption Settings
Encryption Settings The Encryption settings must match the APs (WAP-4060PE) on the Wireless network you want to join. · Windows XP will detect any available Wireless networks, and allow you to config- ure each network independently. · Your network administrator can advise you of the correct settings for each network. - Page 56 2. Select the wireless network from the Available Networks list, and click Configure. 3. Select and enter the correct values, as advised by your Network Administrator. For example, to use EAP-TLS, you would enable Data encryption, and click the checkbox for the setting: The key is provided for me automatically, as shown be- low.
-
Page 57: Using 802.1X Mode (Without Wpa)
4.7 Using 802.1x Mode (without WPA) The procedures are similar to using WPA-802.1x. The only difference is that on your client, you must NOT enable the setting: The key is provided for me automatically. Instead, you must enter the WEP key manually, ensuring it matches the WEP key used on the Access Point. -
Page 58: Operation And Status
Chapter 5 Operation and Status 5.1 Operation Once both the WAP-4060PE and the PCs are configured, operation is automatic. However, you may need to perform the following operations on a regular basis. · If using the Access Control feature, update the Trusted PC database as required. - Page 59 This indicates whether or not the profile is enabled. Click this to open a sub-window where you can view Statis- tics on data transmitted or received by the WAP-4060PE. Click this to open a sub-window which displays further details about each security profile.
-
Page 60: Statistics Screen
5.3.1 Statistics Screen This screen is displayed when the 2.4GHz Statistics button on the Status screen is clicked. It shows details of the traffic flowing through the WAP-4060PE. Data - Statistics Screen System Up Time This indicates the time period which the system has been System Up Time running since the last restart or reboot. -
Page 61: Profile Status
The Wireless band used by this profile. Band Status Indicates whether or not this profile is enabled. The number of wireless stations currently using accessing this Clients WAP-4060PE using this profile. If the profile is disabled, this will always be zero. -
Page 62: Activity Log
5.3.3 Activity Log This screen is displayed when the Log button on the Status screen is clicked. Data - Activity Log Data Current Time Buttons Refresh Save to file Clear Log The system date and time is displayed. The Log shows details of the connections to the WAP- 4060PE. -
Page 63: Station List
Mode The mode of each Wireless Station. This displays the SSID used the Wireless station. Because the SSID WAP-4060PE supports multiple SSIDs, different PCs could connect using different SSIDs. This indicates the current status of each Wireless Station. Status Update the data on screen. -
Page 64: Management
Upgrade Firmware 6.2 Admin Login Screen The Admin Login screen allows you to assign a password to the WAP-4060PE. This password limits access to the configuration interface. The default password is pass- word. It is recommended to change it for security consideration. -
Page 65: Auto Config/Update
Change Admin Pass- word New Password Repeat New Password Admin Connections Allow Admin connec- tions via wired Ethernet only Enable HTTP HTTP Port Number Enable HTTPS HTTPS Port Number Enable Telnet 6.3 Auto Config/Update The Auto Config/Update screen provides two features: ·... - Page 66 Data - Auto Config/Update Screen Admin Connections Perform Auto Configuration on this AP next restart Respond to Auto- configuration request by other AP Provide login name and password If checked, this AP will perform Auto Configuration the next time it restarts. ·...
-
Page 67: Config File
This screen allows you to Backup (download) the configuration file, and to restore (upload) a previously saved configuration file. You can also set the WAP-4060PE back to its factory default settings. To reach this screen, select Config File in the Management section of the menu. - Page 68 This will terminate the current connection. The WAP- 4060PE will be unavailable until it has restarted. · By default, the WAP-4060PE will act as a DHCP client, and automatically obtain an IP address. You will need to determine its new IP address in order to re-connect.
-
Page 69: Log Settings (Syslog)
A "Rouge AP" is an Access Point which should not be in use, and so can be consid- ered to be providing unauthorized access to your LAN. This WAP-4060PE can assist to locate 2 types of Rogue APs: · APs which have Wireless security disabled. -
Page 70: Snmp
Data - Rogue AP Screen Enable Detection Enable Detection Scan Detection generates SNMP Trap Rogue Detection No Security Not in Legal AP List Define Legal AP List 6.7 SNMP SNMP (Simple Network Management Protocol) is only useful if you have a SNMP program on your PC. - Page 71 Data - SNMP Screen General Use this to enable or disable SNMP as required Enable SNMP Community Enter the community string, usually either "Public" or "Private". Select the desired option: Access Rights · · Managers The IP address of the manager station is not checked. Any Station The IP address is checked, and must match the address you Only this station...
-
Page 72: Upgrade Firmware
2. Select the upgrade file. Its name will appear in the Upgrade File field. 3. Click the Upgrade button to commence the firmware upgrade. Note: The WAP-4060PE is unavailable during the upgrade process, and must restart when the upgrade is completed. Any connections to or through the WAP-4060PE will be lost. -
Page 73: Specifications
Modulation Port Antenna Connector Output Power Sensitivity Operating Mode Security WAP-4060PE IEEE 802.11b, 802.11g DSSS (Direct Sequence Spread Spectrum) OFDM with BPSK, QPSK, 16QAM, 64QAM, DBPSK, DQPSK, 10/100Mbps RJ-45 port * 1, 802.3af compliant Reverse SMA male * 1 18dBm 11 Mbps (CCK): -85dBm 5.5 Mbps (QPSK): - 89dBm... - Page 74 Web based configuration Management RADIUS Accounting RADIUS-On feature RADIUS Accounting update Message Log Access Control list file support Configuration file Backup/Restore Statistics support Device discovery program Windows Utility Super G mode 802.11g Data Rate 802.11b Dimensions (L x W x 150 x 102 x 30mm Weight 210g...
-
Page 75: Troubleshooting
If your PC uses a Fixed (Static) IP address, ensure that it is using an IP Address which is compatible with the WAP-4060PE. (If no DHCP Server is found, the WAP-4060PE will default to an IP Address and Mask of 192.168.0.228 and 255.255.255.0.) On Windows PCs, you can use Control Panel-Network to check the Properties for the TCP/IP protocol. -
Page 76: Command Line Interface
The CLI requires either a Telnet connection or a physical connection from your PC to the serial port (RS232 port) on the WAP-4060PE. C.1 Using the CLI - Telnet 1. Start your Telnet client, and establish a connection to the WAP-4060PE. e.g. Telnet 192.168.0.228 2. -
Page 77: Command Reference
4. Use the “Connect” command to start the connection. 5. You will be prompted for a user name and password. Enter the current user name and password for the AP you are connecting to. The default values are admin for the User Name, and password for the Password. 6. - Page 78 get 11gonly Display 11g Only Allowed get 11goptimize Display 11g Optimization Level get 11goverlapbss Display Overlapping BSS Protection get acl Display Access Control List get aging Display Aging Interval get antenna Display Antenna Diversity get association Display Association Table get authentication Display Authentication Type get autochannelse- Display Auto Channel Select...
- Page 79 get ctstype get domainsuffix get dtim get enableANI get encryption get extendedchan- mode get firStepLvl get fragmentthresh- get frequency get gateway get gbeaconrate get gdraft5 get groupkeyupdate get hardware get hostipaddr get ipaddr get ipmask get keyentrymethod get keysource get login get minimumrate get nameaddr get nf...
- Page 80 get overRidetxpower Display Tx power override get operationMode Display Operation Mode get power Display Transmit Power Setting get quietAckCtsAllow Display if Ack/Cts frames are allowed during quiet period get quietDuration Display Duration of quiet period get quietOffset Display Offset of quiet period into the beacon period get radiusname Display RADIUS server name or IP address get radiusport...
- Page 81 get wds get wep get wirelessmode get 80211d get http get HttpPort get https get HttpsPort get syslog get syslogSeverity get syslogServer get manageOnlyLan get roguedetect get rogueinteval get rogueband get roguetype get roguesnmp get roguelegal get autoConfig get autoResponse get autoChan- geName get autoSetResp...
- Page 82 get ftpLogin Display FTP Login Name get ftpPassword Display FTP Password get activeCurrentPro- Display active Current Profile file get profileName Display Profile Name get profileVlanId Display Profile VLAN ID get APPrimaryProfile Display AP Primary Profile get WDSPrimaryPro- Display WDS Primary Profile file get securityMode Display Security Mode...
- Page 83 get trapRecvIp get wdsMacList get enableWireless- Client get isolationType get winsEnable get winsserveraddr get wirelessSeparate get description get dhcpmode get wlanstate help Lebradeb ping radar! reboot quit set 11gonly set 11goptimize set 11goverlapbss set acl set aging set antenna Display Trap Receiver IP Display WDS Mac Address List Display Wireless Client Enable/Disable Display Isolation Type...
- Page 84 set authentication Set Authentication Type set autochannelse- Set Auto Channel Selection lect set basic11b Set Use of Basic 11b Rates set basic11g Set Use of Basic 11g Rates set beaconinterval Modify Beacon Interval set burstSeqThresh- Set Max Number of frames in a Burst set burstTime Set Burst Time set calibration...
- Page 85 set fragmentthresh- set frequency set gateway set gbeaconrate set groupkeyupdate set gdraft5 set hostipaddr set ipaddr set ipmask set keyentrymethod set keysource set login set minimumrate set nameaddress set noiseImmunityLvl set ofdmTrigHigh set ofdmTrigLow set ofdmWeakSigDet set overRidetxpower set operationMode set password set passphrase set power...
- Page 86 set radiusport Set RADIUS port number set radiussecret Set RADIUS shared secret set rate Set Data Rate set rate Set Data Rate set rate Set Data Rate set rate Set Data Rate set rate Set Data Rate set regulatorydomain Set Regulatory Domain set remoteAP Set Remote AP's Mac Address set hwtxretries...
- Page 87 set wirelessmode set 80211d set http set HttpPort set https set HttpsPort set syslog set syslogSeverity set syslogServer set manageOnlyLan set roguedetect set rogueinteval set rogueband set roguetype set roguesnmp set roguelegal set autoConfig set autoResponse set autoChan- geName set autoSetResp set autoUpdate set autoUpgradeOnly set autoUpdateInter-...
- Page 88 set activeCurrentPro- Set active Current Profile file set profileName Set Profile Name set profileVlanId Set Profile Vlan Id set APPrimaryProfile Set AP's Primary Profile set WDSPrimaryPro- Set WDS's Primary Profile file set securityMode Set Security Mode set Accounting Set Accounting Enable/Disable set Accountingport Set Accounting port number set keyValue...
- Page 89 set dhcpMode set wdsMacList set enableWireless- Client set isolationType set winsEnable set winsServerAddr set wirelessSeparate set sdSet set sdAdd set sdDel start wlan stop wlan timeofday version Set Dhcp Mode Set WDS Mac Address List Set Wireless Client Enable/Disable Set Isolation Type Set WINS Server Enable/Disable Set WINS Server IP address Set wireless separate Mode...