Table of Contents
Advertisement
Quick Links
Download this manual
See also:
User Manual
Advertisement
Table of Contents

Related Manuals for Planet WAP-4060PE


Summary of Contents for Planet WAP-4060PE
-
Page 1: Table Of Contents
Table of Contents Physical Details Front panel Rear panel Hardware Installation General installation PoE installation Configuring the Access Point WAP-4060PE Manager Installation Running WAP-4060PE Manager Further Configuration... - Page 2 This page is intentionally left blank...
-
Page 3: Physical Details
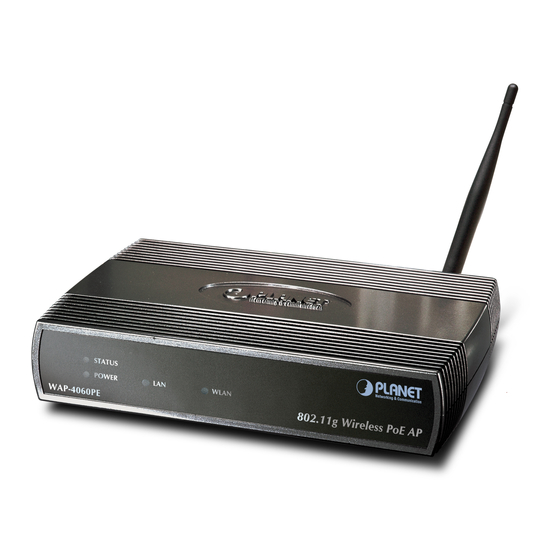
Package Content • WAP-4060PE • Dipole Antenna • Quick Installation Guide • User’s manual CD-ROM • Power Adapter If any of the above items are missing or damaged, contact NOTE: your local dealer for support. Physical Details Front panel STATUS On - Error condition. -
Page 4: Rear Panel
General installation 1. Locate an optimum location for the WAP-4060PE. The best place for your WAP-4060PE is usually at the center of your wireless network, with line of sight to all of your mobile stations. 2. Assemble the antennas to WAP-4060PE. Try to place them to a position that can best cover your wireless network. -
Page 5: Poe Installation
4. Connect the unpowered Ethernet port on the PoE adapter to your Hub or switch. 5. Connect the power supply to the PoE adapter and power up. 6. Check the LEDs on the WAP-4060PE to see it is drawing power via the Ethernet connection. Configuring the Access Point A simple Windows setup utility is supplied on the CD-ROM. -
Page 6: Running Wap-4060Pe Manager
Running WAP-4060PE Manager When the utility is executed, it searches the network for all active WAP-4060PE, and lists them on screen, as shown by the example below. Wireless Access Points The main panel displays a list of all Wireless Access Points found on the network. For each... -
Page 7: Further Configuration
WAP-4060PE for more configurations. Further Configuration If you want to configure more settings of WAP-4060PE, please refer to the user s manual in the CD. If you have any difficulty on resolving the problem while installing or using the... - Page 8 This page is intentionally left blank...