
Related Manuals for Cobra PR561 BLT


Summary of Contents for Cobra PR561 BLT
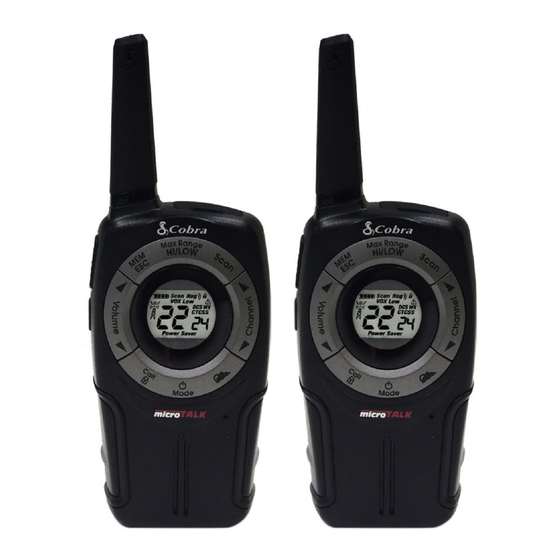
- Page 1 Owner’s Manual TWO-WAY RADIO MODEL PR561 BLT Printed in China PR562 BLT Part No. KEM-ML38404-01A English Nothing Comes Close to a Cobra ®...
-
Page 2: Making Life Easier And Safer
Customer Assistance Product Service & Support For any questions about operating this new Cobra branded product, PLEASE CONTACT US FIRST...do not return this product to the retail store. The contact information for support will vary depending on the country in which you purchased and utilize the product. -
Page 3: Product Features
Introduction Product Features Product Features 10. Talk Button 1. Antenna 11. Memory/Escape Button 2. External Speaker/ 12. Max Range Hi/Lo Button Microphone/ USB Charge Jack 3. Mode/Power Button 13. Scan Button 4. Call/Lock Button 14. Wrist Strap Connection 5. Channel Up/Down 15. - Page 4 Backlit LCD Display Features • 22 Channels Seven shared with FRS/GMRS, seven FRS only, eight GMRS only. • 10 Channel Weather Radio ® • Bluetooth compatible Bluetooth headset pairing • Weather Alert • 121 Privacy Codes (38 CTCSS codes/ 83 DCS codes) •...
-
Page 5: Caring For Your Microtalk
3. Plug the cable into USB power source. Use only the supplied rechargeable batteries and charger for recharging your Cobra microTALK radio. ® Cobra recommends your radio is turned off while being charged. Non-rechargeable alkaline batteries can also be used in your radio. -
Page 6: Operation
The radio will display flashing battery icon while charging. Cobra recommends your radio be turned off while being charged. Non-rechargeable alkaline batteries can also be used in your radio. Quick Start 1. -
Page 7: Battery Low
Battery Low • When battery power is low, the final bar in the Battery Battery Low Low icon will blink and an audible tone will sound twice before the radio shuts off. Your batteries should be replaced or recharged, if using rechargeable batteries. The radio will display flashing battery icon while charging. -
Page 8: To Adjust Volume
Listening for a Response • Release the Talk button to receive incoming Listening transmissions. Your microTALK radio is always in ® Standby mode while the Talk or Call buttons are not pressed. To Adjust Volume • Press the Volume Up or Volume Volume Button Down button. -
Page 9: Lock Function
– Press and hold the Max Range Hi/Lo button or change channels to return to Standby mode. Hi Power Icon To turn maximum range extender on: – Press the Max Range Hi/Lo button for less than five seconds. Hi icon will be displayed. (High power is not valid on channels 8~14) To turn maximum range extender off: Low Power Icon... -
Page 10: Mode Functions
Operation Mode Functions Scrolling Through the Mode Function • By scrolling through the Mode function, you will be able to select or turn on preferred features of your microTALK radio. When ® scrolling through the Mode function, your radio features will be displayed in the same predetermined order: Mode/Power Set CTCSS Privacy Codes... - Page 11 Set CTCSS Privacy Codes • To select a CTCSS privacy code: Mode/Power 1. After selecting a channel, press the Mode/Power button until the CTCSS icon appears and the small numbers next to the channel number flash on the display. (00 through 38) Privacy Code If DCS is turned on at the channel selected, the display will flash the...
- Page 12 Set DCS Privacy Codes • Mode/Power To select a DCS privacy code: 1. After selecting a channel, press the Mode/Power button until the DCS icon appears and the small numbers flash on the display (00 through 83). DCS Privacy Code If CTCSS is turned on at the channel selected, the display will flash the DCS icon and “OFF.”...
- Page 13 Voice Activated Transmit (VOX) • In VOX mode, your microTALK radio can be used “hands-free”, automatically ® transmitting when you speak. You can set the VOX sensitivity level to fit the volume of your voice and avoid transmissions triggered by background noise. To turn VOX mode on or off: Mode/Power 1.
-
Page 14: Memory Locations
10 Memory Locations • Your microTALK radio has 10 Memory Locations for storing ® your most frequently used channels and channel/privacy code combinations. These Memory Locations can be selected individually or can be scanned. (See page 18 for memory location scan.) To program a memory location: MEM/ESC Button 1. - Page 15 Operation Mode Functions (continued) If “oF” flashes in place of the privacy code numbers, a privacy code is already set in the opposite (CTCSS or DCS) system. Press the Channel Up or Channel Down button to cancel the opposite code and select a privacy code from the active system for the selected channel.
- Page 16 Ten Call Tone Settings • You can choose between ten different Call Tone Settings to transmit a call alert. To change a call tone setting: Mode/Power 1. Press the Mode/Power button until the letter “C” and the current call tone number (01 through 10) is displayed.
-
Page 17: Roger Beep Confirmation Tone
Roger Beep Confirmation Tone • Your listener will hear an audible tone when you release the Talk button. This alerts the other party that you are finished talking and it is OK for them to speak. To turn roger beep on or off: Mode/Power 1. -
Page 18: Bluetooth On/Off
Bluetooth On/Off • When Bluetooth is On, it can pair any compatible Bluetooth headset automatically. Once a Bluetooth headset connected, your microTALK ® radio can be used “hands-free”, automatically transmitting when you speak to the microphone of the Bluetooth headset. You can set the iVOX sensitivity level for Microphone of Bluetooth Headset to fit the volume of your voice and avoid transmissions triggered by background noise. - Page 19 1. Follow the Bluetooth headset manufacturer’s Bluetooth Icon (Flashing) instruction to enable its Bluetooth function and enter to pairing mode. 2. Once the Bluetooth function is enabled, the radio will try to search and pair any compatible Bluetooth headset. Successful pairing will be indicated by a Bluetooth Icon (Solid) solid Bluetooth icon displayed.
-
Page 20: Channel Scan
Channel Scan • Your microTALK radio can automatically scan channels. ® To scan channels: Scan Button 1. Press and release the Scan button, the Scan icon and the channel numbers appear on the display. 2. Press and hold the Scan button to begin scanning channels. - Page 21 Privacy Code Scan • radio can automatically scan the Privacy Codes Your microTALK ® (either CTCSS 01 through 38 or DCS 01 through 83) within one channel. Only one set of privacy codes (CTCSS or DCS) can be scanned at a time. To scan privacy codes: Scan Button 1.
-
Page 22: Memory Scan
Memory Scan • Your microTALK radio can automatically scan the stored memory ® locations.(See page 10 for setting memory locations) MEM/ESC Button To scan memory locations: 1. Make sure 2 or more memory locations programmed already. 2. Press and release the MEM/ESC button to enter Scan Button Memory mode from Standby mode. - Page 23 NOAA* All Hazards Radio Channels • radio to listen to NOAA All Hazards You can use your microTALK ® Radio channels transmitting in your area. To listen to All Hazards Radio channels: Weather Button 1. Press the Weather button until the All Hazards Radio icon and the currently selected All Hazards Radio channel are displayed.
- Page 24 Weather (WX) Alert Mode • Turning On the Weather Alert function will allow your radio to automatically receive NOAA weather signals and warnings from designated weather broadcast stations. If the radio is turned ON, it will alert to Weather and other emergency alerts broadcast by NOAA.
-
Page 25: General Specifications
Important: Please note that Cobra GMRS models with 15 Channels may designate different channel numbers for the same frequency. For example, a Cobra 15 Channel GMRS model would need to be tuned to Channel 11 in order to communicate with a 22 Channel GMRS tuned to Channel 15. - Page 26 FCC RF Exposure Requirements: For body-worn operation, this radio has been tested and meets the FCC RF exposure guidelines when used with Cobra accessories supplied or designated for this product. Use of other accessories may not ensure compliance with FCC RF exposure guidelines. Use only the supplied antenna.
-
Page 27: Limited One-Year Warranty
® are registered trademarks of Cobra Electronics Corporation, USA. Cobra Electronics Corporation™ is a trademark of Cobra Electronics Corporation, USA. All other product or service names are the property of their respective owners. ©2016 Altis Global Limited, Berkeley Lake, GA, USA. All rights reserved.