
Related Manuals for LG LuV300


Summary of Contents for LG LuV300
-
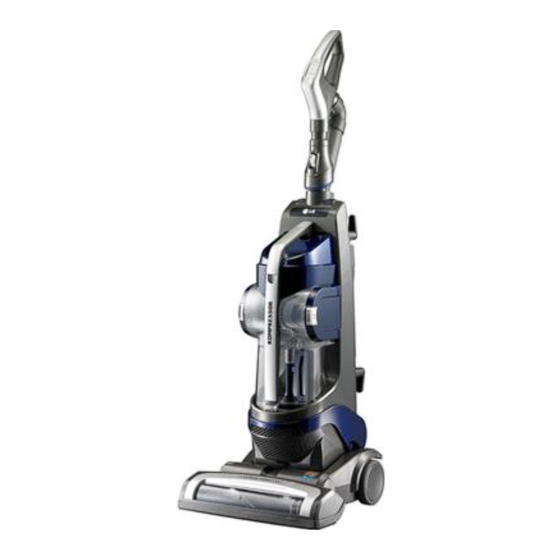
Page 1: Vacuum Cleaner
Vacuum Cleaner Owner's Manual MODEL: LuV300 Read and follow all safety and operating instructions before first use of this product. P/No.: MFL62862401... -
Page 2: Table Of Contents
TABLE OF CONTENTS LG Vacuum Cleaner Warranty ..............3 Before Using Your New Vacuum Cleaner .............4 Important Safety Instructions ..............4~5 Parts and Features ..................6 Assembly ....................7~9 Unpacking the Vacuum Cleaner ....................7 Assembly Parts .........................7 Wand & Hose assembly ......................8 Attaching the Hose ........................8 Accessory Storage ........................9... -
Page 3: Lg Vacuum Cleaner Warranty
LG VACUUM CLEANER WARRANTY FIVE YEAR LIMITED WARRANTY When assembled, operated, and maintained according to all instructions supplied with this product, if the appliance fails due to a defect in material or workmanship within one year from the date of purchase, return it to any LGE service center. -
Page 4: Before Using Your New Vacuum Cleaner
BEFORE USING YOUR NEW VACUUM CLEANER Please read this guide. It will help you assemble and operate your new LGE vacuum cleaner in the safest and most effective way. For more information about the care and operation, call your nearest LGE service center. You will need the complete model and serial numbers when requesting information. - Page 5 IMPORTANT SAFETY INSTRUCTIONS WARNING Your safety is important to us. To reduce the risk of fire, electric shock, injury to persons, or damage when using your vacuum cleaner, follow basic safety precautions including the following: ❏ READ THIS MANUAL BEFORE ASSEMBLING OR USING YOUR VACUUM CLEANER. ❏...
-
Page 6: Parts And Features
PARTS AND FEATURES It is important to know your vacuum cleaner’s parts and features to assure its proper and safe use. Review these before using your vacuum cleaner. Common Replacement Parts Accessory Tools HEPA Filter ADQ72913001 Foam Pre Filter Filter Frame MDQ61918301 (ADV72987201) Foam Filter... -
Page 7: Assembly
ASSEMBLY To reduce the risk of shipping damage, your vacuum cleaner is shipped partially unassembled. Unpacking the Vacuum Cleaner Assembly Parts Carefully unpack the vacuum cleaner and 1. Vacuum Cleaner Body make sure that you have all parts before discarding of any packaging. 2. -
Page 8: Wand & Hose Assembly
Wand & Hose assembly Attaching the Hose 1. Remove Cover by sliding up. 1. Attach the top side of the hose to the handle. The top side of the hose can be recognized because is has 2 clips for releasing. 2. -
Page 9: Accessory Storage
WARNING Personal Injury and Product Damage Hazard! DO NOT use outlets above counters. Damage to items in the surrounding area could occur. Accessory Storage Cord Storage Your vacuum cleaner features convenient on- To store the cord: board storage for the crevice tool. 1. -
Page 10: Operation
OPERATION Control Operation Body Release Operation • To begin vacuuming press the pedal on the left side of the vacuum and pull down. NOTE: When the vacuum is in the upright position the agitator will not run. 1. Carpet / Floor: To toggle between the agitator being on or off. -
Page 11: Adjusting The Pile Height
Adjusting the Pile Height Suggested pile height settings: You may need to raise the height to make To adjust the pile height: some jobs easier, such as vacuuming scatter When it is necessary to raise and lower the rugs and longer pile rugs. front of the cleaner for various carpet pile heights, press the right foot pedal to adjust the pile height. -
Page 12: Attachments
Attachments Dusting brush Use the Dusting brush in place for cleaning Pet Hair Tool furniture, walls, etc. This air-turbine powered brush is great for stairs and vehicle interiors, as well as removing pet hair, lint, etc. from fabrics and carpets. Crevice Tool The crevice tool can be used for tight corners, between cushion and various other hard to... -
Page 13: Using The Wand Or Wand Handle
Using the Wand or Wand Handle 4. To use the handle only, press the release button on the bottom of the handle and pull the wand straight out of the handle. CAUTION Never pull the vacuum cleaner by the hose. If using any accessory on the end of the handle the entire wand must be removed from 5. -
Page 14: Installing Attachments
Installing Attachments Using the Pet hair tool Using the crevice tool: The Pet hair tool attaches to the wand like the Slide the crevice tool over the end of the wand other attachments. It features a turbine- or fit it into the handle. powered agitator to provide extra cleaning power on carpets and fabrics. -
Page 15: Agitator Motor Overload Protection
Agitator Motor Overload Thermal Overload Protection Protection This vacuum cleaner has a thermal overload protector which automatically activates to The agitator has a built-in protection against protect the vacuum cleaner from overheating. motor damage should the agitator jam. If the If a clog prevents the normal flow of air to the agitator slows down or stops, the agitator motor, the thermal protector turns the motor... -
Page 16: Care & Cleaning
CARE & CLEANING Always follow all safety precautions when cleaning and servicing the vacuum cleaner. Storing the Vacuum Cleaner Dust Tank Components When not in use, wrap the cord around the The dust tank consists of several key cord hanger, as shown. Store the crevice tool components. -
Page 17: Emptying The Dust Tank
Emptying the Dust Tank TO REINSTALL THE DUST TANK, place it in the holder, then tilt forward until it clicks into place. Make sure the dust tank is properly WARNING seated! Always unplug power cord from electrical outlet before performing any service on vacuum cleaner. -
Page 18: Cleaning The Foam Pre-Filter
To Clean the Pre-Filter: the pre-filter. You can purchase additional foam filters from LG by calling 800-243-0000 1. Remove the dust tank from the vacuum and asking for parts on page 6. -
Page 19: Pet Hair Tool
Pet hair tool Agitator Maintenance To clean the pet hair tool 1. Remove the four screws on the bottom of WARNING the pet hair tool. 2. Press in on the tabs and lift off the cover. Electrical shock and personal injury 3. -
Page 20: Replacing The Agitator Belt
19. 2. Lift the agitator straight out. 7. Reinstall the agitator brush cover as described above. For a replacement belt, order LG service center belt part # MAS61842501. Replacing the batteries 1. Slide the battery cover up and away from 3. -
Page 21: Removing Clogs
Removing Clogs 3. Remove the dust tank and check the dust tank inlet where it connects to the vacuum cleaner body. WARNING Electrical shock and personal injury hazard. Always unplug the vacuum cleaner before servicing. Failure to do so could result in electrical shock or personal injury. -
Page 22: Cleaning The Exterior Of The Vacuum Cleaner
Cleaning the Exterior of the Wipe the exterior of the vacuum cleaner with a clean, soft cloth that has been dipped in Vacuum Cleaner water and wrung dry. DO NOT allow water to enter any openings in WARNING the vacuum cleaner. DO NOT clean tools in dishwasher or clothes Electrical shock and personal injury washer. -
Page 23: Troubleshooting
TROUBLESHOOTING Review this chart to find do-it-yourself solutions for minor performance problems. Any service or repair needed, other than as described in this Use & Care Guide, should be performed through your local LGE service center. WARNING Electrical shock and personal injury hazard. Always unplug the vacuum cleaner before servicing. - Page 24 PROBLEM POSSIBLE CAUSE POSSIBLE SOLUTION Cleaner picks up • Wrong pile height setting • Adjust pile height moveable rugs or is • Use lower power level • Reduce the power level hard to push • Clean the inside of the Brush on Pet hair •...