Table of Contents
Advertisement
Instruction Manual
D100394X012
Fisher
EHD, EHS, and EHT Valves
™
NPS 1-1/2x1 through NPS 8x6
Contents
. . . . . . . . . . . . . . . . . . . . . . . . . . . . . . . . .
. . . . . . . . . . . . . . . . . . . . . . . . . . . . .
. . . . . . . . . . . . . . . . . . . . . . . . . . . . . . . . .
. . . . . . . . . . . . . . . . . . . . . . . . . . . . . . .
. . . . . . . . . . . . . . . . . . . . . . . . . . . . . . . . . .
. . . . . . . . . . . . . . . . . . . . . . . . . . . . . . . . .
. . . . . . . . . . . . . . . . . . . . . . . . . .
. . . . . . . . . . . . . . . . . . . . . . . . . . . . . .
. . . . . . . . . . . . . . . . . . . . . . . . . . . . . .
. . . . . . . . . . . . . . . . . . . . . . . . . .
. . . . . . . . . . . . . . . . . . . . . . . . . . . . . . .
. . . . . . . . . . . . . . . . . . . . . . . . . . . . . . . . . . .
. . . . . . . . . . . . . . . . . . . . . . . . . . . . . . . . . . .
Introduction
Scope of Manual
This instruction manual includes installation, maintenance, and parts information for the Fisher EHD, EHS, and EHT
control valves in NPS 1-1/2 x 1 through NPS 8x6. Refer to separate manuals for instructions covering the actuator,
positioner, ENVIRO-SEAL
Do not install, operate, or maintain EHD, EHS, or EHT valves without being fully trained and qualified in valve, actuator,
and accessory installation, operation, and maintenance. To avoid personal injury or property damage, it is important
to carefully read, understand, and follow all the contents of this manual, including all safety cautions and warnings. If
you have any questions about these instructions, contact your
proceeding.
Unless otherwise noted, all NACE references are to NACE MR0175-2002.
www.Fisher.com
. . . . . . . . . . . . . . . . . . . . . . . . .
. . . . . . . . . . . . . . . . . . . . . . . . .
. . . . . . . . . . . . . . . . . . . . . . . .
. . . . . . . . . . . . . . . . . . . . .
. . . . . . . . . . . . . . . .
. . . . . . . . . . .
. . . . . . .
. . . . . . . . . . . . . . . . .
™
packing, HIGH-SEAL packing, and accessories.
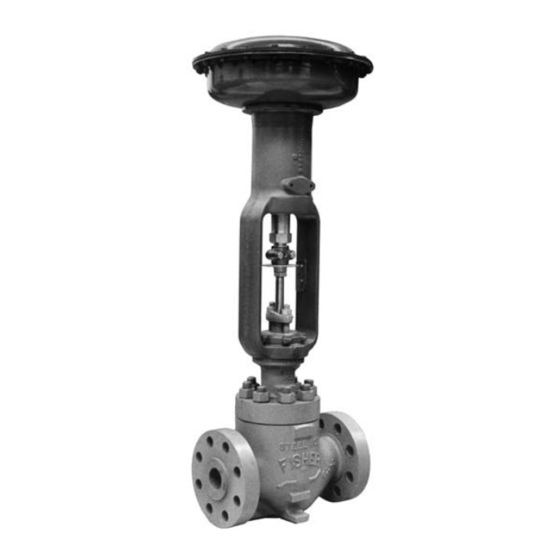
Figure 1. Fisher EH Valve with 657 Actuator
1
1
2
3
3
4
6
7
7
8
12
14
15
16
21
24
24
. .
26
26
. . .
26
28
28
29
W3387
Emerson sales office
EH (1-1/2x1 through 8x6)
or Local Business Partner before
July 2017
Advertisement
Table of Contents

Related Manuals for Emerson Fisher EHD


Summary of Contents for Emerson Fisher EHD
-
Page 1: Table Of Contents
Introduction Scope of Manual This instruction manual includes installation, maintenance, and parts information for the Fisher EHD, EHS, and EHT control valves in NPS 1-1/2 x 1 through NPS 8x6. Refer to separate manuals for instructions covering the actuator, ™... -
Page 2: Description
Instruction Manual EH (1-1/2x1 through 8x6) July 2017 D100394X012 Table 1. Specifications End Connection Styles Flow Characteristic Buttwelding: All available ASME B16.25 schedules Standard Cage: J Equal percentage, J modified , J or linear that are compatible with ASME B16.34 equal percentage pressure/temperature ratings Cavitrol... -
Page 3: Specifications
Leakage Class Maximum Leakage Test Medium Test Pressure ANSI/FCI Leakage Class Valves with TSO trim are factory tested to a more stringent Emerson Automation Service ΔP TSO (Tight Shutoff) Water Solutions test requirement of no leakage at time of shipment. -
Page 4: Installation
(especially due to differences in thermal expansion rates), do not apply any other conditions to the valve without first contacting your Emerson sales office or Local Business Partner. CAUTION If hoisting the valve, use a nylon sling to protect the painted surfaces. - Page 5 If post‐weld heat treating is needed, remove all trim parts to avoid any damage to internal elastomeric, plastic, and metal parts. Contact your Emerson sales office or Local Business Partner for additional information. 5. Install a three‐valve bypass around the valve if continuous operation is required during maintenance.
-
Page 6: Maintenance
Instruction Manual EH (1-1/2x1 through 8x6) July 2017 D100394X012 Maintenance Valve parts are subject to normal wear and must be inspected and replaced as necessary. Inspection and maintenance frequency depends on the severity of service conditions. This section includes instructions for packing lubrication, packing maintenance, adding packing rings, replacing packing, trim removal, valve plug maintenance, lapping seats, and trim replacement. -
Page 7: Packing Lubrication
Instruction Manual EH (1-1/2x1 through 8x6) D100394X012 July 2017 WARNING Personal injury could result from packing leakage. Valve packing was tightened prior to shipment; however some readjustment will be required to meet specific service conditions. Check with your process or safety engineer for any additional measures that must be taken to protect against process media. -
Page 8: Replacing Packing
2070 1550 1. For other materials, contact your Emerson sales office or Local Business Partner for torques. CAUTION When lifting the bonnet (key 1), be sure that the valve plug and stem assembly (keys 3 and 4, figure 18, 19, or 20) remains on the seat ring (key 6, figure 18, 19, or 20). - Page 9 Instruction Manual EH (1-1/2x1 through 8x6) D100394X012 July 2017 Figure 3. Live‐Loaded Packing 39B4153‐A A6297‐1 Typical HIGH‐SEAL ULF Packing System Typical ENVIRO‐SEAL Packing System with PTFE Packing A6722 39B4612/A Typical ENVIRO‐SEAL Packing System Typical ENVIRO‐SEAL Packing System with Graphite ULF Packing with Duplex Packing...
- Page 10 Instruction Manual EH (1-1/2x1 through 8x6) July 2017 D100394X012 Figure 4. Packing Arrangements UPPER WIPER (KEY 12) PACKING FOLLOWER PACKING FOLLOWER (KEY 13) (KEY 13) FEMALE ADAPTOR GRAPHITE RIBBON (KEY 32) PACKING RING (KEY 7) V‐RING (KEY 7) KEY 6 GRAPHITE FILAMENT PACKING RING (KEY 7) MALE ADAPTOR...
- Page 11 Personal injury or damage to equipment could occur if improper stud and nut materials or parts are used. Do not operate or assemble this product with stud(s) and nut(s) that are not approved by Emerson/Fisher engineering and/or listed on the serial card provided with this product.
-
Page 12: Trim Removal
Instruction Manual EH (1-1/2x1 through 8x6) July 2017 D100394X012 When all nuts are tightened to that torque value, increase the torque by one fourth of the specified nominal torque and repeat the crisscross pattern. Repeat this procedure until all nuts are tightened to the specified nominal value. Apply the final torque value again and, if any nut still turns, tighten every nut again. - Page 13 Instruction Manual EH (1-1/2x1 through 8x6) D100394X012 July 2017 Key numbers referenced in this procedure are shown in figure 18 for the EHD valve, figure 19 for the EHS valve, and figure 20 for the EHT valve except where indicated. 1.
-
Page 14: Valve Plug Maintenance
Instruction Manual EH (1-1/2x1 through 8x6) July 2017 D100394X012 Figure 6. Detail of Protected Soft Seat OUTER PLUG INNER PLUG CAGE PROTECTED SOFT SEAT SEAT RING A7088 Figure 7. Typical Balanced TSO Trim VALVE PLUG SEAL A7096 PROTECTED SOFT SEAT Valve Plug Maintenance Key numbers used in this procedure are shown in figure 18 for the EHD valve, in figure 19 for the EHS valve, and in figure 20 for the EHT valve. -
Page 15: Lapping Seats
Instruction Manual EH (1-1/2x1 through 8x6) D100394X012 July 2017 1. With the valve plug (key 3) removed according to the Trim Removal procedure, proceed as appropriate: For the EHD valve, the piston rings (key 8) are each in two sections; remove the sections from the grooves in the valve plug. -
Page 16: Trim Replacement
Instruction Manual EH (1-1/2x1 through 8x6) July 2017 D100394X012 5. After lapping, again disassemble as necessary, clean the seating surfaces, reassemble, and test for shutoff. Repeat the lapping procedure if necessary. Trim Replacement After all trim maintenance has been completed, reassemble the valve by following the numbered steps below. Be certain that all gasketed surfaces have been well cleaned. - Page 17 Instruction Manual EH (1-1/2x1 through 8x6) D100394X012 July 2017 TOOL DIMENSIONS VALVE SIZE, VALVE Inches NPS/ RATING RATING 54.4 12.4 2.140 0.49 CL1500 57.2 31.8 41.1 120.7 11.2 11.2 19.1 2.25 1.25 1.62 4.75 0.44 0.31 0.44 0.75 51.9 12.2 2.120 0.48 1-1/2 x 1...
- Page 18 Instruction Manual EH (1-1/2x1 through 8x6) July 2017 D100394X012 Table 9. Recommended Torque for Installing Seat Ring Retainer TORQUE For All Valves with For All Valves with For Valve with 2‐Stage For Valve with 3‐Stage Gasketed Seat Ring VALVE VALVE O‐Ring Seat Ring Cavitrol III Cage and Cavitrol III Cage and...
- Page 19 Instruction Manual EH (1-1/2x1 through 8x6) D100394X012 July 2017 b. Use a power torque wrench or driver having torque capabilities equal to or greater than those shown in table 9. Connect the torque tool to an extension if necessary. The tool or extension must snugly fit the square hole in the seat ring retainer tool.
- Page 20 Hot torquing is not recommended. Note Stud(s) and nut(s) should be installed such that the manufacturer's trademark and material grade marking is visible, allowing easy comparison to the materials selected and documented in the Emerson/Fisher serial card provided with this product.
-
Page 21: Retrofit: Installing C-Seal Trim
Personal injury or damage to equipment could occur if improper stud and nut materials or parts are used. Do not operate or assemble this product with stud(s) and nut(s) that are not approved by Emerson/Fisher engineering and/or listed on the serial card provided with this product. - Page 22 An installation tool must be used to properly position the C‐seal plug seal on the valve plug. A tool is available as a spare part from your Emerson sales office or Local Business Partner or a tool could be manufactured following the dimensions given in figure 11.
- Page 23 Instruction Manual EH (1-1/2x1 through 8x6) D100394X012 July 2017 FOR VALVE DIMENSIONS, mm PLUGS Part Number (See Drawing Below) FITTING (To Order PORT SIZE A Tool) (Inches) 52.324 ‐ 52.680 ‐ 55.118 ‐ 2.875 82.55 4.978 ‐ 5.029 3.708 ‐ 3.759 41.148 70.891 ‐...
-
Page 24: Replacement Of Installed C-Seal Trim
Instruction Manual EH (1-1/2x1 through 8x6) July 2017 D100394X012 11. Install the new seat ring, cage, valve plug/retainer assembly, and stem into the valve body and completely reassemble the valve package following the appropriate instructions in the Trim Replacement section of this manual. - Page 25 Instruction Manual EH (1-1/2x1 through 8x6) D100394X012 July 2017 Figure 12. Installing the C‐seal Plug Seal Using the Installation Tool INSTALLATION TOOL C‐seal METAL VALVE PLUG PLUG SEAL HORIZONTAL REFERENCE SURFACE FLOW DOWN NOTE: PRESS INSTALLATION TOOL OVER VALVE PLUG UNTIL THE TOOL CONTACTS THE HORIZONTAL REFERENCE SURFACE OF THE VALVE PLUG. A6778 Figure 13.
-
Page 26: Lapping Metal Seats (C-Seal Constructions)
An installation tool must be used to properly position the C‐seal plug seal on the valve plug. A tool is available as a spare part from your Emerson sales office or Local Business Partner or a tool could be manufactured following the dimensions given in figure 11. - Page 27 Instruction Manual EH (1-1/2x1 through 8x6) D100394X012 July 2017 3. Place the C‐seal plug seal over the top of the valve plug and press it onto the plug using the installation tool. Carefully press the C‐seal plug seal onto the plug until the installation tool contacts the horizontal reference surface of the valve plug (figure 12).
-
Page 28: Parts Ordering
WARNING Use only genuine Fisher replacement parts. Components that are not supplied by Emerson Automation Solutions should not, under any circumstances, be used in any Fisher valve, because they may void your warranty, might adversely affect the performance of the valve, and could cause personal injury and property damage. -
Page 29: Parts List
9* Backup Ring Retaining Ring Note Retaining Ring (for EHT valve body only) Contact your Emerson sales office or Local Business Partner for Part Cage Gasket (2 req'd) Ordering information. Seat Ring O‐Ring or Gasket Bonnet Stud (8 req'd) Hex Nut (8 req'd) Flow Arrow ... - Page 30 Instruction Manual EH (1-1/2x1 through 8x6) July 2017 D100394X012 Figure 16. Fisher EH Bonnet Assembly 71 mm (2‐3/16 INCH) YOKE BOSS BONNET 56A5372‐E WITH SINGLE ARRANGEMENT PTFE PACKING A2699‐2 35A3976‐A 18A8557‐A DETAIL OF 127 mm (5‐INCH) YOKE BOSS ACTUATOR BOLTING DETAIL OF BAFFLE AND RETAINING RING (OPTIONAL FOR NPS 3, 4, &...
- Page 31 Instruction Manual EH (1-1/2x1 through 8x6) D100394X012 July 2017 Figure 18. Fisher EHD Valve FLOW DIRECTION FOR ALL TRIMS EXCEPT WITH A WHISPER TRIM III CAGE OR A VALVE PLUG WITH DIVERTER CONE VIEW A GASKETED SEAT RING O‐RING SEAT RING...
- Page 32 Instruction Manual EH (1-1/2x1 through 8x6) July 2017 D100394X012 Figure 19. Fisher EHS Valve FLOW DIRECTION FOR ALL TRIMS EXCEPT THOSE WITH A CAVITROL III CAGE VIEW A O‐RING SEAT RING GASKETED SEAT RING CONSTRUCTION CONSTRUCTION j APPLY LUB 56A5494‐E PARTS NOT SHOWN: KEY 29 FLAT WASHER EHS BODY WITH STANDARD TRIM 57A2891‐B...
- Page 33 Instruction Manual EH (1-1/2x1 through 8x6) D100394X012 July 2017 Figure 20. Fisher EHT Valve FLOW DIRECTION FOR ALL TRIMS EXCEPT WITH A WHISPER TRIM III CAGE OR A VALVE PLUG WITH DIVERTER CONE VIEW A VIEW B O‐RING SEAT RING GASKETED SEAT RING CONSTRUCTION CONSTRUCTION...
- Page 34 Instruction Manual EH (1-1/2x1 through 8x6) July 2017 D100394X012 Figure 21. Typical Cavitrol III Constructions DETAIL OF EHT BODY WITH 3‐STAGE CAVITROL III CAGE VIEW A VIEW B GASKETED SEAT RING O‐RING SEAT RING O‐RING SEAL BETWEEN CONSTRUCTION CONSTRUCTION CAGE AND SEAT RING 57A2883‐B 57A2881‐B DETAIL OF EHS BODY WITH 2‐STAGE CAVITROL III CAGE...
- Page 35 Instruction Manual EH (1-1/2x1 through 8x6) D100394X012 July 2017 Table 12. Valve Plug Diameters and Operating Temperatures OPERATING TEMPERATURE RANGE DIAMETER VALVE BODY CAGE MATERIAL STEM MATERIAL CODE DESIGN S31600 -198 to +427 -325 to +800 S31600 (316 Stainless Steel) EHD, EHS Chrome-coated S31600 Chrome-coated...
- Page 36 Responsibility for proper selection, use, and maintenance of any product remains solely with the purchaser and end user. Fisher, Cavitrol, ENVIRO-SEAL, and Whisper Trim are marks owned by one of the companies in the Emerson Automation Solutions business unit of Emerson Electric Co.