Table of Contents
Advertisement
Quick Links
Advertisement
Table of Contents

Related Manuals for Pioneer Elite VSX-47TX


Summary of Contents for Pioneer Elite VSX-47TX
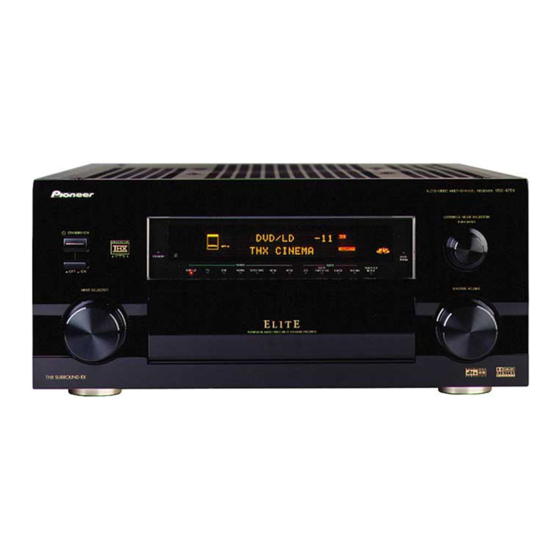
- Page 1 AUDIO/VIDEO MULTI-CHANNEL RECEIVER VSX-47TX Operating Instructions...
- Page 2 Thank you for buying this Pioneer product. Please read through these operating instructions so you will know how to operate your model properly. After you have finished reading the instructions, put them away in a safe place for future reference.
-
Page 4: Table Of Contents
Controlling the MULTI-ROOM system from the main room ... 76 Controlling the MULTI-ROOM system from the sub room ... 77 The PIONEER SR System: Operating other PIONEER components ... 78 Multi Operations ... 79 Performing multi operations ... 80 System off ... 81 Using System off ... - Page 5 Controlling the MULTI-ROOM system from the main room ... 76 Controlling the MULTI-ROOM system from the sub room ... 77 The PIONEER SR System: Operating other PIONEER components ... 78 Multi Operations ... 79 Performing multi operations ... 80 System off ... 81 Using System off ...
-
Page 6: Features
Next Generation THX Standards and New Digital Formats The VSX-47TX is the first receiver in the world to be THX Ultra2 certified. Among the new THX technologies is ASA (Advanced Speaker Array), which can process any 5.1 channel source for 7.1 channel playback (THX Ultra2 Cinema and THX MusicMode), or 6.1 channel playback (THX Surround EX). -
Page 7: Before You Start
Before You Start Checking the Supplied Accessories Please check that you have received all of the following supplied accessories. FM wire Antenna AM Loop Antenna Remote Control Cable for Auto Surround Sound Setup Remote Control Unit Preparing the Remote Control Loading the batteries Load the batteries into the remote control as shown below. -
Page 8: Operating Range Of Remote Control Unit
Operating range of remote control unit The area in which you can use the remote control to operate the VSX-47TX is fairly large. To use, point the remote control toward the remote sensor on the front panel of this unit while within the range shown below. -
Page 9: Quick Start Guide Part1
1) Your Home System The heart of your system is the VSX-47TX receiver and it is very flexible in getting you theater-like surround sound. You can use this receiver with anywhere from two to seven speakers (front left, front right, center, surround left and right, and surround back left and right) and a subwoofer to get home theater surround sound. -
Page 10: Hooking Up Your Dvd Player & Tv
Quick Start Guide Part1 Before making or changing the connections, switch off the power and disconnect the power cord from the AC outlet. 1 1 1 1 1 Hooking Up Your DVD Player & TV In order to use Dolby Digital/DTS soundtracks which are at the heart of home theater you need to hook up your DVD player with digital audio connections. -
Page 11: Speaker Connections
2 2 2 2 2 Speaker Connections Home theater is designed to be setup with five, or seven speakers (front left & right; center; surround left & right; and, optimally, surround back left & right) and a subwoofer, but you can use this receiver with fewer speakers. -
Page 12: Setting Up The Main Unit
Quick Start Guide Part1 3 3 3 3 3 Setting up the Main Unit 1 Connect the supplied AC power cord to the back of the main unit and plug the other end into a wall outlet (don't use any other power cord than the one that came with this receiver). -
Page 13: Quick Start Guide Part2
Quick Start Guide Part2 1 1 1 1 1 Auto Surround Sound Setup If setting up your surround sound speakers seems like it's going to be an involved task you only need to use this quick, automatic method to achieve good surround sound. You'll need to hook up the remote control, which has a microphone in it, so that the receiver can hear and judge the distance, size, sound character and sound pressure level of the speakers and thus know what settings to make. - Page 14 Quick Start Guide Part2 1. Auto Surround Setup Connect microphone Please be quiet Move obstacles away If you have a subwoofer turn power on and turn volume up [Start] [Cancel] 1. Auto Surround Setup Please Wait Caution!! Test tone is output loudly.
-
Page 15: Acoustic Calibration Eq
memo • Make sure the room environment follows the guidelines displayed on the OSD during auto setup. If the room environment is not optimal for auto setup (too much ambient noise, obstacles blocking the speakers from the microphone on the remote control, etc.) the final settings may be incorrect. -
Page 16: Connecting Your Equipment
These jacks are labeled by the Japanese designation "S2" on the VSX-47TX but they are simply S video jacks. Composite Video Component Video Input Default Settings If you use component video cords to hook up your video equipment it is easiest to do so following the default settings, which are listed below. -
Page 17: Connecting Video Components
Connecting Video Components Connect your video components as shown on this and the following page. For video components (for example, a DVD player) there are two types of connections to make, video and audio. Hook up your video signal with either component video, S video or composite video cords (the quality descends in this order) but you must use the same type of cord as you used to hook up your TV. -
Page 18: Connecting Vcrs Or Dvrs
Connecting Your Equipment Connecting VCRs or DVRs Connect the video out of your VCR/DVR using either S video or composite video cords, depending on how you connected the receiver to your TV (see p.16). Use analog audio cords for the audio signal. To record, you also need to connect a set of audio/video outputs from the receiver to the audio/video inputs on your VCR/DVR. -
Page 19: Connecting Satellite Tv Components
Connecting Satellite TV (SAT) Components Hook up the video signal with either component video, S video, or composite video cords, depending on how you connected the receiver to your TV (see p.16). For the audio signal, in order to use digital soundtracks broadcast you must hook up a digital input. Use either a coaxial or optical cable, it doesn't matter which (see p.22-23). -
Page 20: Connecting Analog Audio Components
Connecting Your Equipment Connecting Analog Audio Components Connect your audio components to the jacks as shown below. These are all analog connections and your analog audio components (turntable, cassette deck) use these jacks. Remember that for components you want to record with you need to hook up four plugs (a set of stereo ins and a set of stereo outs), but for components that only play (like a turntable) you only need to hook up one set of stereo plugs (two plugs). -
Page 21: Cassette Deck Placement
Cassette deck placement Depending on where the cassette deck is placed, noise may occur during playback of your cassette deck which is caused by leakage flux from the transformer in the receiver. If you experience noise, move the cassette deck farther away from the receiver. Connecting to the Multi Channel Analog Inputs (DVD-A or Super Audio CD compatible player) If you have a DVD-A or Super Audio CD compatible player, or are using an external Dolby Digital/DTS... -
Page 22: Connecting Digital Audio Components
Connecting Digital Audio Components Connect your digital components as shown below. The VSX-47TX has two coaxial, three optical and one 2 RF inputs for a total of six digital inputs. In order to use digital soundtracks like Dolby Digital or DTS (among others) you need to make digital audio connections. -
Page 23: Digital Input Default Settings
7 Coaxial cords/Optical cables Commercially available digital audio coaxial cords (standard video cords can also be used) or optical cables (not supplied) are used to connect digital components to this receiver. Be sure to insert completely and in the case of the optical cable, right-side up. -
Page 24: Connecting The Radio Antennas
Connecting Your Equipment Connecting the Radio Antennas Connect the supplied FM wire antenna and the AM loop antenna to the ANTENNA terminals as shown below. These antennas should provide adequate reception quality in most cases, but connecting outdoor antennas should noticeably improve sound quality. Before making or changing the connections, switch off the power and disconnect the power cord from the AC outlet. -
Page 25: Connecting Speakers
Simply connect the speakers you have in the manner described below. The VSX-47TX will work with just two stereo speakers (called "front" speakers in the diagram) but it is desirable to have at least three speakers (two "front" speakers and a "center" speaker). -
Page 26: Placing Your Speakers
Connecting Your Equipment Placing Your Speakers Proper speaker placement is essential to realize the best sound from your system. The diagram and tips given here are just a rough guide, for more information see page 102 & 103. Also, it is very important for speaker placement to read the instructions that come with your speakers so please be sure to do so. -
Page 27: Displays & Controls
Displays & Controls Remote Control This page describes the buttons on the remote control used to operate the receiver. SETUP S0URCE SYSTEM RECEIVER DVD/LD TV CONT MULTI CONTROL MULTI VCR1/ VCR2 VIDEO OPERATION CD-R/ TUNER RECEIVER TAPE1 DIMMER INPUT ATT LOUDNESS SPEAKER A/B VIDEO SEL... - Page 28 (5.1, 7.1, AUTO). ! SYSTEM OFF button (see p.81) This button turns off components in two ways. First, when pressed it will turn off all PIONEER components. Secondly, any component that has programmed into the SYSTEM OFF settings will be turned off.
- Page 29 # MULTI OPERATION button Use this button to start the MULTI OPERATION mode. See p.79-80 for how to program and use the MULTI OPERATION mode. $ RECEIVER button Use this button to switch the remote control into receiver mode in order to get certain receiver functions or do receiver setups.
-
Page 30: Back Panel
Displays & Controls Back Panel All the terminals on the back panel are explained and/or referenced here. 5: U-shaped connectors Don't remove the U- shaped connectors unless you plan to connect an external amp to this receiver. 1 DIGITAL OUT terminals (see p.22) Use these terminals to output the signal from a DVD, CD player or any other kind of digital player. - Page 31 REMOTE IN MULTI- ROOM & SOURCE MONITOR (TV) (SAT) COMPONENT VIDEO ASSIGNABLE that you can control them all pointing the remote control(s) at one remote sensor. 11 MONITOR OUT terminals (connect a TV or monitor here, see p.16) Use these terminals to output a video signal to a TV or monitor.
-
Page 32: Front Panel
MULTI CH TUNER PHONO INPUT MASTER VOLUME MULTI ROOM & SOURCE LISTENING STATION CH SELECT CONTROL ON/OFF S-VIDEO VIDEO AUDIO VIDEO INPUT TUNER LISTENING MULTI ROOM & SOURCE STATION CH SELECT CONTROL ON/OFF S-VIDEO VIDEO AUDIO VIDEO INPUT 9 10 VSX-47TX... - Page 33 (5.1, 7.1 or AUTO). 17 MULTI-ROOM & SOURCE button (see p.74-78) Press to use the multi room feature (requires an optional PIONEER Multi-Room Remote Sensor Unit MR-100 or another IR receiver). CONTROL button (see p.74-78) Used together with the INPUT SELECTOR to...
-
Page 34: Display
Displays & Controls Display All the display information is explained and/or referenced here. SIGNAL AUTO OVER ATT DIGITAL ANALOG TAPE 2 TUNED STEREO MONO RF ATT 1 SIGNAL SELECT indicators Light to indicate the input signal you selected. ANALOG: Lights when analog signals are assigned. -
Page 35: Setting Up For Surround Sound
Setting Up for Surround Sound To ensure the best possible surround sound, complete the following setup operations. Some of these are the same (and take precedence over) the settings you made in the Quick Start Guide, so consider if the ones you made at that time were adequate. -
Page 36: Speaker Systems
Setting Up for Surround Sound SPEAKER SYSTEMS The following steps show you how to select the correct setup for the type and number of speakers you connected. Most importantly, you need to decide how to route the sound for all the speakers you connected. To do this select the size of the front, center, surround and surround back speakers (if you hooked them up). - Page 37 3.1. Speaker Systems [Manual Free] [Manual THX] (all small) [Auto] [Return] 2.1. Speaker Systems Manual Free Speaker System Select Normal Surround ( Next) 2.1. Speaker Systems Manual Free ” Normal Surround ” Front [LARGE] Center [LARGE] Surround [LARGE] SurrBack [LARGE Subwoofer [ YES ( NEXT)
-
Page 38: Channel Delay
Setting Up for Surround Sound CHANNEL DELAY Adding a slight delay to some speakers is necessary to achieve proper sound depth, separation as well as an effective surround sound effect. You need to figure out the distance from your listening position to your speakers to add the proper delay. -
Page 39: Channel Level
CHANNEL LEVEL (channel balance) The following steps show you how to balance the sound output level of your speakers. Proper speaker balance is essential for obtaining high quality surround sound. If continuing from CHANNEL DELAY go to step 1. If starting fresh, complete steps 1-3 in “Setting Up for Surround Sound“... - Page 40 Setting Up for Surround Sound 3.3. Channel Level Manual Front Center Front Surround SurrBack SurrBack Surround Subwoofer [Return] 3.3. Channel Level Semi Auto Front Center Front Surround SurrBack SurrBack Surround Subwoofer Return = Push Enter 2.3. Channel Level Manual Front Center Front Surround...
-
Page 41: Acoustic Calibration Eq
Acoustic Calibration EQ This setting is a kind of room equalizer for your speakers. You can select a frequency balance between your speakers that suits your personal tastes. This feature also allows you to increase the amount of a certain frequency in the soundtrack, which will have the effect of hearing more (or less) bass, mid-range or treble. -
Page 42: Check The Auto Settings
Setting Up for Surround Sound Check the Auto Settings If you want to check what settings have been input for your surround sound parameters you can do it following the steps below. SETUP S0URCE SYSTEM RECEIVER DVD/LD MULTI CONTROL VCR1/ VCR2 VIDEO CD-R/... -
Page 43: Basic Operation
Stereo and Multichannel Playback The following instructions show you how to play Dolby Digital or DTS sound sources with the VSX-47TX. Before doing so be sure to complete the setup procedures described in the Quick Start Guide (starting on page 13) or Setting Up for Surround Sound (starting on page 35). -
Page 44: Switching The Channels Used For Playback (Listening Ch Select)
Basic Operation ¡ – STATION DTV MENU CLASS STATION ¢ – CHANNEL CHANNEL TV INPUT INPUT TV CONTROL TV VOL MIDNIGHT VOLUME TV CH DIGITAL STEREO STANDARD MUTE /DIRECT SURROUND LISTENING ADVANCED ADVANCED MODE CINEMA CONCERT (DVD-A/SACD) ACOUSTIC MULTI CH LISTENING LIGHT INPUT... -
Page 45: Switching Analog/Digital Signal Input
Switching ANALOG/DIGITAL Signal Input This button selects the type of input signal, ANALOG, DIGITAL or 2 RF, sent to the receiver. You need to take special care to switch to the appropriate input when necessary. For example, the switch would have to be on DIGITAL to hear DOLBY DIGITAL or DTS surround sound material but it would have to be on analog to record from the ANALOG out jacks on the receiver. -
Page 46: Your Home System
Basic Operation Listening Modes The five listening mode types on the receiver are explained here. To select listening modes see pages 43-44. The kind of playback you can get in the three modes, STANDARD, HOME THX, and ADVANCED CINEMA, depends on what kind of a source (DVD, etc.) you are using. The basic distinction is between 2 channel sources and multichannel sources. -
Page 47: Home Thx Modes
This mode gives 6.1 channel surround sound and is suitable for music. The NEO:6 Music mode plays the stereo source as is through the front left/right speakers, and generates a natural, ambient surround and center sound. For 6.1 or 7.1 channel playback of 5.1 Channel Sources: SX (Studio extension) You can only use this mode if you have setup this receiver for use with surround back speaker(s) (see pages 11, 25, 36-37) and select 7.1 in LISTENING CH SELECT (see p.44). -
Page 48: Advanced Cinema Modes
Basic Operation For 7.1 channel playback of 5.1 channel sources: THX ULTRA2 CINEMA You can only choose this mode if you have set up this receiver for use with two surround back speakers (see pages 11, 25, 36-37 and select 7.1 in LISTENING CH SELECT (see p.44). When played using THX SURROUND EX, the surround sound field may actually sound narrower on some earlier Dolby Digital 5.1 and DTS 5.1 channel sources than with THX CINEMA processing. -
Page 49: Advanced Concert Modes
ADVANCED CONCERT modes The ADVANCED CONCERT (Digital Signal Processing) modes allow you to transform your living room into a variety of different sonic environments when playing either two-channel or multichannel sources. It optimizes its effects in accordance with your source, LISTENING CH SELECT and speaker configuration. CLASSICAL Simulates the acoustic effects of a large concert hall. -
Page 50: Listening With Acoustic Calibration Eq
Basic Operation Listening with Acoustic Calibration EQ You can listen to the soundtrack with the Acoustic Calibration EQ you set on page 41. To do so follow the instructions below. For information about each Acoustic Calibration EQ mode, see page 41. TV INPUT INPUT TV CONTROL... -
Page 51: Listening In Midnight Mode
Listening in MIDNIGHT Mode This useful feature makes it possible to get excellent surround sound effects even when listening at low volumes. It can be used with any surround sound source and play soundtracks so that the quieter sounds are audible even while playing a soundtrack at low volumes. -
Page 52: Adjusting Bass And Treble (Tone Control)
Basic Operation Adjusting Bass and Treble (TONE CONTROL) You can adjust the low (bass) and high (treble) frequencies. The TONE button can also be used to bypass the tone circuitry. SETUP S0URCE SYSTEM RECEIVER DVD/LD MULTI CONTROL VCR1/ VCR2 VIDEO CD-R/ TUNER TAPE1... -
Page 53: Dvd Audio/Multi Channel In Playback
DVD Audio/MULTI CHANNEL IN Playback MULTI CH IN allows you to connect a DVD audio player or an external decoder to enjoy certain types of specialized discs. To use MULTI CH playback follow the instructions below. TV INPUT INPUT TV CONTROL TV VOL MIDNIGHT VOLUME... -
Page 54: Dual Mono Setting And Playback
Basic Operation DUAL MONO setting and playback The dual mono setting can only be used when listening to Dolby Digital or homemade discs that have dual mono software encoded in them. Dual mono software usually is used to put two different mono recordings with one soundtrack on one DVD. -
Page 55: Using The Headphones
Using Headphones headphone jack Video Select This function allows you to listen to one sound source while you watch a different video source on your TV. The sound source is set in the normal fashion as explained on p.43 & 44 You then change the video input with the VIDEO SEL button. -
Page 56: Adjusting The Brightness Of The Display
Basic Operation Adjusting the Brightness of the Display Use the display DIMMER button to adjust the brightness of the fluorescent display. SETUP S0URCE SYSTEM RECEIVER DVD/LD MULTI CONTROL VCR1/ VCR2 VIDEO CD-R/ TUNER TAPE1 DIMMER INPUT ATT LOUDNESS VIDEO SEL SIGNAL SEL TAPE 2 –... -
Page 57: Using The Tuner
Using the Tuner Automatic and Manual Tuning The following steps show you how to tune in FM and AM radio broadcasts using the automatic (search) and manual (step) tuning functions. If you already know the exact frequency of the station you want, see “Direct Access Tuning“... -
Page 58: Direct Access Tuning
Using the Tuner Direct Access Tuning The following steps show you how to tune directly to a specific frequency using the remote control. SETUP S0URCE SYSTEM RECEIVER DVD/LD MULTI CONTROL VCR1/ VCR2 VIDEO CD-R/ TUNER TAPE1 DIMMER INPUT ATT LOUDNESS VIDEO SEL SIGNAL SEL TAPE 2... -
Page 59: Memorizing Frequently Used Stations
Memorizing Frequently Used Stations The following steps show you how to memorize up to 30 radio stations in 3 classes (each holding 10 stations). When memorizing FM frequencies, the receiver also memorizes the MPX mode (STEREO or MONO). SETUP S0URCE SYSTEM RECEIVER DVD/LD TV CONT... -
Page 60: Naming Memorized Stations
Using the Tuner Naming Memorized Stations You can input a name of up to eight characters for each preset station in the receiver’s memory (see the previous page). This name can be anything you choose. For example, you could input "CLASSICS" for that station and when you listen to it the name, rather than the frequency number, will appear on your display. -
Page 61: Recalling Memorized Stations
Recalling Memorized Stations SETUP S0URCE SYSTEM RECEIVER DVD/LD TV CONT MULTI CONTROL VCR1/ MULTI VCR2 VIDEO OPERATION CD-R/ TUNER RECEIVER TAPE1 DIMMER INPUT ATT LOUDNESS SPEAKER A/B VIDEO SEL SIGNAL SEL TAPE 2 EFFECT/CH SELL – TONE BASS/TREBLE DISC ENTER DIRECT ACCESS DISP MODE SYSTEM SETUP REMOTE SETUP... -
Page 62: Remote Control Of Other Components
Remote Control of Other Components Remote Control of Other Components Setting Up the Remote Control to Control Other Components In addition to controlling the receiver, the supplied remote control can operate your other components (VCR, TV, DVD, CD, etc.) after you program it to do so. In this way, instead of fumbling with many different controls and buttons, you only need to use one remote control. - Page 63 This method should help you customize the remote control for your system and let you control all of your components with the remote control for the VSX-47TX. 8 Repeat the process from step 2 for all of your components.
-
Page 64: Programming Signals From Other Remote Controls (Learning Mode)
Remote Control of Other Components Programming Signals from Other Remote Controls (LEARNING Mode) If preset codes are not available for your component(s), or the available preset codes do not operate correctly, you can use this procedure to program in signals from the remote control(s) of your other component(s). These steps can also be used to add further operations to the remote control that were successfully set with the stored settings (see p.62-63). - Page 65 5∞ buttons to select YES. Press ENTER. Repeat steps 4 and 5 to teach the remote control of the VSX-47TX all the commands from the other remote control. 7 If you want to program in more commands for another MULTI CONTROL button use the 5∞...
-
Page 66: Using Remote Control With Other Components
Remote Control of Other Components Using Remote Control with Other Components CD/MD/CD-R/VCR/DVD/LD/DVD recorder/Cassette Deck operations • The following operations are available from the receiver's remote control after you program it memo (see “Setting Up the Remote Control to Control Other Components,“ p.62-65). •... -
Page 67: Cable Tv/Satellite Tv/Digital Tv/Tvoperations
Cable TV/Satellite TV/Digital TV/TVoperations • The following operations are available from the receiver's remote control after you program it memo (see “Setting Up the Remote Control to Control Other Components,“ p.62-65). • To perform these operations, press the MULTI CONTROL button for the component you want to control. -
Page 68: Setting Up The Direct Function
VCR 2 mode you'll get no picture on your TV because the external video deck signal is not going through the VSX-47TX. To get around this problem you set the DIRECT FUNCTION for VCR 2 to OFF. Now when you press VCR 2 function button you can control the external video deck with the remote but the receiver does not go into VCR 2 mode. -
Page 69: Using Other Functions
Using Other Functions Recording from Audio/Video Components The following explanations show you how make a recording from one component to another connected to this receiver. Note that an analog recorder (such as a VCR) cannot record from a source that is connected using only a digital connection. -
Page 70: Speaker System B Setup
Using Other Functions Speaker System B Setup Stereo playback in another room Connect a pair of speakers to the B speaker terminals to listen to stereo playback in another room (kitchen, bedroom, etc.). Select NORMAL SURROUND and choose the speaker system setup that you want. See the next page for more details on these speaker system settings. -
Page 71: Switching A/B Speaker System
Switching A/B Speaker System This unit has three types of speaker systems A, B, A&B. This switch allows you to select the speaker system you will use. DVD/LD TV CONT MULTI CONTROL VCR1/ MULTI VCR2 VIDEO OPERATION CD-R/ TUNER RECEIVER TAPE1 DIMMER INPUT ATT... -
Page 72: Connecting Additional Amplifiers
Using Other Functions Connecting Additional Amplifiers This receiver has more than sufficient power for any home use, but it is possible to add additional amplifiers to every channel of your system. Make the connections shown below to add amplifiers to power your speakers. Before making or changing the connections, switch off the power and disconnect the power cord from the AC outlet. -
Page 73: Pre Out Power Setup
Pre Out Power Setup Using an separate stereo pre-amplifier It is possible to use a separate stereo pre-amp in conjunction with this receiver. You might want to do this if you need to connect more sources than this receiver can accommodate. You can connect sources to either this receiver or to the external pre-amp (giving you a greater number of input possibilities). -
Page 74: Multi-Room
If you go into the main room to change the source but forget the remote control it's not a problem. While in MULTI ROOM mode the input selector on the front panel of the VSX-47TX is able to change the input even though the receiver is off. -
Page 75: Setup Menu
VARIABLE or FIXED. If you hook up a just a power amplifier in the sub room the VSX-47TX will act as a pre-amp. In this case choose VARIABLE for the VOLUME LEVEL setting. If you hook up a full integrated amplifier in the sub room (such as another Pioneer VSX receiver) choose FIXED for the VOLUME LEVEL setting. -
Page 76: Controlling The Multi-Room System From The Main Room
1 Press the MULTI ROOM & SOURCE ON/OFF button to turn on the MULTI ROOM system. The display shown below will illuminate when the receiver is in STANDBY mode. VSX-47TX AUDIO/VIDEO MULTI-CHANNEL AMPLIFIER Also, the MULTI ROOM indicator will light. LISTENING MODE SELECTOR MASTER VOLUME 2 Press the CONTROL button to enter the control mode. -
Page 77: Controlling The Multi-Room System From The Sub Room
• When you are doing the system setup process the MULTI-ROOM cannot be used. • If you use a PIONEER amplifier in the sub room, when you want to control the VSX-47TX only you will also change the settings in the sub room. To avoid this, cover up the remote sensor on the sub room amplifier. -
Page 78: The Pioneer Sr System: Operating Other Pioneer Components
The PIONEER SR System: Operating other PIONEER components Connecting an optional control cord allows you to operate other PIONEER components simply by pointing the receiver's remote control at the remote sensor on the front panel of the receiver. The receiver then sends the remote control signals to the other devices via the CONTROL OUT terminal. -
Page 79: Multi Operations
The steps below show you how to program a string of up to 5 different operations for each MULTI CONTROL button. You don't need to program the power of this receiver (or any Pioneer component used) to go on, it (or they) will do so automatically when multi operations are performed. -
Page 80: Performing Multi Operations
MULTI VIDEO OPERATION TUNER RECEIVER The power of the receiver (and any Pioneer compo- LOUDNESS SPEAKER A/B nents use in the program) goes on and the pro- TAPE 2 EFFECT/CH SELL grammed multi operations are performed automati- cally. -
Page 81: System Off
For example, you can program the unit to stop your DVD, turn off your TV and turn off your DVD player. You don't need to program power off for PIONEER components, they will go off automatically in this mode. -
Page 82: Using System Off
The remote control must be on to be able to use this command but it can be in any mode. All the components programmed into the SYSTEM OFF mode will stop and/or go off. The receiver and Pioneer components will go off as well. TV CONT MULTI OPERATION... -
Page 83: Editing Remote Control Display Names
Editing Remote Control Display Names Use this capability to rename the display on the remote control for different MULTI CONTROL buttons (DVD/LD, etc.). For example, you could change "TV" to "DVD2". In this way you can personalize your system. This is similar to the feature on p.95 but that feature changes the display on the receiver. -
Page 84: Editing Buttons Names (Key Label)
Using Other Functions Editing Button Names (KEY LABEL) Use the KEY LABEL capability to rename the display on the remote control for different buttons (keys). You would want to do this if you taught a specific button a new operation. S0URCE DVD/LD MULTI CONTROL... -
Page 85: Adjusting The Light On The Remote Control
Adjusting the Light on the Remote Control This feature allows you to adjust the brightness of the light on the remote control. SETUP S0URCE SYSTEM RECEIVER DVD/LD TV CONT MULTI CONTROL VCR1/ MULTI VCR2 VIDEO OPERATION CD-R/ TUNER RECEIVER TAPE1 DIMMER INPUT ATT LOUDNESS... -
Page 86: Clearing Remote Control Settings You Have Input
Using Other Functions Clearing Remote Control Settings You Have Input This feature allows you to clear a particular setting, or all of the settings from a function in the REMOTE SETUP menu. S0URCE DVD/LD MULTI CONTROL VCR1/ VCR2 CD-R/ TAPE1 DIMMER INPUT ATT VIDEO SEL... -
Page 87: Resetting The Main Unit
(DVD-A/SACD) SETUP DIGITAL IN S-VIDEO VIDEO AUDIO VIDEO INPUT 1 While holding down the DIGITAL NR VSX-47TX AUDIO/VIDEO MULTI-CHANNEL AMPLIFIER button press the STANDBY/ON LISTENING MODE SELECTOR button for about three seconds. MASTER VOLUME & SOURCE ON/OFF 2 When you see RESET? appear in the display, press the TONE –... -
Page 88: Advanced Setup
Advanced Setup Assigning the Digital Inputs If you did not hook up your digital equipment in accordance with the default settings for the digital inputs (see p.17, 19 & 22-23) you need to complete the procedure below. You have to do this in order to tell the receiver what digital equipment is hooked up to which terminal so the buttons on the remote correspond to what you have hooked up. -
Page 89: Assigning The Component Video Inputs
Assigning the Component Video Inputs This receiver has three component video inputs. By default they act as video inputs for the DVD/LD, TV and SAT functions, but you can reassign them if you want to use them as video inputs for other receiver functions. -
Page 90: Expert Setup
Advanced Setup Expert Setup These settings are more advanced. Some could add depth or listenability to your sound (like the Dynamic Range Control) and others are for your convenience (like the Function Rename). You can decide if you want to make these settings or not. -
Page 91: Osd (On-Screen Display) Adjustment
OSD (On-screen Display) ADJUSTMENT Use this feature to adjust your TV display if it seems difficult to see all the instructions on the screen. This adjustment basically lets you move the screen displays up or down and left or right to get a better match between the displays for this receiver and your TV. -
Page 92: Bass Peak Level
Advanced Setup BASS PEAK LEVEL The LFE (Low Frequency Effect) channel in Dolby Digital, DTS program sources can produce heavily concentrated ultra-low bass tones that may exceed the capabilities of your speaker system. The following steps show you how to set the peak level for the LFE channel. If continuing from the preceding page the BASS PEAK LEVEL MANAGER should be selected. -
Page 93: Dynamic Range Control
DYNAMIC RANGE CONTROL This feature makes it possible to enjoy full surround sound effects on Dolby Digital sources even at low volumes. It does this by compressing the dynamic range. Dynamic range is the difference between the loudest and the softest sounds in any given signal. Compressing the range plays sounds so the quieter ones are audible and the louder ones don’t get distorted or become overpowering. -
Page 94: Speaker Placement
Advanced Setup MULTI CH IN SELECT If you have two surround back speakers, and connected a source, such as a DVD-Audio player, to the analog multi-channel inputs, you can use this setting to control how the surround and surround back channels are routed. -
Page 95: Function Rename
FUNCTION RENAME Use the FUNCTION RENAME capability to rename the display on the receiver and your OSD for different functions (DVD, etc.). For example, you could rename VCR1/DVR as "DVR-7000". VIDEO SEL SIGNAL SEL TAPE 2 EFFECT/CH SELL – TONE BASS/TREBLE DISC ENTER... -
Page 96: Thx Audio Setup
Advanced Setup THX Audio Setup THX Ultra2 Subwoofer Setup If you have a high-precision speaker that outputs very low frequencies, the sound may have too much boom because of the resonant frequencies in the room where your subwoofer is setup. If you have this problem use the THX Ultra2 Subwoofer Setup to adjust the low end sounds. -
Page 97: Surround Back Speaker Position
Surround Back Speaker Position This setting has been specifically designed to set the distance between your surround back speakers. If you don't have surround back speakers, or just have one, you won't be able to select this setting. The Advanced Speaker Array (ASA) system was developed with the principles of THX Ultra2 technology in order to get optimum sound from your surround back speakers. -
Page 98: Re-Equalization
Advanced Setup Re-Equalization Re-Equalization is a built-in feature of THX technology (see p.101) and is thus always in use for HOME THX modes. If you want to apply this feature to other listening modes complete the steps below. Whether this setting will benefit you or not depends on the type of room you have and your individual listening tastes. -
Page 99: Techno Tidbits & Problem-Solving
Movie Mode or Music Mode do not give good results). One can select one of them depending on your soundtrack of choice. memo • For receivers and components other than the VSX-47TX Dolby Pro Logic II may not have the above mentioned functions. Soundtracks using linear PCM audio generate too much data for multichannel use. -
Page 100: Dolby Digital Surround Ex
Techno Tidbits & Problem-solving Dolby Digital Surround EX This new recording technology is able to play 6.1 channel sound and was developed in a collaboration between Dolby Laboratories and Lucasfilm, Ltd. for the film "Stars Wars: The First Episode", the first movie ever to be made with Dolby Digital Surround EX technology. - Page 101 ASA optimizes the surround sound experience using two new modes; THX Ultra2 Cinema and THX MusicMode. THX Ultra2™ Cinema mode: When presented with a multichannel digital signal (Dolby Digital, DTS, etc.) the VSX-47TX automatically selects THX Ultra2 Cinema mode. This mode plays 5.1 movies using all 8 speakers giving you the best possible movie watching experience.
-
Page 102: Speaker Placement Information
Techno Tidbits & Problem-solving Speaker Placement Information Placement of your speakers is a crucial aspect of attaining accurate and realistic surround sound. Certain pointers concerning speakers stands, direction, angle and distance of speakers will be useful in this regard. Firstly, it is best not to put your speakers directly on the floor. If you do this some of the sound vibra- tion (especially bass) will go directly into the flooring and be lost. - Page 103 Speaker Placement for a Complete THX Speaker System If you have a complete THX Speaker System set (LucasFilm authorized), follow the diagram below to place your speakers. Placing your surround back speakers together, and the same distance from the listening position, will allow you to take advantage of the ASA technology (see p.97 & 101). Notice the surround speakers should output at an angle parallel to the listener.
-
Page 104: Audio Block Diagram
Techno Tidbits & Problem-solving Audio Block Diagram... -
Page 105: Troubleshooting
Sometimes the trouble may lie in another component. Investigate the other components and electrical appliances being used. If the trouble cannot be rectified even after exercising the checks listed below, ask your nearest PIONEER authorized service center or your dealer to carry out repair work. Symptom... - Page 106 Techno Tidbits & Problem-solving Symptom No sound from surround or center speakers. No sound output from the subwoofer. No sound output from the surround back speakers. No sound output from one speaker. Sound is produced from some components, but not from digital components.
- Page 107 Symptom Cause When playing an LD the • The LD is not a Dolby Digital compatible SIGNAL SELECT is on 2 RF disc. but there is still no sound. Other audio problems Subwoofer output is very • Settings route signal away from low.
- Page 108 Techno Tidbits & Problem-solving Symptom Video No image is output when a function is selected. There is no image coming from the selected component video jacks. Can't record video. Input/display The display is dark. You can't get DIGITAL to come up when using the SIGNAL SELECT button.
- Page 109 Symptom Cause During playback of a DVD • The multi channel connections are audio source, the player analog, so there is no digital transfer. shows a transfer rate of 96kHz, but the receiver does not. During playback of a DTS •...
- Page 110 A damaged power cord can cause a fire or give you an electrical shock. Check the power cord once in a while. When you find it damaged, ask your nearest PIONEER authorized service center or your dealer for a replacement. EST 1924 Selecting fine audio equipment such as the unit you’ve...
-
Page 111: Specifications
Specifications Amplifier Section Continuous average power output of 160 watts* per channel, min., at 6 ohms, from 20 Hz to 20,000 Hz with no more than 0.09 %** total harmonic distortion (front). Continuous Power Output (6 ) Front ... 160 W + 160 W (20 Hz-20 kHz, 0.09 %, 6 ) Center ... - Page 112 Should this product require service in the U.S.A. and you wish to locate the nearest Pioneer Authorized Independent Service Company, or if you wish to purchase replacement parts, operating instructions, service manuals, or accessories, please call the number shown below.