Table of Contents
Advertisement
Quick Links
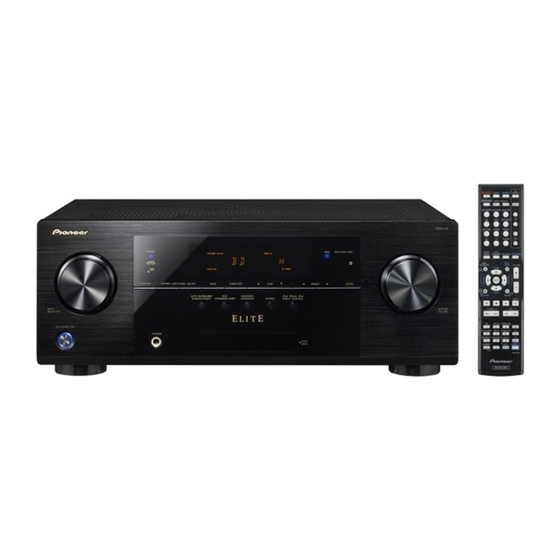
AV Receiver
VSX-42
Register your product on
http://www.pioneerelectronics.com (US)
http://www.pioneerelectronics.ca (Canada)
• Protect your new investment
The details of your purchase will be on file for reference in the event of an insurance claim such as loss or theft.
• Receive free tips, updates and service bulletins on your new product
• Improve product development
Your input helps us continue to design products that meet your needs.
• Receive a free Pioneer newsletter
Registered customers can opt in to receive a monthly newsletter.
Operating Instructions
Advertisement
Table of Contents

Related Manuals for Pioneer VSX-42 ELITE


Summary of Contents for Pioneer VSX-42 ELITE
-
Page 1: Operating Instructions
• Receive free tips, updates and service bulletins on your new product • Improve product development Your input helps us continue to design products that meet your needs. • Receive a free Pioneer newsletter Registered customers can opt in to receive a monthly newsletter. Operating Instructions... - Page 2 VENTILATION CAUTION IMPORTANT When installing this unit, make sure to leave space around the unit for ventilation to improve heat radiation CAUTION (at least 40 cm at top, 20 cm at rear, and 20 cm at each RISK OF ELECTRIC SHOCK side).
- Page 3 This Class B digital apparatus complies with Canadian ICES-003. D8-10-1-3_A1_En Only use attachments/accessories specified by Read these instructions. CAUTION the manufacturer. Keep these instructions. This product satisfies FCC regulations when shielded Use only with the cart, stand, tripod, bracket, or Heed all warnings.
-
Page 4: Table Of Contents
Contents Thank you for buying this Pioneer product. Please read 03 Basic Setup 06 Playback with NETWORK features through these operating instructions so you will know how to Automatically setting up for surround sound (MCACC) . . 23 Introduction ........38 operate your model properly. - Page 5 Contents 08 Control with HDMI function Making Control with HDMI connections....52 HDMI Setup ........52 Before using synchronization .
-
Page 6: Before You Start
Before you start Flow of settings on the receiver The unit is a full-fledged AV receiver equipped with an The Speaker System setting (page Checking what’s in the box abundance of functions and terminals. It can be used easily (Specify either using the surround back or front height after following the procedure below to make the connections Please check that you’ve received the following supplied speaker.) -
Page 7: Controls And Displays
Chapter Controls and displays Front panel VSX-42 MCACC HDMI iPod iPhone iPad SPEAKERS CONTROL MULTI-ZONE ON/OFF BAND TUNER EDIT TUNE PRESET ENTER AUTO SURROUND/ ALC/ ADVANCED iPod iPhone iPad STREAM DIRECT STANDARD SURR SURROUND STEREO DIRECT CONTROL MASTER INPUT SELECTOR VOLUME STANDBY / ON PHONES... -
Page 8: Display
Controls and displays Dolby Digital indicators Removing the front cover Display 2 D – Lights when a Dolby Digital encoded signal is detected. PHASE Lights when the Phase Control is switched on (page 35). 2 D+ – Lights when a source with Dolby Digital Plus 2.1 A MCACC VIDEO... -
Page 9: Remote Control
Controls and displays Press BD, first to access: SLEEP DVR/BDR Remote control Press to change the amount of time before the receiver – Displays the disc ‘top’ menu of a Blu-ray TOP MENU switches into standby (30 min – 60 min – 90 min – Off). You Disc/DVD. -
Page 10: Loading The Batteries
Controls and displays Number buttons and other component controls MUTE Operating range of remote control Use the number buttons to directly select a radio frequency Mutes/unmutes the sound. The remote control may not work properly if: (page 32) or the tracks on a CD, etc. There are other buttons DISP •... -
Page 11: Connecting Your Equipment
Chapter Connecting your equipment • To connect the ZONE 2 speakers, an additional Important Determining the speakers’ application amplifier is required. • Both the surround back speakers and the front height By connecting the left and right front speakers (L/R), the speakers can be connected at the same time. - Page 12 Connecting your equipment If the surround speakers cannot be set directly to the side The front height terminals can also be used for Speaker B. of the listening position with a 7.1-channel system, the surround effect can be enhanced by turning off the Up Front height setting Mix function (see Setting the Up Mix function on page...
-
Page 13: Connecting The Speakers
Connecting your equipment B-Speakers terminals: CAUTION Switching the speaker terminal Twist exposed wire strands together. If you selected Surr.Back in The Speaker System setting on • Make sure that all speakers are securely installed. This not page 49, you can switch between speakers using the only improves sound quality, but also reduces the risk of Push open the tabs and insert exposed wire. -
Page 14: Making Cable Connections
Connecting your equipment • If the video signal does not appear on your TV, try adjusting • 3D, Deep Color, x.v.Color signal transfer and Audio Return Making cable connections the resolution settings on your component or display. Note Channel are only possible when connected to a compatible that some components (such as video game units) have component. -
Page 15: Video Cables
Connecting your equipment Note Note About the video converter • When connecting optical cables, be careful when inserting • If several video components are assigned to the same input The video converter ensures that all video sources are output the plug not to damage the shutter protecting the optical function, the converter gives priority to HDMI, component, from the HDMI OUT terminal. -
Page 16: Connecting A Tv And Playback Components
Connecting your equipment Connecting a TV and playback components DVD player HDMI/DVI-compatible components Blu-ray Disc player Connecting using HDMI If you have an HDMI or DVI (with HDCP) equipped component (Blu-ray Disc player, etc.), you can connect it to this receiver using a commercially available HDMI cable. -
Page 17: Connecting Your Tv With No Hdmi Input
Connecting your equipment Connecting your TV with no HDMI input DVD player Set-top box This diagram shows connections of a TV (with no HDMI input) and DVD player (or other playback component) to the receiver. • With these connections, the picture is not output to the TV VIDEO OUT Select one VIDEO OUT... -
Page 18: Connecting Your Dvd Player With No Hdmi Output
Connecting your equipment Connecting your DVD player with no HDMI DVD player Set-top box output This diagram shows connections of a TV (with HDMI input) and DVD player (or other playback component with no HDMI Select one Select one Select one output) to the receiver. -
Page 19: Connecting Optional Bluetooth ® Adapter
For details, see By connecting this receiver to the network via the LAN When the Bluetooth ADAPTER (Pioneer Model No. AS-BT100 Network Setup menu on page terminal, you can listen to Internet radio stations. To listen to... -
Page 20: Connecting Antennas
Connecting your equipment Using external antennas Connecting antennas Connecting an IR receiver Connect the AM loop antenna and the FM wire antenna as If you keep your stereo components in a closed cabinet or To improve FM reception shown below. To improve reception and sound quality, shelving unit, or you wish to use the sub zone remote control Use an F connector (not supplied) to connect an external FM connect external antennas (see... -
Page 21: Switching Components On And Off Using The 12 Volt
Connecting your equipment Switching components on and off using the Connecting an iPod Connecting a USB device This receiver has a dedicated iPod terminal that will allow you It is possible to play audio and photo files by connecting USB 12 volt trigger to control playback of audio content from your iPod using the devices to this receiver. -
Page 22: Plugging In The Receiver
A damaged power cord can cause a fire or give you an electric shock. Check the power cord once in a while. If you find it damaged, ask your nearest Pioneer authorized independent service company for a replacement. •... -
Page 23: Basic Setup
Chapter Basic Setup RECEIVER Switch on the receiver and your TV. Press on the remote control, then press the Automatically setting up for surround sound HOME MENU button. (MCACC) Switch the TV input to the input that connects this The Home Menu appears on your TV. Use ///... -
Page 24: Other Problems When Using The Auto Mcacc Setup
Basic Setup Other problems when using the Auto MCACC Wait for the test tones to finish. Make sure ‘OK’ is selected, then press ENTER. A progress report is displayed on-screen while the If the screen in step 8 is left untouched for 10 seconds setup receiver outputs test tones to determine the speakers is not pressed in step 9, the Auto MCACC... -
Page 25: Basic Playback
Chapter Basic playback If you selected the proper input source and there is still Selecting the audio input signal Playing a source no sound, select the audio input signal for playback (see The audio input signal can be selected for each input source. Selecting the audio input signal below). - Page 26 Basic playback • When digital input (optical or coaxial) is selected, this receiver can only play back Dolby Digital, PCM (32 kHz to 96 kHz) and DTS (including DTS 96 kHz/24 bit) digital signal • In order to enjoy the picture and/or sound from devices connected to each terminal, select the input by doing the following. formats.
-
Page 27: Playing An Ipod
• Installing software versions other than indicated on the panel. browse that category. website of Pioneer to your iPod/iPhone/iPad may result in • This feature can only be used with an iPod having video • To return to the previous level any time, press RETURN. -
Page 28: Playing A Usb Device
If a USB Error message lights in the display, try following Important the points below: ENTER DISP • Pioneer cannot guarantee compatibility (operation and/or • Switch the receiver off, then on again. bus power) with all USB mass storage devices and HOME •... -
Page 29: About Playable File Formats
16 bit specifically, Pro, Lossless, Voice. Channel 2 ch Apple lossless encoding is not supported. Bitrate 8 kbps to 320 kbps Uncompressed FLAC files are not supported. Pioneer does not guarantee playback. VBR/CBR Supported/Supported Photo files WAV (LPCM) Extension Format .wav... -
Page 30: Bluetooth Adapter For Wireless Enjoyment Of Music
Wireless music play technology device and Bluetooth ADAPTER. / to select one of PIN codes 0000, 1234 or 8888, When the Bluetooth ADAPTER (Pioneer Model No. AS-BT100 • To enable Bluetooth communication, pairing should be then press ENTER. or AS-BT200) is connected to this unit, a product equipped done with both of your system and Bluetooth wireless You can use any of 0000/1234/8888 PIN codes. -
Page 31: Listening To Music Contents Of Bluetooth Wireless Technology Device With Your System
S.R AIR. PASSKEY. AIR JAM Listening to Music Contents of Bluetooth wireless Air Jam – a Pioneer-exclusive application and available for free. technology device with Your System Air Jam lets you connect multi compatible devices to this unit... -
Page 32: Listening To The Radio
Basic playback Note Improving FM sound Listening to the radio • If the receiver is left disconnected from the AC power outlet If the TUNE or ST indicators don’t light when tuning to an FM The following steps show you how to tune in to FM and AM for over a month, the station memories will be lost and will station because the signal is weak, set the receiver to the radio broadcasts using the automatic (search) and manual... -
Page 33: Listening To Your System
Chapter Listening to your system Note Choosing the listening mode • Stereo surround (matrix) formats are decoded accordingly This receiver offers a variety of listening modes to using NEO:6 CINEMA or DOLBY PLIIx MOVIE (see Type of surround Suitable sources accommodate playback of various audio formats. -
Page 34: Using The Advanced Surround
Listening to your system You can also adjust the C.WIDTH, DIMEN., and PNRM. effect Allows you to create natural surround F.S.S.ADVANCE (see Setting the Audio options on page 36). Using the Sound Retriever (Front Stage sound effects using just the front speakers You can also adjust the H.GAIN effect (see Setting the Audio Surround... -
Page 35: Better Sound Using Phase Control
Listening to your system Better sound using Phase Control Using surround back channel processing Setting the Up Mix function This receiver’s Phase Control feature uses phase correction You can have the receiver automatically use 6.1 or 7.1 In a 7.1-channel surround system with surround speakers measures to make sure your sound source arrives at the decoding for 6.1 encoded sources (for example, Dolby Digital placed directly at the sides of the listening position, the... -
Page 36: Setting The Audio Options
Listening to your system Setting/What it does Option(s) Setting/What it does Option(s) Setting the Audio options EQ (Acoustic Calibration EQ) DRC (Dynamic Range Control) There are a number of additional sound settings you can AUTO Switches on/off the effect of Acoustic Adjusts the level of dynamic range for movie make using the AUDIO PARAMETER menu. - Page 37 Listening to your system Only when listening to 2-channel sources in NEO:6 CINEMA Setting/What it does Option(s) and NEO:6 MUSIC mode. –3 to +3 DIMEN (Dimension) Default: 0 Adjusts the surround sound balance from front to back, making the sound more distant (minus settings), or more forward (positive settings).
-
Page 38: Playback With Network Features
Playback the music files stored in PCs on the Pioneer website. AirPlay may not be compatible with Digital Media Controller (DMC). Devices controlled by this You can playback a lot of musics stored in your PCs using this iPod, iPhone, iPad or iTunes software versions other than DMC to play files are called DMRs (Digital Media Renderers). -
Page 39: Playback With Network Functions
Playback with NETWORK features Listening to Internet radio stations Repeat step 2 to play back the desired song. Playback with Network functions For detailed operating instructions, refer to the section Internet radio is an audio broadcasting service transmitted via shown below. Important the Internet. -
Page 40: Listening To Pandora Internet Radio
In this case can be registered. receiver, use this access code to access the special Pioneer they are registered on the receiver as favorite broadcast Internet radio site and register the desired broadcast stations Registering and deleting audio files and Internet stations and can be played. -
Page 41: The Network Setup Menu
Playback with NETWORK features DHCP server function. Before you set up the network, consult If there is no DHCP server on the network and you select The Network Setup menu with your ISP or the network manager for the required ON, this receiver will use its own Auto IP function to settings. -
Page 42: Language
• If ‘FAIL’ is displayed on the front panel display, • If an update file is provided on the Pioneer website, updating has failed. Try the following: download it onto your computer. When downloading an Input the password. Turn the receiver’s power off, then turn it back on update file from the Pioneer website onto your computer, /... -
Page 43: About Network Playback
WARRANTY. refer to the operating instructions for the software or device affect unprotected content. When you download licenses for IN NO EVENT WILL PIONEER, ITS AFFILIATES, OR THEIR for more information. protected content, you agree that Microsoft may include a RESPECTIVE OFFICERS, DIRECTORS, OR EMPLOYEES BE DLNA™, the DLNA Logo and DLNA CERTIFIED™... -
Page 44: About Playback Behavior Over A Network
FLAC (Free Lossless Audio Codec) is an audio format allows With this software, you can play back files stored on the PC Pioneer is not responsible for any malfunction of the player lossless codec. Audio is compressed in FLAC without any loss through various devices wherever you like in your home. -
Page 45: About Playable File Formats
Channel 2 ch specifically, Pro, Lossless, Voice. Bitrate 8 kbps to 320 kbps Uncompressed FLAC files are not supported. Pioneer does not VBR/CBR Supported/Supported guarantee playback. WAV (LPCM) .wav Sampling frequency 32 kHz, 44.1 kHz, 48 kHz,... -
Page 46: Home Menu
Chapter Home Menu • Network Standby – Allows the AirPlay function to be used Select the setting you want to adjust. Using the Home Menu even when the receiver is in the standby mode (see Network Standby menu on page 51). -
Page 47: X.over
Home Menu X.Over Choose the set of speakers that you want to set then When you’re finished, press RETURN. You return to the Manual SP Setup menu. select a speaker size. • Default setting: 100Hz / to select the size (and number) of each of the This setting decides the cutoff between bass sounds playing Note following speakers:... -
Page 48: Channel Level
Home Menu Adjust the level of each channel using /. Channel Level Speaker Distance If you selected Manual, use / to switch speakers. The Using the channel level settings, you can adjust the overall For good sound depth and separation from your system, you Auto setup will output test tones in the order shown on- balance of your speaker system, an important factor when need to specify the distance of your speakers from the... -
Page 49: The Input Assign Menu
Home Menu Select ‘Component Input’ from the Input Assign menu. The Input Assign menu The Video Parameter setting Assigns input function for analog audio input terminal and This receiver can up-convert the video signal input from the 3 b . Co mpo n e nt Inp ut 3 . -
Page 50: Resolution
Home Menu Resolution Aspect The Auto Power Down menu Specifies the output resolution of the video signal (when video Specifies the aspect ratio when analog video input signals are Set to automatically turn off the receiver after a specified time input signals are output at the HDMI OUT terminal, select this output at the HDMI OUT terminal. -
Page 51: The Network Standby Menu
Home Menu The Network Standby menu The ZONE2 Setup The 12 V Trigger Setting This setting allows the AirPlay function for operating the When making multi-zone connections using the ZONE 2 OUT If the input switches over to the input function set here, a receiver from a computer connected on the same LAN as the terminals and performing playback in Zone 2, you can set control signal is output from the receiver’s 12 V trigger... -
Page 52: Control With Hdmi Function
Synchronized operations below with a Control with HDMI- Important Select ‘HDMI Setup’ from the Home Menu. compatible Pioneer TV or Blu-ray Disc player are possible • When connecting this system or changing connections, be when the component is connected to the receiver using an Ho me Me nu 6 . -
Page 53: Before Using Synchronization
Control with HDMI function • BD, DVD, SAT/CBL, DVR/BDR, VIDEO, GAME – The When in the synchronized amp mode, the synchronized HDMI input signal selected here will be output. This amp mode is canceled if an operation that produces can only be selected when Control is set to OFF. sound from the TV is performed from the TV’s menu screen, etc. -
Page 54: Using The Multi-Zone Feature
Chapter Using the MULTI-ZONE feature Connect a separate amplifier to the ZONE 2 AUDIO OUT When you’re finished, press MULTI-ZONE CONTROL MULTI-ZONE listening jacks on the rear of this receiver. again to return to the main zone controls. This receiver can power up to two independent systems in You should have a pair of speakers attached to the sub You can also press button on the... -
Page 55: Controlling The Rest Of Your System
Chapter Controlling the rest of your system Setting the remote to control other Selecting preset codes directly Clearing all the remote control settings You can clear all presets and restore the factory default components settings. Most components can be assigned to one of the input ... -
Page 56: Controls For Tvs
Selects channels. TV CONTROL CH Category Press to advance to the start of the next track. +/– Repeated presses skips to the start of following Pioneer 0004 Preset code Adjust the TV volume. TV CONTROL tracks. VOL +/– Manufacturer Pause playback or recording. - Page 57 Element 0082 Memorex 0001, 0005, 0006, 0041 0090, 0104 Aiwa 2012 Lasonic 2085 Pioneer 0004, 0006, 0113, 0233, 0252, Emerson 0004, 0006, 0007, 0008, MGA 0004, 0005, 0006, 0100 Sears 0000, 0004, 0006, 0009, 0101, Akai 2066 Lenoxx 2074, 2090...
- Page 58 Daewoo 1005 Hughes Network Systems 6113, Voom 6032 Motorola 1004 DBX 1000 UltimateTV 1031 6038, 6054, 6114, 6115, 6116 Pioneer 2034, 2192, 2255, 2258, 2259, MTC 1002 Zehnder 6101 Dell 1017 Unitech 1002 Hyundai 6016 2260, 2281 Multitech 1002, 1005...
- Page 59 Zenith 6112 CD-R Pioneer 5001, 5053, 5071 Cable Set Top Box (Cable/ Philips 5054 PVR Combination) Yamaha 5055 Pioneer 6029, 6325, 6328, 6329 Amino 6078 Tuner Bright House 6074, 6029 Pioneer 5060 Cable One 6074, 6029 Cablevision 6074, 6029 Laser Disc Player...
-
Page 60: Additional Information
Connecting your equipment on page 11). frequency setting. If there is a PHASE setting on your ask your nearest Pioneer authorized independent service subwoofer, set it to 0º (or depending on the subwoofer, the Check the audio output settings of the source component. -
Page 61: Network Feature
Additional information Can’t operate the remote control. Bluetooth wireless technology device cannot be NETWORK feature Replace the batteries (page 10). Bluetooth connected or operated. Sound from the Operate within 7 m (23 ft.), 30º of the remote sensor (page 10). -
Page 62: Hdmi
Additional information Network connections could be restricted due to the Cannot listen to Internet radio stations. No sound, or sound suddenly ceases. computer’s network settings, security settings, etc. Check the The firewall settings for components on the network are ... -
Page 63: Windows 7
Additional information Configuration B About iPod/iPhone/iPad About FLAC Connect your HDMI-equipped component directly to the display using an HDMI cable. Then use the most convenient FLAC Decoder connection (digital is recommended) for sending audio to the Copyright © 2000, 2001, 2002, 2003, 2004, 2005, 2006, 2007 receiver. -
Page 64: About Messages Displayed When Using Network Functions
Additional information About messages displayed when using Resetting the main unit Use this procedure to reset all the receiver’s settings to the network functions factory default. Use the front panel controls to do this. Refer to the following information when you come up with a •... -
Page 65: Specifications
Additional information Integrated control section The Safety of Your Ears is in Your Hands Specifications Control (IR) terminal ... . . Ø 3.5 Mini-jack (MONO) Get the most out of your equipment by playing it at a IR signal . - Page 66 253 Alexandra Road, #04-01, Singapore 159936 TEL: 65-6472-7555 PIONEER ELECTRONICS AUSTRALIA PTY. LTD. 5 Arco Lane, Heatherton, Victoria, 3202, Australia, TEL: (03) 9586-6300 PIONEER ELECTRONICS DE MEXICO S.A. DE C.V. Blvd.Manuel Avila Camacho 138 10 piso Col.Lomas de Chapultepec, Mexico, D.F. 11000 TEL: 55-9178-4270 K002_B3_En...