Table of Contents

Related Manuals for Danby DDY060WDB


Summary of Contents for Danby DDY060WDB
- Page 1 GUÍA DEL USUARIO OWNER’S MANUAL MODELO • MODEL DDY060WDB PORTABLE DRYER Owner’s Manual......1 - 12 SÉCHE-LINGE PORTATIF Manuel du propriétaire....13 - 24 2017.06.13...
-
Page 2: Date Of Purchase
Welcome Welcome to the Danby family. We are proud of our quality products and we beleive in dependable service. We suggest that you read this owner’s manual before plugging in your new appliance as it contains important operation information, safety information, troubleshooting and maintenance tips to ensure the reliability and longevity of your appliance. -
Page 3: Important Safety Information
Important Safety Information READ AND FOLLOW ALL SAFETY INSTRUCTIONS IMPORTANT WARNING SAFETY REQUIREMENTS DANGER: Risk of child entrapment. Before thowing away an old appliance: Ensure that component parts are replaced with like components and that servicing is done by factory •... - Page 4 Important Safety Information READ AND FOLLOW ALL SAFETY INSTRUCTIONS • Do not dry articles that have been previously • Do not operate the appliance if it has a cleaned in, washed in, soaked in or spotted damaged power cord or plug. If the power with gasoline, dry-cleaning solvents, or other cord is damaged, it must be replaced by the fl...
-
Page 5: Installation Instructions
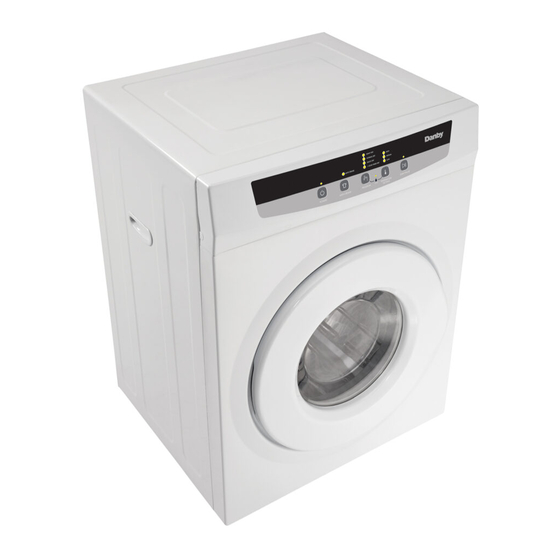
INSTALLATION INSTRUCTIONS FEATURES Front Control Panel Air Filter Door Gasket Door Drum Window Air Intake Back Casing Exhaust Vent Back Cover... - Page 6 Important: If you wish to install the dryer with a stacking kit, we strongly recommend only using the Danby Dryer with the Danby Laundry Stacking Kit and ensure that you follow all installation instructions that come with the Laundry Stacking Kit.
- Page 7 INSTALLATION INSTRUCTIONS WALL MOUNTING INSTRUCTIONS 1. Determine where you would like the dryer positioned and mark the required bracket position on the wall. 2. Securely affi x the hanging brackets to the wall. Brace • The hanging brackets must be screwed into wall studs to ensure the installation is secure.
- Page 8 INSTALLATION INSTRUCTIONS WALL MOUNTING INSTRUCTIONS 1. Install the exhaust connector on the back of the unit. The exhaust connector can be aimed in any direction that is convenient for your installation. Exhaust connector 2. Using four 12mm screws, attach the plastic spacers to the rear of the unit.
-
Page 9: Control Panel
OPERATING INSTRUCTIONS CONTROL PANEL HEAVY DRY NORMAL DRY HIGH MEDIUM QUICK DRY AIR DRY 1 HOUR TIMED DRY POWER AIR DRY PROGRAM TEMPERATURE START/PAUSE LOCK SETTING Power: Press the Power button to turn the unit on Temperature: Press the Temperature button to scroll or off. - Page 10 OPERATING INSTRUCTIONS Prior to loading the dryer check that the items you OPERATING INSTRUCTIONS are drying do not have the following symbols on them as items marked with these symbols should • The maximum capacity of the unit is 6 Kgs (13.2 not be placed in a dryer: Lbs) of dry textile material.
-
Page 11: Care And Maintenance
CARE & MAINTENANCE Cleaning the lint fi lter Unplug the power cord prior to any cleaning. The lint fi lter must be in place when the unit is running and should be cleaned before and after every load. 1. Removing the lint fi lter. •... -
Page 12: Troubleshooting
TROUBLESHOOTING Danby Consumer Care: 1-800-263-2629 Hours of operation: Monday to Thursday 8:30 am - 6:00 pm Eastern Standard Time Friday 8:30 am - 4:00 pm Eastern Standard Time Information in this manual is subject to change without notice. PROBLEM POSSIBLE CAUSE Dryer does not operate •... -
Page 13: Terms Of Warranty
Nothing within this warranty shall imply that Danby will be responsible or liable for any spoilage or damage to food or other c... -
Page 14: Numéro De Modèle
Bienvenue Bienvenue à la famille Danby. Nous sommes fi ers de la qualité de nos produits et nous croyons en le service fi able. Nous vous suggérons de lire ce manual d’utilisation avant de brancher votre nouvel appareil car il contient des informations inportantes sur l’utilisation, la sécurité, le dépannage et la maintenance, afi... -
Page 15: Avertissement Important
Consignes de sécurité importantes LIRE ET SUIVRE TOUTES LES INSTRUCTIONS DE SÉCURITÉ EXIGENCES DE SÉCURITÉ AVERTISSEMENT IMPORTANT DANGER : Risque de piéger un enfant. Avant Assurez-vous que les composants sont remplacés de jeter votre ancien appareil: par des composants similaires et que l’entretien est effectué... -
Page 16: Consignes De Sécurité Importantes
Consignes de sécurité importantes LIRE ET SUIVRE TOUTES LES INSTRUCTIONS DE SÉCURITÉ • Ne pas sécher les articles qui ont été • N’utilisez pas l‘appareil s’il présente un cordon préalablement nettoyés, lavés, trempés ou tachés d’alimentation ou une prise endommagés. Si le à... -
Page 17: Instructions D'installation
INSTRUCTIONS D’INSTALLATION CARACTÉRISTIQUES Avant Panneau de contrôle Filtre à air Joint de porte Porte Tambour Fenêtre Prise d’air Arrière Enveloppe Évacuation d’air Couverture arrière... - Page 18 Important: Si vous désirez installer la sécheuse avec un kit d’empilage, nous vous recommandons vivement d’utiliser le dessiccateur Danby avec le kit d’empilage Danby et de vous assurer que vous suivez toutes les instructions d’installation fournies avec le kit d’empilage de linge.
- Page 19 INSTRUCTIONS D’INSTALLATION INSTRUCTIONS DE MONTAGE PAR MUR Plafond 1. Déterminer où vous souhaitez que le sécheur positionné et de marquer la position du support requis sur le mur. 2. Fixer solidement les supports de suspension au mur. Entretoise • Les supports de suspension doivent être vissés dans des montants de paroi pour assurer l’installation est sécurisé.
- Page 20 INSTRUCTIONS D’INSTALLATION INSTRUCTIONS DE MONTAGE PAR MUR 1. Installez le connecteur d’échappement à l’arrière de l’appareil. Le connecteur d’échappement peut être orienté dans n’importe quelle direction qui convient à votre installation. Connecteur d’échappement 2. À l‘aide de quatre vis de 12 mm, fi xez les entretoises en plastique à...
- Page 21 CONSIGNES D’UTILISATION PANNEAU DE COMMANDE SÉCHAGE INTENSIF HAUT SÉCHAGE NORMAL MÉDIUM SÉCHAGE RAPIDE SÉCHER À L’AIR SÉCHAGE CHRONOMÉTRÉ UNE HEURE DÉMARRAGE SÉCHER À L’AIR PROGRAMMES RÉGLAGE DE DÉMARRAGE/PAUSE SERRURE TEMPÉRATURES Démarrage: Appuyez sur le bouton démarrage Réglage de température: Appuyez sur le bouton pour allumer ou éteindre l’appareil.
-
Page 22: Consignes D'utilisation
CONSIGNES D’UTILISATION CONSIGNES D’UTILISATION Avant de charger le sécheur, vérifi ez que les articles que vous séchez ne portent pas les symboles suivants car les articles marqués avec ces symboles • La capacité maximale de l’appareil est de 6 ne doivent pas être placés dans un séchoir: Kgs (13,2 Lbs) de matière textile sèche. -
Page 23: Soins Et Entretien
SOINS ET ENTRETIEN Nettoyage du fi ltre à peluche Le fi ltre est fi xé à Débranchez le cordon d’alimentation avant tout l’arrière du tambour nettoyage. Le fi ltre à peluche doit être en place lorsque l’appareil fonctionne et doit être nettoyé avant et après chaque charge. -
Page 24: Dépannage
DÉPANNAGE Danby soins du consommateur: 1-800-263-2629 Heures d’ouverture: Lundi à Jeudi 8 h 30 à 18 h, heure normale de l’Est Vendredi de 8 h 30 à 16 h, heure normale de l’Est Les informations contenues dans ce manuel sont sujettes à modifi cation sans préavis. -
Page 25: Conditions Générales
Les frais de transport entre votre domicile et le lieu de l'entretien ne sont pas couverts par la présente garantie et doivent être acquittés par l'acheteur. Nothing within this warranty shall imply that Danby will be responsible or liable for any spoilage or damage to food or other c ontents of this appliance, whether due Aucune partie de la garantie ne prévoit implicitement que le fabricant sera tenu responsable des dommages subis par les aliments ou... - Page 26 NOTES / REMARQUES: __________________________________________________________________________________________ __________________________________________________________________________________________ __________________________________________________________________________________________ __________________________________________________________________________________________ __________________________________________________________________________________________ __________________________________________________________________________________________ __________________________________________________________________________________________ __________________________________________________________________________________________ __________________________________________________________________________________________ __________________________________________________________________________________________ __________________________________________________________________________________________ __________________________________________________________________________________________ __________________________________________________________________________________________ __________________________________________________________________________________________ __________________________________________________________________________________________ __________________________________________________________________________________________ __________________________________________________________________________________________ __________________________________________________________________________________________ __________________________________________________________________________________________ __________________________________________________________________________________________ __________________________________________________________________________________________ __________________________________________________________________________________________...
- Page 27 NOTES / REMARQUES: __________________________________________________________________________________________ __________________________________________________________________________________________ __________________________________________________________________________________________ __________________________________________________________________________________________ __________________________________________________________________________________________ __________________________________________________________________________________________ __________________________________________________________________________________________ __________________________________________________________________________________________ __________________________________________________________________________________________ __________________________________________________________________________________________ __________________________________________________________________________________________ __________________________________________________________________________________________ __________________________________________________________________________________________ __________________________________________________________________________________________ __________________________________________________________________________________________ __________________________________________________________________________________________ __________________________________________________________________________________________ __________________________________________________________________________________________ __________________________________________________________________________________________ __________________________________________________________________________________________ __________________________________________________________________________________________ __________________________________________________________________________________________...
- Page 28 MODELO • MODEL DDY060WDB Impreso en China Danby Products Limited, Guelph, ON, Canada N1H 6Z9 Printed in China Danby Products Inc., Findlay, Ohio, USA 45840...