HP 4200 User Manual
Hide thumbs
Also See for 4200:
- Installation and user manual (36 pages) ,
- Installation and user manual (36 pages) ,
- Color manual (61 pages)
Table of Contents
Advertisement
Quick Links
HP Print Server
Appliance 4200
User's Guide
Click a title to view a topic.
General Information
Product Overview
Product Specifications
Initial Set Up
Getting Started
Front Panel
Hardware Installation
Web Interface
Network Settings
TCP/IP
Microsoft Networking
LPD
Printers and Drivers
Managing
Installing
Security
Microsoft NT Authentication
Administrator Account
LPD
Front Panel Password
Maintenance
Advertisement
Table of Contents
Troubleshooting

Related Manuals for HP 4200


Summary of Contents for HP 4200
- Page 1 HP Print Server Appliance 4200 User's Guide Click a title to view a topic. General Information Product Overview Product Specifications Initial Set Up Getting Started Front Panel Hardware Installation Web Interface Network Settings TCP/IP Microsoft Networking Printers and Drivers Managing...
-
Page 2: Troubleshooting
Backup, Restore, Reboot, and Upgrade Troubleshooting Diagnostics Page Event Log System Messages Troubleshooting Tips Questions Support Warranty and Regulations... - Page 3 HP Print Server Appliance Documentation for Firmware Version 2.3.x © 1999-2002 Hewlett-Packard Company...
-
Page 4: Product Overview
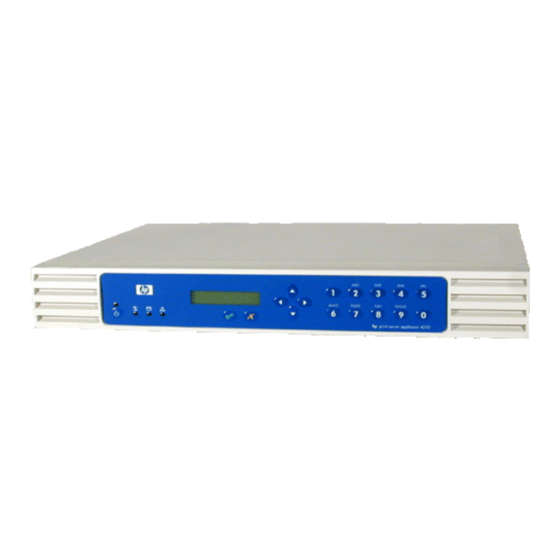
Figure 1: The HP Print Server Appliance 4200 The HP Print Server Appliance 4200 is a state-of-the-art device for managing and monitoring printing over a network. It is a network device that has been designed to provide a quick and easy way to add print capacity... -
Page 5: Operation And Management
printing configurations which can result in improved performance in both printing and file access. These advantages are discussed below. Microsoft NT domain security, also known as Microsoft NT Authentication and Authority, is a feature that allows administrators to easily authorize or restrict print administration and services to specific groups or users by using their existing username and password of the NT 4.0 domain. -
Page 6: Product Updates
This feature is enabled by default and can be disabled by unchecking this box. Each time an image is retrieved, it is logged like any other visit to HP's website. In addition, each request includes the serial number of the requesting unit. - Page 7 HP's privacy policy which can be found at:http://www.hp.com/country/us/eng/privacy.htm.
-
Page 8: Product Specifications
Supported Web Browsers What Ships in the Box Security Features Physical Specifications Electrical Specifications Environmental Specifications Safety Certifications Figure 1: The HP Print Server Appliance 4200 Model Number Product Model number HP Print Server Appliance 4200 J4117A System Requirements The computer printing to the appliance must be running TCP/IP and have Microsoft Windows 95, 98, NT, 2000, ME, XP, or other... -
Page 9: Supported Clients
Windows 2000 Windows ME Windows XP Any RFC 1179-compliant LPD client including (not all LPD implementations are RFC 1179-compliant): HP-UX 10.x and above Solaris Linux AIX 4.3 and above Note: The Microsoft Point and Print feature for Windows NT and Windows 2000 is only supported on an x86 PC. -
Page 10: Supported Printers
Netscape Navigator 4.01 or greater Microsoft (R) Internet Explorer 4.0 or greater (with update version SP1) What Ships in the Box The following are included in the box: HP Print Server Appliance 4200 Quick Start Poster Documentation CD-ROM Rubber feet... -
Page 11: Electrical Specifications
Acoustic noise 52 dB Minimum Hard Drive 10 Gigabytes Minimum Processor Speed 300 Megahertz Recommended Number of Printers Supported Largest Spoolable File Size 2 Gigabytes Minimum Spooling Capacity 7 Gigabytes Electrical Specifications Attribute Specification Power requirements 120/240 VAC at 50/60 Hz Power consumption 100-127 VAC/1.0A 200-240 VAC/.75A... -
Page 12: Getting Started
Links to related documents: Troubleshooting the Appliance What Ships in the Box The following items ship with appliance. If something is missing from the box, please contact the HP Dealer or Reseller where the appliance was purchased. Figure 1: Contents of the box... - Page 13 Microsoft Networking Settings page to identify the WINS server address and the Windows NT domain or workgroup. For NT Domain security, complete the other fields on this page. Install printers on clients. Back up the settings. Be sure to register the appliance (http://www.hp.com/go/printappliance_registration).
-
Page 14: Front Panel
Configure the IP Address for the Appliance Set or Change the Front Panel Password The front panel on the HP Print Server Appliance 4200 has the following components: LEDs There are four indicator lights (LEDs) on the front of the appliance. Understanding how the lights function is important for proper operation of the appliance. -
Page 15: Front Panel Display
Disk Activity LED ON when there is disk activity on the appliance. Alert LED OFF during normal operations (ON during bootup and shutdown). Power Button - Starting Up and Shutting Down the appliance Press the Power button to power up the appliance. The bootup process begins. When the device is powered on, the Power LED is lit. - Page 16 Numeric Keypad The numeric keypad has buttons for the numbers 0-9. Above the keys are letters of the alphabet, like the keypad on a telephone. Use the numeric keypad to enter numeric values, such as IP address, subnet mask, etc., when configuring the appliance. The letters above the keys can be useful as a mnemonic aid when entering the device's password.
- Page 17 Press . Press Enter a new password and press Retype the new password and press The front panel displays this message briefly. Press to end the operation and the device will return to the display of normal operating messages. Or, after a moment, it will display normal operating messages. Configuring the IP Address Using the Front Panel Configuring the IP Address Manually Configuring the IP Address Using DHCP...
-
Page 18: Configuring The Ip Address Manually
Configuring the IP Address Manually In Manual mode, the following is displayed: Display Action Use the number buttons on the front panel of the appliance to enter the IP address. Press Use the number buttons on the front panel of the appliance to enter the subnet mask. Press Use the numbers on the front panel of the appliance to enter the default gateway. -
Page 19: Hardware Installation
Hardware Installation Links within this document: Desktop/Rack Shelf/Under-Printer Installation Rackmount Installation Cable Connections Troubleshooting the Appliance Links to related documents: Troubleshooting the Appliance This document explains how to connect the components of the appliance. When installing the hardware for the appliance, be certain to carefully follow all instructions to ensure the proper connection and function of the appliance. -
Page 20: Rackmount Installation
Rackmount Installation The appliance may be rack-mounted into industry-standard instrument/computer racks. The appliance is shipped with a pair of rack-mount brackets with four screws. There are also four screws for mounting the brackets to the appliance in the rack. The appliance requires 1.5 rack units (RU) of vertical space. It does not require rails for rack mounting. Note: The rackmount installation should be performed by an experienced individual, using appropriate tools, and exercising appropriate safety precautions. - Page 21 Note: The Simple Signaling cable is not included with the appliance or with the APC UPS. This cable can be ordered from APC (APC part # 940-0020B). Connect the power cable to the power receptacle on the back of the appliance. Note: Make certain that air flow is not restricted around the back of the unit.
-
Page 22: Web Interface For The Appliance
Web Interface for the Appliance Links within this document: Supported Web Browsers Accessing the Web Interface Menu Overview Page Changing the Date and Time The appliance contains an embedded web server. The web server allows administrators to manage the configuration of the appliance, review the status of the device, and view print jobs from your web browser. -
Page 23: Network Settings
Menu The menu is always displayed on the left side of the any displayed page in the web interface. Click on any of the following topics listed on the menu for more information: General Overview Date/Time Admin Accounts Diagnostics Event Log Install Upgrade Restart Appliance Network Settings... -
Page 24: Changing The Date And Time
Changing the Date and Time Use the Date and Time Configuration page to set the date and time of the appliance. Field Name Description Date Enter the date in the format: mm/dd/yyyy. The complete year must be specified. Leading zeroes may be omitted. -
Page 25: Tcp/Ip Network Settings
TCP/IP Links within this document: TCP/IP Network Settings Configuring the Appliance Using the Web Interface Links to related documents: Related System Messages Troubleshooting the Appliance TCP/IP Network Settings The TCP/IP Network Settings page is accessible under Network Settings on the menu. On this page, administrators can configure: the IP address subnet mask... - Page 26 Field Name Description Obtain an IP address automatically using Select this option for the appliance to be automatically DHCP configured using Dynamic Host Configuration Protocol (DHCP). Ensure that a valid DHCP server and address leases are available. If DHCP was chosen, the IP address, subnet mask, and default gateway will be automatically configured.
- Page 27 (or empty). DNS Domain Name The DNS domain name. For example, a server named mail.hp.com (hp.com is the DNS name and mail is the hostname). The domain name must match standard naming conventions. The name must be alphanumeric. It may also contain dashes ( - ) (for example : mycompany.com).
-
Page 28: Microsoft Networking Settings
Microsoft Networking Settings Links within this document: Microsoft Networking Settings Page Microsoft NT Domain Authentication Features Adding the Appliance to a Domain Enabling and Disabling Microsoft NT Domain Authentication Granting Printer Access or Authority to Users and Groups Administrator Accounts for the Appliance Windows 2000 and Windows XP Security Integration Links to related documents: Troubleshooting the Appliance... - Page 29 Print Server Enter a name for the appliance. The appliance name will be displayed: Appliance In the Network Neighborhood on each client workstation. The Network Name Neighborhood is visible from Microsoft Windows Explorer. On the Overview page in the web interface for the appliance On the front panel of the appliance.
- Page 30 NT Domain The current status of the appliance's membership in the NT domain. Membership Status Create Check this to create a new computer account for the appliance in the NT domain; then account in the enter the domain administrator username and password below. NT Domain for this device Note: A WINS server must be specified in the...
- Page 31 To complete the Microsoft Networking Settings page, follow these steps: At a workstation, access the web browser and enter the IP address for the appliance. Log on to the appliance as an administrator. (The default is "admin" for the username and "admin" for the password.) Under Network Settings on the menu, select Microsoft Networking.
- Page 32 Adding the Appliance to a Domain There are two ways to add the appliance to a domain: Complete the fields on the Microsoft Networking Settings page. Set the appliance name and then, at a minimum, select the box for "Create account in the NT Domain for this device" and complete "Domain Administrator Name"...
- Page 33 Windows 2000 and Windows XP Security Integration The Print Server Appliance 4200 integrates into domains controlled by Windows 2000 or Windows XP servers in the same manner that an NT 4.0 server does. The appliance uses...
- Page 34 This feature enables the Line Printer Daemon (LPD) protocol (sometimes referred to as "BSD compatible" network printing) to spool and control print jobs on the appliance from any RFC 1179-compliant LPD client including (not all LPD implementations are RFC 1179-compliant): HP-UX 10.x and above Solaris Linux AIX 4.3 and above...
-
Page 35: Lpd Settings
LPD Settings On the LPD Settings page, the administrator can enable or disable LPD printing. Field Name Description Disable LPD printing Disables LPD printing and print job management from any and all hosts. Enable LPD printing from Enables LPD printing and print job management from any and all hosts ALL hosts (default). - Page 36 Configuring LPD Printing To enable or disable LPD printing, follow these steps: Log on to the Administrator page of the web interface. On the menu, under Network Settings click LPD Settings. Complete the fields as described above.
-
Page 37: Managing Printers
Managing Printers Links within this document: Printers Option Adding a Printer Deleting a Printer Viewing and Managing Print Jobs Printer Properties Printer Drivers Printer Driver Management Adding New Drivers to the Appliance Security Warning When Adding New Drivers Links to related documents: Installing Printers on Clients Related System Messages Troubleshooting the Appliance... - Page 38 Printer Name Name of the printer as entered in the Printer Name field on the Add Printer page in the web interface. This name is displayed in Network Neighborhood as an available printer configured on the appliance. The printer name can be up to 79 characters long, including alphanumeric characters and the following special characters: _ - .
- Page 39 HP LaserJet 4 series printers HP LaserJet 5 series printers HP LaserJet 6 series printers HP LaserJet 4000 series printers HP Color LaserJet 4500 series printers HP LaserJet 5000 series printers HP LaserJet 8000 series printers HP Color LaserJet 8500 series printers...
- Page 40 (.). Network Connection: HP JetDirect internal card or single-port external box: Select this if the printer has an internal HP JetDirect print server card, or is connected to an external single-port HP JetDirect print server. HP JetDirect 3-port external box: Some external HP print servers support more than one printer (for example, the HP JetDirect 500X).
- Page 41 Printer (Queue) Name: Enter the printer name and description. Printer (Queue) Name Page Field Names Description Printer Name The printer name is displayed in Network Neighborhood as a printer configured on the appliance. It can be up to 79 characters long, including alphanumeric characters and the following special characters: _ - + , .
- Page 42 Printer Driver for Windows Point and Print Clients: Printer Drivers for Windows Point and Print Clients Page Field Description Names Client Displays all printer drivers currently installed on the appliance, and highlights the Printer driver currently associated with the specified printer. To change the driver for the Driver printer, highlight a different driver and click .
- Page 43 Select the printer driver for the printer being added. If the driver is displayed in the Client Printer Driver field, click . The Printers page will be displayed. If the printer driver for the printer is not displayed in the drop down list on this page, click security warning is displayed.
-
Page 44: Printer Properties
Status Status of the print job: Printing: currently printing on the printer Paused: user paused the print job Spooling: job is being spooled to the appliance by a client Queued: job is queued and is waiting to be printed Unknown: error occurred; unknown status (the user should delete the print job with this status) To manage print jobs for a printer, follow these steps: Under Print Services on the menu, select Printers. - Page 45 Network Connection: HP JetDirect internal card or single-port external box: Select this if the printer has an internal HP JetDirect print server card, or is connected to an external single-port HP JetDirect print server. HP JetDirect 3-port external box: Some external HP print servers support more than one printer (for example, the HP JetDirect 500X).
- Page 46 To make any changes to this page, follow these steps. Under Print Services on the menu, select Printers. Click for the printer. If desired, make any changes to the printer's properties. If desired, click to print a test page. For more information about test pages, see Diagnostics (under General on the menu).
- Page 47 (2.2.xx), it is recommended that you initialize the driver after the firmware is upgraded. Go to the Printers page and click for that printer. Then select Drivers. In the drop-down list, select the default printer driver (HP LaserJet 4) and click .
- Page 48 Printer Properties - Security Page The Printer Properties - Security page appears when "Printer Properties" is selected for a printer and then the Security tab at the top of the page is clicked. The Security page shows printer security information if NT Domain security is enabled (an NT domain is specified on the Microsoft Networking Settings page).
-
Page 49: Printer Drivers
Printer Drivers Links within this document: Printer Driver Management Adding New Drivers to the Appliance Links to related documents: System Messages... - Page 50 HP LaserJet 4 series printers HP LaserJet 5 series printers HP LaserJet 6 series printers HP LaserJet 4000 series printers HP Color LaserJet 4500 series printers HP LaserJet 5000 series printers HP LaserJet 8000 series printers HP Color LaserJet 8500 series printers All printer drivers added to the appliance are displayed on the Driver Management page.
- Page 51 Printer Drivers List the printer drivers for the operating system specified above, or lists all printer drivers if "All Operating Systems" is chosen. Each driver can have only one name (the same as in the .ini file) regardless of the number or type of printers associated with it. If a driver displayed in blue is preceded with a "~"...
- Page 52 Print Drivers list box. If desired, highlight the printer driver to delete, enable, or disable. Note: A driver cannot be deleted if it is currently associated with a printer. The HP LaserJet 4 printer driver can never be deleted.
- Page 53 The appliance comes preloaded with numerous HP printer drivers. While these will cover many needs, other drivers may be required. This section discusses the procedure for adding drivers to the appliance. Note: After the appliance has been configured and drivers have been associated with printers, the configuration should...
- Page 54 New Printer Driver page (Step 2 of 3): New Printer Driver (Step 2 of 3) Field Name Description Drivers Highlight the driver to install and click Note: An XP, 2K, or NT driver must be added before a 9x driver can be added.
- Page 55 New Printer Driver page (Step 3 of 3): New Printer Driver (Step 3 of 3) Field Name Description Install a driver Select additional printer drivers to install. Additional printer drivers can be installed for the client OS or any previous version of the OS. for example, if the client OS is XP, drivers for 2K, NT, or 9x can be installed.
- Page 56 If no duplicate drivers were found during installation, the Installing Printer Drivers page is displayed. If, during installation, a duplicate driver has been found, you can either replace the current driver or keep the existing one. Installing Printer Drivers page While the drivers selected are being installed and initialized, this screen displays the status of each step.
- Page 57 If you are trying to install a 9x driver and the name does not match, it is possible that the driver names provided for different operating systems are not the same. If this is the case, please contact HP support.
-
Page 58: Configuring The Administrator Account
Configuring the Administrator Account Links within this document: Administrator Accounts Local Accounts Page Adding an Administrator Account Changing the Password for an Existing Administrator Account Deleting an Administrator Account Domain Accounts Page Single Sign-on (SSO) Basic Authentication Configuring Internet Explorer Links to related documents: Related System Messages Troubleshooting the Appliance... - Page 59 Authentication has been enabled (on the Microsoft Networking Settings page), this page is displayed automatically when the administrator selects Admin Accounts. Caution: If all local administrator passwords are forgotten, the only way to gain access to the appliance through a local administrator account is to reset the appliance to factory defaults (using the front panel).
- Page 60 Adding a Local Administrator Account In addition to the default local administrator account, other administrator accounts can be added on the Add an Administrator page. To add an administrator account, follow these steps: Log on to the web interface. On the menu under General, click Admin Accounts. The Admin Accounts (Local Accounts) page is displayed.
- Page 61 Password Enter the password. The password is case sensitive and can contain alphanumeric characters and the following special characters: ~ ` ! @ $ % ^ ( ) - _ { } . Note: The appliance will accept a null or blank password. Confirm Password Enter the password again to confirm it (if there is a password).
-
Page 62: Deleting An Administrator Account
Once the administrator account name and password have been changed, the current browser session is no longer authenticated and you will be prompted to re-enter your password. Re-connect to the appliance, using the new administrator account name and password. Note: Local accounts on the appliance cannot be renamed. If necessary, delete the local account and then add it with its new administrator name. -
Page 63: Single Sign-On (Sso)
added to the appliance. Note: If Domain Authentication is not enabled, the Local Accounts page is displayed and the Domain Accounts will not be available. Admin Accounts - Domain Accounts Page Field Name Description List Names from The drop-down list contains names of the primary domain and all trusted domains. NT Groups Shows all of the NT groups in the domain specified in the above field. -
Page 64: Basic Authentication
username and password. All users that are in the Domain Admins group for the domain in which the appliance is a member server automatically have domain administrator rights. If the administrator is using Internet Explorer but the URL used to access the appliance is not within the local intranet, then the administrator will be prompted for domain account information. -
Page 65: Configuring Internet Explorer
Configuring Internet Explorer By default, URLs (including IP addresses) with periods in the name (for example, http//www.hp.com and http://10.0.0.1) or URLs that go through a proxy server are not included in a browser's local intranet. An administrator can view or change their local intranet settings in the Internet Options page under the Security tab by selecting Local Intranet and clicking on the Sites button. - Page 66 Backing Up, Restoring, Reseting, Rebooting, and Upgrading the Appliance Links within this document: Backing Up Network Settings and Printer Information Restoring Network Settings and Printer Information (Using the Web Interface) Resetting the Appliance to Factory Defaults (Using the Front Panel) Rebooting (or Restarting) the Appliance Upgrading the Firmware on the Appliance Links to related documents:...
- Page 67 Choose a file name, drive, and directory to hold the saved configuration. Click . The saved configuration is in binary format and cannot be edited using a text editor. Now there is a backup file for the appliance, settings can be restored if required (see the next section). Restoring Network Settings and Printer Information (Web Interface) If configuration values have been accidentally changed or lost, a previously saved copy of the configuration...
- Page 68 CAUTION: To prevent possible file corruption on the appliance, do not simply disconnect the power cord. Turn on the appliance again by pressing the Power button. During the restart sequence, when the front panel display reads "Configuring," press . The following message is displayed: Press to reset the appliance to its factory defaults.
- Page 69 HP support website and save it on a local hard drive or CD (http://www.hp.com/cposupport). The exact file location will be needed for step Access the appliance's web interface and click Install Upgrade (under General on the menu). On the Install Upgrade page, type the complete path to the firmware image on the local hard drive (for example, "C:\TEMP\UPGRADE.HP") or click Browse to find the firmware image downloaded in step...
- Page 70 Network Statistics Information General Information on the Configuration Summary Page Parameter Description Model Name HP Print Server Appliance 4200 Model Number Model number of the appliance. Current Firmware Revision Current version of firmware running on this appliance. Base (Factory) Firmware Revision...
- Page 71 TCP/IP Network Configuration Information Parameter Description IP Configuration Mode How this unit was configured (manual or DHCP). IP Address IP address of this appliance. Subnet Mask IP subnet mask of this appliance. Default Gateway Default gateway of this appliance. Domain Name Server (DNS) IP address of the DNS server.
- Page 72 Installed Printer Drivers Information This section lists the printer drivers installed on this appliance. Network Statistics Information Parameter Description MAC Address Unique network hardware address for this appliance. Total Packets Received Total number of network packets this unit has received since the last reboot.
-
Page 73: Event Log Page
The Event Log is accessible through the web interface under General. It contains information about the appliance to facilitate troubleshooting and maintenance at your site. In addition, this log helps HP customer support in resolving problems. Events are listed on the log. - Page 74 Buttons on the Event Log Page Button Description Name Displays the Event Log Filters page where filters can be selected, based on the message level and type. Only those events with the Level(s) and/or Type(s) selected will be included on the Event Log page. Displays any new events that have occurred.
- Page 75 Displays online help for the Event Log. Fields on the Event Log Page Field Name Description Event Log filtered log - On the Event Log Filters page, filters (Types and Levels) have been (filtered log) selected that have screened out messages that are currently in the Event Log. Event Log (full full unfiltered log - All of the messages in the Event Log are displayed;...
- Page 76 The following filters can be selected for events. One or more Type filters and one or more Level filters must be selected: Levels (at least one must be selected): CRIT (Critical error) - an error that affects the basic funtions of multiple users and/or administrators.
-
Page 77: System Messages
System Messages Links within this document: Add Printer and Add Driver Wizards Under General: Date/Time Page Administrator Account Page Problems Event Log Page Install Update Page Restart Appliance Page Under Network Settings: TCP/IP Page Microsoft Networking Settings Page LPD Settings Page Under Print Services: Printers Page Driver Management Page... - Page 78 9X driver does not match that of the higher operating systems. Verify that the driver specified is the correct driver. If it is the correct driver, please contact HP support.
- Page 79 If this is the case, please contact HP support. Unauthorized to Perform this Action: In order to install printer drivers onto the appliance, You are logged into the PC as : <user name>.
- Page 80 "native" 2000/XP may or may not be compatible with Windows driver available for this printer. To do this, locate 2000/XP. HP recommends that you test the driver and install the native Windows 2000/XP driver in thoroughly. For more information about drivers, order to ensure this driver works properly with consult the online manual.
-
Page 81: Date / Time Page
Adding drivers requires Java. Your browser doesn't Before drivers can be installed, Java must be have Java, or has disabled Java. installed and JavaScript enabled in your web browser. JavaScript can be enabled in Internet To enable Java, change your browser's settings. Explorer, under: If you're using Internet Explorer 6, you probably need Internet Options-->Security (tab)-->Custom Level... - Page 82 The necessary information to set the date and time was Complete both fields and click not found. The date and/or time fields are blank. Invalid Time/Date The date and/or time fields may only contain The date and/or time fields contain non-numeric numbers and the specified separator characters.
- Page 83 Retype the complete path to the firmware image (for example, "C:\TEMP\UPGRADE.HP") or click Browse to find the saved firmware image. If the filename is unknown, access HP's website and download the upgrade image (http://www.hp.com/cposupport). The specified file is not a valid print server appliance Retype the complete path to the firmware image (for upgrade file.
- Page 84 Invalid Subnet Mask Subnet masks are written as four numbers separated The subnet mask must be in the format by periods, where the first number is between 1 and xxx.xxx.xxx.xxx. 255 and the other three numbers are between 0 and 255.
- Page 85 LPD Settings Page Message Explanation / Remedy Invalid Hostname Retype the hostname using only alphanumeric Hostnames must be alphanumeric characters with no characters with no spaces. Dashes ( - ) and periods ( spaces. Dashes ( - ) and periods ( . ) are acceptable. .
-
Page 86: Driver Management Page
Confirm removal or cancel the operation. The HP LaserJet 4 printer driver is essential and The HP LaserJet 4 printer driver is a default driver cannot be deleted. and cannot be deleted. The following drivers are in use and cannot be An attempt was made to remove a driver that is deleted.. - Page 87 Browse to find the saved configuration file. configuration file was specified. Type the complete path to the configuration file (for example, "C:\TEMP\CONFIG.HP") or click Browse to find the saved file. The specified file is not a valid print server appliance Retype the complete path to the configuration file configuration file.
-
Page 88: Troubleshooting The Appliance
Condition Possible Cause/Solution The appliance does not Bad power cable or AC outlet. Replace cable and/or verify that power up. the outlet is working properly. If the outlet and cable are good, contact HP in order to replace the unit. - Page 89 A critical defect has been detected. Power cycle the unit to see if this corrects the problem. If the Alert LED stays lit, contact HP. I can't locate the appliance Make sure the appliance is configured with an IP address, on the network.
-
Page 90: Configuration Problems
appliance may experience so many errors in its file system that it rebuilds the disk from the default image. The printers, network configuration, and drivers will be not be automatically restored. The configuration must be restored manually using the Restore functionality with the last configuration manually backed Configuration Problems... - Page 91 How do I know the printer An updated driver will be copied to the client if the driver has the driver I installed on the same name and a newer version or date. You can verify this by appliance was installed on printing a test page from the client.
- Page 92 - not supported Sharing tab Not Shared toggle - not supported (may be selected but will be ignored) Shared toggle - supported Share Name text field - not supported Alternate Drivers - not supported Security tab Permissions button - supported Auditing button - not supported Ownership button - not supported I keep getting prompted for...
-
Page 93: Printing Problems
(use this work? the default HP PRINT SERVER setting); however, some require a special string in order to work. The LPD remote queue name can be obtained from the print server vendor. - Page 94 I have not been able to The IP address or printer name may not be correctly configured print from any client to for the desired printer. Verify that the appliance can print to the the intended printer. printer by using the "print test page" functionality of the printer property page in the web interface of the appliance.
- Page 95 IP address. If you get a negative response from either of these commands, you need to correct your DNS configuration. If you do not receive a negative response, please contact HP support. Jobs are getting stuck The appliance uses LPD to send print jobs to its printers. If the print...
-
Page 96: Printer Driver Problems
Your Windows 9x driver may not have the same name in its .inf file 9x driver for a printer for as the Windows NT, 2K, or XP drivers. Please contact HP support. which I already have a Windows NT, 2K, or XP driver installed. - Page 97 If you are trying to install a 9x driver and the name does not match, it is possible that the driver names provided for different operating systems are not the same. If this is the case, please contact HP support. About the Indicator Lights (LEDs) There are four indicator lights (LEDs) on the front of the appliance.
- Page 98 Network connection is bad. Verify network cable connections, blinks. replace cable. Alert LED remains Critical failure is detected. Note the message on LCD front panel. lit after bootup is Power cycle the unit. If the problem persists, contact HP. completed.
-
Page 99: Frequently Asked Questions
Can I use a hyphen in the appliance name? Can the appliance integrate into a Windows 2000 environment? Can the appliance be configured via TELNET? Is the appliance compatible with non-HP print servers? Printing Is there a maximum size print job I can send to the appliance? -
Page 100: Printer Driver
Can the appliance accept print jobs from UNIX clients? Can I print over my network using Novell as the network OS? What is the limit on the number of jobs that can be spooled? How are print jobs sent to the appliance? How are print jobs sent from the appliance to the printer? I am trying to print in Landscape mode, but the margins are offset. - Page 101 Answers Configuration Can I use Web Jetadmin to manage my appliance? No. However, Web Jetadmin will be able to discover a configured appliance and allow the embedded web server to be launched from the Web Jetadmin interface. Does the appliance support bootp or rarp? No.
- Page 102 Not Shared toggle - not supported (may be selected but will be ignored) Shared toggle - supported Share Name text field - not supported Alternate Drivers - not supported Security tab Permissions button - supported Auditing button - not supported Ownership button - not supported Why do I get prompted for a password when I use a web browser to access the appliance even though the appliance is a member of a domain?
- Page 103 This process is also sometimes described as a network installation of a printer driver. Can the appliance accept print jobs from UNIX clients? Print jobs are accepted from HP-UX, Solaris, and any other RFC 1179-compliant LPD clients. To set up LPD printing, go to the LPD page in the appliance's web interface (under Network Settings).
- Page 104 DNS entry for the appliance's IP address. If you get a negative response from either of these commands, you need to correct your DNS configuration. If you do not receive a negative response, please contact HP support. Jobs are getting stuck on the appliance for one of my printers.
- Page 105 (subheading) Since you are an Internet Explorer 6 user, you will need to go to the Microsoft website to download and install the Microsoft virtual machine (go to the Microsoft website and search on "virtual machine"). Then make sure the virtual machine is turned on. In Internet Explorer, go to: Internet Options-->Security (tab)-->Custom Level (button)-->Microsoft VM Select any option other than "disable".
- Page 106 If you are trying to install a 9x driver and the name does not match, it is possible that the driver names provided for different operating systems are not the same. If this is the case, please contact HP support.
-
Page 107: Hewlett-Packard Limited Warranty Statement
HP does not warrant that the operation of HP products will be uninterrupted or error free. If HP is unable, within a reasonable time, to repair or replace any product to a condition as warranted, you will... -
Page 108: Local Warranty Statements
HP has marketed this product. The level of warranty service you receive may vary according to local standards. HP will not alter form, fit or function of the product to make it operate in a country for which it was never intended to function for legal or regulatory reasons. -
Page 109: Declaration Of Conformity
This equipment has been tested and found to comply with the limits for a Class A digital device, pursuant to Part 15 of the FCC Rules. These limits are designed to provide reasonable protection against interference in a commercial environment. This equipment generates, uses and can radiate radio frequency energy and, if not installed and used in accordance with the instructions, may cause interference to radio communications. - Page 110 Product Name: HP Print Server Appliance 4200 (Model Number J4117A) HP JetDirect 4000 Network Print Appliance ( Model Number: J4107A) conforms to the following Product Specifications: Safety: EN60950 (1992) +A1,A2,A3,A4,AII / IEC 950 (1991) +A1, A2, A3, A4...
-
Page 111: Trademarks And Copyrights
UNIX is a registered trademark of The Open Group. JetDirect is a registered trademark of Hewlett-Packard Company. HP-UX Release 10.20 and later and HP-UX Release 11.00 and later (in both 32 and 64-bit configurations) on all HP 9000 computers are Open Group UNIX 95 branded products. -
Page 112: All Rights Reserved
Copyright 1988, 1989 by Carnegie Mellon University. All Rights Reserved Permission to use, copy, modify, and distribute this software and its documentation for any purpose and without fee is hereby granted, provided that the above copyright notice appear in all copies and that both that copyright notice and this permission notice appear in supporting documentation, and that the name of CMU not be used in advertising or publicity pertaining to distribution of the software without specific, written prior permission. - Page 113 acknowledgement: This product includes software developed by the University of California, Berkeley and its contributors. Neither the name of the University nor the names of its contributors may be used to endorse or promote products derived from this software without specific prior written permission. THIS SOFTWARE IS PROVIDED BY THE REGENTS AND CONTRIBUTORS "AS IS"...
-
Page 114: Gnu General Public License
Copyright (c) 1995, 1996, 1997, 1998, 1999 The Internet Software Consortium - DHCP. All rights reserved. Redistribution and use in source and binary forms, with or without modification, are permitted provided that the following conditions are met: Redistributions of source code must retain the above copyright notice, this list of conditions and the following disclaimer. - Page 115 software, or if you modify it. For example, if you distribute copies of such a program, whether gratis or for a fee, you must give the recipients all the rights that you have. You must make sure that they, too, receive or can get the source code. And you must show them these terms so they know their rights.
- Page 116 including an appropriate copyright notice and a notice that there is no warranty (or else, saying that you provide a warranty) and that users may redistribute the program under these conditions, and telling the user how to view a copy of this License. (Exception: if the Program itself is interactive but does not normally print such an announcement, your work based on the Program is not required to print an announcement.) These requirements apply to the modified work as a whole.
- Page 117 terms and conditions. You may not impose any further restrictions on the recipients' exercise of the rights granted herein. You are not responsible for enforcing compliance by third parties to this License. If, as a consequence of a court judgment or allegation of patent infringement or for any other reason (not limited to patent issues), conditions are imposed on you (whether by court order, agreement or otherwise) that contradict the conditions of this License, they do not excuse you from the conditions of this License.
- Page 118 AS TO THE QUALITY AND PERFORMANCE OF THE PROGRAM IS WITH YOU. SHOULD THE PROGRAM PROVE DEFECTIVE, YOU ASSUME THE COST OF ALL NECESSARY SERVICING, REPAIR OR CORRECTION. IN NO EVENT UNLESS REQUIRED BY APPLICABLE LAW OR AGREED TO IN WRITING WILL ANY COPYRIGHT HOLDER, OR ANY OTHER PARTY WHO MAY MODIFY AND/OR REDISTRIBUTE THE PROGRAM AS PERMITTED ABOVE, BE LIABLE TO YOU FOR DAMAGES, INCLUDING ANY GENERAL, SPECIAL, INCIDENTAL OR CONSEQUENTIAL...
-
Page 119: Gnu Library General Public License
signature of Ty Coon, 1 April 1989 Ty Coon, President of Vice This General Public License does not permit incorporating your program into proprietary programs. If your program is a subroutine library, you may consider it more useful to permit linking proprietary applications with the library. - Page 120 everyone's free use or not licensed at all. Most GNU software, including some libraries, is covered by the ordinary GNU General Public License, which was designed for utility programs. This license, the GNU Library General Public License, applies to certain designated libraries.
- Page 121 tool for writing it). Whether that is true depends on what the Library does and what the program that uses the Library does. You may copy and distribute verbatim copies of the Library's complete source code as you receive it, in any medium, provided that you conspicuously and appropriately publish on each copy an appropriate copyright notice and disclaimer of warranty;...
- Page 122 You may copy and distribute the Library (or a portion or derivative of it, under Section 2) in object code or executable form under the terms of Sections 1 and 2 above provided that you accompany it with the complete corresponding machine-readable source code, which must be distributed under the terms of Sections 1 and 2 above on a medium customarily used for software interchange.
- Page 123 access to copy the above specified materials from the same place. d) Verify that the user has already received a copy of these materials or that you have already sent this user a copy. For an executable, the required form of the "work that uses the Library" must include any data and utility programs needed for reproducing the executable from it.
- Page 124 free software distribution system which is implemented by public license practices. Many people have made generous contributions to the wide range of software distributed through that system in reliance on consistent application of that system; it is up to the author/donor to decide if he or she is willing to distribute software through any other system and a licensee cannot impose that choice.
- Page 125 source file to most effectively convey the exclusion of warranty; and each file should have at least the "copyright" line and a pointer to where the full notice is found. one line to give the library's name and a brief idea of what it does. Copyright (C) year name of author This library is free software;...
- Page 126 Initiated standard shutdown (102) Level: Informational Category: Administrative Description: The appliance was shutdown safely. This is generally done by using the power button on the front panel or through the web interface (Restart). Completed standard startup (103) Level: Informational Category: Administrative Description: The appliance completed startup.
- Page 127 Action: Try recharging the UPS battery or replacing the battery with a new one. Shutdown initiated. UPS battery run time expired (107) Level: Informational Category: Administrative Description: After a power disruption, the appliance is scheduled to run for one minute on the UPS (Uninterruptable Power Supply) battery.
- Page 128 Category: Security Description: The appliance was unable to communicate with a Primary Domain Controller (PDC) or a Backup Domain Controller (BDC) (if one is set up) to verify the user's name and password. This means that clients will not be allowed to print because a Domain Controller was not available to verify the user's name and password.
- Page 129 page, the security settings may have changed. Verify that the user has authority to print. This can be done from the web interface by selecting Printers --> Printer Property Page --> Security. By default, the group "Everyone" has permission to print. If "Everyone" does not have permission to print, add either the specific user, or a group to which the user belongs.
- Page 130 Microsoft Network Settings page is correct. Make sure the WINS server has an entry for the device being looked up. For example, if the WINS server does not reply with the IP address of a Domain Controller, the appliance will not be able to authenticate users. Added printer driver (211) Level: Informational Category: Administrative...
- Page 131 Make sure the IP address entered is the correct IP address for the printer. Check the cables for the appliance and the printer to make sure they are connected and secure. Failed DNS name resolution (301) Level: Critical Error Category: Networking Description: The IP address and hostname of the printer were incorrect (see the TCP/IP Network...
- Page 132 Description: The printer was able to communicate with the appliance, but the printer refused to allow the appliance to connect to the LPD port (port 515). HP networked printers only allow 8 simultaneous LPD connections and refuse connection number 9. HP printers with many separate sources for LPD print jobs, may generate this error.
- Page 133 Category: Administrative Description: The printer was deleted successfully on the Printers page in the web interface. Changed printer IP address (403) Level: Informational Category: Administrative Description: The IP address for the printer has been changed successfully on the Printer Properties page in the web interface.
- Page 134 Level: Informational Category: Administrative Description: The configuration settings for the appliance have been restored successfully from the backup using the Restore feature in the web interface (under General). Added administrator account (409) Level: Informational Category: Administrative Description: The administrator account has been added to the appliance successfully using the Add Administrator feature in the web interface.
- Page 135 page. Disabled NT domain authentication (414) Level: Informational Category: Administrative Description: NT domain authentication has been disabled on the Microsoft Network Settings page. Added account in NT domain (415) Level: Informational Category: Administrative Description: A new computer account for the appliance was created on the NT domain via the Microsoft Network Settings page.
- Page 136 page in the web interface. Failed to create NT domain machine account (420) Level: Informational Category: Administrative Description: Using the Microsoft Networking page, creation of a machine account failed. This means that Microsoft networking will not work until a machine account has been created. This could be due to: The user name and password combination was not valid.
- Page 137 Description: The time was changed successfully on the Date/Time page in the Web interface.
- Page 138 Installing Printers on Clients Links within this document: Installing Printers on Microsoft Clients (the Microsoft Point and Print feature) Bypassing Point and Print Configuring Printing for UNIX Clients Links to related documents: Troubleshooting the Appliance Installing printers on each client computer is required in order for clients to be able to print using the appliance. Note: Hewlett-Packard recommends verifying installation with one client computer before configuring more clients.
- Page 139 Right-click on the printer to install. Select Install from the drop-down menu. For Windows NT, 2000, and XP clients, driver installation is complete. For Windows 95, 98, and ME clients, a wizard will ask several things (for example, "Do you want to print from DOS", etc.). Or, add the printer using the following steps: Make sure that the appliance is installed and that the printers are set up and turned on.
- Page 140 TEXT must be specified (or TEXT2, TEXT3 for multi-port JetDirect print servers). This must be done even though the target printer is an HP JetDirect device. Use the normal print queue when printing jobs that have been formatted with a printer-specific page description language such as PDL (like PostScript) or PCL.
- Page 141 Configuring Print Queues Using SAM (HP-UX Systems) On HP-UX systems, the SAM utility can be used to configure remote print queues for printing. Before the SAM program is executed, select an IP address for the appliance and set up an entry in the /etc/hosts file on the system running HP-UX.
- Page 142 Printing a Test File To verify that the printer and appliance connections are correct, print a test file. At the UNIX prompt enter: lp -dprintername file_name or on a BSD-like system: lpr -Pprintername file_name where printername is the name of the printer as added to the appliance, and file_name is the file to be printed.