Table of Contents
Advertisement
Quick Links
Download this manual
See also:
User Manual
Advertisement
Table of Contents

Related Manuals for Sonim XP STRIKE


Summary of Contents for Sonim XP STRIKE
-
Page 1: User Guide
Sonim XP STRIKE User Guide ©2012 Sprint. Sprint and the logo are trademarks of Sprint. Other marks are trademarks of their respective owners. Copyright © 2012 Sonim Technologies, Inc. - Page 2 SONIM and the Sonim logo are trademarks of Sonim Technologies, Inc. Other company and product names may be trademarks or registered trademarks of the respective owners with whom they are associated. Disposal of Old Electrical and Electronic Equipment The symbol of the crossed-out wheeled bin indicates that within the...
-
Page 3: Table Of Contents
Removing the Battery ....................2 Charging the Battery .....................3 Activating Your Phone ......................4 Activating an Existing Number using a New Phone ............4 Setting Up Voicemail Box.....................5 Phone Basics ..........................6 Sonim XP STRIKE Layout ....................6 Switching ON your Phone ....................9 Sonim XP3410 STRIKE Home Screen.................9... - Page 4 Home Screen Indicators ......................9 Shortcut Keys in Home Screen ..................11 Keypad Functions ......................11 Main Menu Icons .......................14 Managing Your Phone ......................15 DC Settings ........................15 User Status .........................16 Permissions ........................16 Group Call Options .....................16 Headset Mode ......................16 One Touch DC Setting ....................16 Update DC ........................17 Profile Settings ........................17 Display Settings .........................17...
- Page 5 Security Settings ........................21 Change Lock Code .....................22 Call Restrictions ......................22 Phone lock ........................22 Voice Privacy ......................22 Network Settings ........................23 Network Service Settings ....................23 Restore Factory Settings....................23 Speed Dial .........................23 Phone Details ........................24 Managing Calls .........................25 Make a Call ........................25 Dial a Local Number ....................25 Dial an International Number ..................26 Dial a Number via Contacts ..................26 Dial a Number via the Call History ..................26...
- Page 6 Sending SMS ......................31 Sending MMS ......................31 Sending DC Alerts to Contacts...................31 Dialing a Number from Contacts ..................32 Edit Contact Details ......................32 Delete Contact ........................32 Sending Contact Details ....................32 By SMS ........................32 By MMS ........................32 By Bluetooth .......................33 Selecting Multiple Contacts ....................33 DC Groups .........................33 Phonebook Settings ......................34 Delete All Contacts ......................34...
- Page 7 Emergency Alerts ......................42 Inbox...........................42 Settings ........................42 Text Input Mode .........................43 Managing Profiles ........................44 Tools ............................45 Alarm ..........................45 Calendar ..........................46 Notes ..........................46 To-do List ...........................46 Calculator ..........................47 Stopwatch ..........................47 World Clock ........................47 Unit Converter ........................48 Update Phone ........................48 Update Profile ........................48 Mobile Sync ........................48 My Files ..........................48 Managing Your Files .........................49...
- Page 8 Activate Bluetooth .......................58 Deactivate Bluetooth ....................59 Active Devices ......................59 Pairing Devices ......................59 Connecting a Bluetooth Headset ................59 Rename Paired Device ....................60 Delete Paired Device ....................60 Setting Bluetooth Device Name ..................60 Sending Data via Bluetooth ..................60 Receiving Data via Bluetooth ..................61 Accessing Using USB Function..................61 Maps ............................62 Entertainment..........................63...
- Page 9 ● Make sure to register within 30 days from date of purchase to activate and take advantage of this Comprehensive Product Warranty. Sonim reserves the right to refuse warranty service otherwise. ● Refer to www.sonimtech.com/support for further details. 3-Year Warranty...
-
Page 10: General Information
General Information Congratulations on the purchase of a Sonim XP STRIKE mobile phone. This phone is a CDMA and EVDO REV-A enabled handset with quad-band capabilities and has an intuitive, feature- rich user interface, which allows you to make the best use of the offered functions. The following topics in this chapter will provide the general information related to the Sonim XP STRIKE phone. -
Page 11: Safety Guidelines
Avoid using the phone in close proximity to personal medical devices, such as pacemakers and hearing aids. Use only Sonim XP STRIKE approved charging equipment to charge your phone and avoid damage to your phone. This product, and any enhancements marked with this symbol, cannot be disposed as unsorted waste but must be taken to separate collection at their end-of-life. -
Page 12: Battery Replacement
When the talk and standby times are noticeably shorter than normal, replace the battery with an original Sonim battery. If a replacement battery is being used for the first time or if the battery has not been used for a prolonged period, it may be necessary to connect the charger and then disconnect and reconnect it to begin charging the battery. -
Page 13: Avoid High Temperatures
Avoid High Temperatures If you leave the battery in hot or cold places, such as in a closed car in summer or winter conditions, it will reduce the capacity and lifetime of the battery. For best results, try to keep the battery between -20°C and +55°C (-4°F and 131°F). -
Page 14: Sar Information
The tests are performed in positions and locations (that is, by the ear and worn on the body) as required by the FCC for each model. The highest SAR value for the Sonim XP3410-A-R1 phone when tested by Sonim for use: ●... -
Page 15: Getting Started
To setup the phone, insert and charge the battery. Battery usage ● Use only a Sonim certified battery that is designed for this phone model. The use of other batteries may void the warranty terms of your phone and cause damage. ●... -
Page 16: Inserting The Battery
Inserting the Battery 11. Rotate both the battery cover screws in counter clockwise direction (as shown in the figure). Use the screwdriver provided to open the screws. Sometimes, the battery cover may be tight and extra effort is required to open it. 12. -
Page 17: Charging The Battery
2. Lift the back cover to view the battery slot. 3. Raise the upper end of the battery from the slot and remove the battery. 4. Close the battery cover. Rotate the battery cover screws in clockwise direction. You can use the screwdriver provided to tighten the screws. -
Page 18: Activating Your Phone
3. If the battery is being charged when the phone is switched off, only the battery icon is displayed (as shown in the adjacent figure). If the battery is being charged while the phone is switched on, you will notice that the bars in the battery charge icon (visible on the home screen) show movement indicating that the battery is being charged. -
Page 19: Setting Up Voicemail Box
Note: For more information about phone activation, contact Sprint Customer Service by calling 1-888-211-4727 from any other phone. Setting Up Voicemail Box When you activate your voicemail box, unanswered incoming calls will be forwarded to your voice mail. Callers will be prompted to leave a message for you. This feature requires you to enter a voice mail number provided by your service provider. -
Page 20: Phone Basics
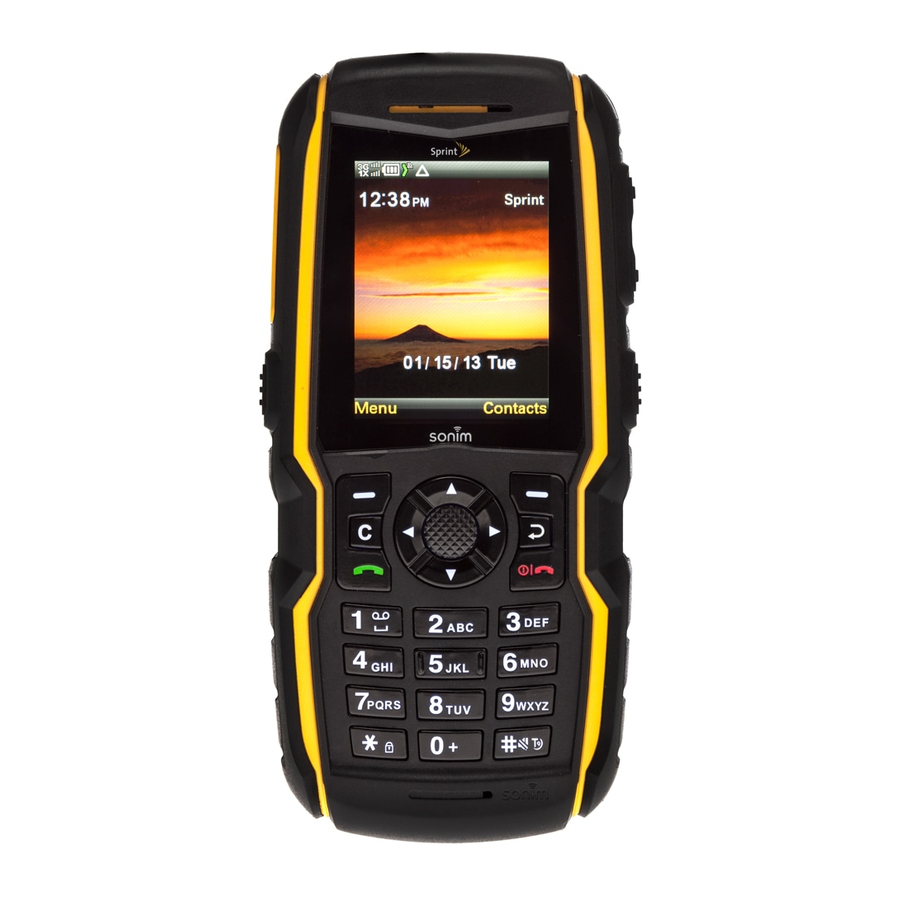
(W) and 320 (H) pixels. The TFT technology used displays 262K colors. The Sonim XP STRIKE keypad has 11 function keys and 12 alphanumeric keys. The left side of the phone has one key and the right side of the phone has three keys. The torch, camera, battery and the speaker are located in the back side of the phone. - Page 21 Sonim XP STRIKE Front Layout Phone Basics...
- Page 22 Sonim XP STRIKE Back Layout Phone Basics...
-
Page 23: Switching On Your Phone
When the phone is switched on, it tries to register with the network. After successful registration, the name of the service provider is displayed in the home screen. Sonim XP3410 STRIKE Home Screen Home Screen Indicators The home screen indicators are visible in the status bar, when the phone is in standby mode. - Page 24 Indicates that the user is in the roaming network. Roaming Indicates that the user is online in Qchat. Qchat Indicates that the user is offline in Qchat The following table describes the display indicators on the call screen in the Sonim XP3410 STRIKE phone: Display Description Name Indicators Indicates an active call.
-
Page 25: Shortcut Keys In Home Screen
Indicates a call on mute. Call on Mute Indicates if loudspeaker is activated during a call. Loud speaker The following table describes the display indicators on the home screen in the Sonim XP3410 STRIKE phone: Display Description Name Indicators Indicates an incoming call. - Page 26 ● Press and hold to switch on or switch off the mobile phone. Power ● Press when in Menu or Edit modes to return to Standby mode. On/Off/End call ● Press to reject an incoming call. ● Press and hold to end Music player / Radio when Music player / Radio are ON.
- Page 27 ● Press to view the pages in the text editor. ● Press to browse menus/lists at the same level. ● Press to browse the main menu. Left/Right ● Press to navigate between tabs. ● Press to move the cursor left or right in the text editor. ●...
-
Page 28: Main Menu Icons
Main Menu Icons To access the phone menu, press the Menu key. The main menu which comprises the following 12 items is displayed. Icon Description History – view Qchat and voice call history details. Settings- view and modify settings related to Qchat, security, network, phone, display, profiles, and tone. -
Page 29: Managing Your Phone
Managing Your Phone This section provides the information for personalizing and setting up your phone. The following topics in this chapter will provide more information about various phone settings. DC Settings Profile Settings Display Settings Tone Settings Date and Time Settings Shortcut Settings Call Settings Phone Settings... -
Page 30: User Status
One Touch DC Setting Update DC Add Member Restart Details Online Info My Qchat Address User Status You can set the DC user status to Available or Offline. If the user is offline they cannot receive DC alerts and calls. Permissions View and add the list of phone numbers to the Restrict Incoming list. -
Page 31: Update Dc
Update DC You can check and update the Qchat application to the latest version. Profile Settings To edit and activate various profiles, select Menu > Settings > Profiles. You can set your phone to one of the following profiles – General, Home, Meeting, Outdoor, Silent and Flight. For more information about profiles, refer Managing Profiles. -
Page 32: Date And Time Settings
● Message alert tone: You can set the alert type to pre-defined alert tone, or tones from My Stuff folder or silent, for incoming messages. ● Keypad tones: You can set the volume of the keypad tone. ● Application tones: You can enable or disable audible tones when applications are running. -
Page 33: Language Settings
Startup Tone Setting Switch Off Tone Setting Welcome Note Setting Hearing Aid Compatibility Settings Data Charge Alert Settings Data Guard Alert GPS Switch Settings Language Settings You can change the phone‟s interaction language by selecting your preferred language. For example, select Menu > Settings > Phone settings > Language > English to display all menu items, user feedback messages and text entry language in English. -
Page 34: Hac Rating
The best way to evaluate the suitability of the phone is to try it with the intended hearing aid device. Sonim XP3410-A-R1 has been tested for hearing aid device compatibility and complies with the Federal Communications Commission (FCC) requirements. Sonim XP3410-A-R1 is rated M4/T3. -
Page 35: Hearing Aid Compatibility (Hac) Settings
Hearing Aid Compatibility (HAC) Settings To enable coupling with a hearing aid device operating in telecoil/microphone mode, select Menu > Settings > Phone settings > Hearing aid > ON. Once HAC is enabled, the HAC symbol is displayed in the indicator bar. Select OFF to disable this feature. Note : While using the mobile phone for voice calls with hearing aid, slightly adjust the position of the phone against the ear to reduce the interference and to give better voice quality. -
Page 36: Change Lock Code
Change Lock Code This function enables you to change the phone lock code, Select Menu > Settings > Security > Change lock code. Enter the new lock code and select OK. The default lock code is the last 4 digits of the MDN number. Call Restrictions This function enables you to avoid receiving unnecessary calls. -
Page 37: Network Settings
Network Settings This function enables you to select the network roaming options. You can set the roaming access mode and select one of the following Set mode options: Options Description Can receive calls and messages only in your home Home only network Can receive calls and messages in both home and Automatic... -
Page 38: Phone Details
6. To make a call, press and hold the shortcut designated number key for Speed dial from home screen. Phone Details Select to view the user information such as phone number and mobile identification number, and software and hardware version details. Managing Your Phone... -
Page 39: Managing Calls
Managing Calls This section provides information on managing calls and call settings. The following topics in this chapter will provide the more information about managing phone calls. Make a Call Receive a Call Managing Call History Any key Answer Auto Redial Auto-Service Update Default International Prefix Data Calls... -
Page 40: Dial An International Number
Dial an International Number 1. Press and hold the numeric key 0 till the + symbol is displayed. 2. Enter the Country code, Area code (without preceding 0) and the phone number 3. Press the Green button (Call button) or select Options > Call. Dial a Number via Contacts You can dial a number directly from the Contacts. -
Page 41: Call History Options
● Alert history – view the Qchat alert history. ● Data calls – view the size of data transferred (in KB) related to Last sent data Last received data All sent data All received data Duration of last data call ... -
Page 42: Any Key Answer
Any key Answer When Any key answer is enabled, you can press any key except the Red button (End call button) to answer a call. To activate this feature, select Menu > Settings > Call settings > Any key Answer > ON. Note: Long pressing (press and hold) the Power on/off key during a call will switch off the phone. -
Page 43: Call Summary
Call Summary You can select Menu > Settings > Call settings > Call Summary > On to view the call summary. In-Call Timer You can select Menu > Settings > Call settings > In-call timer > ON to activate the call time display. -
Page 44: Managing Contacts
Managing Contacts You can use the phonebook to maintain phone numbers of your contacts. You can also add, delete, dial phone numbers, and send SMS and MMS messages, to contacts in the phonebook. To access the contacts, select Contacts from the home screen or select Menu > Contacts. The contacts stored in the phonebook are displayed. -
Page 45: Searching Contacts
Searching Contacts You can search and locate a particular contact from you contacts list. Select Contacts > All contacts >Find. Enter the contact name and select search Sending Message to Contacts You can send SMS and MMS messages to the contacts. Note: Unsent messages will be saved to Drafts, automatically. -
Page 46: Dialing A Number From Contacts
3. Enter the alert message and select Send. Dialing a Number from Contacts On the home screen, select Contacts and do one of the following: Select the Green button (Call button), to call the default number assigned for that contact. Select the contact and press the center key to view the details. -
Page 47: By Bluetooth
2. Select Options > Send business card > Via multimedia message. 3. Select the Details to be send. 4. Select the recipients from the Phonebook. 5. Select Send, to send the contact information. By Bluetooth If Bluetooth is not turned ON, a message is displayed to turn it ON. 6. -
Page 48: Phonebook Settings
Options Function New group Create a new group. Get Team DC Group Group details View and modify the group name. Invite Invite all the group members for a call. Delete group You can delete the group. Phonebook Settings To view or define settings for your phonebook, select Menu > Contacts > Settings. ●... -
Page 49: Managing Alerts
Managing Alerts You can use missed alerts to view missed calls, missed DC calls and DC alerts. The following topics in this chapter will provide more information about missed alerts. Missed Calls Missed DC Calls Missed DC Alerts Missed Calls You can view the list of missed incoming calls. -
Page 50: Missed Dc Alerts
Missed DC Alerts You can view the list of missed DC alerts. Select Options to manage missed calls \ Options Function Time of call Delete the selected number from the missed calls list Query status View the status of the call initiator Query call right Save the selected number to DC Contacts. -
Page 51: Managing Messages
Managing Messages SMS and MMS are convenient and inexpensive means of communication. You can send a text message to other people using SMS service. MMS allows you to send messages with multimedia content such as pictures, audio files, video files, and so on. Note: The MMS facility is available only if you subscribe it from your network operator. -
Page 52: Mms Settings
MMS Settings Select Menu > Messages > Multimedia message > Multimedia message settings, to edit the following MMS settings: Settings Function Save sent message You can save the sent messages. Message validity Set the period for which the text message will be valid. Receive a confirmation report whether or not the message has been Delivery report delivered. -
Page 53: Mms Messages
Options Function Send You can send the message. Clear field Clear the contents in the message pane. Insert contact Select and add a contact from the phonebook, to the message. Insert number Select and add a number from the phonebook, to the message. Insert symbol Select the required symbol to include in the message. -
Page 54: Managing Message Folders
Insert number Select and add a number from the phonebook, to the message. Insert symbol Select the required symbol to include in the message. Writing language Select the input languages. Prediction options Set the input options to T9, add a new T9 word, alphabetic prediction. Cancel message Delete the message before it is sent. -
Page 55: Drafts
Drafts Messages that have been saved to be sent later are stored in Drafts. 1. To access unsent SMS messages, select Menu > Messages > Text message > Drafts. To access unsent MMS messages, select Menu > Messages > Multimedia message > Drafts. -
Page 56: Deleting Messages
Delete: You can delete the message. Message status: You can view the sending status of the message. Resend: You can resend the message. Forward: You can send the message to another recipient. 3. Press the center key to view the message. 4. -
Page 57: Text Input Mode
Display Settings You can set the font size to view the emergency alert messages. Text Input Mode When you enter text for messages and notes, the input mode is displayed at the top left of the screen. Press and release the # key to view the different text input modes (Abc/ABC/abc). In conventional mode, you can enter a letter by repeatedly pressing a key until the letter you want appears. -
Page 58: Managing Profiles
Managing Profiles You can activate and modify various settings on your Sonim XP STRIKE phone using Profiles. On the home screen, select Menu > Settings > Profiles to display the profile list. You can customize the profiles to use features such as incoming call alert, ring tone, ring volume, vibrating alert, message alert tone, keypad tones, application tones and alert for settings. -
Page 59: Tools
Tools This chapter provides details about the following tools supported by Sonim XP STRIKE. Alarm Calendar Notes To-do List Calculator Stopwatch World Clock Unit Converter Update Phone Update Profile Mobile Sync My Files Alarm You can set alarm for a particular time. Select Menu > Tools > Alarm. -
Page 60: Calendar
Calendar The calendar enables you to set appointments, schedule reminders when required, set alerts and repeat specific settings. Tasks can be viewed on daily and monthly basis. For more information, refer Managing Calendar. Notes Select Menu > Tools > Notes to store the required information. Use Options to add, edit or delete notes. -
Page 61: Calculator
Calculator The calculator in this phone is designed to perform simple mathematical calculations. 1. Select Menu > Tools > Calculator. 2. To enter the numbers, press the numeric keys. 3. To use mathematical operators use the navigation keys. Navigation Key Function + (Addition) Down... -
Page 62: Unit Converter
Set the daylight saving time for the selected city to ● 0 (Wintertime) - no daylight saving. DST set ● +1 hour - add an hour to DST. ● +2 hours - add 2 hours to DST. Unit Converter You can convert one type of physical units to another type. Select Menu > Tools > Unit converter. -
Page 63: Managing Your Files
Managing Your Files Using the My files menu, you can store and manage audio files, and image files. You can preview the files, view their details and delete files. The internal storage capacity is approximately 170 MB. 1. To view your files select Menu > Tools> My files. 2. - Page 64 Sort Sort the images by name, date, format, and size. Add folder Create a new folder. Memory status View the memory used and free memory in MB. Select the images one by one and select Options to delete, send, move or Mark copy the marked images.
- Page 65 Options Function Use tone Set the audio file as ringtone, alarm, calendar or contact tone. Delete Delete the audio file. Send the audio file to any phone as multimedia message, as an e-mail, Send or via Bluetooth. Move Move a file to different folder. Copy Copy a file to different folder.
-
Page 66: Managing Calendar
Managing Calendar The calendar enables you to set appointments, schedule reminders when required, set alerts and repeat specific settings. Tasks can be viewed on daily and monthly basis. 1. To access the Organizer and its associated functions, select Menu > Tools > Calendar. - Page 67 ● Send note: Send the note via SMS or Bluetooth. ● Month view: View the calendar in month format. ● Go to date: You can go to a particular date and view the events for that date. ● Go to today: You can access the current date. ●...
-
Page 68: My Stuff
My Stuff Sonim XP STRIKE includes an application manager and a content manager to download and use Java applications. For more information refer to the following topics. Application Manager Ringback Tones Games Ringtones Screen Savers Applications Application Manager You can use application manager to download Java applications, and store it to your phone or SD card. -
Page 69: Managing Browser
Managing Browser Sonim XP STRIKE his mobile phone has an internal browser that allows you to browse contents of various Websites on the Internet. This facility is made available only if you subscribe to a data service from your network operator for Internet access. You need to consult your local operator for more details. -
Page 70: Browser Settings
Send this page to Send the current Web page link as a SMS or MMS a friend message to a selected contact. View and modify browser settings. For more Browser Settings information, refer Exit Browser Exit the browser. Browser Settings To view and modify the following browser settings, select Menu >... - Page 71 Set the speed of the browser pointer to slow/normal/fast. Virtual mouse pointer Select OFF to disable the browser pointer You can enable or disable pop-ups. Select one of the following options: ● Block all popups – always blocks the popups Popups ●...
-
Page 72: Managing Connectivity
Bluetooth is a wireless connection that enables devices to exchange information. Devices within a range of 10 meters can be connected using Bluetooth technology. The Sonim XP STRIKE is compliant with Bluetooth specification 2.0 supporting the following profiles: Headset profile: HFP, HSP, GAVDP, AVRCP, OPP, IOPT, FTP, and A2DP. This device can send images and audio files using Bluetooth connection. -
Page 73: Deactivate Bluetooth
Pairing Devices Phones paired with your Sonim XP STRIKE will be displayed under Paired Devices. To connect a phone: 1. Select Menu > Settings > Bluetooth > Paired devices > New or Options > Pair new - device. -
Page 74: Rename Paired Device
Rename Paired Device 1. Select Menu > Settings > Bluetooth > Paired devices. 2. Select the paired device. 3. Select Options > Settings >Rename. 4. Enter the new name. 5. Select OK. Delete Paired Device 1. Select Menu > Settings > Bluetooth > Paired devices. 2. -
Page 75: Receiving Data Via Bluetooth
USB cable and SD is inserted in the phone. The following two options are displayed: Data storage: Select this to use the USB cable as mass storage device to transfer and synchronize data between the Sonim XP STRIKE phone and your computer. Modem mode: Select this to use the phone as a modem. -
Page 76: Maps
Maps Maps is a navigational application that uses internal GPS. This provides turn by turn navigations to the user. To access this application, 1. Select Menu > Maps >Sprint Navigation. 2. Accept the license agreement. 3. Enter the login information and select Go. The GPS navigator home page is displayed. -
Page 77: Entertainment
Entertainment Sonim XP STRIKE phone provides the following entertainment features: Voice Recorder Video Recorder FM Radio Music Player Camera Voice Recorder ● To record an audio file, select Menu > Entertainment > Voice recorder. ● To record an audio file, select and select the center key. -
Page 78: Fm Radio
● To temporarily stop the recording, select Pause. ● To continue with the recording, select the center key. ● To end the recording, select Stop. The recorded video file is stored under My files. Select Options to access the following video recorder options: Options Function Delete... -
Page 79: Music Player
Rename the playlist. Playlist details View the playlist name, song number, duration and location. Camera The Sonim XP STRIKE has a 2 MP (megapixel) camera for taking pictures. The pictures can then be saved in your phone. Using the Camera Entertainment... -
Page 80: Using The Camera
Camera Settings Using the Camera 1. Select Menu > Camera OR press the camera key. The camera is switched on. 2. Press the center key or the camera key to shoot the picture. The picture is automatically saved in Menu > My files > Images. 3. - Page 81 ● Effects: Select the required color effects for the image to be taken. ● White balance: Select the required white background color balance. ● Open My Files: Open My files to view other pictures ● Settings: Image size: Select the picture size from the following options: 1600X1200, 1280X960, 640X480 and 320X240.
-
Page 82: Using Micro Sd Card
Using Micro SD Card In Sonim XP STRIKE phone, you can insert a removable Micro SD Card to increase the storage capacity. This card is inserted into the slot inside the phone. You can access your SD card from Menu > My files. You can perform the following functions on the SD card. -
Page 83: Using Pc-Tools Application
1. Click the Sonim PC Tool icon ( ) on your computer desktop. 2. Connect the SONIM XP STRIKE phone to the USB port of the computer using a USB cable. 3. Once the USB cable is connected, the USB config screen is displayed on the phone. -
Page 84: End User License Agreement
Software. Sonim, and, to the extent that the Software contains material or code of a third party, such third party, shall be entitled third party beneficiaries of these terms. The validity, construction and performance of this license shall be governed by the laws of Delaware, United States. -
Page 85: Phone Care
Sonim, with the same or better model in the same or better condition. Sonim and its service partners reserve the right to charge a handling fee if a returned product is found not to be under warranty according to the conditions below. - Page 86 However, it will eventually wear out - this is not a defect. When the talk-time or standby time is noticeably shorter, it is time to replace your battery. Sonim recommends that you use only batteries and chargers approved by Sonim. Minor variations in display brightness and color may occur between phones.
-
Page 87: Fcc Statement
FCC Statement WARNING: Changes or modifications made to this equipment not expressly approved by Sonim Technologies, Inc. for compliance could void the user‟s authority to operate the equipment. The XP3410-A-R1 device complies with Part 15 of the FCC rules. Operation is subject to the following two conditions: This device may not cause harmful interference. - Page 88 Battery usage, 1 Charging the battery, 3 Inserting battery, 2 Removing battery, 2 Phone Models, 2 Phone usage instructions, 3 SAR Information, 5 Setting up Voicemail box, 5 Sonim XP STRIKE layout, 6 Back layout, 8 Front layout, 7 Index...